


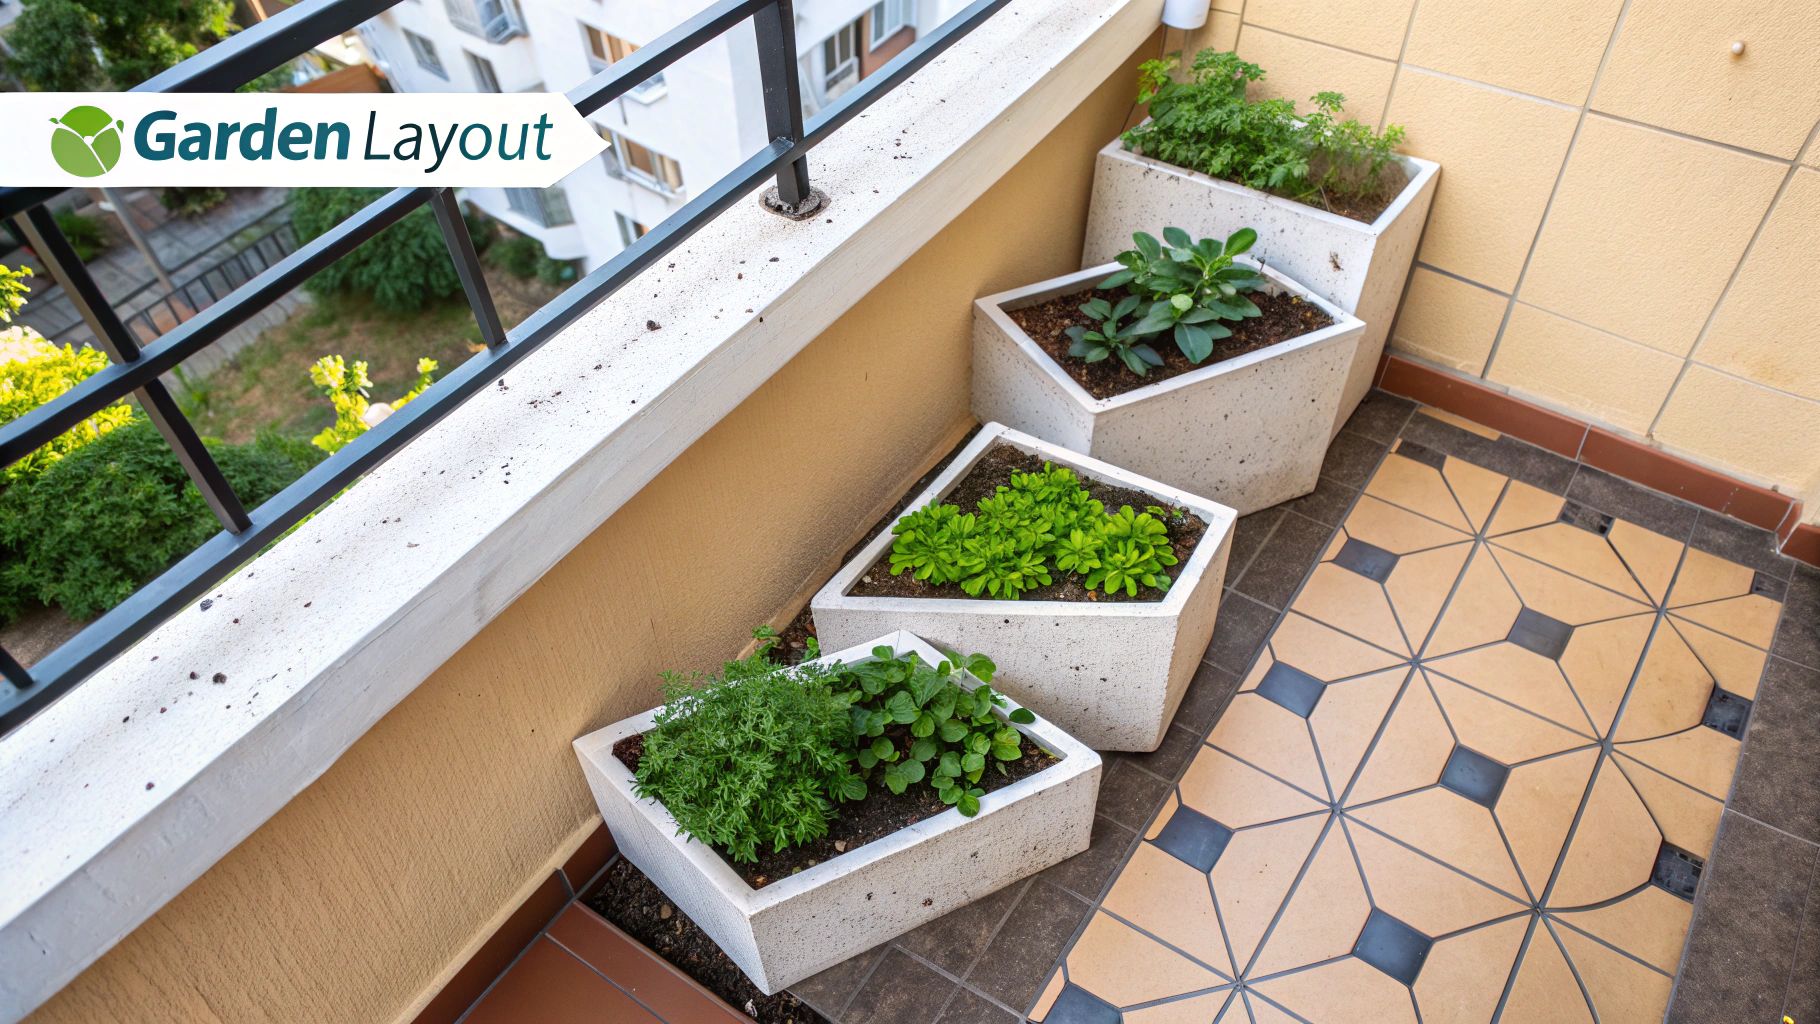
Imagine having fresh, organic produce right outside your door, even in the middle of the city. A balcony vegetable garden makes that possible. It's all about using containers, making smart plant choices, and really getting to know your unique environment to create a productive mini-farm. Honestly, your success starts with a realistic look at your sunlight, wind, and space—long before you even think about buying seeds.
What's Your Balcony's True Gardening Potential?
Before you get carried away with cute containers and seed packets, let's play detective. Your balcony is its own little ecosystem, a microclimate with a unique set of rules. From my experience, skipping this initial assessment is the number one reason new balcony gardeners get discouraged. So, let’s figure out what you’re really working with.
This isn't just about theory. It’s the practical groundwork that makes the difference between a few sad, struggling plants and a balcony overflowing with produce. We'll walk through how to evaluate your specific conditions to make sure your gardening plans are both safe and set up for success.
Tracking Your Sunlight
Sunlight is the absolute, non-negotiable fuel for your garden. Most of the vegetables we love to eat—like tomatoes, peppers, and cucumbers—need at least six to eight hours of direct sunlight every day to produce a good harvest. On the other hand, many leafy greens and herbs are perfectly happy with a bit less. You can't just guess; you need to know exactly what your balcony gets.
It's simpler than it sounds. Just pop out and check on your balcony a few times during the day. I usually recommend checking around 9 AM, 12 PM, and 4 PM to see which spots are sunny and for how long. There are even handy smartphone apps that can track the sun's path across the sky as the seasons change. Is your space a sun-drenched paradise perfect for tomatoes, or is it a shadier retreat better suited for spinach and mint?
To help you get started, here's a quick guide to match common vegetables with the amount of sun your balcony receives.
Balcony Sunlight Assessment Guide
This table is a great starting point for figuring out what will thrive in your specific spot.
| Sunlight Level (Hours/Day) | Description | Best Vegetables to Grow |
|---|---|---|
| Full Sun (6-8+ hours) | Receives direct, unobstructed sunlight for most of the day. Ideal for heat-loving plants. | Tomatoes, Peppers, Cucumbers, Squash, Eggplant, Corn, Beans, Most Herbs (Basil, Rosemary) |
| Partial Sun/Shade (4-6 hours) | Gets direct sun for part of the day, with shade in the morning or afternoon. | Leafy Greens (Lettuce, Spinach, Kale), Root Vegetables (Carrots, Radishes), Broccoli, Peas, Chard |
| Light Shade (2-4 hours) | Mostly shaded, with some dappled or brief direct morning sun. Limited options but still workable. | Arugula, Mint, Parsley, Scallions, Some Lettuce Varieties, Microgreens |
Remember, these are just guidelines. A plant listed for full sun might still produce in partial sun, just with a smaller yield. Experimentation is part of the fun!
Understanding Your Microclimate
Sunlight is only part of the story. Your balcony has other environmental quirks that can make or break your garden. Wind, especially on higher floors, can be a huge issue. It dries out soil in a flash and can easily snap the stems of delicate plants. Take some time to observe how the air moves around your building. You might discover a surprisingly sheltered corner that’s the perfect spot for more sensitive crops.
Likewise, the materials of your building matter. Brick and concrete are fantastic at absorbing and radiating heat, creating warm zones. These pockets can be a blessing in the spring and fall, effectively extending your growing season. In the heat of summer, though, they might become too intense. Identifying these spots lets you place your plants where they'll be happiest.
The key takeaway is to work with your balcony's specific conditions, not against them. Acknowledging that your east-facing, windy balcony won't support the same plants as a sheltered, south-facing one is the first step toward a successful harvest.
Practical Logistics and Safety
Finally, we have to talk about the practical stuff. The big one is weight. How much can your balcony safely support? A few small pots are no problem, but large containers filled with wet soil and mature plants get incredibly heavy. If you have any doubt at all, please consult your building management or a structural engineer. Safety first.
Water access is the other major logistical hurdle. Are you prepared to haul a watering can back and forth through your home every day? Or is there a spigot nearby you could attach a hose to? Figuring this out now will save you a world of frustration down the road.
Thinking about these logistics is all part of a bigger trend toward creating efficient and beautiful small-scale gardens. Just as designers have clever tips for maximizing space in small areas inside the home, we can apply those same principles of smart design to our outdoor spaces. This boom in home cultivation is part of a massive global movement. In fact, the home gardening market is projected to hit USD 26.47 billion by 2034, driven by a shared desire for sustainable living and fresh, organic produce. You're part of something big
Choosing Containers and Crafting the Perfect Soil
When you're eager to get planting, it's easy to overlook two of the most critical elements for a successful balcony garden: your containers and the soil you fill them with. Think of them as the complete life-support system for your plants. Getting these right from the start will save you a world of headaches later on and is the difference between a sad-looking plant and a thriving, productive one.
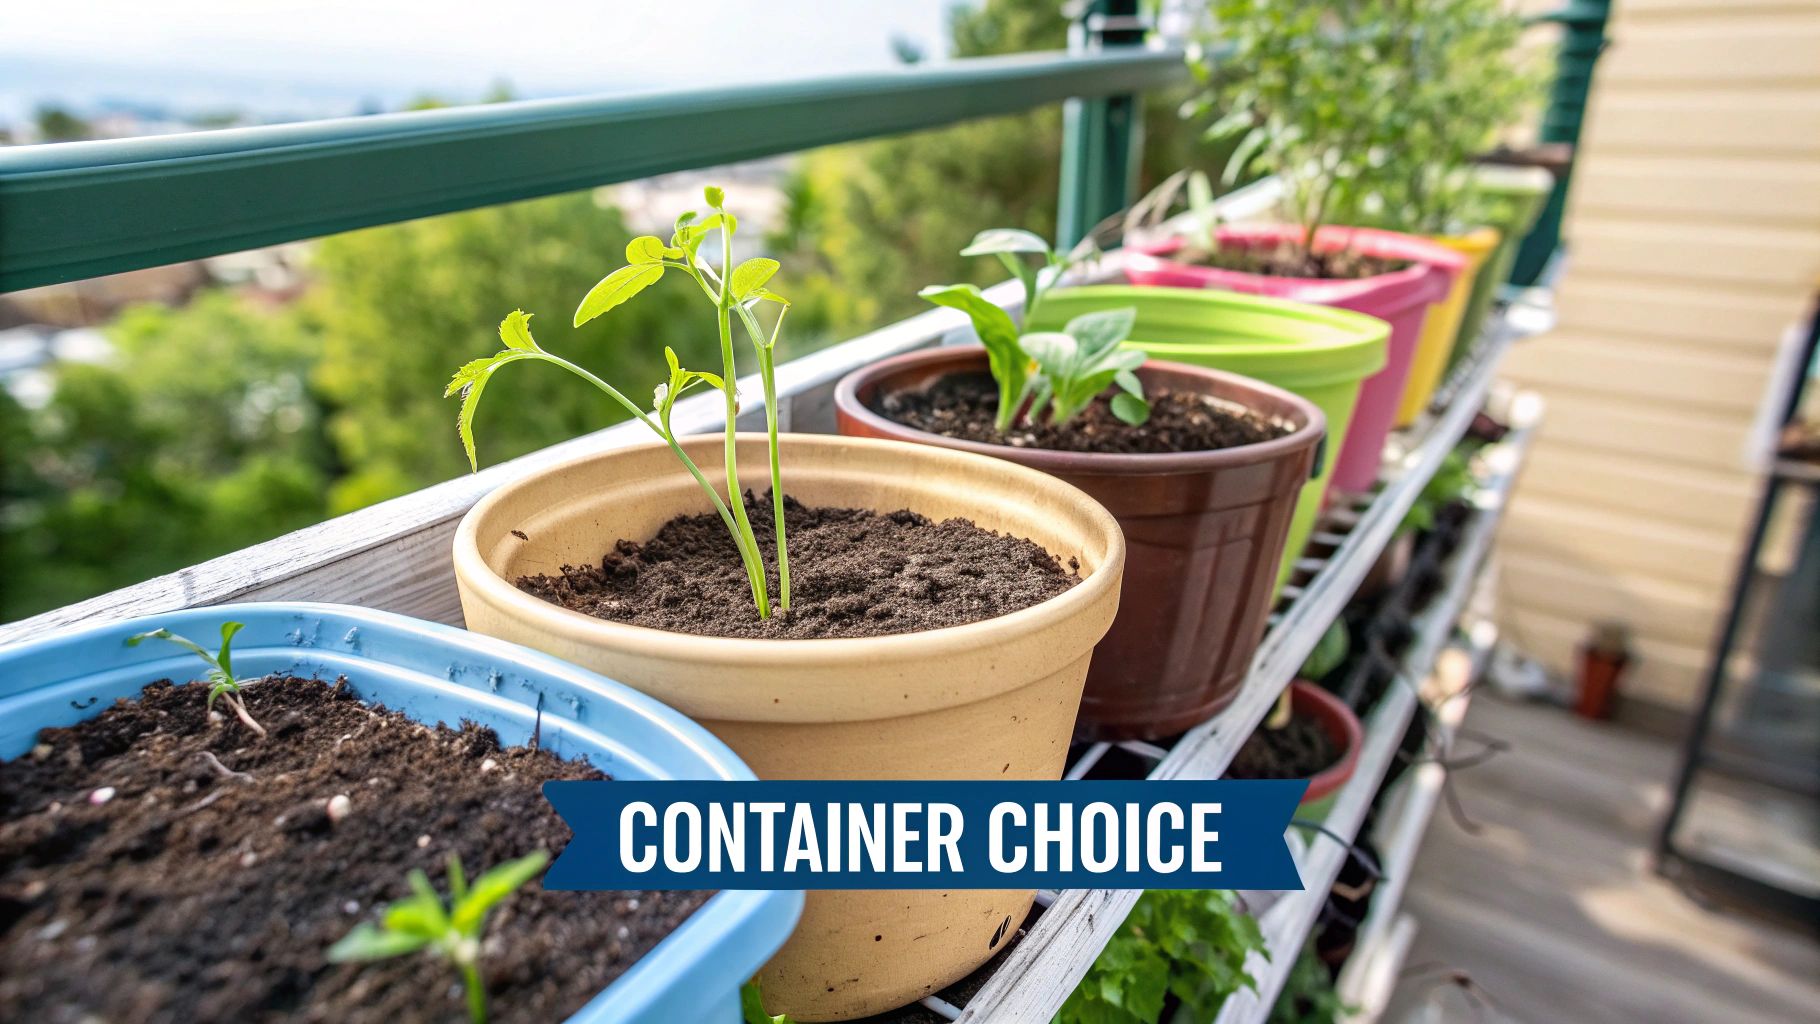
First up, let's talk about pots. Your container choice directly impacts how often you'll need to water and the overall health of your vegetables. While looks are nice, function should always come first.
A Gardener’s Guide to Container Materials
On a balcony, the microclimate can be intense—hot sun, drying winds—and different materials handle these conditions in very different ways.
- Terracotta (Clay): These classic pots are porous, which is great for airflow and helps prevent root rot. If you tend to overwater or are growing something like rosemary that hates "wet feet," they're a solid choice. The big downside? That same porosity means they dry out incredibly fast. On a hot, sunny balcony, you might be watering them every single day.
- Glazed Ceramic: You get the aesthetic of terracotta but with a glaze that actually holds moisture. They’re also heavy, which adds stability against wind—a real plus on an exposed balcony. Just be mindful of your balcony's weight limit if you plan on using several large ones.
- Plastic/Recycled Plastic: Honestly, you can't beat plastic for practicality. It's lightweight, inexpensive, and fantastic at retaining moisture. My advice is to look for UV-resistant models, as cheap plastic can get brittle and crack after a season or two in the sun.
- Fabric Grow Bags: These have become my go-to for most vegetables, especially root veggies like carrots and potatoes. They are incredibly lightweight and promote fantastic root health through a process called "air pruning." When a root hits the fabric wall, it stops and sends out new feeder roots instead of circling the pot. This creates a much denser, healthier root ball. Plus, the drainage is foolproof.
My One Non-Negotiable Rule: Whatever you choose, it must have excellent drainage. If a pot you love only has one tiny hole (or none at all!), get out a drill and add more. Without a clear escape route, water will pool at the bottom, drown the roots, and cause fatal root rot. It’s the fastest way to kill a plant.
The Secret to Great Balcony Soil
Now, let's get our hands dirty. This is where so many new balcony gardeners go wrong: they use soil straight from their yard or a local park. Don't do it! Garden soil is dense, heavy, and compacts into a solid brick in a pot, suffocating your plant's roots.
For containers, you need a dedicated potting mix. A good mix is light and airy, designed to hold the perfect balance of moisture and oxygen. While buying pre-made bags is convenient, I find that mixing my own is more cost-effective and gives me better results.
Here's a simple, all-purpose recipe that works wonders:
- 1 Part Sphagnum Peat Moss or Coco Coir (for moisture retention)
- 1 Part Compost or Well-Rotted Manure (for nutrients)
- 1 Part Perlite or Coarse Sand (for drainage and aeration)
Just mix these three components together thoroughly. The finished blend should feel light and crumbly, even when damp. This structure gives your plant roots the ideal environment to grow strong and healthy. For a closer look at what specific plants prefer, our guide on the best vegetables for containers is a great resource.
Finally, think about size. Pot depth is just as important as the soil inside it. Most herbs are happy in pots that are at least six inches deep. But for bigger, hungrier plants like tomatoes or peppers, you need to go bigger. A five-gallon container (roughly 12 inches deep and wide) is the minimum I'd recommend. Giving them that extra root space is what fuels a truly bountiful harvest.
Picking the Right Vegetables for Your Pots
This is the fun part—deciding what you'll get to eat! But hold on a second. This is also where a lot of new balcony gardeners go wrong. It's easy to get excited and grab a seed packet for a big, sprawling squash or a classic vining tomato, only to realize it's built to conquer a backyard, not a 10-gallon pot.
The real key to a bountiful balcony harvest isn't just about choosing the right vegetable, but the right variety. Many seed companies now offer fantastic "bush," "dwarf," or "patio" versions of popular veggies. These are game-changers, bred specifically to give you a great yield in a compact form.
My Go-To Choices for High-Yield Containers
Forget the generic advice. After years of experimenting on my own balcony, I've found some real winners that perform beautifully in containers.
- Determinate Tomatoes: Unlike their wild "indeterminate" cousins that just keep growing and growing, determinate types reach a fixed, manageable height. They tend to ripen their fruit all at once, which is perfect for making a big batch of sauce. Look for names like 'Patio,' 'Bush Early Girl,' or the adorable 'Tiny Tim' cherry tomatoes.
- Bush Beans: You can skip the hassle of building elaborate trellises. Bush bean varieties like 'Contender' or 'Provider' grow into dense little shrubs and are surprisingly productive. You can get a serious amount of beans from just a couple of well-tended pots.
- "Cut-and-Come-Again" Greens: This is my favorite trick for a non-stop salad supply. Instead of planting head lettuce which gives you a single harvest, opt for loose-leaf varieties. With types like 'Black Seed Simpson' or a simple mesclun mix, you can snip the outer leaves whenever you want a salad, and the plant will keep pushing out new growth from the center for weeks.
- Compact Root Veggies: You might not be growing giant, prize-winning carrots, but smaller, rounder varieties are perfect for pots. 'Paris Market' carrots are nearly spherical and do great in containers that are at least eight inches deep. Radishes, like the 'Cherry Belle' variety, are even better—they're ready in under a month, giving you that quick win every gardener loves.
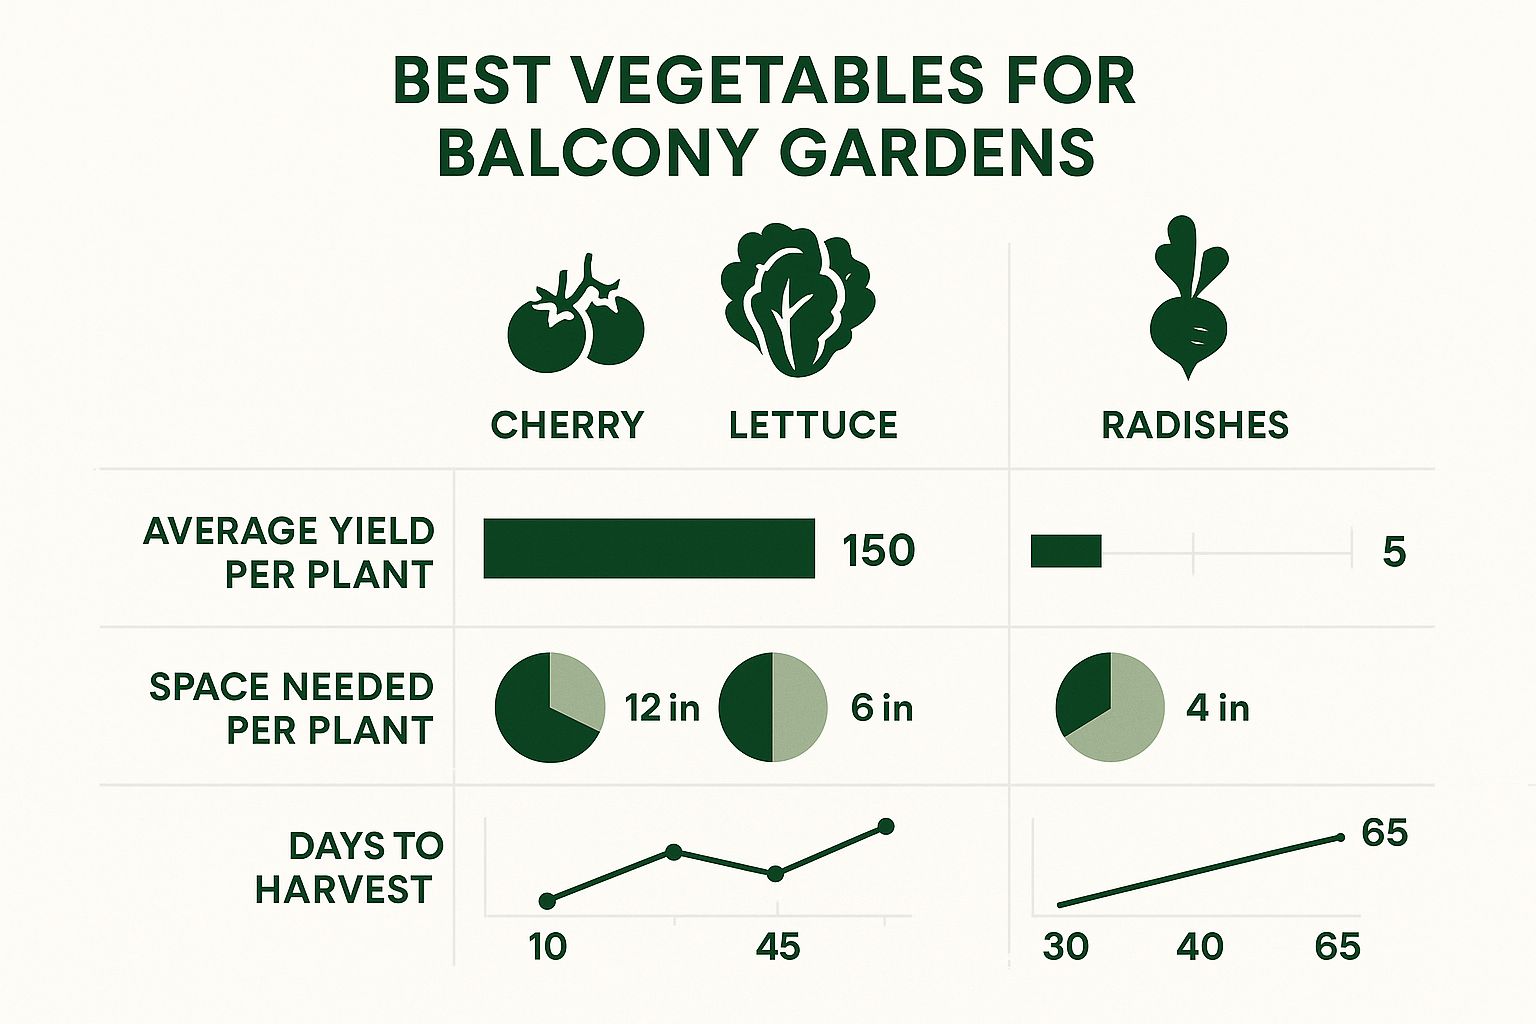
To make it easier to decide, here’s a quick rundown of some of the best vegetables for balcony life, comparing what they need to thrive.
Top Vegetable Choices for Balcony Gardens
| Vegetable | Sun Needs | Minimum Container Size | Growing Difficulty |
|---|---|---|---|
| Bush Beans | 6-8 hours | 3 gallons | Easy |
| Determinate Tomatoes | 8+ hours | 5-10 gallons | Medium |
| Leaf Lettuce | 4-6 hours | 2 gallons | Easy |
| Radishes | 4-6 hours | 1 gallon (8" deep) | Very Easy |
| Spinach | 4-6 hours | 2 gallons | Easy |
| Peppers (Compact) | 8+ hours | 3-5 gallons | Medium |
As you can see, you have plenty of options whether your balcony is a sun trap or gets a bit more shade. Matching the plant to the right conditions is half the battle.
Smart Planting Strategies to Maximize Your Space
Once you have your plants picked out, you can use a couple of clever tricks to squeeze even more production out of your small space. These are techniques that seasoned gardeners rely on.
First up is succession planting. It sounds technical, but it’s simple: instead of planting all your seeds at once, sow a few every two to three weeks. With fast-growing crops like radishes, spinach, or arugula, this staggers your harvest. You'll get a steady supply all season long instead of one giant pile of produce you can't possibly eat in time.
Another fantastic method is companion planting. This is all about pairing plants that help each other out, creating a tiny, cooperative ecosystem on your balcony. It’s a completely natural way to keep your plants healthier and more productive.
A classic example I use every year is planting basil right next to my tomatoes. The strong scent of basil is said to naturally repel pests like tomato hornworms and whiteflies. Plus, many old-school gardeners (myself included) swear it actually makes the tomatoes taste better.
Figuring out these helpful pairings can take your balcony garden to the next level. To learn more, you can explore our detailed guide on which vegetable seeds grow well together and discover more powerful plant partnerships.
Mastering Your Watering and Feeding Routine
Alright, your balcony garden is planted and looking great. Now, your role shifts from architect to daily caregiver. Don't let that intimidate you. Consistent watering and feeding are the simple rhythms that keep your garden alive, and getting them right is a lot easier than you might think.
In my experience, inconsistent care is the quickest way to get discouraged. It leads to one of two sad outcomes: wilted, stressed-out plants or, even worse, waterlogged pots with rotting roots. Let’s dial in a simple, effective routine that actually fits into your life and keeps those veggies happy.
The real key here isn't a rigid schedule but learning to "read" your plants and soil. Once you get the hang of it, you'll know exactly what they need, when they need it.
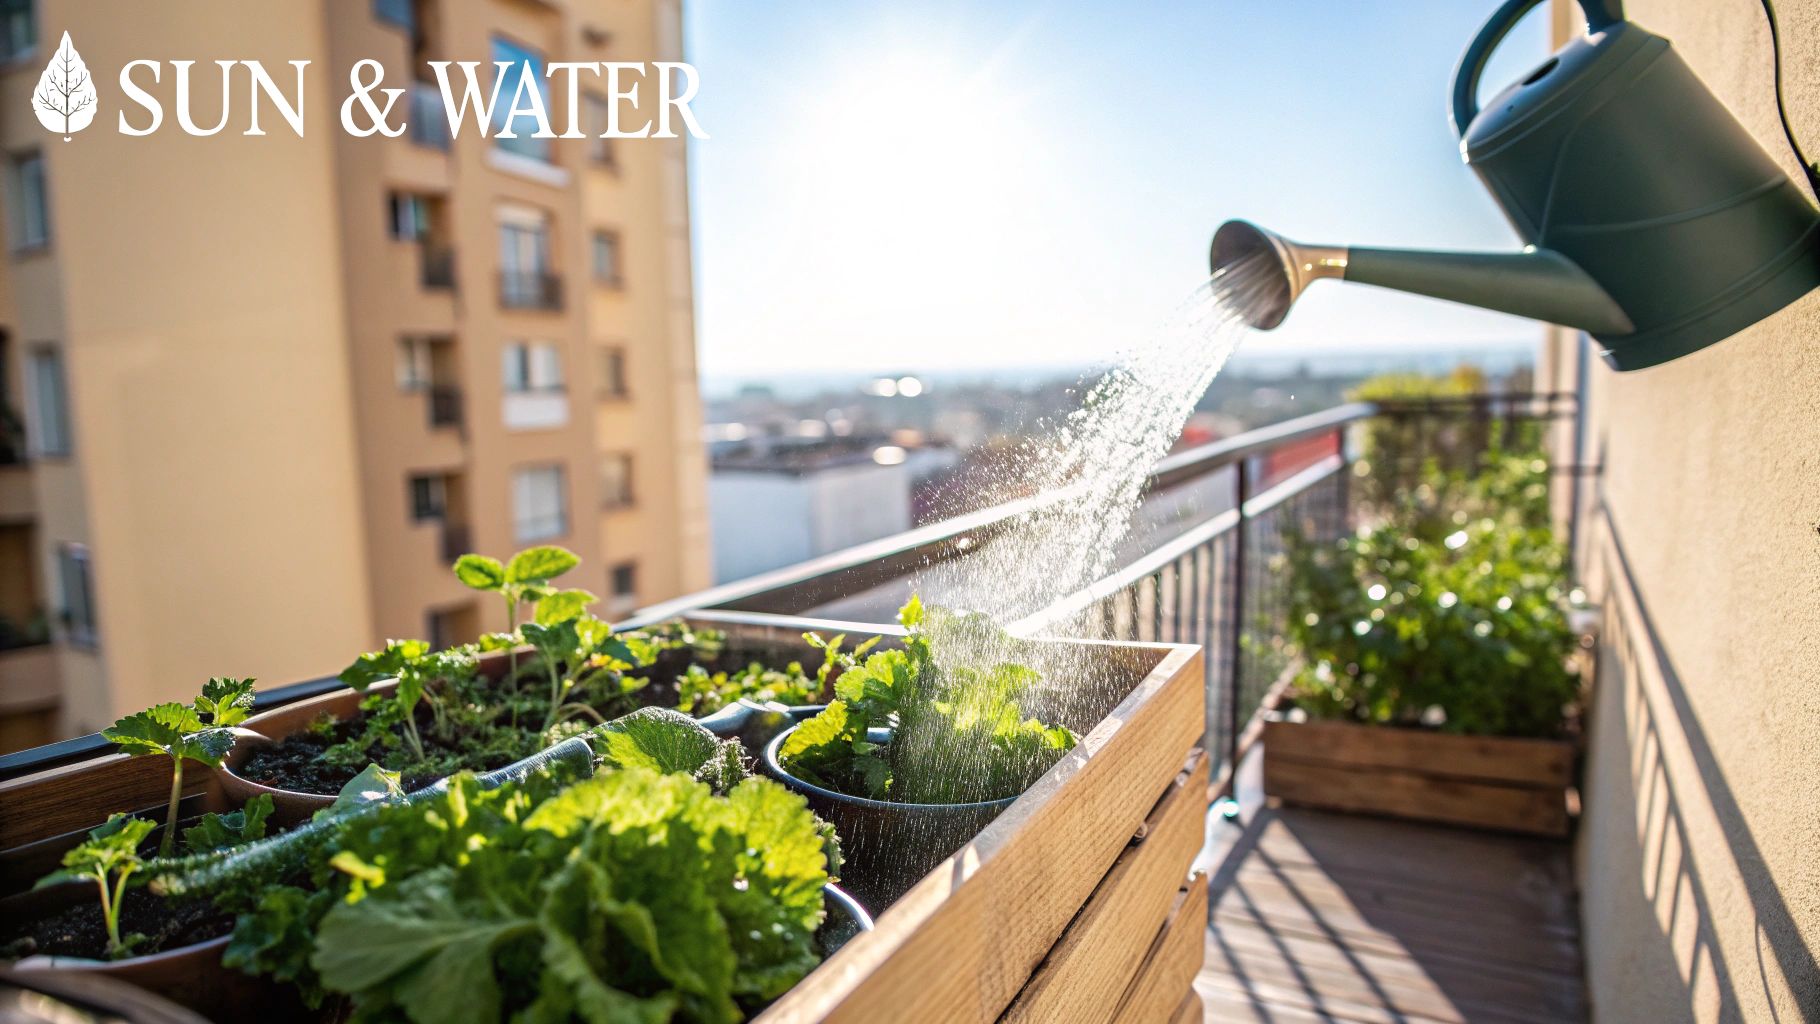
The Art and Science of Watering
New gardeners are often terrified of forgetting to water, but here’s a little secret: overwatering is a far more common and fatal mistake in container gardens. A pot can only hold so much soil and water. Any excess just sits at the bottom, suffocating the roots and leading to root rot—a silent killer you often don’t spot until it’s too late.
So, how do you know when it’s time? The best tool is one you already have: your finger. It's a classic method for a reason.
Just push your index finger about two inches deep into the potting mix. If it feels dry at the tip, it’s time for a drink. If you feel any moisture, hold off and check again tomorrow. This simple test is your best defense against both underwatering and the dreaded root rot.
When you do water, do it right. Pour water slowly and generously over the soil until you see it flowing out of the drainage holes at the bottom. This ensures the entire root system gets a good, deep soak, not just the top layer.
Finding a Watering System for Your Lifestyle
How you deliver that water can be a real game-changer. The right system can make gardening feel like a joyful ritual instead of a daily chore.
- The Classic Watering Can: Perfect for a small setup with just a handful of pots. It gets you up close and personal with your plants, but it can get tedious if you have a lot of containers or have to make multiple trips.
- Self-Watering Planters: These are a lifesaver for busy people or for seriously thirsty plants like tomatoes. They feature a built-in reservoir that wicks water up to the roots as the soil dries out, providing consistent moisture and stretching the time between waterings.
- Drip Irrigation Kits: If you're going all-in with a larger balcony garden, a simple drip system on a timer is a fantastic investment. It delivers water slowly and directly to the soil, which cuts down on evaporation and promotes deep, healthy roots.
The recent explosion in home gardening, especially among younger folks, shows a real desire for both convenience and a connection to our food. It's not just a passing fad; 69.2% of Generation Z and 51% of Generation Y plan to spend more time on gardening. This enthusiasm is driving demand for better supplies and expert advice, which is great news for all of us. You can read more about these gardening trends and consumer preferences to see just how much this community is growing.
Decoding Your Plants’ Nutrient Needs
Think of fertilizer as a meal for your plants. The initial potting mix is like a packed lunch, but it won't last forever. Container plants are heavy feeders because they're stuck in a small space, and every time you water, you're washing some of those vital nutrients out of the soil.
For anything you plan to eat, it’s worth knowing your fertilizer options.
Organic fertilizers like compost tea, fish emulsion, or worm castings are fantastic. They release nutrients slowly and actually improve the soil's structure over time. On the other hand, synthetic fertilizers (those blue crystals or bright liquids) give a fast, concentrated jolt of nutrients but do absolutely nothing for long-term soil health. For a productive balcony vegetable garden, I always recommend sticking with organic options.
Here’s a simple feeding plan that works:
- Start with Rich Soil: When you first pot your plants, make sure you've mixed in a good amount of compost. This acts as a slow-release food source right from the start.
- Begin Feeding: Wait until your plants are established and showing new growth, usually about 3-4 weeks after planting.
- Give Regular Boosts: During the main growing season, apply a balanced liquid organic fertilizer (fish emulsion and liquid kelp are my go-to's) every 2 to 4 weeks. Just be sure to follow the package directions—more is not better, and you can burn your plants' roots.
Solving Common Balcony Garden Problems
Sooner or later, every gardener runs into a few hurdles. It’s just part of the process. On a balcony, these issues can sometimes feel a bit more intense simply because everything is in such close proximity. But don't let that discourage you—most common problems have surprisingly simple fixes that don't involve reaching for harsh chemicals.
Think of this as your troubleshooting field guide. Learning to spot problems early is the real secret to turning a potential disaster into a valuable lesson. Let's tackle those yellowing leaves and unwelcome bugs head-on.
Dealing With Common Pests Organically
That moment of panic when you discover a cluster of tiny bugs on your prized kale plant? We've all been there. The good news is, most balcony pests can be handled gently. The trick is vigilance. I make it a personal habit to peek under the leaves every single time I water.
Here are the usual suspects you might find and how to show them the door:
- Aphids: These tiny, pear-shaped critters love to hang out on tender new growth, sucking the sap right out of your plants. Often, a sharp spray of water is all it takes to knock them off. If they're being stubborn, a simple mix of mild soap and water (about one teaspoon per quart) sprayed directly on them usually works wonders.
- Spider Mites: These are a bit stealthier, but you'll know them by the fine, delicate webbing they spin between leaves and stems. They absolutely love hot, dry conditions, so simply misting your plants to boost humidity can make the area less inviting. Insecticidal soap is also a very effective solution.
- Whiteflies: You’ll know these pests the second you see them. A tiny cloud of white insects will burst into the air when you brush against an infested plant. Yellow sticky traps are a fantastic, non-toxic tool for catching the adults and keeping an eye on their numbers.
My go-to strategy is to combine active treatments with prevention. I try to create a mini-ecosystem that polices itself by attracting beneficial insects like ladybugs. Planting a few marigolds or a bit of dill among your veggies can help draw these helpful predators to your balcony.
For a deeper dive into pest management, our guide on how to get rid of common plant pests naturally has even more strategies to keep your garden thriving.
Diagnosing and Treating Plant Diseases
Beyond pests, you might see signs of disease. These are often triggered by environmental factors—especially moisture levels and air circulation, two things that can be a real challenge to perfect on a balcony.
Again, regular observation is your best tool. Catching a disease in its early stages gives you the best shot at saving the plant and stopping the spread.
Common Culprits and Their Cures
| Disease | Symptoms | Common Cause(s) | Solution |
|---|---|---|---|
| Powdery Mildew | A white, dusty coating on leaves, looking like they've been dusted with flour. | Poor air circulation and high humidity, a classic combo on cool evenings. | Space your plants out to improve airflow. Snip off affected leaves right away. A spray of 1 part milk to 9 parts water can also help. |
| Blossom End Rot | Dark, sunken, leathery spots appearing on the bottom of tomatoes or peppers. | Inconsistent watering, which leads to a calcium deficiency in the plant. | Keep soil moisture even—don't let pots swing from sopping wet to bone dry. A calcium-rich foliar spray can offer a quick fix. |
| Root Rot | Yellowing leaves, a wilting plant (even with wet soil), and a mushy stem base. | Overwatering and poor drainage, creating a waterlogged, oxygen-starved environment for roots. | This one is tough to fix. Stop watering immediately. If you can, gently repot the plant into fresh, dry soil, trimming away any dark, mushy roots first. |
I'll never forget the blossom end rot that ruined my first crop of container tomatoes. It was a frustrating lesson in how a big pot can't make up for an inconsistent watering schedule. Now, I swear by self-watering containers for my tomatoes; they get the steady moisture they need to absorb calcium properly.
Ultimately, a strong, healthy plant is its own best defense. When you provide the right sun, water, and nutrients from day one, you build resilience right into your balcony garden. Every challenge you overcome is a step toward becoming a more confident and successful gardener.
Answering Your Top Balcony Garden Questions
Alright, let's dig into some of the questions I get asked all the time. These are the practical, real-world issues that tend to surface once you've actually got some soil under your fingernails. Think of this as a chat over the garden fence—just some straightforward advice to help you build confidence as your garden grows.
What’s the Best Height for My Containers?
This is a great question, and the answer is crucial because pot depth is directly tied to the health and size of your plants. You have to give the roots enough real estate to build a strong foundation.
As a general starting point, aim for containers that are at least six inches deep. This works perfectly well for plants with shallow roots, like most herbs, lettuce, spinach, and even radishes. They don't need a lot of underground space to be happy.
But for the bigger, hungrier plants? You'll need to upgrade. Anything that produces fruit, like tomatoes and peppers, or root vegetables like carrots, needs more room to stretch out. I’d say a pot with a 12-inch depth is the bare minimum. Honestly, for my big heirloom tomatoes, I go for pots that are 18 to 24 inches deep. The extra space gives them a much more resilient root system and better drainage, which helps them power through hot summer days.
Should I Put Rocks at the Bottom of My Pots?
I see this advice everywhere, but it's an old gardening myth that actually does more harm than good. The thinking is that a layer of gravel will improve drainage, but the physics just doesn't work out that way.
What really happens is you create something called a "perched water table." The water hits the rock layer and stops, pooling in the soil above the rocks instead of draining freely. This pushes the soggy, waterlogged zone right up into your plant’s root ball, which is a fast track to root rot.
Forget the rocks. Your best bet is to use a high-quality, fluffy potting mix and make sure your containers have plenty of drainage holes. If you're concerned about soil washing out, just place a single piece of window screen or a coffee filter over the holes before you add soil.
Can I Grow Vining Plants like Cucumbers?
You absolutely can! The secret is to think vertically. Vining plants are some of the most productive crops you can grow on a balcony, as long as you give them a sturdy structure to climb.
It doesn't have to be complicated. A simple trellis leaned against a wall, a strong tomato cage, or even some netting tied to your balcony railing can all do the trick. Getting these plants to grow up instead of out not only saves a ton of floor space but also dramatically improves air circulation, which is your best defense against fungal diseases like powdery mildew.
A pro tip: Look for "bush" or "patio" varieties of cucumbers, squash, and beans. They're bred specifically for smaller spaces and are much easier to manage.
How Often Should I Replace My Potting Soil?
Container soil isn't like garden soil in the ground; it gets tired, compacted, and stripped of nutrients over a season. While you don't need to dump and replace all of it every single year, a little spring refresh is non-negotiable.
Here’s my annual ritual: I scoop out the top 2-3 inches of old soil from every pot. Then, I top it off with fresh, rich compost and gently mix it into the soil just below. This simple act replenishes the nutrients that last year’s plants used up and gives your new seedlings the boost they need to get started right.
Ready to start your own productive and beautiful garden? Homegrown Garden offers a curated selection of heirloom seeds, beginner-friendly kits, and all the supplies you need to succeed. From our fast shipping to our comprehensive grow guides, we're here to help you cultivate a thriving garden, no matter the size of your space. Explore our collection and get growing today at https://www.homegrown-garden.com.

