


Understanding Your Soil: The Foundation of Garden Success
 Before you even think about buying seeds or new plants, let’s talk about what’s happening right under your feet. It's easy to look at the ground and just see "dirt," but your garden's future really depends on the quality of its soil. Think of it less like a passive pile of earth and more like a bustling, underground city. A thriving garden is built on this complex, living ecosystem that provides everything your plants need to flourish. Properly preparing garden soil means getting to know its core components and figuring out how to get them working together.
The Five Essential Soil Components
At its most basic, healthy garden soil is a mix of five key ingredients, each playing a vital part. Finding the right balance is what turns a patch of difficult ground into a productive powerhouse.
- Mineral Particles: These are the tiny bits of rock—sand, silt, and clay—that give soil its basic structure, or texture. The ratio of these particles dictates how well your soil can hold onto water and nutrients.
- Organic Matter: This is the "life" of the soil. It’s all the decomposing leaves, compost, manure, and expired microorganisms. Good organic matter acts like a sponge, retaining moisture and nutrients while feeding the beneficial life within the soil.
- Water: Water is the delivery truck, transporting nutrients to plant roots and making photosynthesis possible. The aim is for soil that holds enough water to be useful without becoming a waterlogged swamp.
- Air: Plant roots need to breathe, too! Pockets of air in the soil are absolutely necessary for root respiration and for the survival of helpful aerobic microbes.
- Living Organisms: Believe it or not, a single teaspoon of healthy soil can contain billions of invisible helpers, from bacteria and fungi to earthworms. This microbial community is the engine that converts organic matter into food your plants can actually use.
Getting this blend right is the secret to a successful garden. To give you a clearer picture, here's a breakdown of what a balanced soil profile looks like.
| Component | Ideal Percentage | Function | Signs of Imbalance |
|---|---|---|---|
| Mineral Particles | 45% | Provides the basic structure (texture) and anchors plant roots. | Too much sand: drains too fast. Too much clay: compacts easily, poor drainage. |
| Organic Matter | 5% | Retains moisture and nutrients, improves soil structure, feeds soil life. | Soil is pale, hard, and lifeless. Water runs right off the surface. |
| Water | 25% | Dissolves and transports nutrients, essential for plant life processes. | Wilting plants (too little). Root rot, foul smell (too much). |
| Air | 25% | Allows roots and microorganisms to respire. Prevents anaerobic conditions. | Compacted soil, waterlogging, stunted root growth. |
| Living Organisms | <1% | Decomposes organic matter, cycles nutrients, and aerates the soil. | Lack of worms or other insects, slow decomposition of organic material. |
This chart shows that while minerals are the bulk, the other components are what make the soil truly alive and functional for your plants.
Why Soil Composition Matters for Your Plants
Getting this mix right is the key to unlocking your garden's true potential. For example, soil that's too sandy will drain in a flash, washing away precious nutrients before your plants have a chance to grab them. On the flip side, heavy clay soil can become as hard as a brick, starving roots of the air and water they need to survive.
It's a delicate balance. Globally, it's estimated that over 50% of agricultural soils have issues like pH imbalances or nutrient deficiencies that require attention. Most common garden vegetables and flowers prefer a slightly acidic to neutral pH range of 6.0 to 7.0, which is the sweet spot where nutrients are most readily available. You can find more insights into the global state of garden soil by checking out market reports, like this one from businessresearchinsights.com. Understanding these basics will save you from countless gardening headaches and set you on the path to a vibrant, healthy harvest.
Testing Your Soil Like a Professional Gardener
Starting a garden without knowing your soil's makeup is a bit like baking a cake without a recipe. You might throw some ingredients together and hope for the best, but you’re far more likely to end up with a disappointing mess. This is where soil testing becomes your best friend. I'm not talking about those cheap, often inaccurate test strips you see at big-box stores. To truly prepare garden soil for a thriving season, you need real, actionable data that tells you precisely what your garden is missing. Let’s ditch the guesswork and get some real answers.
Simple DIY Tests You Can Do This Weekend
You don’t need a fancy lab coat to learn a surprising amount about your soil. A couple of easy, hands-on tests can give you crucial clues about its texture and how well it drains.
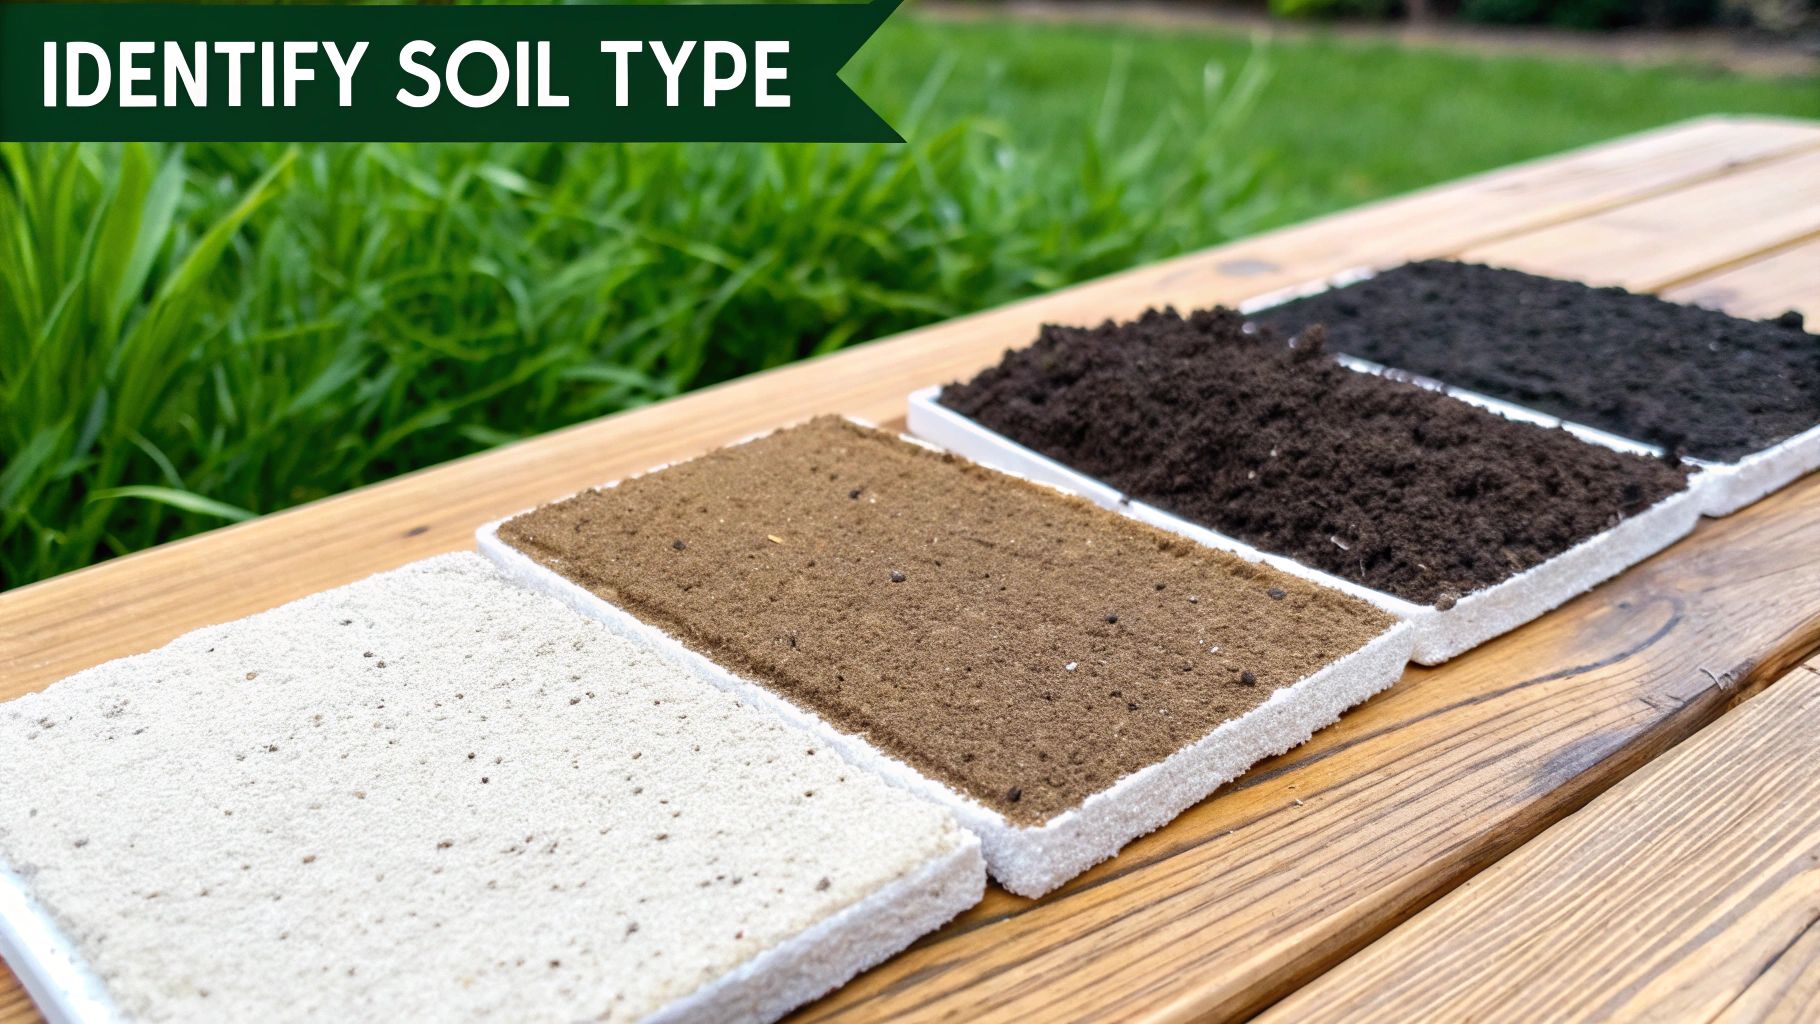
- The Squeeze Test: Scoop up a handful of soil that's moist but not dripping wet. Squeeze it hard in your fist. What happens when you open your hand? If it immediately falls apart, you probably have sandy soil. If it forms a tight, dense ball that refuses to crumble, you're dealing with heavy clay. The ideal result is a clump that holds its shape but breaks apart easily with a gentle poke—that’s the classic loamy texture every gardener dreams of.
- The Percolation Test: This one sounds technical, but it’s simple. Dig a hole about one foot deep and one foot wide. Fill it with water and let it all drain away. Then, fill it up a second time and start a timer. If the water vanishes in less than four hours, your drainage is very fast, pointing again to sandy soil. If water is still sitting there after 12 hours, you've got poor drainage, likely from clay, which can cause root rot.
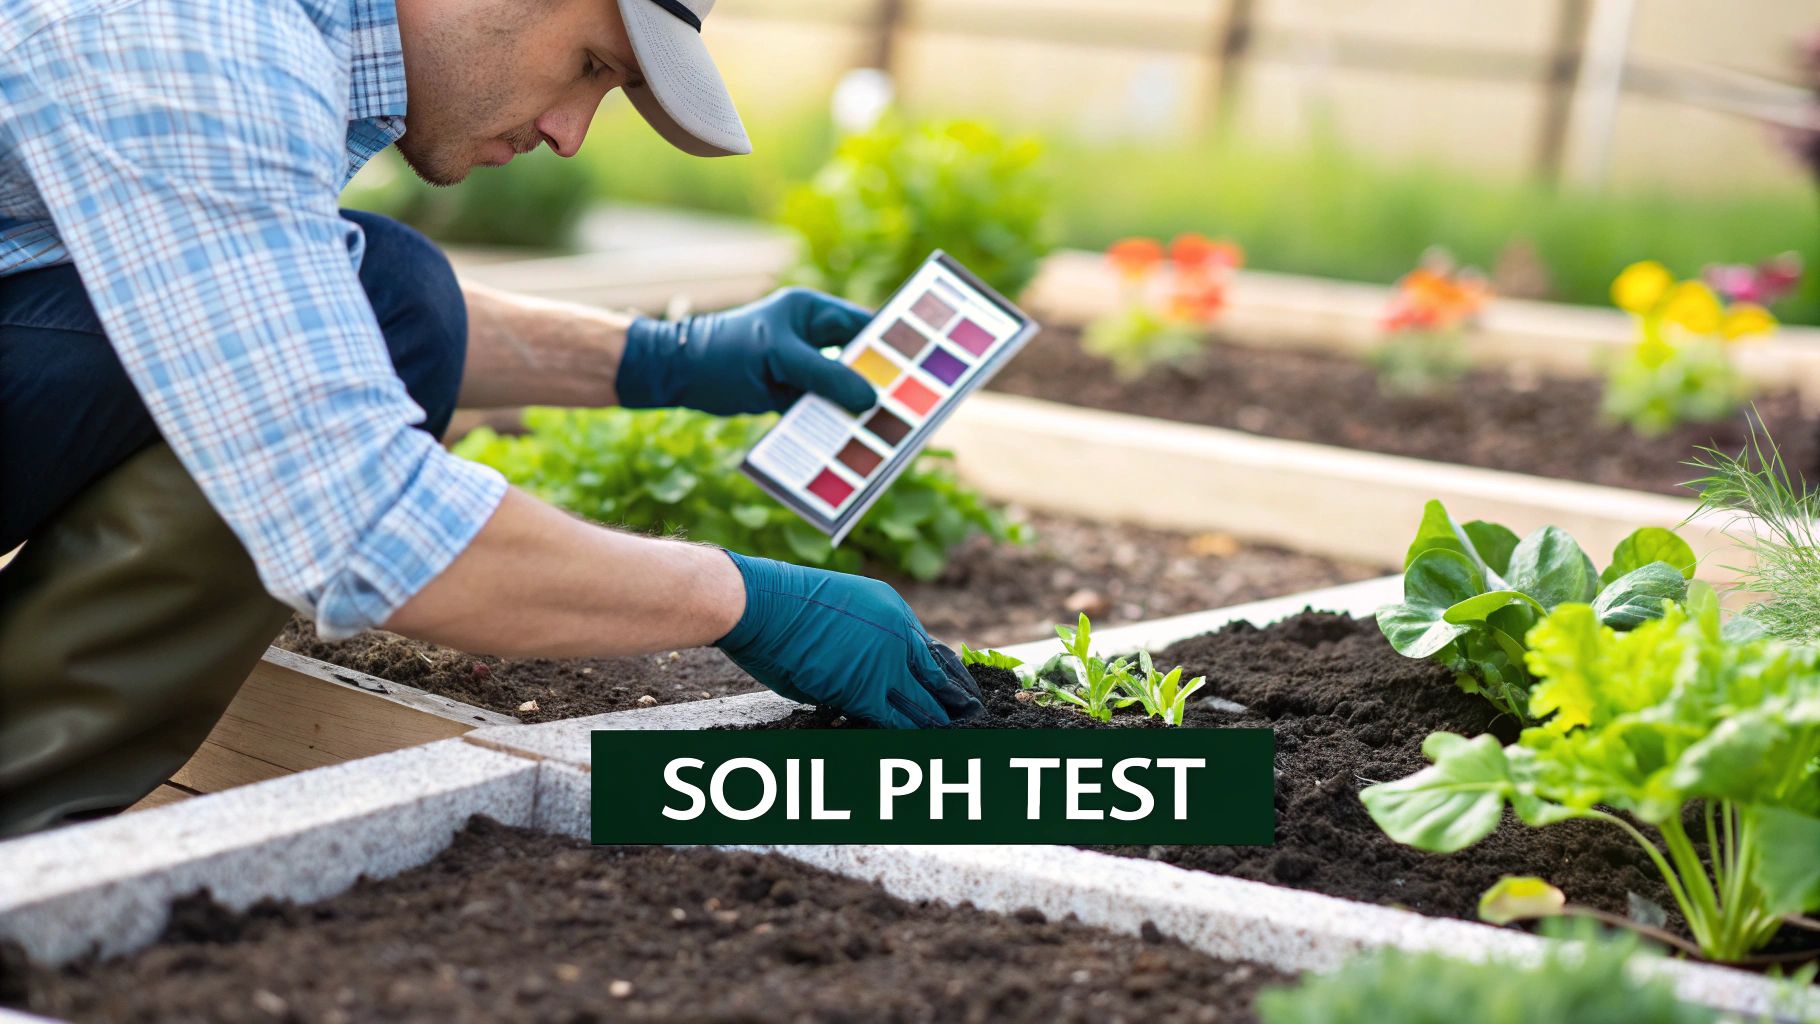
Getting Deeper Insights with a Lab Test
While these at-home tests are great for a quick physical check-up, a professional lab test is the single best investment you can make for your garden’s health. For a small fee, your local cooperative extension office or a private lab will give you a detailed report on your soil’s pH and vital nutrient levels, including nitrogen (N), phosphorus (P), and potassium (K). This report eliminates all the guesswork. I've seen fellow gardeners waste hundreds of dollars on fertilizers their soil didn't even need, all because they skipped this one critical step.
This example from Purdue's extension service shows how to take a proper soil sample.
The most important takeaway here is to collect several smaller samples from all over your garden bed and mix them together. This "composite sample" gives the lab a much more accurate picture of your entire garden, not just one random spot. Combining soil testing with your other seasonal garden prep is a great way to streamline your efforts. Taking the time to test now will set you up for a season of success instead of a season of struggle.
Mastering Soil Amendments That Actually Work
Once you have a good read on your soil's personality, it's time for the fun part: turning it into the rich, fertile ground your plants dream about. This is where we move beyond just digging a hole and really start gardening. By adding the right things, we can transform problem spots into productive powerhouses. Let's skip the generic advice and talk about what seasoned gardeners actually do to fix heavy clay or make sandy soil hold onto precious water.
Choosing Your Organic Matter Wisely
Organic matter is the secret sauce for amazing soil, but not all types are the same. Each brings something different to the party, and honestly, using a mix is almost always the best approach. It’s like creating a balanced diet for your garden beds.
- Aged Compost: Think of this as the ultimate soil multi-vitamin. Good, finished compost is packed with a wide range of nutrients, helps bind soil particles for better structure, and introduces a whole world of beneficial microbes. You'll know it's ready when it smells rich and earthy, not sour or like a garbage bin.
- Well-Rotted Manure: Manure is a fantastic source of nitrogen and other essential nutrients. The key word here is "rotted." Fresh manure is too "hot" and will burn your plants' sensitive roots, so it must be aged for at least six months. Cow, horse, and chicken manure are all great options, each offering a slightly different nutritional punch.
- Leaf Mold: This is a gardener's best-kept secret for improving water retention. It's simply decomposed leaves, and it acts like a natural sponge, soaking up moisture and releasing it slowly. If you're dealing with sandy soil that dries out in a flash, leaf mold is a game-changer.
This simple chart shows how you can blend these key amendments to get a well-rounded mix for general garden improvement.
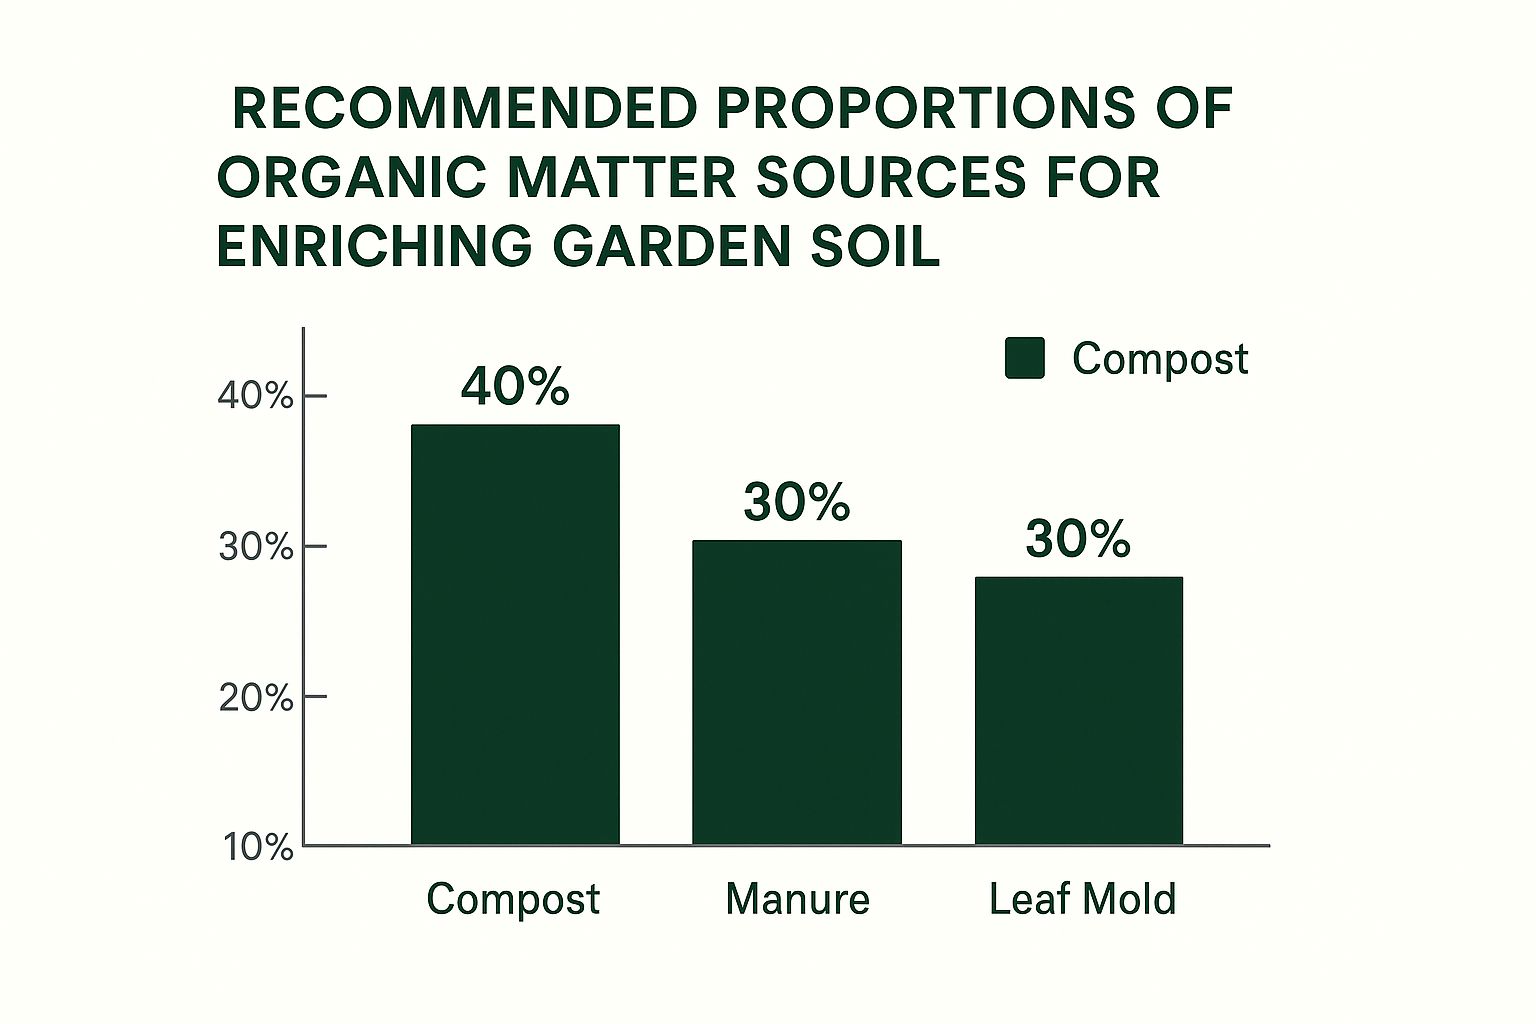
As you can see, diversifying your organic matter provides a much more complete set of benefits than just relying on one type alone.
To help you decide what's best for your garden's specific needs, here's a quick comparison of common amendments.
| Amendment Type | Primary Benefits | Application Rate | Best For | Cost Range |
|---|---|---|---|---|
| Compost | Improves structure, adds nutrients, boosts microbial life | Spread a 1-3 inch layer | All soil types, especially clay and depleted soils | Low (if homemade) to Moderate |
| Aged Manure | High in nitrogen, enriches soil with nutrients | Spread a 1-2 inch layer | Vegetable gardens, heavy feeders | Low to Moderate |
| Leaf Mold | Excellent water retention, improves soil tilth | Spread a 2-3 inch layer | Sandy soils, woodland gardens, moisture-loving plants | Free (if homemade) to Low |
| Agricultural Lime | Raises soil pH, adds calcium | Follow soil test recommendations | Acidic soils (low pH) | Low |
| Elemental Sulfur | Lowers soil pH | Follow soil test recommendations | Alkaline soils (high pH), acid-loving plants | Moderate |
| Rock Phosphate | Slow-release phosphorus, trace minerals | 5-10 lbs per 100 sq ft | Encouraging root growth and blooms | Moderate to High |
This table should give you a solid starting point for picking the right tools for the job. You don't need to use everything, but knowing your options lets you tailor your approach perfectly.
The Role of Mineral Amendments
While organic matter builds that beautiful, crumbly foundation, mineral amendments are like targeted medicine. They fix specific chemical imbalances that your soil test might have pointed out, ensuring your plants can actually absorb all the good stuff you're adding.
- Agricultural Lime: If your soil test came back with a low pH, meaning it's too acidic, lime is the classic fix. It "sweetens" the soil, making key nutrients more available for most common vegetables and flowers.
- Elemental Sulfur: On the flip side, if your soil is too alkaline (high pH), a little sulfur will help bring that number down into a more plant-friendly range. This is essential if you're hoping to grow acid-loving plants like blueberries or azaleas.
- Rock Dust (or Rock Phosphate): This is a slow-and-steady amendment. It provides a long-term supply of phosphorus and other trace minerals that are vital for developing strong roots and getting plenty of flowers.
Adding compost and manure is a practice embraced by gardeners worldwide for good reason. It’s estimated that 30-40% of gardeners and farmers make these organic additions a top priority. They understand that this is the key to building fertility that lasts. You can dive deeper into these sustainable practices and find out more about garden soil trends on businessresearchinsights.com.
Putting in the effort to amend your soil is the first real step toward a garden you can be proud of. Once your soil is prepped and ready, you'll be set up for a fantastic planting season. For your next step, you might find our guide on 10 tips for sowing and germination helpful to give your seeds the best start.
Perfect Timing and Proven Techniques for Soil Preparation
 Once you've picked out your amendments, your success in preparing garden soil really comes down to two things: when you do the work and how you do it. Mess up the timing, and you can accidentally destroy the very soil structure you're trying so hard to build. I’ve seen enthusiastic gardeners turn their lovely, loamy soil into compacted bricks just by working it when it was far too wet.
The sweet spot is when the soil is moist enough to be workable but not so saturated that it forms a sticky clump. An easy way to check is with a simple squeeze test: grab a handful of soil and squeeze. If it gently crumbles apart when you open your hand, you're good to go.
Choosing Your Method: Tilling, Hand-Working, and No-Till
The way you physically prepare your garden bed should depend on its current condition and what you're hoping to achieve long-term. If you're starting a brand-new garden plot from a patch of lawn or dealing with heavily compacted earth, some initial tilling might be necessary. This helps aerate the soil and break up dense layers so plant roots can stretch out. These foundational practices, which have roots in agriculture, are key to a successful garden. You can explore more insights on the garden soil industry at businessresearchinsights.com to see how these methods impact the broader market.
However, tilling isn't something you want to make an annual habit. Tilling too often can disrupt the delicate ecosystem of soil life you want to nurture. Here are a few different approaches to consider:
- Occasional Tilling: This is best for breaking new ground or mixing in large amounts of amendments into really poor soil. Ideally, you’d do this just once to establish the bed.
- Hand-Working: For smaller gardens, raised beds, or established areas, a broadfork or a sturdy digging fork is your best tool. This method loosens and aerates the soil without pulverizing its structure, which protects the homes of earthworms and beneficial microbes.
- No-Till/No-Dig Method: This is a wonderfully sustainable approach that involves layering organic matter like compost and mulch directly onto the soil surface, season after season. The soil life—worms, fungi, and bacteria—does the hard work of pulling the nutrients down into the soil for you. This is my go-to method for established beds because it builds incredible fertility over time.
A fantastic way to get started with the layering method is to begin in the autumn, which gives the materials all winter to break down. You can check out our guide on how to prepare your garden for fall for more tips on getting a jump-start on the next growing season. This kind of seasonal planning is the secret to building wonderfully healthy soil year after year.
Specialized Soil Preparation for Different Garden Types
Trying to use the same soil mix for every plant is a recipe for a mediocre garden. What works wonders for a hungry vegetable patch would be a total disaster for a rock garden filled with succulents. The secret to a truly spectacular garden lies in tailoring your soil to the specific needs of your plants and the style of garden you're creating. Plants have evolved to thrive in all sorts of environments, and giving them a little piece of their native home is a game-changer.Creating Specific Growing Zones
Thinking about your garden in "zones" can make this whole process much simpler. For instance, my vegetable beds get a generous helping of rich compost and aged manure every single year. Veggies like tomatoes and squash are heavy feeders, meaning they need a constant supply of nutrients to give you that amazing harvest we all dream of.
On the other hand, my perennial flower border gets a much lighter touch. Many perennials, like the lavender and echinacea I have, actually do better in leaner soil. If the soil is too rich, you can end up with weak, floppy stems and fewer flowers. For these plants, a simple top-dressing of leaf mold to improve soil structure and hold moisture is often perfect.
Setting up these distinct zones is pretty straightforward:
- For Acid-Loving Plants: In the bed where I grow my blueberries, rhododendrons, and azaleas, I work in some elemental sulfur and use pine needle mulch to help lower the soil pH.
- For Alkaline-Loving Plants: My lavender, clematis, and lilacs prefer "sweeter" soil, so I amend their area with a small amount of garden lime to raise the pH to a level they enjoy.
Adapting to Modern Gardening Styles
Great gardens aren't just for big backyards anymore. The popularity of urban and small-space gardening calls for a different soil strategy.
Raised Beds: These are a fantastic option because you have complete control over the soil. You are basically building your ideal soil mix from the ground up. A solid all-purpose recipe is one part compost, one part vermiculite or perlite (for drainage), and one part topsoil or coconut coir. Because they're contained, raised beds also warm up faster in the spring, giving you a head start on the season.
Container Gardens: When you're planting in pots, the soil needs to be light and airy. This prevents it from becoming a dense, waterlogged brick, which is a major risk in a confined space. Never use soil straight from your garden in a pot; it will compact and suffocate your plant's roots. Instead, look for a quality potting mix or create your own with a base of peat-free coir, compost, and plenty of perlite for drainage.
This need for specialized soil isn't just a trend I'm seeing; it's happening across the gardening industry. The fact that you can now buy specific mixes for everything from cacti to orchids shows just how critical the right soil is for plant health. This is especially apparent with the boom in indoor and balcony gardening, which has also thankfully pushed a positive shift toward peat-free products for environmental reasons. You can explore more about the garden soil market on globalgrowthinsights.com to see how the industry is changing.
Ultimately, matching your soil to your plants is the final, crucial step in successful garden preparation.
Solving Common Soil Problems That Frustrate Gardeners
Even with the best intentions, your garden soil can sometimes throw you a curveball. One day your plants are green and lush, and the next they’re looking a bit yellow and sad. Figuring out how to read these signals and troubleshoot the underlying issues is a key part of preparing garden soil for lasting success. It’s like learning to solve the little puzzles your garden sends your way.
Tackling Clay, Sand, and Rocks
Let's get our hands dirty and talk about the most common structural headaches gardeners face. Heavy clay soil, which feels like sticky modeling clay when wet and turns into concrete when dry, is infamous for poor drainage that can suffocate plant roots. The fix isn't to add sand, which can backfire and create a cement-like substance. Instead, the answer is massive amounts of organic matter. A yearly top-dressing of 2-3 inches of coarse compost will slowly work its way into the clay, breaking it up and creating vital air pockets.
Sandy soil presents the opposite challenge; water and nutrients drain away before your plants can grab them. I once worked with a client whose sandy garden patch wilted by noon on every sunny day. The solution was to mix in materials that hold onto moisture. We worked in plenty of leaf mold and coco coir, which act like tiny sponges. Topping it off with a thick layer of wood chip mulch also made a huge difference by slowing down evaporation.
Rocky soil is more of a physical battle than a chemical one. If you're starting a new garden bed, it’s absolutely worth the upfront effort to dig down and pull out as many rocks larger than your fist as you can. For established gardens where digging would be too disruptive, building upwards with raised beds is often the most practical path forward. This gives you total control over the growing medium from the start.
Decoding Plant Symptoms
Your plants are always talking to you; you just have to learn their language. Pale, yellowing leaves, for example, are often a classic sign of a nitrogen deficiency, a frequent issue early in the growing season. For a quick boost, a dose of liquid fish emulsion can do the trick. For a longer-term solution, focus on adding nitrogen-rich materials like manure to your compost pile.
If you notice stunted growth and leaves with a purplish tint, you might be looking at a phosphorus deficiency. This problem is often linked to the soil's pH being either too high or too low, which effectively "locks up" the available phosphorus. This is a perfect example of why a soil test is so important. Simply adding a phosphorus fertilizer won't do any good if you don't first correct the underlying pH issue with lime or sulfur. Catching these visual cues early can stop a small problem from becoming a harvest-ruining disaster.
Your Personalized Soil Success Action Plan
Now that you've got the dirt on testing, amending, and timing, it's time to create a real game plan for your garden. Think of preparing your soil not as a one-and-done chore, but as an ongoing conversation you have with your little patch of earth. Let's take all that theory and turn it into actionable steps you can start this weekend.
Your Seasonal Soil Checklist
Every garden is at a different stage, so your next steps will depend on where you're starting from. Here’s a quick guide to figure out what to do next based on your garden's current situation.
- For a Brand-New Garden Plot: Your first job is to clear the area of any grass, weeds, or debris. Once you have a blank slate, get a feel for your soil with a simple texture and percolation test. This gives you a baseline. Before you even think about adding amendments, send a sample off for a professional lab test—it takes the guesswork out of the equation.
- For an Existing Bed That's Struggling: If your plants just aren't thriving, a lab test is your best friend. It will pinpoint exactly what’s missing, whether it's key nutrients or an imbalanced pH. Your go-to fix will likely involve adding 2-3 inches of high-quality compost to boost both fertility and structure. If you’re battling heavy clay or sandy soil that drains too quickly, this is the perfect time to work in specific amendments like leaf mold.
- For a Thriving, Established Garden: The name of the game here is maintenance. To keep things humming along, a light top-dressing of compost each spring or fall is usually all you need to replenish nutrients. Keep an eye out for any signs of compaction. If the ground feels hard, gently use a broadfork to loosen the soil without wrecking its delicate structure.
Building this rich, healthy foundation is the single most important thing you can do for your plants. It paves the way for stronger growth, more abundant harvests, and fewer headaches down the line, making each gardening season better than the last.
Ready to get planting in your freshly prepared soil? Check out our curated collection of heirloom seeds and gardening kits at Homegrown Garden to get your season off to a fantastic start.

