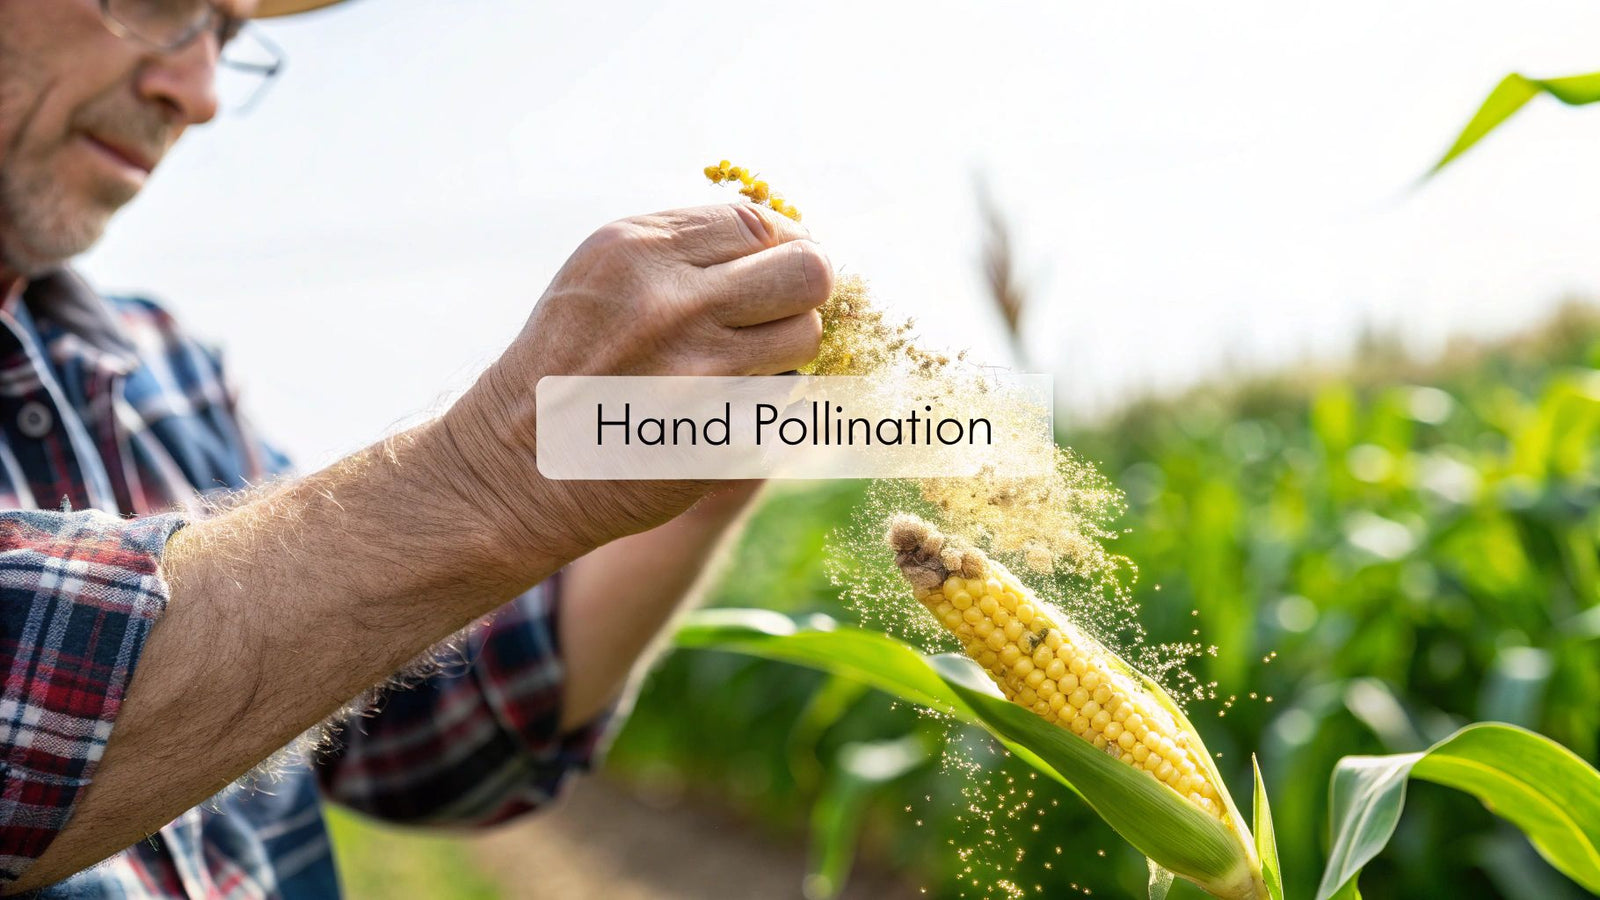

Hand-pollinating corn is a pretty simple trick: you're just collecting the powdery pollen from the male tassels and dusting it onto the female silks. It's a small step that mimics what the wind is supposed to do, but it makes a huge difference, ensuring every potential kernel on an ear gets fertilized for a full, juicy harvest.
Why Hand Pollinating Corn Is a Gardener's Secret Weapon
Ever shucked an ear of corn you were so excited about, only to find sad, patchy gaps where plump kernels should be? It’s a common letdown, and it’s almost always a pollination problem. Out in huge farm fields, the wind has no trouble carrying pollen across thousands of stalks. But in a small backyard patch, there often isn't enough density for that to happen effectively.
That's where you come in. By hand-pollinating, you take control. This technique is a game-changer, especially if you have specific goals for your garden.
- Bigger Harvests: When you make sure every single silk gets a dusting of pollen, you get fuller, more uniform ears of corn. It’s that simple. No more disappointing gaps.
- Small Space Gardening: If you're growing corn in a single row or a small block, wind pollination is notoriously unreliable. Taking matters into your own hands is pretty much the only way to guarantee a good crop.
- Saving Pure Seeds: For anyone saving seeds from heirloom varieties, preventing cross-pollination is everything. Hand pollination lets you decide exactly which pollen fertilizes which plant. This keeps your saved seeds true-to-type for next season. It’s that kind of foresight that makes for a great gardener, similar to knowing which vegetables to start in early spring for a bumper crop down the line.
Ensuring a Successful Harvest
For a great yield, we usually rely on nature—wind and helpful insects. But sometimes the weather doesn't cooperate, or you might have a lack of natural pollinators like bees. When that happens, your direct intervention becomes incredibly valuable.
Hand pollination is a meticulous process, but it's absolutely crucial for maintaining genetic purity and ensuring high-quality seed production, especially if you're into seed-saving or specialized breeding.
Under the right conditions, careful hand pollination can achieve nearly 100% fertilization success. That's a huge improvement over the often-unpredictable results you get from just hoping for a windy day. This detailed work is the backbone of what many serious breeders and dedicated gardeners do to get incredible results.
The 7 Steps for How to Pollinate Corn by Hand
Alright, this is where the magic happens. We're about to step in for Mother Nature and play the part of the wind to ensure every single stalk gives you a fantastic ear of corn. Hand-pollinating might sound complicated, but it's really just a simple, 7-step process. Follow along, and you'll be doing it with confidence in no time, giving every potential kernel its best shot at becoming sweet, juicy corn.
1. Find the Ready Tassels
First things first, you need to know when the male flowers—the tassels at the very top of the stalk—are ready to give up their pollen. You'll see them pop out from the top of the plant, but they need a few days to mature before they start shedding that golden dust.
The easiest way to check? Just give a stalk a gentle shake. If you see a fine, yellow powder drift down, you're in business. Don't get ahead of yourself and snip a tassel too early; if it's not shedding pollen, it's not ready. Getting this timing right is everything.
2. Identify Receptive Silks
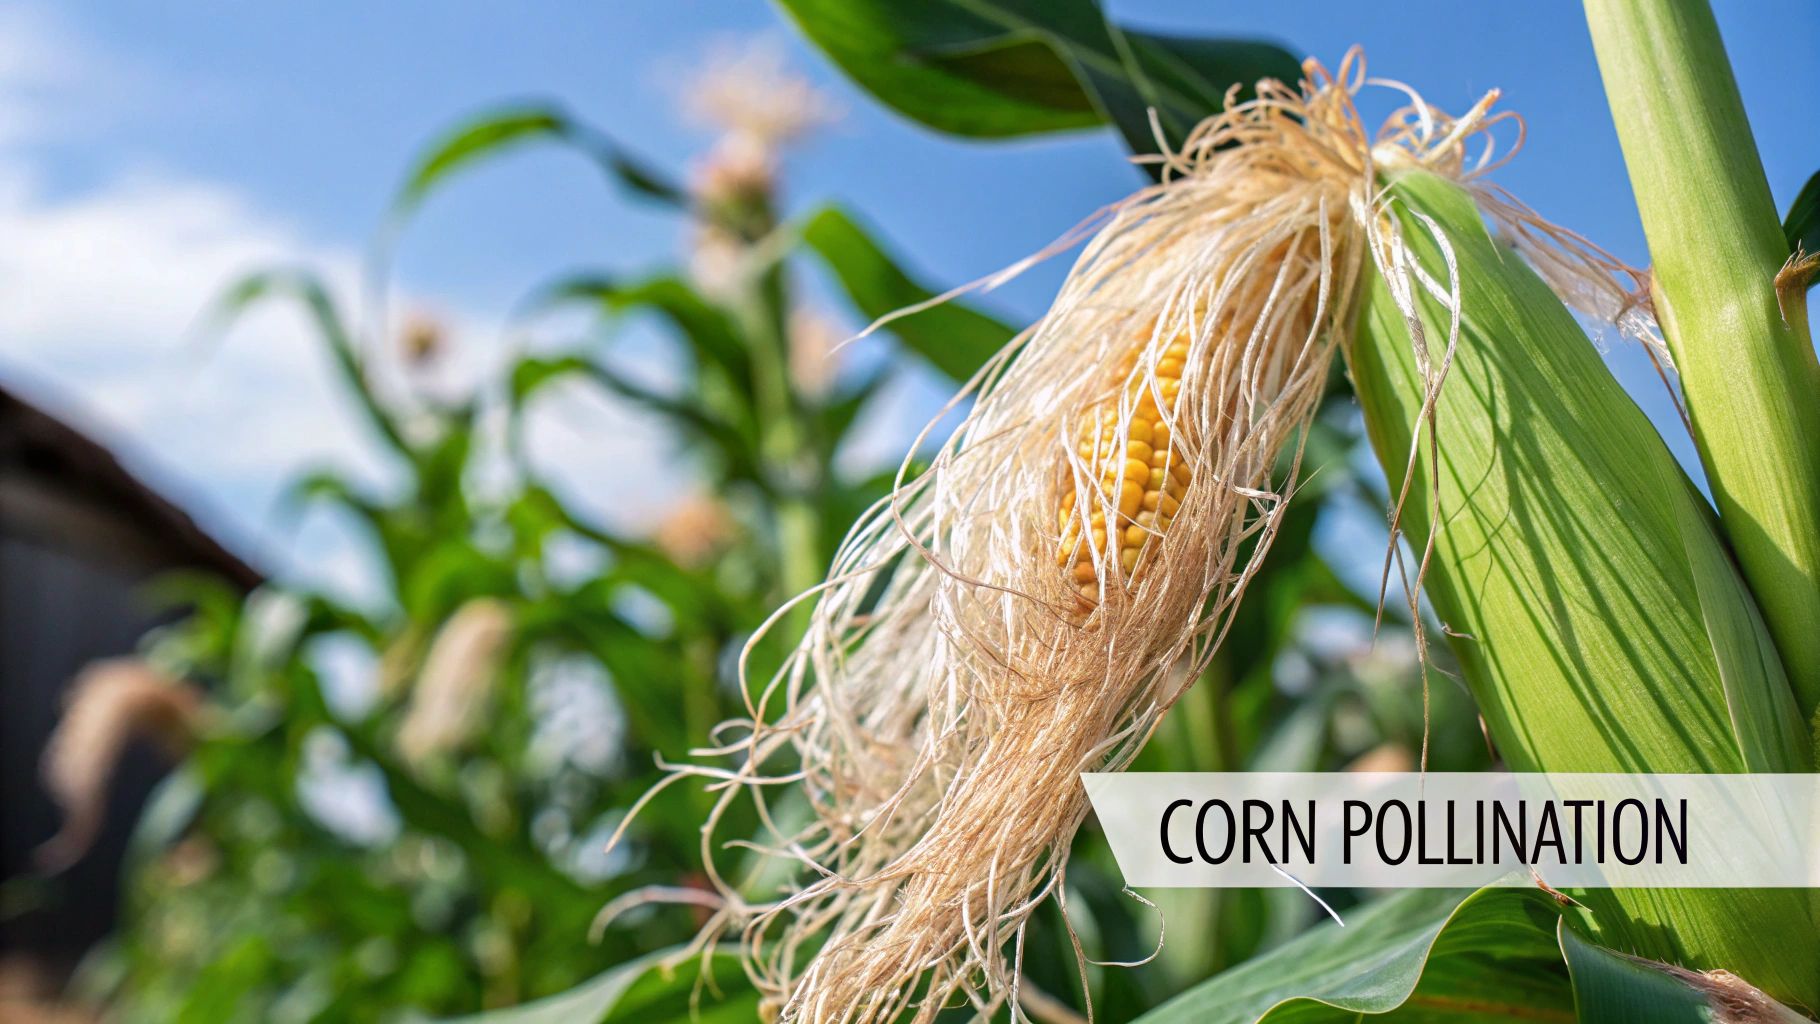
Next, cast your eyes downward to the female parts of the plant. The silks are those delicate, hair-like threads spilling out from the tip of each developing ear, which you'll usually find about halfway down the stalk.
You'll know the silks are receptive when they look fresh, feel slightly sticky, and have a vibrant color—often a pale green or soft yellow. Here’s the amazing part: every single one of those silks connects to a single ovule that wants to become a kernel. For a full, perfect ear, every silk needs to get pollinated. No pressure!
3. Collect the Pollen
With shedding tassels and sticky silks, it’s go-time. You'll need something to collect the pollen in—a clean, dry paper bag or a small bowl works perfectly.
- The Bag Method: My favorite technique is to gently bend the stalk's top, placing the paper bag right over the tassel.
- Give it a Shake: A few firm but gentle shakes inside the bag is all it takes. You’ll immediately see the yellow pollen gathering at the bottom.
- Make the Rounds: Move from one plant to the next, collecting pollen from several different tassels. This ensures you have plenty to work with and promotes good genetic diversity in your patch.
For best results, do this in the morning right after the dew has dried, but before the hot afternoon sun can bake the pollen and reduce its viability.
4. Apply Pollen to the Silks
Now for the rewarding part—delivering the pollen. Take your bag of "gold dust" and gently pour or sprinkle it all over the silks on each ear of corn. Don't be shy! It's always better to over-apply than to miss a few silks.
My Go-To Tip: For really precise work, I like to use a small, soft-bristled paintbrush. Just dip the brush into your collected pollen and "paint" it directly onto the silks. Make sure you get good coverage from the base to the very tips of the silk bundle.
This is exactly what the wind does, but you're doing it with purpose and a much higher success rate.
This little graphic breaks down the core process of collecting pollen and dusting the silks.
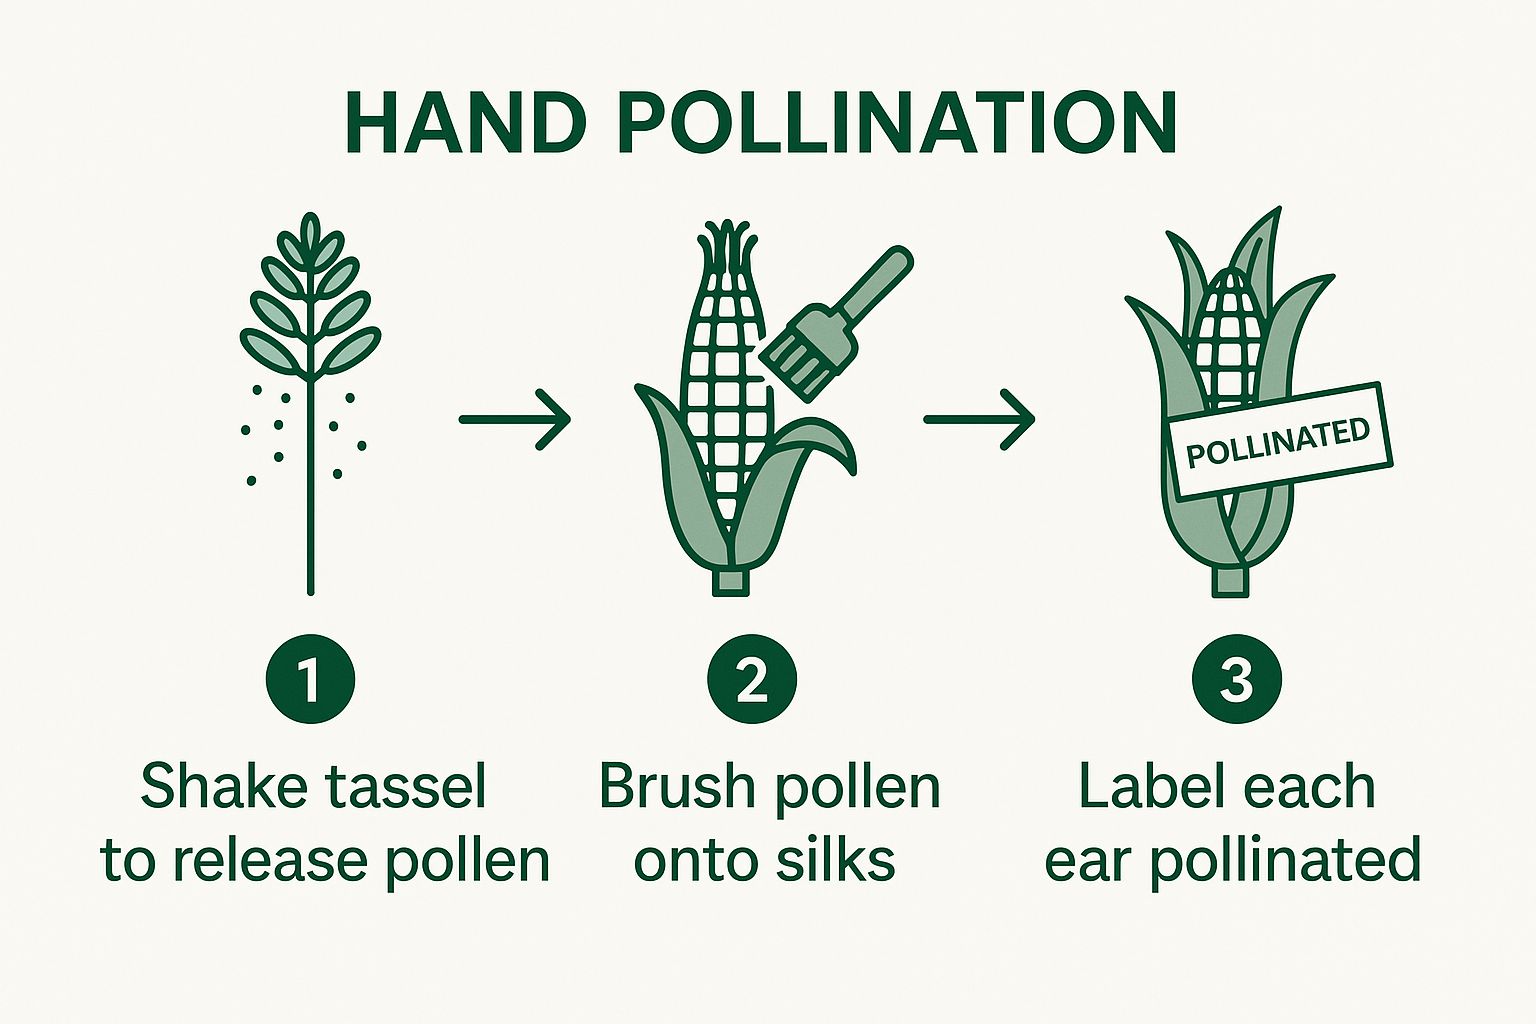
Think of it as a simple cycle: release the pollen, apply it to the silks, and if you're saving seeds, label your work. That's the heart of hand pollination.
5. Repeat the Process for Best Results
Silks don't all pop out on the same day. To make sure you pollinate every last one as it emerges, it’s a great idea to repeat this whole process 2-3 times over a few consecutive days. This is the secret to avoiding those frustrating, gappy cobs and getting a completely full ear of corn.
6. Protect Your Work (Especially for Heirlooms)
If you're saving seeds from a special heirloom variety, protecting the ear you just pollinated is a crucial final step. To prevent any stray pollen from other corn varieties from contaminating your work, simply slip a small paper bag over the ear and secure it loosely. This guarantees the purity of your seeds.
7. Don't Forget to Label
Finally, if you're growing multiple corn varieties or doing a little experimenting, good labeling is your best friend. Use a small tag or a permanent garden marker to write down the date you pollinated and which variety the pollen came from. This is absolutely essential for seed saving and helps you see what works. It's a simple habit that pays off, just like meticulously planning your garden by following smart tips for starting seeds indoors.
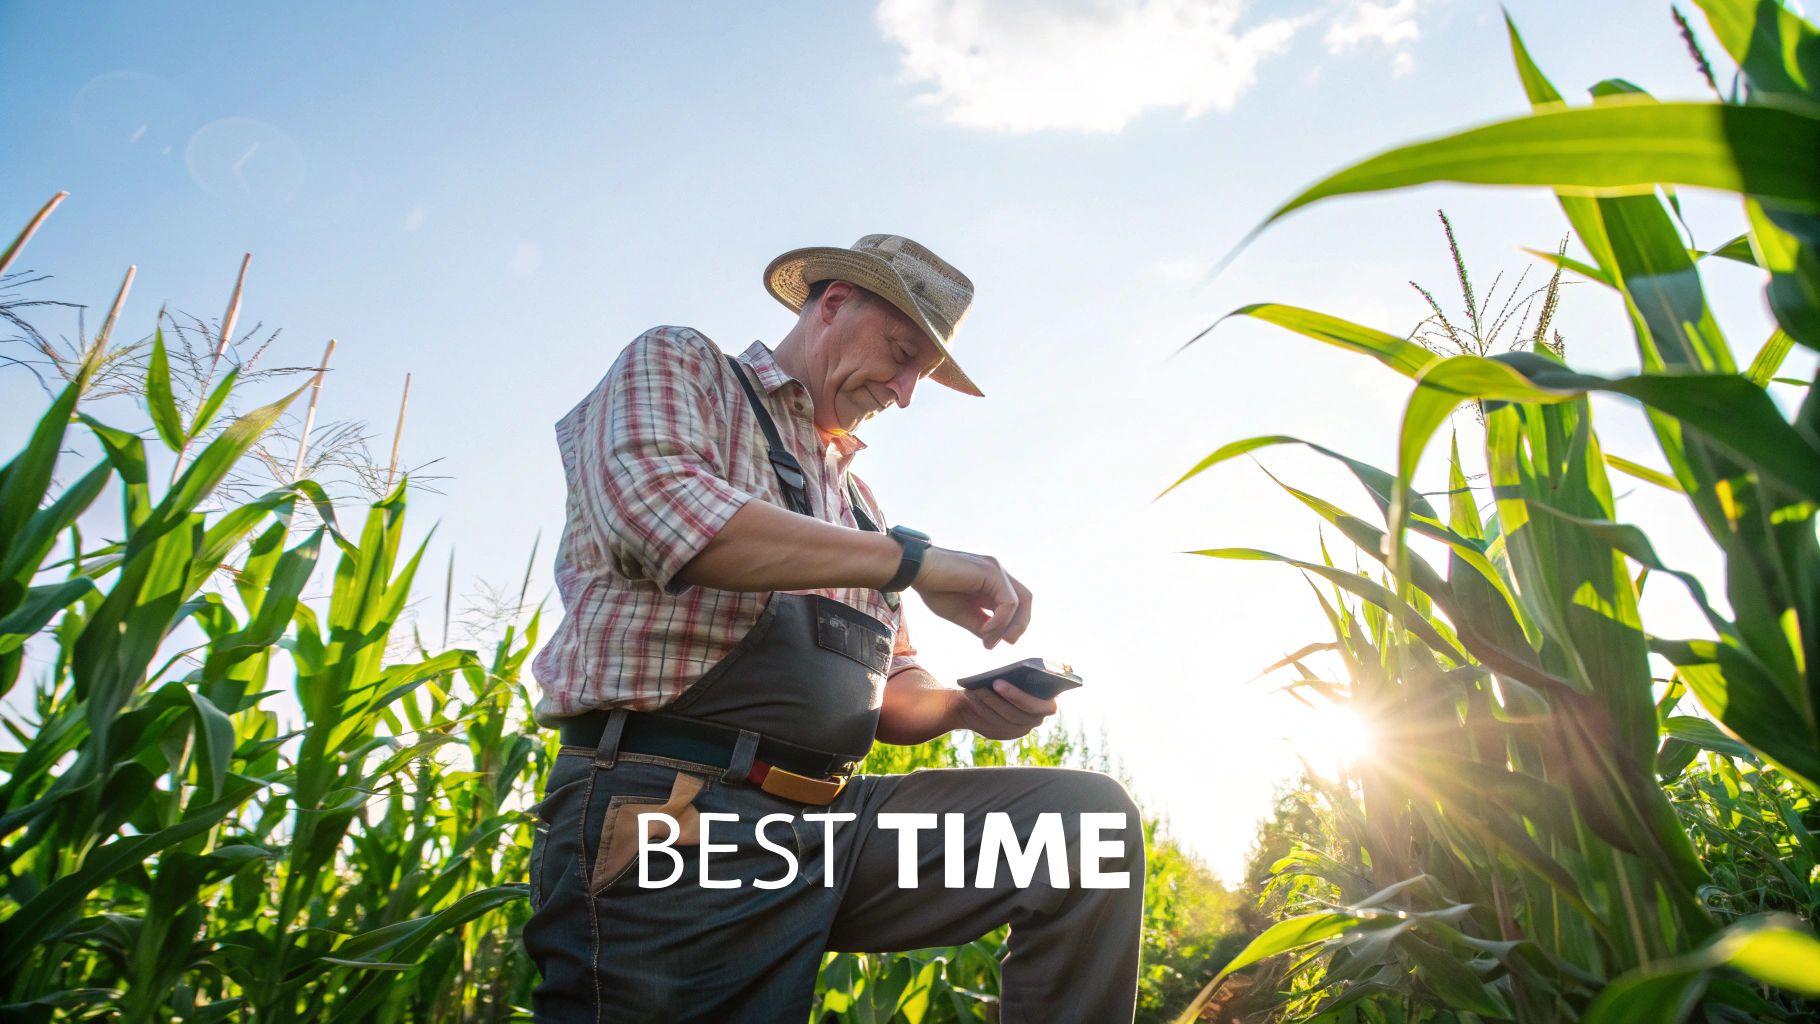
Getting the Timing and Conditions Just Right
If you take away just one thing about hand-pollinating corn, let it be this: timing is everything. Success hinges on a narrow, often fleeting window of opportunity. Your goal is to catch the pollen at its peak potency and dust it onto the silks when they're at their most receptive. It’s a bit of a dance, but your plants will tell you when they're ready to lead.
The best time of day for this little garden project is almost always mid-morning. You need to let the morning dew burn off completely—any moisture will turn that fine pollen into a clumpy, useless mess. But don't wait too long. The intense afternoon sun can bake the pollen, killing it before it even has a chance to do its job.
For me, the sweet spot is usually between 9 a.m. and 11 a.m. on a dry, calm day. That's your golden window.
Reading the Plant's Cues
Your corn will give you some pretty clear signals when it's go-time. You just have to know what you’re looking for. For pollination to work, the male tassels (up top) and the female silks (on the ears) need to be ready simultaneously.
I can't stress this enough: corn pollen is incredibly fragile. Once it leaves the tassel, its viability drops fast, often lasting just a few hours in the heat. This is why acting quickly during that morning window is so critical if you want full, delicious ears of corn.
That short lifespan means you can't procrastinate. A few hours of delay can be the difference between a beautiful, fully-formed cob and a sad, patchy one.
To help you get it right, here’s a quick checklist I use to see if my corn is ready for its close-up.
Corn Pollination Readiness Checklist
This simple table breaks down the visual cues that tell you your corn is primed for pollination. A quick glance can save you from acting too early or too late.
| Plant Part | Sign of Readiness | What to Look For |
|---|---|---|
| Tassels (Male) | Shedding Pollen | Give the stalk a gentle shake. If a fine, yellow dust falls, you're in business. The tassel should look open and "fluffy." |
| Silks (Female) | Fresh and Sticky | The silks should be newly emerged from the ear's husk. Look for a vibrant pale green or yellowish color and a slightly sticky feel. |
| Overall Plant | Synchronized Timing | In a perfect world, tassels shed pollen just as silks emerge. If they're out of sync, you might need to collect pollen and save it for a day or two. |
Keep a close eye on these signs. If you shake a tassel and nothing happens, give it another day. On the flip side, if the silks are already brown and dry, they're past their prime and won't accept any pollen. You've missed the window for that particular ear.
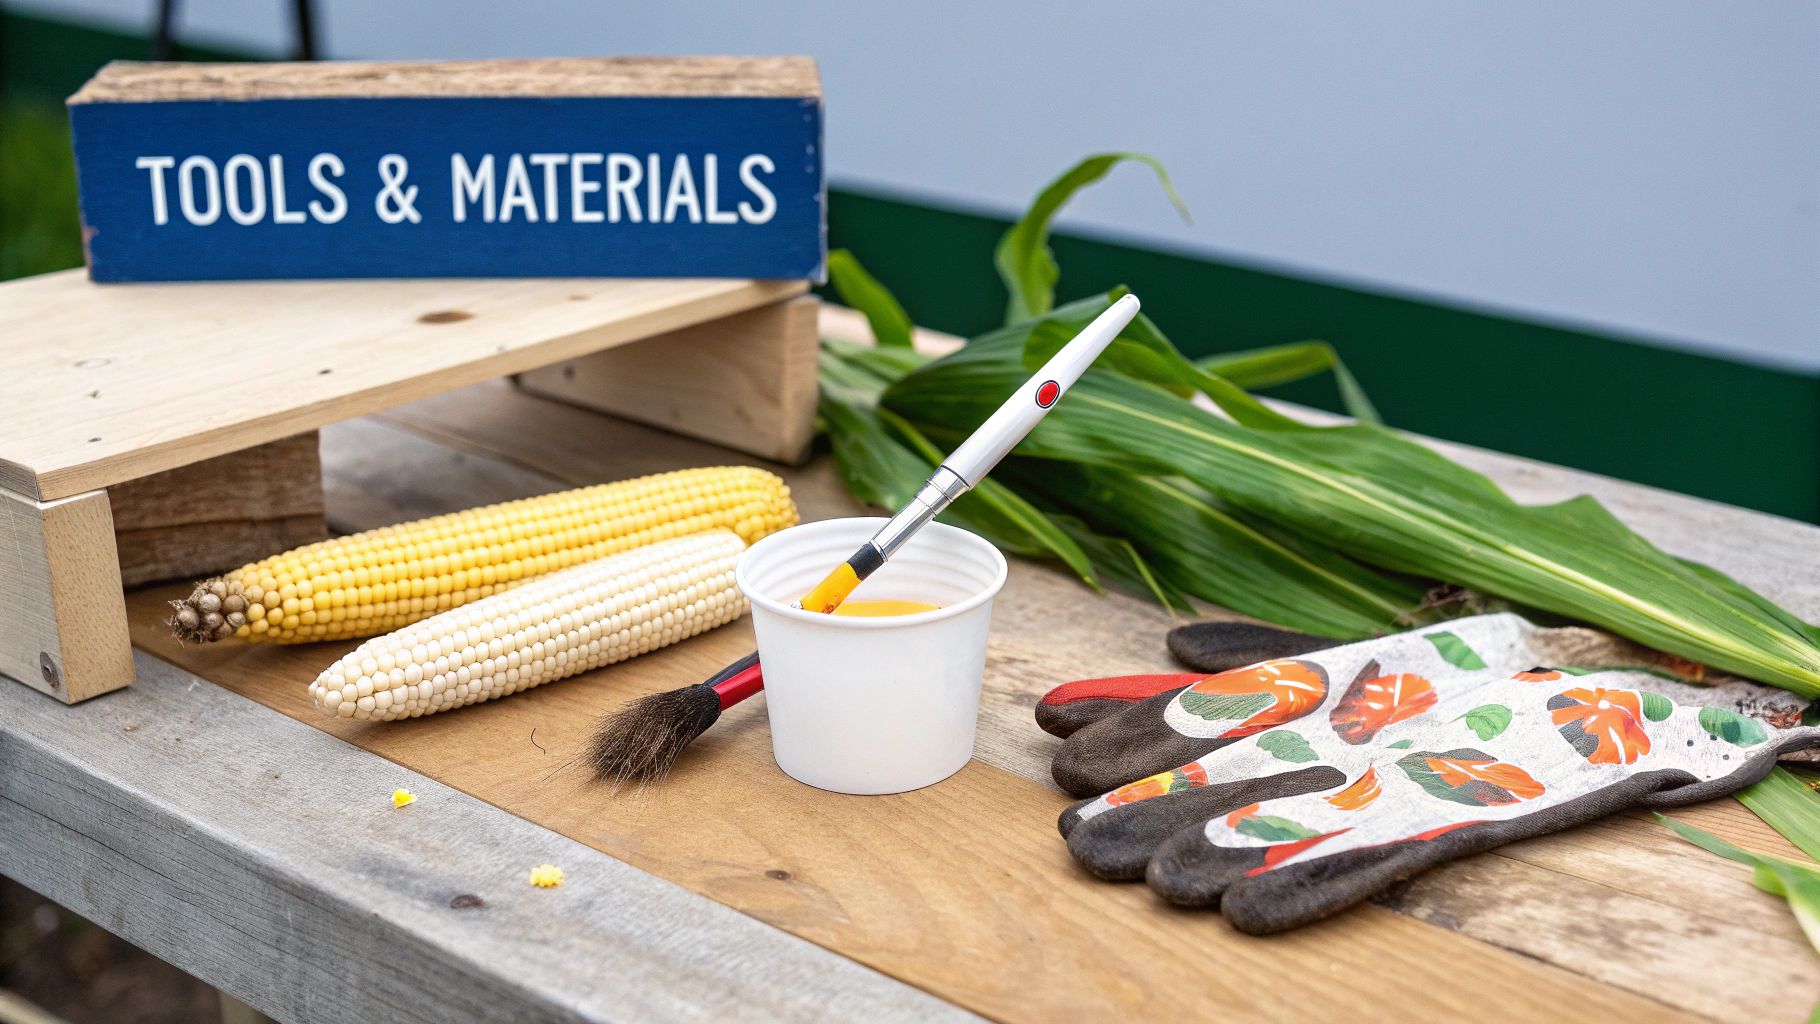
The Simple Tools You'll Need for Pollination
Forget about fancy equipment. To step in and play the part of the pollinator in your garden, all you really need are a few basic household items. Hand-pollinating corn is a surprisingly simple, low-tech process that relies more on a gentle touch than any specialized gear.
For gathering pollen from the tassels, nothing beats a clean paper bag. It's my go-to method for its sheer efficiency. You just slip the bag over a tassel, give it a little shake, and you've collected a cloud of pollen with almost no mess. A small bowl will also do the trick, though you'll need a steadier hand to tap the tassel without spilling.
Applying the Pollen
Once you've collected that golden dust, you have a few easy ways to get it onto the silks. The best tool often just depends on how precise you want to be.
- Your Hands: The most direct method. A gentle dusting with your fingers works perfectly well.
- Paper Bag: For quick and heavy coverage, you can carefully pour the pollen right from the bag onto the silks. This is great when you're just trying to ensure full ears of corn.
- A Soft Brush: If you're saving seeds and want total control, a small, soft artist's paintbrush is your best bet. It lets you be incredibly deliberate about which silks get pollinated.
This hands-on approach is far from new; it's a technique that has been fundamental to agriculture for centuries. Its significance skyrocketed in the 20th century with the rise of hybrid corn breeding, where these basic tools helped breeders achieve hybridization success rates above 90%. You can dive deeper into these historical methods and their impact by exploring research on royalsocietypublishing.org.
Troubleshooting When Things Go Sideways
Even with the best intentions, hand-pollinating corn doesn't always go according to plan. That's just part of gardening. The good news is that most common problems are fixable if you know what to look for.
A classic frustration is when your tassels and silks just aren't in sync. Sometimes the tassels are ready to drop pollen before a single silk has appeared. Don't panic. Just shake that early pollen into a paper bag, seal it up, and pop it in the fridge. It'll stay viable for a day or two, giving your silks time to catch up.
Dealing with Weather and Timing
Weather is the ultimate wild card. A sudden rainstorm just after you've finished pollinating can wash away all your hard work. If it rains within a few hours, it's a good idea to head back out the next morning and re-pollinate just to be safe.
High winds are another headache. It’s tough to collect pollen when it's blowing all over the yard. Your best bet on windy days is to work early in the morning when the air is typically calmer. Using a deep paper bag to shake the tassels into, rather than a shallow bowl, will also help keep the pollen contained.
Here's a pro tip: You can peek at your progress without disturbing the whole ear. About a week after pollinating, gently peel back a small part of the husk. If you see plump, developing kernels in neat rows, congratulations! If you spot a lot of gaps, it means not every silk got fertilized.
Fixing Gaps in Your Corn Cobs
What if you peek and find a patchy, incomplete cob? That "scatter-kerneled" look is a tell-tale sign of spotty pollination. Remember, every single silk leads to a single kernel. If a silk is missed, you get a gap.
To avoid this, I always make a point to pollinate each ear 2-3 times over consecutive days. Silks don't all emerge at once, so this staggered approach gives you the best chance of catching them all.
Of course, thinking ahead helps too. A strong garden layout from the start can prevent many of these headaches down the line. If you're in the planning stages, our guide on how to plant vegetable seeds will help you set your garden up for success from day one. A little persistence and observation can turn a pollination hiccup into a valuable lesson for an even better harvest next year.
Common Questions About Hand-Pollinating Corn
Even with years of dirt under my fingernails, I know that hand-pollinating corn can feel a bit fussy at first. It's a hands-on task, but getting the details right can be the difference between a few sad cobs and a truly impressive harvest. Let's walk through some of the most common questions I hear from fellow gardeners.
How Many Times Should I Pollinate Each Ear?
For the best possible results, you'll want to pollinate each ear 2-3 times. I find that doing this on consecutive days works wonders.
The reason is simple: corn silks don't all pop out at once. By coming back for a second or third pass, you give yourself the chance to pollinate every single silk as it emerges. This is the secret to getting those perfectly full, picture-worthy cobs.
Can I Use Pollen from a Different Corn Variety?
You absolutely can, but there's a catch. Using pollen from a different corn variety means you're creating a cross-pollinated hybrid. The corn you eat this season will be perfectly fine and delicious, but don't count on saving those seeds. If you plant them next year, they won't grow true to the parent plant.
This is a technique that seed producers have used for ages. Given the narrow pollination window for corn—usually just from about 8 a.m. to noon—getting in there and doing it by hand can make a huge difference. In fact, under tricky conditions, direct pollination can boost a plant's success by up to 20% over just leaving it to the wind. You can find more insights on crop production if you want to dig deeper into the science.
What if It Rains Right After I Pollinate?
Ah, rain. It's great for the garden, but terrible for fresh pollen. A good shower can wash away all your careful work in an instant, leaving the silks unfertilized.
If it rains within a few hours of pollinating, I always assume the pollen is gone. Just play it safe and reapply more pollen the next morning once everything has dried out. It's a small extra step that guarantees success.
How Do I Know if My Pollination Worked?
Thankfully, you don't have to wait until harvest day to find out if you were successful. You can get a sneak peek much sooner.
After just a few days, check on the silks. If the pollination took, they will start to dry up, turn a brownish color, and fall away easily from the ear. Seeing those browning silks is one of the best early signs that you've got baby kernels forming inside.
Here at Homegrown Garden, we believe anyone can grow something amazing with quality seeds and a bit of know-how. Take a look at our heirloom corn seeds and gardening kits to get your own patch started. You can find everything you need for your garden at our shop: https://www.homegrown-garden.com.