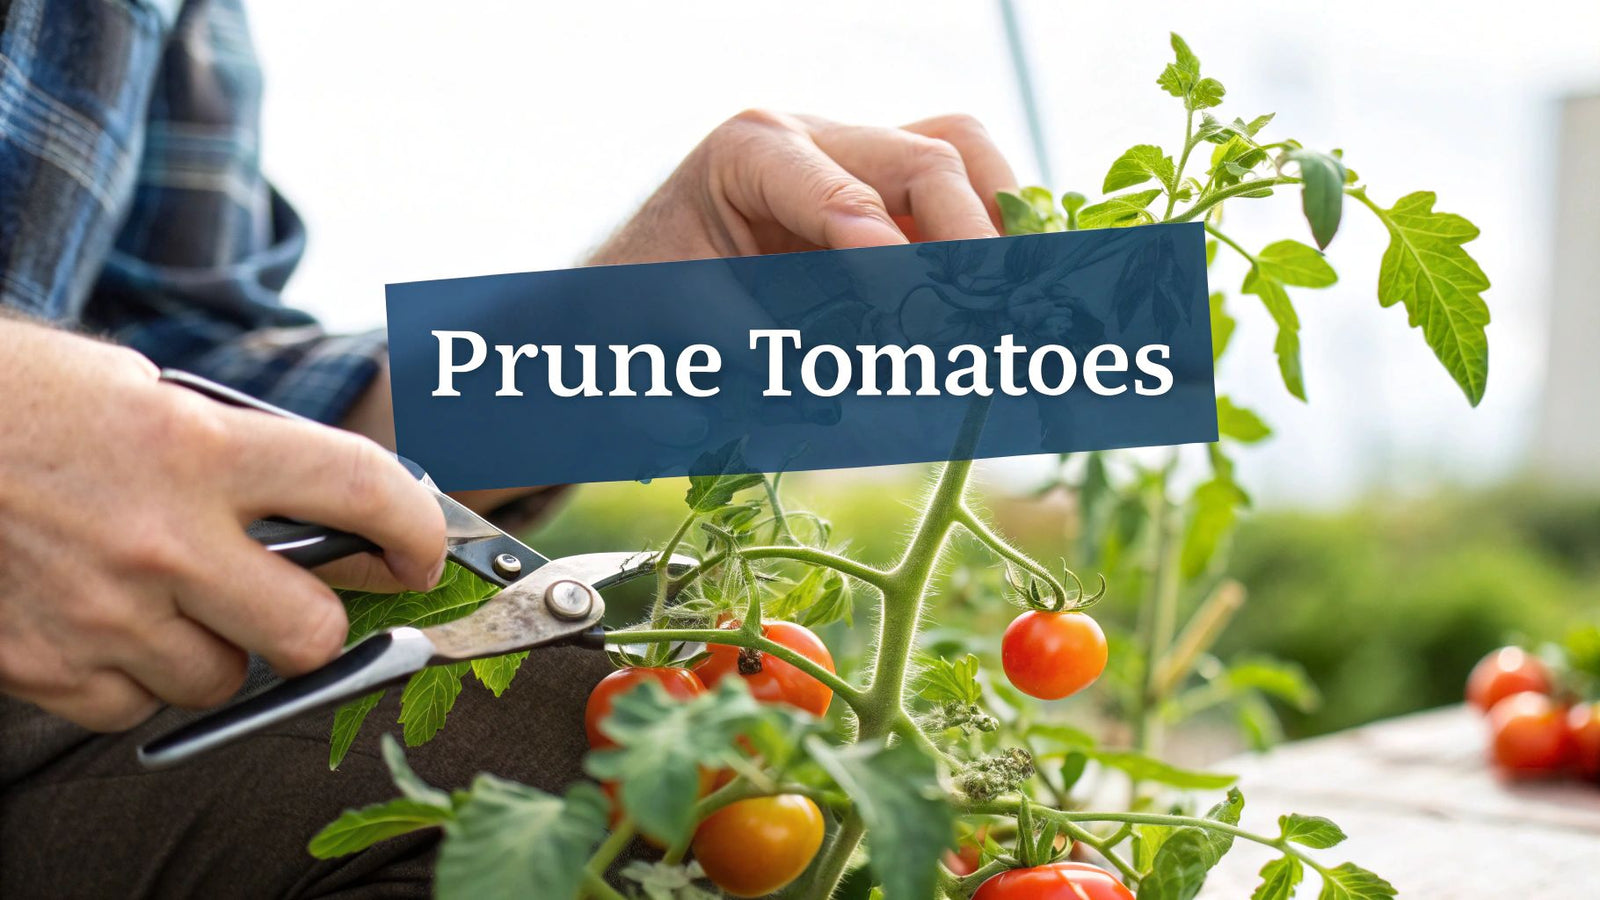

Pruning your tomato plants is a simple but vital step. It’s all about selectively removing the non-essential parts—mostly suckers and the lower leaves—to get a better harvest. By doing this, you're telling the plant to stop wasting energy on growing endless foliage and start focusing on what really matters: producing big, flavorful tomatoes. It also dramatically improves airflow, which is your best defense against common fungal diseases.
7 Reasons Pruning Tomatoes Is Your Secret to a Bigger Harvest
I get it. Taking a pair of shears to the tomato plants you’ve babied from seed can feel wrong, almost scary. New gardeners often worry they’ll do more harm than good. But what if I told you that a few strategic snips are the single best thing you can do for your harvest? Trust me, learning how to prune tomatoes is less about hacking away and more about smart, targeted energy management for your plant.
Think of an unpruned tomato plant like a company with way too many projects on the go. Every new branch, leaf, and sucker is another "project" that drains energy from the main goal: producing delicious, ripe fruit. When you prune, you step in as the project manager, focusing the plant's resources exactly where they’ll have the biggest impact.
The Great Divide: Determinate vs. Indeterminate Tomatoes
Before you make a single cut, you absolutely must know what type of tomato you’re growing. This isn't optional. Pruning the wrong type of plant can wipe out your harvest. Tomatoes fall into two main camps: determinate and indeterminate.
To help you figure out what's in your garden, here's a quick cheat sheet:
Determinate vs Indeterminate Tomato Pruning Quick Guide
| Characteristic | Determinate (Bush) Tomatoes | Indeterminate (Vining) Tomatoes |
|---|---|---|
| Growth Habit | Grows to a set, compact height (3-4 feet) | Keeps growing all season long (6-10+ feet) |
| Fruiting Pattern | Sets all fruit at once over a few weeks | Produces fruit continuously until frost |
| Pruning Needs | Minimal. Only remove leaves below the first flower cluster. | Essential. Requires regular pruning of suckers. |
| Pruning Impact | Heavy pruning removes future fruit-bearing branches. | Pruning encourages larger fruit and better plant health. |
| Common Examples | 'Roma', 'Rutgers', 'Celebrity' | Most heirlooms ('Brandywine') & cherry tomatoes ('Sun Gold') |
So, what does this all mean for you?
If you've got determinate (bush) tomatoes, your job is easy. These guys grow to a predetermined size, set all their fruit in a big burst, and then they're done for the season. Think 'Roma' or 'Rutgers'. You should prune them very little, just snipping off the leaves below the very first flower cluster to keep them off the ground. If you prune them heavily, you're literally cutting off your future tomatoes.
On the other hand, if you're growing indeterminate (vining) tomatoes, you need to get comfortable with pruning. These are the sprawling vines that just keep going, producing fruit all summer until the first frost kills them. Most heirlooms and almost all cherry tomatoes fall into this category. Without pruning, they become a tangled, disease-prone mess that struggles to ripen anything.
If you love these vining types, you can dive deeper into our guide on how to grow heirloom tomatoes for more tips on specific varieties.
The Quality Over Quantity Principle
It sounds a bit backward, but getting more often means aiming for less. By pruning, you're forcing the plant to support fewer tomatoes. This means each remaining fruit gets a much bigger share of the plant's sugars and nutrients. The result? Significantly larger, richer, and more intensely flavorful tomatoes. Instead of a hundred small, watery fruits, you get a solid crop of big, juicy ones you'll be proud of.
While this drastically improves the usable harvest for a home gardener, it's interesting to see the data. One controlled study found that while pruning reduced the total number of fruits per square meter—from 953 on unpruned plants down to 469 on single-stem plants—the pruned plants were healthier and had fewer pest problems. For a home gardener, the takeaway is simple: pruning gives you better tomatoes, even if it's technically fewer of them.
A well-pruned tomato plant is an efficient plant. It channels its energy into ripening high-quality fruit rather than wasting it on excessive green growth that will never mature before the season ends.
This focus on efficiency is the secret behind a truly impressive harvest. Learning to prune correctly is the first and most important step toward getting there.
Step 1: Getting the Right Tools for a Clean Pruning Job
Before you even think about making that first cut on your tomato plants, we need to talk about your gear. This isn't just about making the job easier—it's about the health of your plants. Using dull or dirty tools can crush delicate stems instead of cutting them, leaving a ragged wound that’s a perfect entry point for disease.
When you're out in the garden, you want to be a plant surgeon. The goal is a clean, quick-healing cut. That all starts with having the right instrument in your hand.
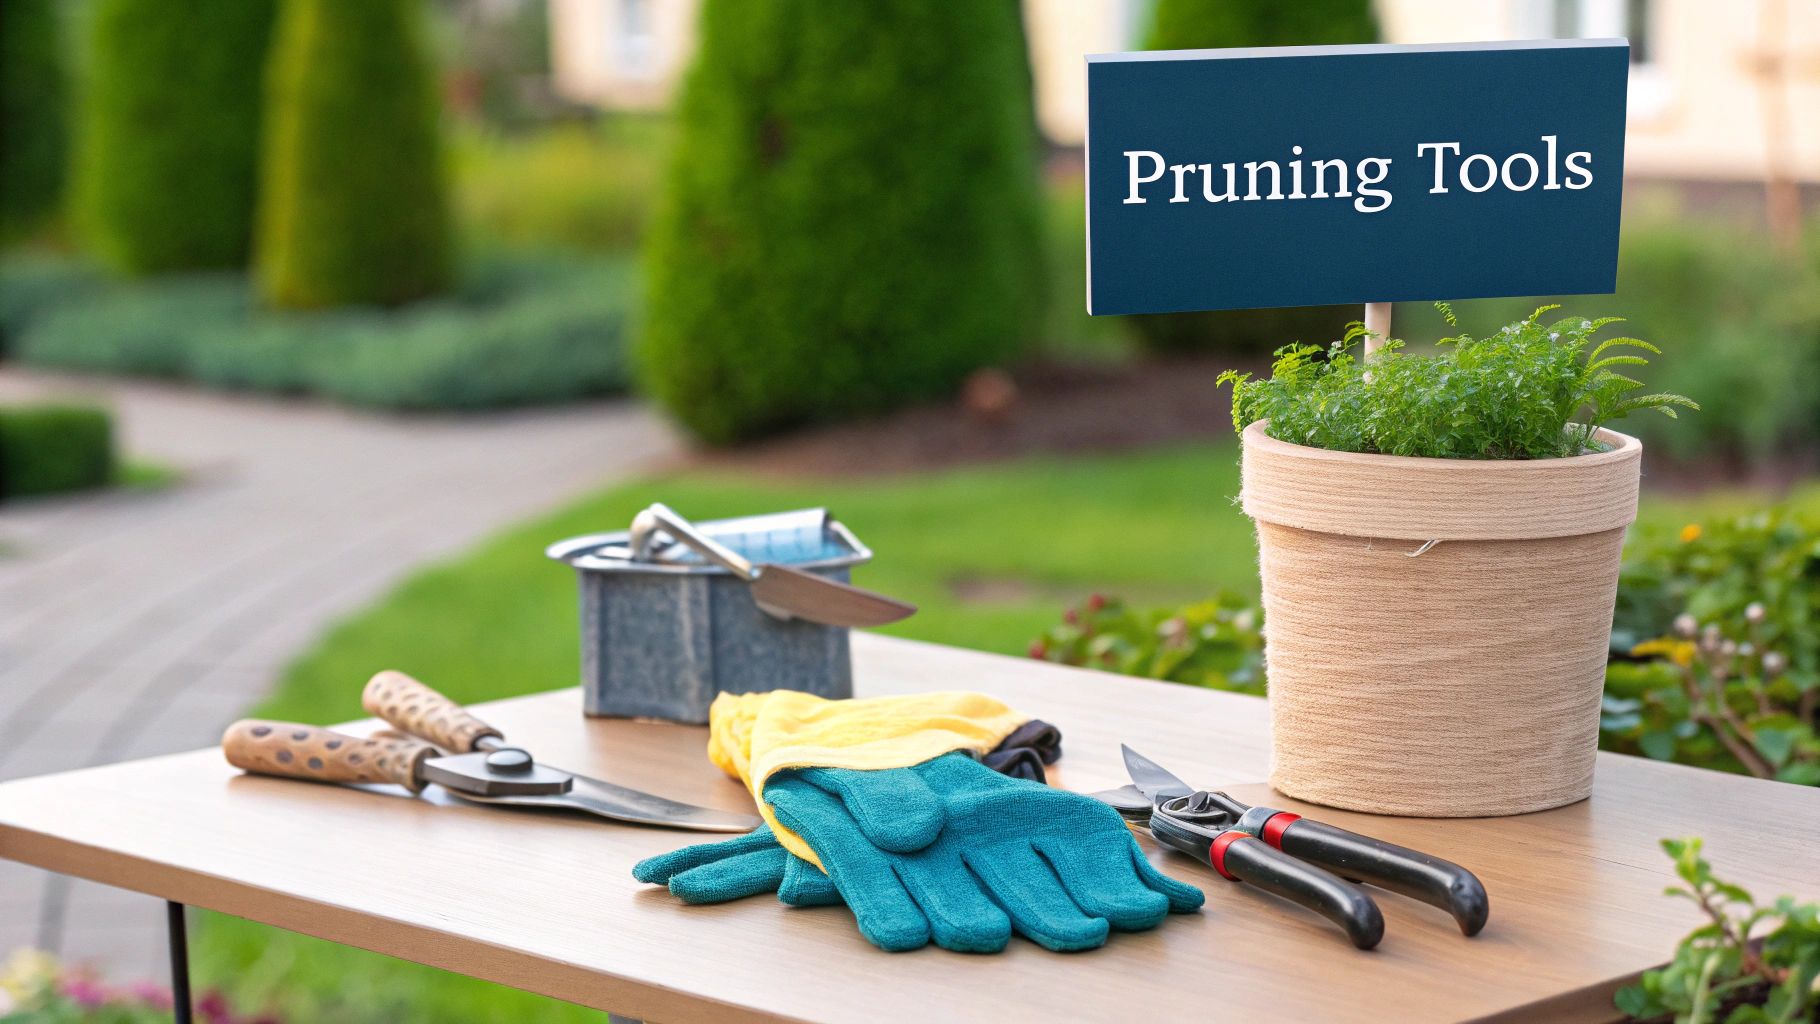
Your 3 Go-To Pruning Tools
You really don't need a massive toolbox for this. Honestly, just a few quality tools will see you through almost any pruning situation your tomatoes throw at you.
Here are the essentials I always have in my gardening belt:
- Bypass Pruners: These are your workhorses. Unlike anvil-style pruners that crush, bypass pruners have two blades that glide past each other like scissors. This gives you a clean slice, perfect for snipping off thicker suckers and lower branches without mangling the main stem.
- Micro-Tip Snips: For the more delicate, surgical work, these are a lifesaver. Their small, sharp points let you get into those tight little crotches where a new sucker is just starting, allowing you to remove it without damaging the surrounding leaves or stem.
- Gardening Gloves: This one’s a must. Tomato leaves and stems have oils that can irritate some people's skin. More importantly, gloves protect your plants from you by keeping any germs on your hands away from the fresh cuts you just made.
The Most Important Tool in Your Kit Is a Clean One
This is the step that even seasoned gardeners sometimes skip, and it can be disastrous. Plant diseases, especially nasty fungal and bacterial ones like fusarium wilt or blight, can spread through your entire patch on a single pair of dirty pruners.
I learned this lesson the hard way. Years ago, I was rushing to get my pruning done and went from plant to plant without cleaning my shears. Within two weeks, I watched in despair as a soil-borne disease marched down the row, taking out half of my prized heirloom tomatoes. I was the one who had spread it from a tiny wound on the first plant to every other one I touched.
Sterilizing your tools between each individual plant is the single most effective thing you can do to stop disease in its tracks. Make it a non-negotiable habit.
It’s so simple to do. Just grab a small spray bottle of rubbing alcohol (isopropyl alcohol) or a container of disinfectant wipes and keep it with you in the garden. After you finish pruning one plant, give the blades of your pruners a thorough wipe-down before you even look at the next one. It takes five seconds, and it could save your harvest.
Step 2: How to Identify and Remove Tomato Suckers Like a Pro
If there's one skill that separates a good tomato harvest from a great one, it's mastering the art of the sucker hunt. This is the absolute heart of pruning, but don't worry—it’s much simpler than it sounds. Once you know what to look for, you’ll start seeing these little energy drains all over your indeterminate tomato plants.
So, what is a tomato sucker? It’s simply a new shoot that pops up in the “axil”—that’s the V-shaped joint where a leafy side branch meets the main stem. If you let it go, that sucker will grow into a whole new main stem, complete with its own flowers and fruit. While more stems might sound like a good thing, it actually creates a tangled jungle. The plant is forced to spread its energy and resources too thin, leaving you with a bunch of small, disappointing tomatoes instead of large, juicy ones.
This image shows you exactly where to find them.
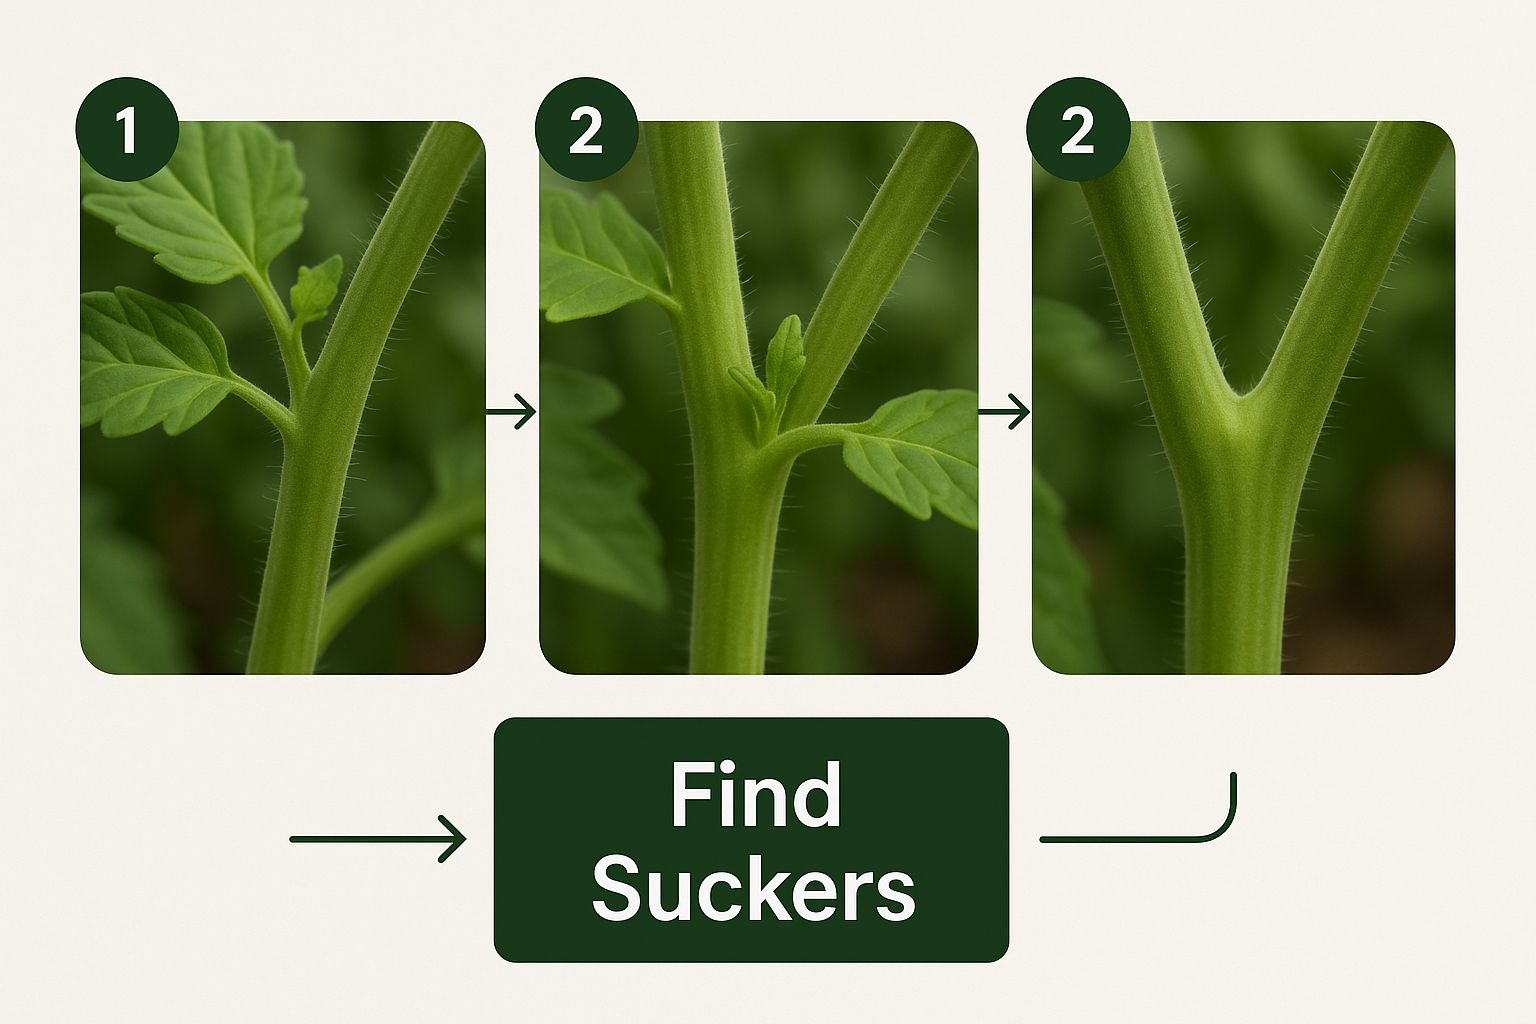
As you can see, they grow right out of that crucial joint. This makes them pretty easy to tell apart from the productive leaf branches. By spotting and removing them early, you channel all that growth potential right back into the main stem where you want it—fueling the fruit that's already developing.
The Best Way to Remove Suckers
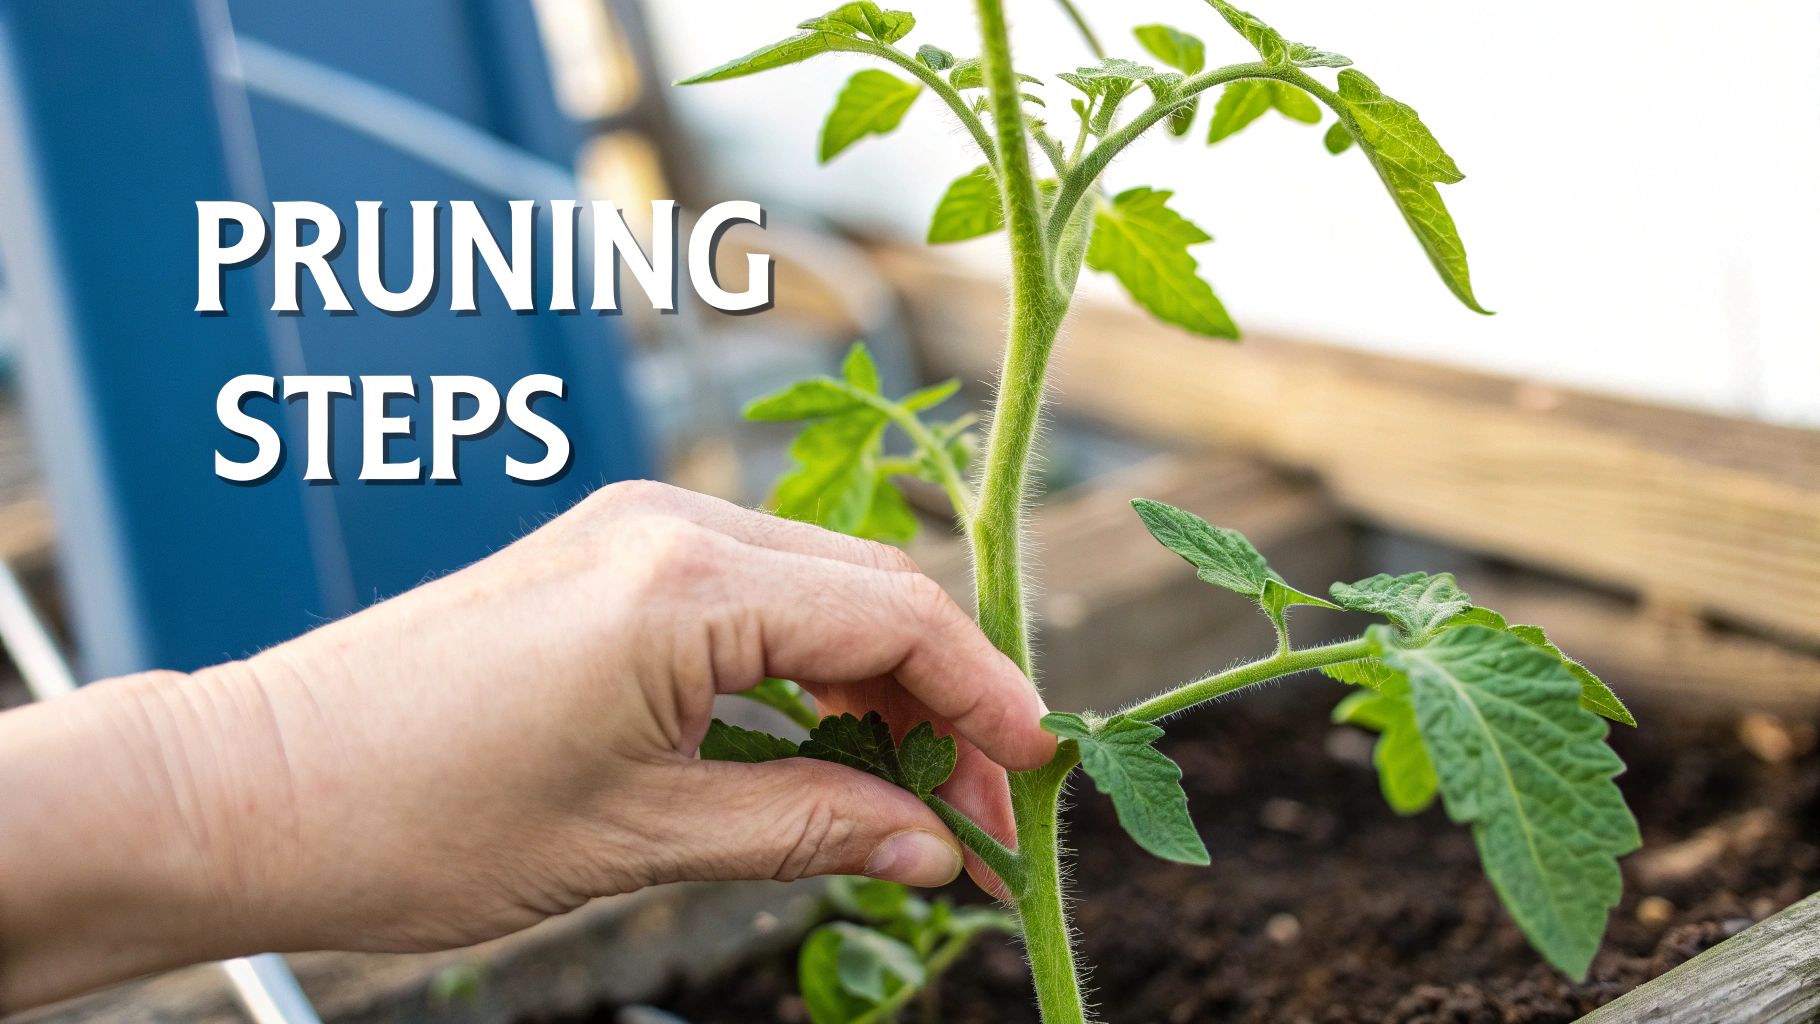
The perfect time to nab a sucker is when it's still small and tender, usually less than four inches long. At this stage, you don’t even need tools. Honestly, your fingers are the quickest and most effective tool for the job.
Here’s the simple pinch-and-snap method I use every week in my own garden:
- Find the Sucker: Trace a leaf branch back to the main stem. You're looking for that new little shoot growing out of the "V" where they meet.
- Get a Good Grip: Gently take hold of the sucker right at its base, where it connects to the plant.
- Bend and Snap: Give it a firm but gentle bend back and forth. It should snap off cleanly with a satisfying little pop, leaving a tiny wound that will heal over in no time.
This method is incredibly fast and minimizes stress on the plant. Try to make a weekly patrol of your tomato patch a habit. Once you get the hang of it, it only takes a few moments per plant.
What if a Sucker Gets Too Big?
It happens to the best of us. You get busy, miss a week in the garden, and suddenly a sucker you overlooked has turned into a thick, woody stem. When they get much bigger than a pencil, trying to snap them with your fingers is a bad idea. You risk tearing the main stem, leaving a large, ragged wound that’s an open invitation for diseases.
For these overgrown suckers, it's time to grab your sanitized tools. Use a sharp pair of bypass pruners or micro-tip snips to make a clean cut. Get as close to the main stem as you can without nicking it.
My Two Cents: Don't ever hesitate to remove a sucker, no matter how big it's gotten. Even if it has already started to flower, it's still competing for vital resources. Taking it off will always be better for the plant's overall health and your final harvest.
Think of it as tough love. That one big sucker is in direct competition with the fruit you’re trying to ripen.
A Gentler Alternative: Missouri Pruning
If you feel a little guilty removing the entire sucker, or if you live in a scorching hot climate where a bit of extra shade is a blessing, there’s a fantastic alternative called Missouri Pruning.
Instead of yanking the whole sucker from its base, you just pinch off its growing tip. You leave the first two tiny leaves on the sucker and remove the rest.
This clever technique achieves two things at once:
- It stops the sucker from turning into another full-sized, energy-hogging stem.
- The leftover leaves provide extra foliage to help with photosynthesis and can shield ripening fruit from sunscald.
It's a wonderful compromise, especially for beginners. You get the main benefit of pruning—redirecting the plant's energy—while leaving a little leafy insurance policy. It's a less aggressive but still very effective way to manage growth and boost your harvest.
Step 3: Using Lower Leaf Removal to Prevent Common Diseases
Beyond just pinching off suckers, one of the most effective pruning techniques you can learn is removing the lower leaves. Think of it as your first line of defense. Experienced gardeners swear by this method to create a growing environment where common tomato diseases just can't get a foothold. It's a simple, proactive strategy that truly works wonders.
The biggest threat to most tomato plants isn't an insect; it's the fungal pathogens that hang out in the soil. Spores for nasty diseases like early blight, septoria leaf spot, and anthracnose spend the winter right there in your garden dirt. When it rains or you water, soil splashes up onto the lowest leaves, and that's all it takes for these diseases to latch on and infect your plant.
Creating a Disease-Resistant Zone
By stripping away the bottom foliage, you're essentially creating a "splash-free" zone at the base of your plants. This simple act removes the bridge that soil-borne pathogens use to climb up onto the plant. It also dramatically improves airflow around the base, helping it dry out faster after a watering—and fungus hates dry conditions.
So, when do you start? I usually wait until my indeterminate plants are looking strong and have started setting their first cluster of fruit. At that stage, the plant is mature enough to handle the stress, and those lower leaves have pretty much finished their job anyway.
Here’s my approach:
- Target the Right Leaves: Zero in on the leaves starting from the bottom of the stem up to the first fruit cluster. These are the oldest and most vulnerable.
- Wait for Good Weather: Always do this on a dry, sunny day. Pruning in wet weather is like sending an open invitation to the very diseases you’re trying to avoid.
- Keep Your Tools Clean: A sanitized pair of bypass pruners or sharp snips is a must. A clean cut heals quickly and minimizes the risk of infection.
How to Properly Prune Lower Leaves
The goal here is to clear out the bottom 8 to 12 inches of the main stem. It might feel a bit drastic at first, but your plants will be much healthier for it. When you're done, you should see a clean, leafless "trunk" at the base.
When you remove a leaf branch, make the cut as flush with the main stem as possible. Leaving a little stub can create a spot for pests or disease to settle in. Just work your way up the plant until you get to the branch right below the lowest truss of tomatoes.
A common mistake I see is gardeners being too timid. Don't stop short. Removing that entire bottom foot of foliage is what gives you the maximum benefit for airflow and splash protection. The rest of the leaves higher up are more than capable of powering the plant's growth.
Once you’re done pruning, make sure to gather all the clippings. Leaving old foliage on the ground completely defeats the purpose, as the spores can still survive in the debris. I toss them in my municipal yard waste bin, not my personal compost pile, just to be safe. This little bit of garden hygiene is a critical step in keeping your entire tomato patch healthy and is a cornerstone of how to prune tomato plants effectively.
Step 4: When to Top Your Plants for That Final Harvest
As summer starts to fade and you feel that first hint of autumn in the air, your indeterminate tomato plants are probably still trying to grow taller. I admire their ambition, but their time is running out. This is where a smart, late-season pruning technique called topping becomes your best friend for getting one last, fantastic harvest.
Topping is just one simple snip: you cut off the plant's main growing tip. That single cut sends a strong message throughout the plant. It essentially tells it, "Hey, stop spending energy on new flowers and getting taller. It's time to focus everything you've got on ripening the fruit already on the vine."
The Perfect Timing for Topping
Timing is absolutely critical here. If you top the plant too early, you'll lose out on fruit that could have ripened mid-season. Wait too long, and the first frost will beat you to it.
The sweet spot? Aim to top your indeterminate tomatoes about 30 days before your area's first expected frost date.
This one-month buffer is just what the plant needs to shift its resources. All those sugars and growth hormones get redirected, helping the existing green tomatoes swell up and ripen much faster. It's a trick commercial growers use to get a final wave of beautiful, sun-ripened tomatoes instead of a vine full of green ones that never stood a chance.
Not sure about your frost date? A quick online search for your gardening zone will give you a good estimate. If you're a planner, you might have it jotted down from when you started your seeds. If not, our guide on https://homegrown-garden.com/blogs/blog/when-to-start-tomato-seeds can help you map out your timeline better next year.
How to Make the Cut
When the time is right, grabbing your pruners and topping the plant is easy. Here’s what to do:
- Find the growing tip: Look at the very top of each main stem. You’re looking for that soft, new growth at the peak.
- Locate your spot: Follow that main stem down from the tip until you find the first healthy, mature leaf set. You'll make your cut just above this point.
- Make a clean snip: Use sharp, clean pruning shears to snip off the top few inches of the stem. A clean cut prevents disease and helps the plant heal quickly.
Don't worry, you aren't hurting the plant. You're just taking the reins and redirecting its energy to maximize your harvest before the cold weather arrives and shuts down the show for good.
This final prune is a simple but powerful step. It’s the finishing touch that makes sure all your hard work pays off with one last basket of delicious, homegrown tomatoes.
Step 5: Avoiding the 4 Most Common Pruning Mistakes
Learning how to prune tomatoes is a journey. Every gardener, including me, makes a few wrong cuts along the way. The goal isn't absolute perfection, but to sidestep the big blunders that can really sabotage your harvest.
Think of this as your field guide to pruning with confidence. By understanding these common pitfalls, you can keep your plants healthy, strong, and incredibly productive.
1. The Cardinal Sin: Over-Pruning
It’s easy to get carried away with the clippers—I've been there. The single biggest mistake I see gardeners make is over-pruning. In a rush to create perfect airflow, they strip away far too many leaves.
Always remember, those leaves are the plant's solar panels. They're what fuel photosynthesis, the engine that powers fruit production and ripening.
When you remove too much foliage, you're essentially starving the plant. This leads to a cascade of problems:
- Stalled Growth: The plant just doesn't have the energy to grow bigger or ripen the tomatoes it already has.
- Smaller Harvest: Fewer leaves directly translates to less energy, meaning fewer, less impressive tomatoes.
- Sunscald: This one is a heartbreaker. Fruit suddenly exposed to harsh sun develops ugly, blistered white or yellow patches. While you can cut the bad spots off, it ruins the quality of your hard-earned tomato.
My rule of thumb: Never remove more than one-third of the plant's total foliage at one time. Aim for a balance—enough airflow to prevent disease, but plenty of leaf cover to protect the fruit and power the plant.
2. Pruning When Plants Are Wet
This is like sending an open invitation for disease to wreck your garden. Fungal and bacterial pathogens, the culprits behind early blight and septoria leaf spot, absolutely thrive in moisture. When you make a fresh cut on a wet stem, you create a perfect, damp highway for these spores to enter and take hold.
Pruning should always be done on a dry, sunny afternoon. This gives the wounds several hours to dry out and begin callusing over before the cool, damp evening air sets in.
Making a pruning cut is minor surgery for your plant. You'd want your own surgeon operating in a sterile environment, and the same principle applies here. Pruning in dry weather is one of the easiest, most effective ways to protect your plants and keep pests away. For more on that, check out our helpful guide on common tomato pests and how to get rid of them.
3. Pruning Determinate Varieties Too Aggressively
We've touched on this, but it's such a catastrophic error that it's worth repeating. If you prune a determinate (bush) tomato variety like it's an indeterminate (vining) one, you will absolutely decimate your harvest.
Determinate types, like 'Roma' or 'Celebrity', are genetically wired to produce all their flowers—and therefore their fruit—on the very ends of their branches.
When you snip off the suckers and branches on these plants, you are literally cutting off your future tomatoes. For these compact bush varieties, the only pruning you should do is removing the leaves below the very first flower cluster to improve airflow near the soil. Otherwise, just let them be.
4. Forgetting the Bigger Picture
It’s easy to get lost in our own garden plots, but the techniques we use are part of a much larger story. Globally, tomato production is staggering, with forecasts for processing tomatoes alone set to exceed 40 million metric tons in 2025.
This massive scale underscores just how vital proper cultivation is for optimizing yields worldwide. Reading up on these global tomato production trends on morningstarco.com really puts it in perspective. When you correctly prune your plant, you're doing a micro-version of what successful farmers do on a massive scale to ensure a healthy, sustainable food supply.
Step 6: 7 Top Tomato Pruning Questions Answered
Once you get the hang of pruning, you start noticing the little things. It’s those specific situations that pop up in the garden that can really make or break a harvest. Let's tackle some of the most common questions I hear from fellow gardeners, so you can prune with complete confidence.
1. Can I Grow New Plants from the Suckers I Remove?
You sure can! This is one of my favorite garden tricks. Tomato suckers are incredibly eager to root. Don't just toss a healthy, 4-6 inch sucker into the compost. Instead, stick its cut end into a glass of water.
In about a week, you’ll see tiny white roots start to sprout. Once they’re about an inch long, you can pot it up in some soil. Just like that, you have a brand new tomato plant, which is perfect for getting a second, late-season harvest.
2. Is It Possible to Prune Too Much?
Oh, absolutely. It's easy to get carried away. The cardinal rule here is to never remove more than one-third of the plant's foliage at one time. Think of the leaves as the plant's solar panels; they’re what create the energy to produce those delicious tomatoes.
Hacking off too much at once sends the plant into shock. This can stunt its growth and, just as bad, leave your ripening fruit exposed to the harsh sun, causing nasty sunscald. A little restraint now pays off later.
3. What If My Plant's Leaves Are Turning Yellow?
Seeing yellow leaves, especially down low on the plant, is really common. While it can sometimes point to a nitrogen deficiency, it’s more often just the plant being smart. It’s simply shedding its oldest, least efficient leaves to redirect energy upwards.
Go ahead and prune those yellowing leaves off. It’s a win-win: you’re cleaning up the plant, improving airflow around its base, and removing a potential foothold for diseases.
Pruning isn't just about fruit; it's about channeling the plant's energy wisely. Removing old or dying leaves is always a good practice for overall plant health.
4. How Often Should I Prune?
For indeterminate tomatoes, think of pruning as a regular chore, not a one-time event. I find a weekly "sucker patrol" works best. Getting out there once a week lets you spot and pinch off new suckers while they're still small and tender. It's much easier on you and less stressful for the plant. Consistent, light pruning is always better than one massive, aggressive chop.
5. I Cut a Big Sucker and Now the Plant is "Weeping." Is That Bad?
Seeing a bit of sap ooze from a larger wound is perfectly normal, so don't panic. This is precisely why gardeners recommend pruning on dry, sunny mornings. The sun and breeze help the cut dry out and form a protective callus much faster, sealing it off from bacteria and fungi.
6. Do I Really Need to Prune Cherry Tomatoes?
Cherry tomato varieties are almost always indeterminate, and trust me, they can turn into absolute monsters if you let them. They grow with wild abandon.
That said, you can be a little less strict with them. Because their fruit is so small and ripens quickly, the plant can support a much larger crop. My approach is to focus on clearing the lower leaves for good airflow and just thinning out enough suckers to prevent the plant from becoming a tangled, unmanageable beast.
7. Should I Fertilize Right After Pruning?
Hold off on the fertilizer for a bit. Pruning, especially a heavy one, is a stressful experience for the plant. Give it a few days to recover and for those cuts to heal over before you introduce something new like a dose of fertilizer. Let it put its energy toward healing first.
For all your gardening needs, from heirloom seeds to beginner-friendly kits, Homegrown Garden provides the tools and support to help you grow. Explore our full collection and expert guides at https://www.homegrown-garden.com.