


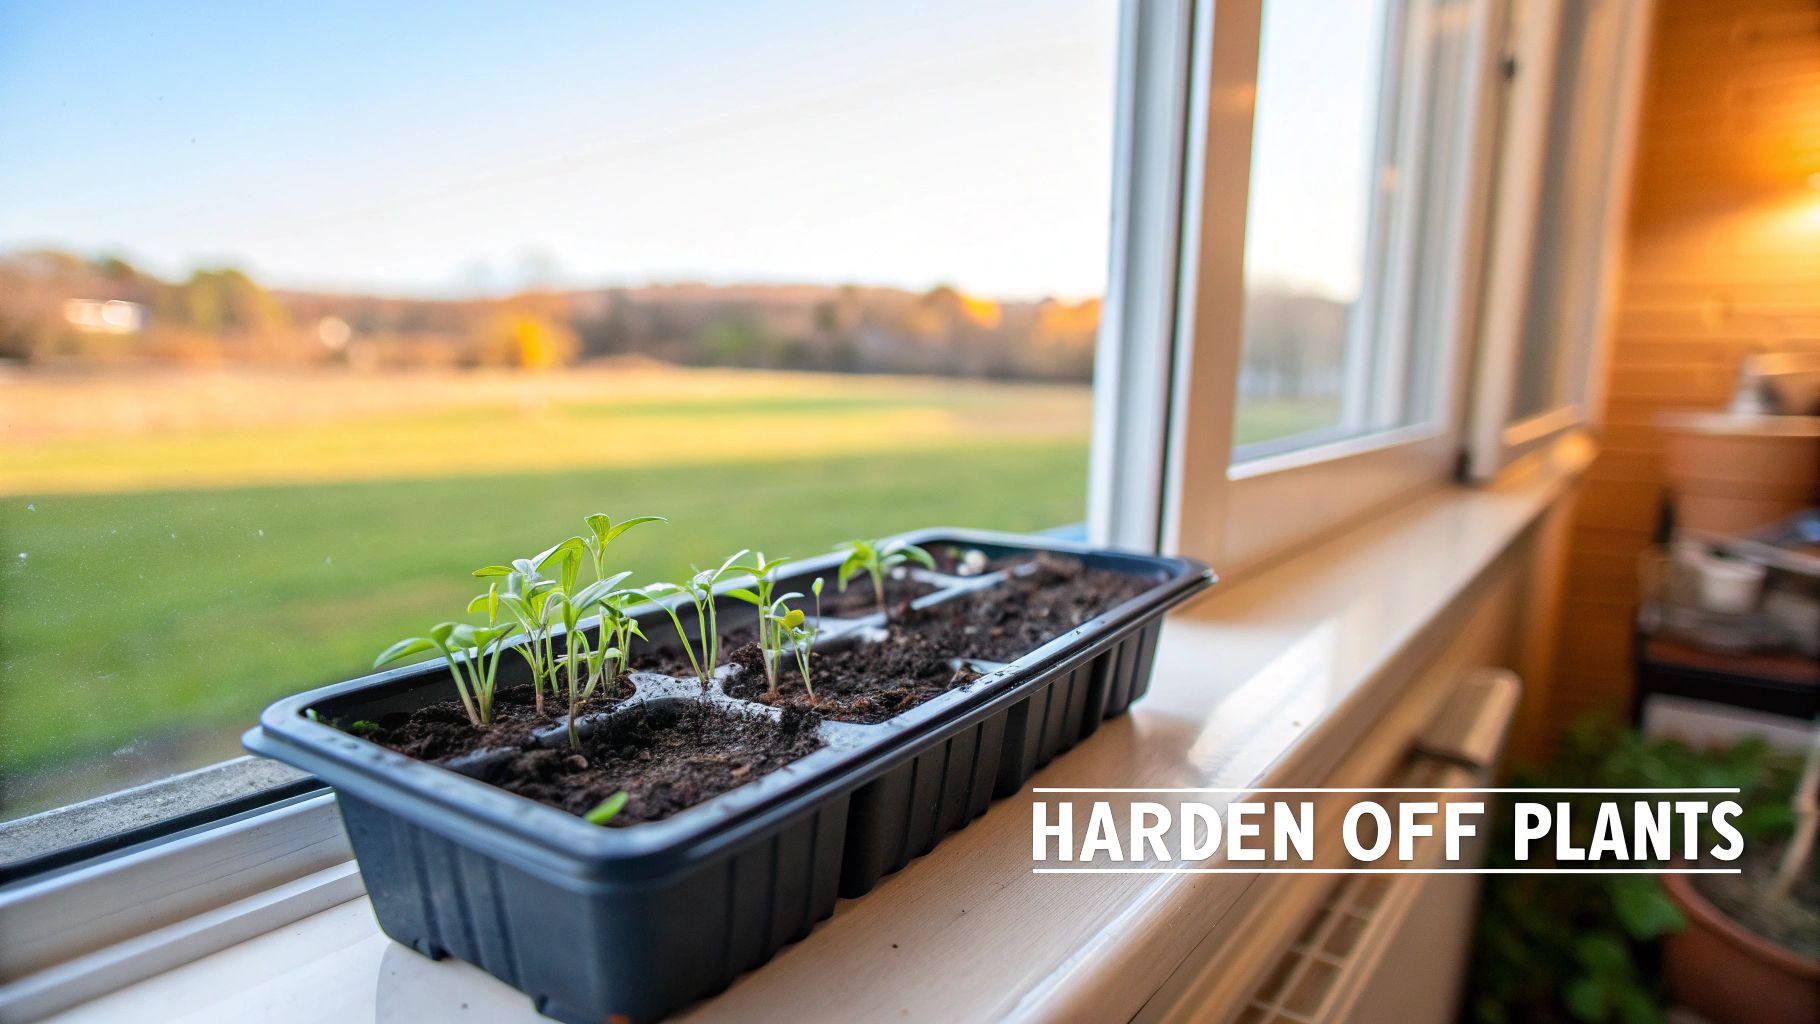
If you’ve ever nurtured tiny seedlings indoors, you know the excitement of getting them ready for the big move outside. But just like a person stepping out of a dark room into the bright sun, your plants need time to adjust. That crucial adjustment period is what gardeners call hardening off.
It’s the simple but vital process of gradually introducing your coddled indoor seedlings to the great outdoors—the intense sun, the gusty wind, and the fluctuating temperatures. Rushing this can lead to transplant shock, a state of stress that can stunt their growth or even be fatal. Think of it as a one-week training camp that prepares your plants to not just survive, but thrive, in the garden.
Understanding What Hardening Off Plants Really Means
Imagine your seedlings are like little athletes who have only ever practiced inside a perfect, climate-controlled gym. They’re strong, but they’re not ready for the real game. Tossing them directly into an outdoor stadium with blinding sun and unpredictable winds would be a disaster. Hardening off is their training schedule, building up their stamina and resilience one day at a time.
Plants started from seed on a cozy windowsill or under specialized grow lights have lived a pampered life. They’ve had consistent warmth, gentle light, and zero wind to contend with. The garden is a whole different ballgame, and making the move without preparation is a serious shock to their delicate systems.
The Science Behind Toughening Up
So, what’s actually happening to the plant during this process? Hardening off triggers some amazing physiological changes that prepare them for life outside. The cuticle, which is the waxy outer layer on the leaves, gets thicker to prevent dehydration and protect against harsh UV rays. At the same time, their cell walls become tougher and their stems grow sturdier, getting them ready to stand up to the wind instead of snapping.
This vital practice triggers significant physiological changes: natural waxes on leaf surfaces thicken by up to 30%, slashing water loss rates by 20-40%. Additionally, cell walls accumulate more lignin, increasing their strength by approximately 25%, making tissues firmer and less prone to mechanical damage.
To see how these changes work together, let's break down the transformation.
4 Key Plant Changes During Hardening Off
| Plant Part | Change During Hardening Off | Benefit for Survival |
|---|---|---|
| Leaves (Cuticle) | The waxy outer layer thickens significantly. | Reduces water loss (transpiration) and protects against UV damage. |
| Stems | Tissues become stronger and more fibrous. | Increases resistance to wind, preventing bending and breakage. |
| Cell Walls | Lignin and cellulose content increases. | Provides structural support and makes the plant less tender. |
| Root System | Growth may slow temporarily as energy is redirected. | Conserves resources to focus on adapting above-ground parts first. |
Each of these adaptations is a piece of the puzzle, coming together to build a plant that's truly ready for the rigors of the garden.
Why It's A Non-Negotiable Step
Skipping this crucial step is one of the most common—and heartbreaking—mistakes a new gardener can make. Without a proper transition period, your promising seedlings are at risk of some serious setbacks:
- Sunscald: The direct, unfiltered sun can literally burn their tender leaves, leaving them bleached and damaged.
- Windburn: A constant breeze can suck the moisture right out of the leaves and physically batter fragile stems.
- Stunted Growth: The stress of such a sudden environmental shock can cause a plant to completely stop growing.
Ultimately, taking a week or two for this process is the best insurance policy for your garden. It ensures all the time and love you poured into your indoor seed starting setup pays off with a harvest of healthy, happy plants. As you get comfortable with acclimating different kinds of plants, you may also find this guide to non-flowering plants helpful for broadening your gardening horizons.
3 Reasons This Step Is Critical for Your Garden's Success
It’s tempting to skip hardening off. I get it. Your seedlings look so strong and you're just excited to get them in the ground. But rushing this step is one of the most common—and heartbreaking—mistakes a gardener can make.
Think of it like this: your seedlings have spent their entire lives in a cozy, climate-controlled home. Moving them straight into the wild world of your garden is like taking a person who’s only ever been indoors and dropping them in the arctic without a coat. The sudden blast of intense sun, whipping winds, and fluctuating temperatures is a system shock they just aren't prepared for.
Without a gradual introduction to the outdoors, your plants are incredibly vulnerable. It’s a gamble that often ends in disappointment and a lot of wasted effort.
Research shows that a shocking 40-60% of seedlings that aren't hardened off may not survive being planted outside. Imagine losing over half of the plants you’ve carefully nurtured from seed in just a few days.
3 Major Threats to Unprepared Seedlings
Investing a week or two into hardening off is the best insurance policy you can get for your garden. You're actively training your plants to defend themselves against three major dangers.
- Leaf Scorch: The UV rays outdoors are way more intense than anything your seedlings experienced under a grow light or on a windowsill. Direct sun can literally burn their tender leaves, creating white or yellow patches that cripple the plant's ability to photosynthesize and grow.
- Windburn: A relentless breeze can strip moisture from leaves much faster than the roots can pull it from the soil. This causes the foliage to dry out, turn brown, and become brittle. Strong gusts can also snap fragile stems that haven't had a chance to build up their strength.
- Temperature Shock: The difference between daytime and nighttime temperatures can be a huge shock to a plant’s system. A sudden cold snap can stunt growth, cause severe wilting, or even kill a seedling overnight.
When you properly acclimate your plants, you’re giving them a chance to toughen up. They respond by growing stronger cell walls, thicker leaves, and more robust root systems. They become resilient.
The payoff for this small investment of time is huge. Plants that are properly hardened off don't just survive; they thrive. They establish faster, grow healthier, and produce much more, often boosting your final harvest by 25-50%.
This process is the bridge between starting seeds indoors and getting them successfully into the garden. To see what comes next, check out our guide on the 11 easy steps for successfully transplanting seedlings. A little patience now pays off all season long.
Your 7-Day Foolproof Schedule for Hardening Off Seedlings
Alright, now that you know why we harden off plants, let's get our hands dirty. This is the simple, day-by-day schedule I use to take the guesswork out of the process and give my seedlings the best possible start in the garden. For best results, kick this off about one to two weeks before the last expected frost date in your area.
Think of it as a training program for your plants. Each day is a slightly longer workout, building up their strength and resilience so they don't get overwhelmed when they finally move out for good. Following this schedule is the best defense against transplant shock.
This is the journey your plant is on—from a pampered indoor seedling to a tough, garden-ready transplant ready to thrive.
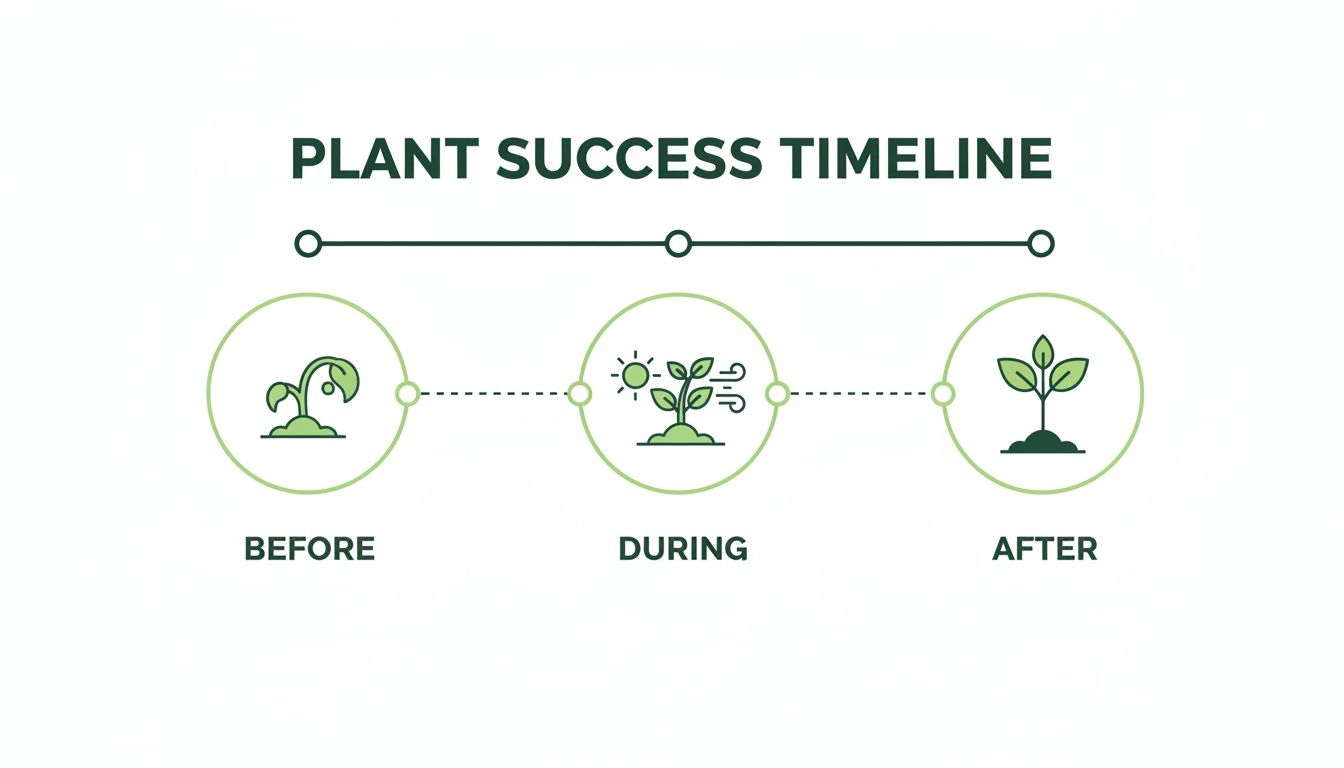
As you can see, that middle "during" phase is the critical bridge. It’s where your careful attention turns a fragile sprout into a robust plant.
The Daily Breakdown
Here’s your roadmap. Just remember to keep an eye on your plants. If you see signs of stress like wilting or pale leaves, dial it back a bit.
-
Day 1 & 2: We start slow. Find a sheltered spot with dappled shade, totally protected from the wind. Leave your seedlings out for just 1-2 hours, then bring them back inside. This is just their first little taste of the real world.
-
Day 3 & 4: Now, we'll increase their outdoor time to 3-4 hours. You can let them catch some of that gentle morning sun, but get them back into the shade before the intense afternoon rays can scorch them.
-
Day 5 & 6: Time to build some real stamina. Let's push their time outside to 5-6 hours, with at least 2-3 of those hours in direct sunlight. They should be looking tougher now and getting used to the light and breeze.
Finalizing the Transition
These last couple of days are all about making sure your plants are ready to leave the nest for good. By now, they should look sturdy and not show any signs of stress after their daily field trips.
A carefully graduated 7-14 day schedule is the gold standard. After ramping up to 6-10 hours with significant direct sun on days 6-9, the final step involves leaving them outdoors for full days and, eventually, overnight once temperatures are consistently appropriate for the crop type.
- Day 7: Today's the final test. Leave your plants outside for the whole day, from morning until evening. If you can, put them in the exact spot you plan to plant them. If they can handle a full day of sun and wind without wilting, they've passed.
If your nighttime temperatures are staying consistently above 45-50°F (7-10°C), you can let them stay out overnight. After that, your seedlings are officially hardened off and ready to be transplanted into the garden. For a deeper dive into the science, Penn State Extension offers great insights on transplant hardening.
3 Ways to Adapt the Plan for Different Plants
That 7-day schedule is a solid foundation, but gardening is never a one-size-fits-all game. Think of it like a training plan: a seasoned marathon runner has different needs than someone just starting a couch-to-5k program. The same goes for your plants. A tough kale seedling and a delicate tomato plant require slightly different approaches to get them ready for the great outdoors.
Tweaking your hardening off plan based on the plant is the secret to getting every single seedling off to a roaring start. This little bit of customized care makes a huge difference, preventing setbacks and ensuring a healthy, productive garden.
1. Adjusting for Cool-Season Vegetables
Cool-season crops are the tough kids on the block. We're talking about plants like broccoli, kale, lettuce, and cabbage, which are naturally more resilient to the cold. They don't need quite as much hand-holding as their warm-weather relatives.
You can often condense their hardening off timeline to just 5-7 days. Since they aren't as fussy about temperature swings, you can be a bit more aggressive with increasing their time outside each day. Just remember, their leaves can still get sunburned, so ease them into direct sunlight gradually.
The real benefit here is that once they’re hardened, these crops can handle chilly weather. Hardy plants like lettuce and cabbage can take daytime temperatures in the 40s°F (4-9°C) and can be transplanted 2-3 weeks before your last frost date. That’s a serious head start on the growing season! For a deeper dive, check out the University of Illinois Extension blog.
2. Taking It Slow with Warm-Season Favorites
On the flip side, you have your tender, sun-loving plants—tomatoes, peppers, cucumbers, and squash. These varieties truly hate the cold and are incredibly sensitive to temperature shock. Rushing them is just asking for trouble.
For these delicate plants, it's best to stretch the process out to a full 10-14 days.
- Go Slow: Increase their exposure to sun and wind much more gradually.
- Watch the Thermometer: Don't even think about leaving them out overnight until nighttime temperatures are reliably staying above 50-55°F (10-13°C).
- Zero Frost Tolerance: Unlike their hardy cousins, these must wait until every last threat of frost has passed before being planted out.
If you skip this crucial step, a shocking 50-80% of these tender seedlings can be lost to sunburn or chilling injury. It's a risk not worth taking.
3. Handling Store-Bought Transplants
It's tempting to grab those big, beautiful plants from the nursery and pop them straight into your garden. They look so ready, right? But hold on—most of them have spent their entire lives in the cozy, protected bubble of a greenhouse. They’re just as vulnerable as your own homegrown seedlings.
Even though nursery plants might be bigger, they’ve still been sheltered from the full force of direct sun and wind. A quick, 3-day adjustment period is a smart insurance policy against transplant shock.
A short and sweet hardening off schedule is all they usually need.
- Day 1: Set them out for the day in a shady, sheltered location.
- Day 2: Move them to a spot that gets morning sun but is shaded from the harsh afternoon rays.
- Day 3: Give them a full day in the sun, then plant them in the cool of the evening.
This simple three-day transition gives your store-bought plants the gentle introduction they need to settle in and start growing.
5 Common Mistakes to Avoid When Hardening Off
Even seasoned gardeners can stumble during the delicate dance of hardening off. The good news is that most mishaps are easily avoidable once you know what to look for. Think of it as learning the ropes—once you see the common pitfalls, you can steer clear and give your plants a smooth, successful transition into the great outdoors.
Let's walk through the five mistakes I see gardeners make most often.
1. Rushing the Timeline
Patience isn't just a virtue; it's a necessity for hardening off. I get it—you're excited to get your plants in the ground. But trying to fast-track this process is the number one cause of failure, leading to scorched leaves, windburn, and plants that just stall out.
Think of it this way: you wouldn't go from a dark room straight into the blazing midday sun without squinting, right? Your plants need time to adjust, too. Give them a bare minimum of 7-10 days to build up their "sunscreen" (thicker leaf cuticles) and strengthen their cell walls. A slow and steady approach, adding just an hour or two of exposure each day, always wins.
2. Ignoring the Wind Factor
Sunlight gets all the attention, but wind is the silent stressor that can do just as much damage. Even a gentle, persistent breeze wicks moisture away from tender leaves much faster than the roots can absorb it, causing a condition we call windburn. It can also snap fragile stems that haven't had a chance to become sturdy.
Always, and I mean always, start your plants off in a spot that’s completely sheltered from the wind. A protected corner on a porch or against the house is perfect. This lets them get used to the bright light and temperature swings without the added assault of a constant breeze.
Once they've had a few days to acclimate, you can gradually move them to slightly breezier spots. That initial protection, though, is non-negotiable.
3. Forgetting to Check the Weather
Spring weather is notoriously fickle. A beautiful sunny day can be followed by a surprise frost, a sudden heatwave, or a day of whipping winds. Leaving your tender seedlings to fend for themselves against these extremes can be a fatal mistake.
Get into the habit of checking the forecast every single morning before you put your plants out. It only takes a minute and can save you from a world of heartache.
- Cold Snap: If the forecast calls for temperatures dipping below 45°F (7°C), that’s your cue to bring them inside for the night.
- High Winds: Don't risk it. Keep them in their most sheltered spot or just skip putting them out for the day.
- Heat Wave: An unexpected scorcher can wilt seedlings in a hurry. Make sure they have dappled shade or cut their outdoor time short.
4. Over-Fertilizing and Over-Watering
This one feels a bit backward, but you need to ease up on the nurturing right before and during the hardening off period. Pushing fertilizer encourages a flush of soft, new growth, which is exactly the kind of growth that's most vulnerable to sun and wind. You want the plant to focus its energy on toughening up its existing structure, not making delicate new leaves.
The same goes for water. You never want your seedlings to wilt, of course, but letting the soil dry out a little between waterings actually encourages the roots to grow stronger and deeper. Constantly saturated soil makes for a weak, complacent root system. A little bit of "tough love" goes a long way here.
5. Leaving Them Out Too Late at Night
The final hurdle is graduating to staying out overnight. Many gardeners get impatient and make this move too soon. Nighttime temperatures can plummet, sending your plants into shock, especially heat-lovers like tomatoes, peppers, and basil.
As a rule of thumb, only leave them out all night after they’ve completed the full 7-10 day process and when nighttime temperatures are reliably staying above 50°F (10°C). For tougher, cool-season crops like broccoli or kale, you can usually get away with it once the nights are consistently above 45°F (7°C). This is the final exam before they're truly ready for the garden.
4 Essential Tools That Simplify the Process
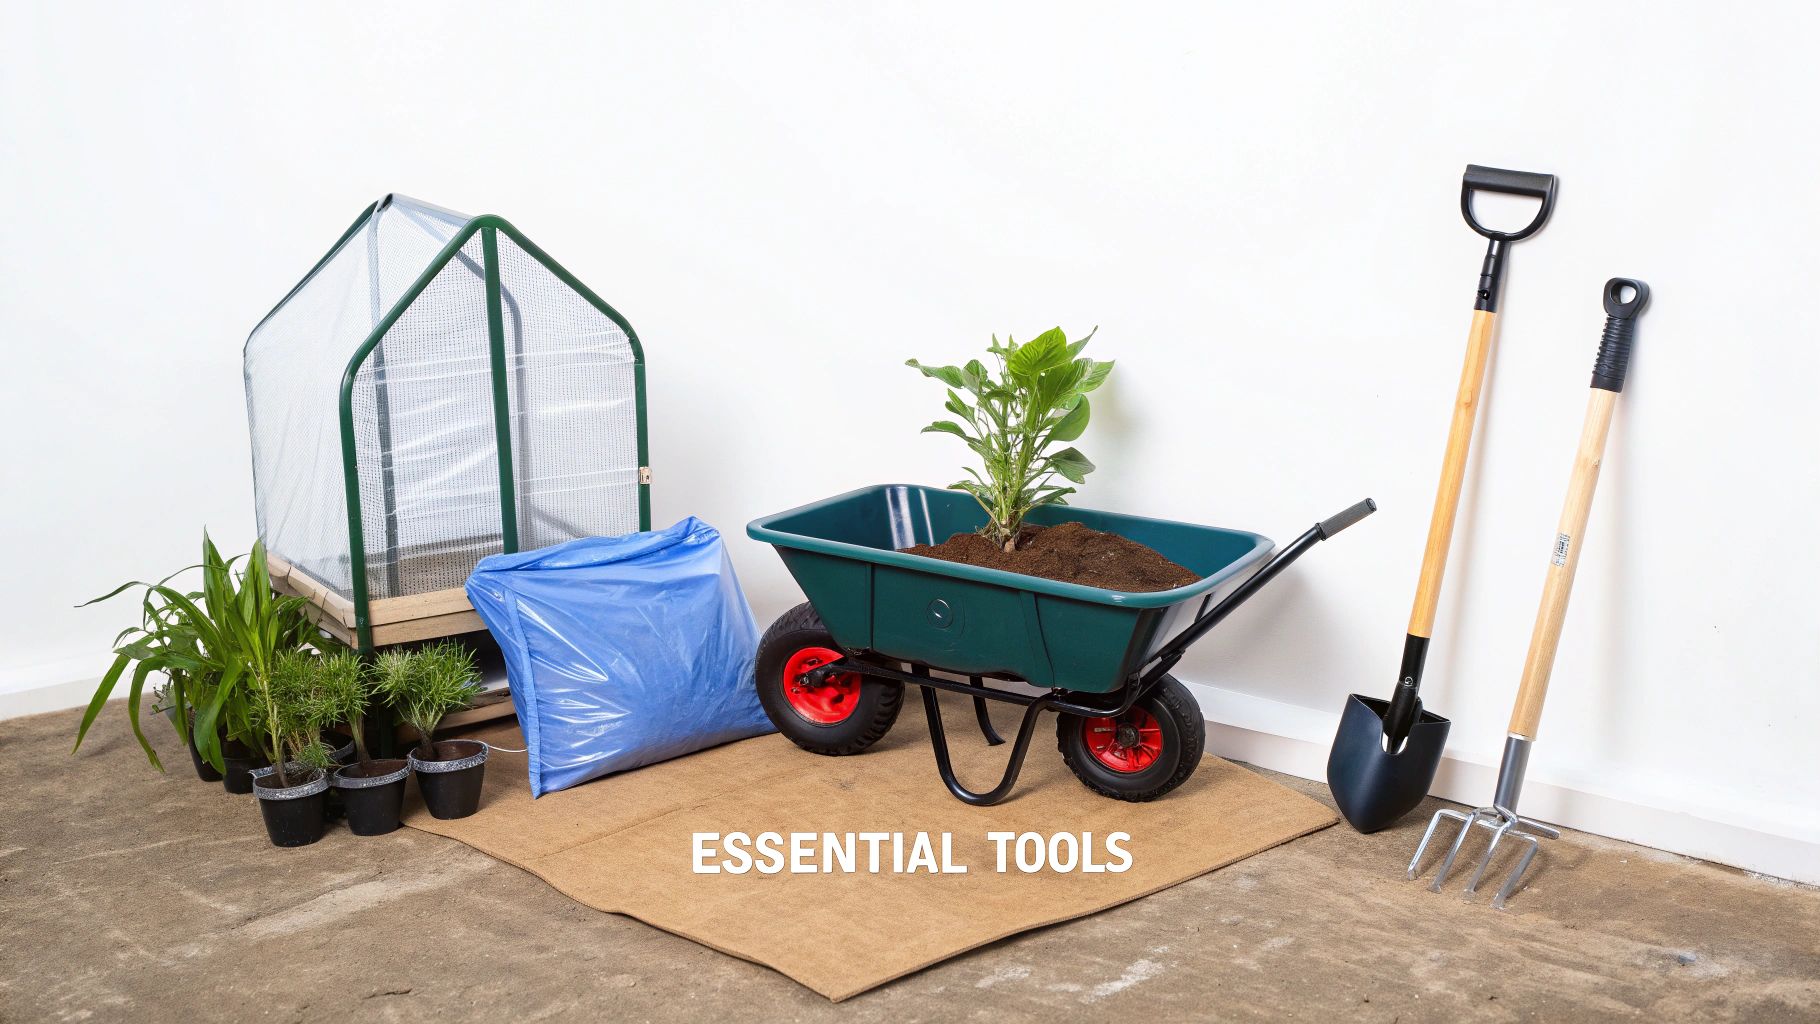
Look, you don't need a shed full of expensive gear to harden off your plants. But a few key items can make the daily shuffle a whole lot easier and give your seedlings a better shot at success.
Think of these tools as a small investment that pays off in time saved and healthier, happier plants. They help you create a more controlled environment and cut down on the back-and-forth grunt work.
1. Cold Frames
A cold frame is basically the ultimate halfway house for your plants. It's a simple, bottomless box with a clear lid that you place right in the garden. This setup creates a sheltered microclimate, giving your seedlings a taste of real sunlight and outdoor air without getting battered by harsh winds or sudden temperature drops.
Instead of lugging trays in and out of the house every day, you just prop the lid open in the morning and close it at night. It's that easy.
A cold frame is the perfect transitional zone. It lets your plants get used to bright, direct light and temperature swings at their own pace, minus the windburn. This one piece of equipment streamlines the entire process.
If you're the DIY type, you can easily build your own. Check out our guide on the 7 steps to build a cold frame for a weekend project.
2. Row Covers
Lightweight fabric row covers are one of the most versatile tools a gardener can own. Just drape a sheet directly over your seedlings in their outdoor spot. It acts as a perfect buffer against scorching sun, whipping winds, or a surprise cold snap.
This is your go-to insurance policy for those unpredictable spring days when the weather just can't make up its mind.
3. Wagons or Wheelbarrows
If you're starting more than just a few plants, a wagon or wheelbarrow is an absolute back-saver. Trust me on this one.
Instead of juggling multiple trays and making endless trips from the house to the garden, you can load everything up at once. This simple piece of gear turns a tedious daily chore into a quick, one-and-done task.
4. Shade Cloth
For anyone gardening in a region with intense sun, shade cloth is non-negotiable. This is a specially designed fabric that filters out a percentage of sunlight, preventing tender, young leaves from getting fried to a crisp.
You can stretch it over a simple hoop frame or lay it over your cold frame to dial down the light intensity. It gives your plants the bright, indirect light they crave without the risk of sunburn.
Your 3 Biggest Hardening Off Questions, Answered
Even the most seasoned gardeners run into questions when hardening off their plants. Let's tackle some of the most common ones so you can move forward with confidence.
1. Can I Just Skip This Whole Thing if It’s Cloudy?
It’s a tempting thought, isn't it? You see a week of gray, calm skies in the forecast and think, "This is my chance to save some time." While that kind of weather is definitely gentler on your plants, you really shouldn't skip the process entirely.
Even on an overcast day, your plants are getting hit with UV radiation and feeling breezes they’ve never encountered indoors. Think of it this way: cloudy weather is like a shortcut, not a free pass. You can use it to your advantage and condense a 7-10 day schedule into just a few days, but don't just toss them out there and hope for the best.
2. What Happens if the Weather Suddenly Turns Nasty?
Spring is famous for its mood swings. One minute it's sunny and calm, the next a surprise cold front, wicked winds, or a thunderstorm rolls in. When this happens, your only job is to protect those baby plants.
- Priority #1: Bring them inside. Seriously, this is the safest bet. Don't let a freak storm wipe out weeks of careful work.
- Find shelter: If you can’t bring them all in, tuck them into the most protected spot you have—under a covered porch, against the wall of the house, anywhere to break the wind and rain. This is where tools like a cold frame or row cover can be a real lifesaver.
The whole point of hardening off is gradual adjustment. A sudden blast of freezing temperatures or gale-force winds is the exact opposite of gradual, and it can kill your seedlings in an instant. Always, always check the forecast before you head out the door in the morning.
3. How Can I Tell if I’m Pushing My Plants Too Hard?
Don't worry, your plants will tell you if they're unhappy. They have some pretty clear ways of saying, "Hey, this is too much, too soon!"
Keep an eye out for these distress signals:
- White or bleached-out spots on leaves: That’s sunscald, the plant equivalent of a nasty sunburn. It means you gave them too much direct sun before they were ready.
- Sudden wilting: If the plant is drooping and looks thirsty even though the soil is damp, it’s a sign of stress from too much sun, wind, or heat.
- Brown, crispy leaf edges: This is a textbook sign of windburn, where the wind has literally dried out the edges of the leaves.
If you spot any of these signs, don't panic. Just pull the plants back into a shadier, more protected spot immediately. Give them a day or two of gentler conditions before you try increasing their outdoor time again.
Ready to grow the strongest, healthiest plants for your garden? Homegrown Garden has everything you need to get started, from premium heirloom seeds to our complete seed starting kits. Check out the collection and start your growing journey today

