


Starting an indoor garden is much simpler than you might think. It really just comes down to making a few smart choices upfront. Your goal is to pick a forgiving plant that actually fits the light in your home, pair it with a suitable pot and soil, and then learn a simple watering rhythm.
For beginners, the key to successful indoor gardening is to start small. This isn't about creating a jungle overnight; it's about building your confidence one happy plant at a time.
A 5-Step Guide to a Thriving Indoor Garden
Diving into the world of houseplants is an awesome way to bring some life and color into your space. And the best part? You really don't need a "green thumb" to make it work. A little bit of know-how goes a long way, and this guide will get you started on the right foot, making sure your new hobby is fun from the get-go.
Bringing plants indoors has become more popular than ever. The global indoor plant market was valued at USD 17.5 billion and is expected to hit USD 28.6 billion by 2032. A huge part of that growth comes from easy-care plants that are perfect for people just starting out.
Setting the Stage for Success
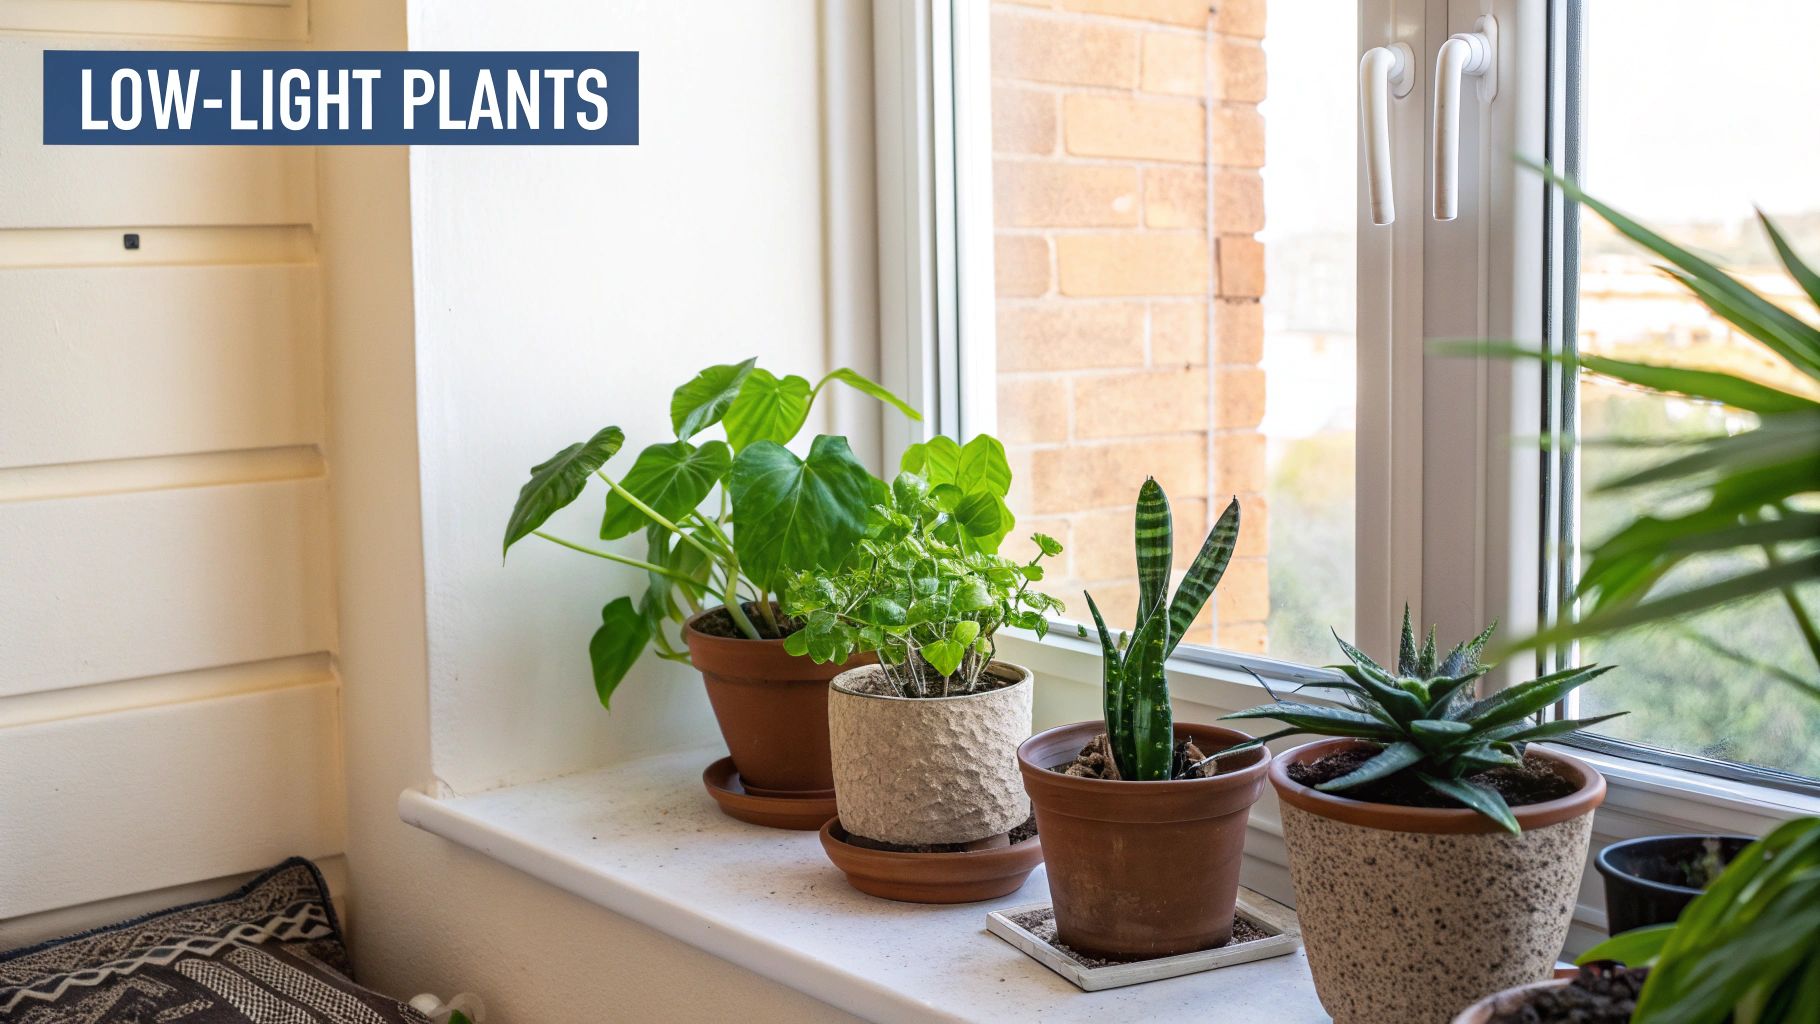
Before you run out and buy your first plant, just take a minute to look around your home. Where does the sun come in? Do you have a window that gets blasted with bright light all afternoon, or is your space more about soft, indirect light?
Paying attention to your home's natural light is the single most important thing you can do. It's the secret to choosing a plant that won't just survive but will actually be happy.
This image gives a great sense of how you can layer different plants to create a cozy, green corner in just about any room.
To help you choose, here's a quick look at five of the most bulletproof plants you can find.
The 5 Easiest Plants for Indoor Gardening Beginners
| Plant Name | Light Requirement | Watering Frequency | Key Benefit |
|---|---|---|---|
| Snake Plant | Low to Bright, Indirect | Every 2-4 weeks | Extremely drought-tolerant and purifies air. |
| Pothos | Low to Bright, Indirect | Every 1-2 weeks | Fast-growing and tells you when it's thirsty (droops). |
| ZZ Plant | Low to Bright, Indirect | Every 3-4 weeks | Almost indestructible; thrives on neglect. |
| Spider Plant | Bright, Indirect | Every 1-2 weeks | Non-toxic to pets and produces "babies" you can propagate. |
| Cast Iron Plant | Low Light | Every 2-3 weeks | Lives up to its name; can handle deep shade and neglect. |
Any of these five would be a fantastic first plant. They're all known for being tough and adaptable, giving you a great chance at success right away.
The 5 Core Steps of Indoor Gardening
Getting these fundamentals right from the start will save you from the most common beginner headaches. Nail these five things, and you'll be on your way.
- Choose the Right Plant: Start with something resilient. A Snake Plant or Pothos is a classic for a reason—they bounce back from mistakes.
- Select the Perfect Pot: This is a big one: your pot must have drainage holes at the bottom. Without them, you're setting the stage for root rot.
- Use Quality Soil: Don't just use dirt from your backyard. A quality, all-purpose indoor potting mix is designed to give your plant the right balance of drainage and nutrients.
- Understand Light Needs: This goes back to observing your space. Always match the plant to the light you already have. Don't try to force a sun-loving plant to live in a dark corner.
- Master Watering: The golden rule is to check before you water. Stick your finger about an inch into the soil. If it's dry, it’s time to water. If it's damp, wait a few more days.
The goal isn't to be a perfect plant parent overnight. It's about learning what your specific plants need and creating simple routines to meet those needs. Consistency beats perfection every time.
If you get really hooked, you might even want to try growing plants from scratch. Starting with seeds is a whole other level of rewarding, and having a great indoor seed starting setup can make all the difference.
7 Houseplants That Even Beginners Can't Kill
Picking your first plant is a big deal. The trick is to start with something that’s tough, forgiving, and won’t hold a grudge while you’re figuring things out. I’ve put together a list of seven nearly indestructible plants that are perfect for helping new gardeners get their confidence up.
And you're not alone in this. The houseplant hobby has absolutely exploded. The indoor plant market was valued at over USD 20 billion and is expected to sail past USD 30 billion by 2032. It's clear that bringing a bit of green indoors is more than just a trend; it's about making our spaces feel more alive.
1. Snake Plant (Dracaena trifasciata)
Let's start with the undisputed champion of low-maintenance plants. The Snake Plant, with its stiff, sword-like leaves, is as tough as they come. It's not picky about light—stick it in a dim corner or a bright room, and it'll probably be fine (though it secretly prefers indirect light).
Its real superpower is its incredible drought tolerance. Snake Plants store water in their leaves, so you only need to water them when the soil is bone dry. Seriously, we're talking maybe once a month. The single fastest way to kill one is by giving it too much love in the form of water, which leads to root rot.
2. ZZ Plant (Zamioculcas zamiifolia)
Are you a forgetful plant parent? Then the ZZ Plant is your soulmate. Its glossy, waxy leaves look incredibly stylish, but it thrives on pure neglect. It's perfectly happy in low-light spots, making it a fantastic choice for offices, hallways, or rooms that don't get a ton of sun.
Much like the Snake Plant, the ZZ has underground rhizomes that act like little water tanks. It absolutely hates having "wet feet," so let the soil dry out completely between waterings, which could be every 3-4 weeks.
3. Pothos (Epipremnum aureum)
Pothos, often called Devil's Ivy, is a vining plant that gives you results, fast. For a beginner, that's incredibly rewarding. Its heart-shaped leaves give you a clear signal when it's thirsty—they'll start to look a little sad and droopy. It's like having a built-in watering reminder.
Pothos is pretty flexible with light, too. It can handle lower light, but it’ll really take off and show more of its beautiful variegation in a spot with bright, indirect sun.
- Pro Tip: Let it trail down from a high shelf or a hanging basket for a stunning effect.
- What to Avoid: Hot, direct sun will scorch its leaves, so keep it out of that west-facing window in the summer.
- Bonus: Pothos is ridiculously easy to propagate. Just snip a vine, stick it in a glass of water, and watch new roots grow.
4. Spider Plant (Chlorophytum comosum)
The Spider Plant is a classic for good reason. It’s adaptable, non-toxic to pets (a huge plus!), and it even gives you free plants by sending out little "spiderettes" on long stems. These can be snipped off and planted to start a whole new plant.
It prefers bright, indirect light and likes its soil to stay evenly moist but never soggy. If you notice the tips of the leaves turning brown, it might be due to the minerals in your tap water. A simple fix is to let your watering can sit out for 24 hours before you use it.
5. Aloe Vera (Aloe barbadensis)
Here’s a plant that’s both beautiful and useful. As a succulent, Aloe Vera loves a sunny spot and is incredibly easy to care for. Plus, the gel inside its leaves is a go-to remedy for soothing minor burns and skin irritations.
A sunny kitchen windowsill is the perfect home for an Aloe Vera plant. It's a spot where it can get plenty of light and be readily available for its handy medicinal properties.
The number one mistake with Aloe? You guessed it—overwatering. Those plump leaves are full of water, so it's best to let the soil dry out completely before you even think about watering it again.
6. Cast Iron Plant (Aspidistra elatior)
This plant absolutely lives up to its name. The Cast Iron Plant is tough enough to handle conditions that would send most other houseplants to an early grave. If you have a truly low-light corner where nothing else will grow, give this one a shot. Its elegant, dark green leaves bring a touch of class to even the shadiest spots. It's a slow grower, but its resilience is second to none.
7. Peace Lily (Spathiphyllum)
Want a flowering plant that doesn't demand a ton of work? The Peace Lily is your answer. It has gorgeous, glossy leaves and produces beautiful white spathes that look like flowers. It’s also great at communicating its needs; the leaves will droop dramatically when it's thirsty, then pop right back up an hour after you water it.
Once you’ve mastered these leafy friends, you might get bold and want to grow something you can eat. When you’re ready for that next adventure, check out our guide on the best vegetables to grow indoors for tips on starting your own little home harvest.
A 3-Step Guide to Choosing Pots and Soil
So, you’ve picked out your first leafy friend. Awesome! The next big step is giving it a proper home. The pot and soil you choose are basically the foundation of your plant's entire world, directly affecting how it gets water, air, and nutrients. Honestly, getting this part right from the get-go is one of the easiest ways to make sure your new plant thrives.
Think of the pot as your plant's house and the soil as its pantry. A good house gives it stability, while a well-stocked pantry offers all the food it needs to grow strong. Making smart choices here will help you dodge some of the most common beginner mistakes.
Step 1: Prioritize Drainage Above All Else
If there's one non-negotiable rule in the world of houseplants, it's this: your pot absolutely must have a drainage hole. I know it's tempting to use that gorgeous decorative pot without one, but trust me, it’s a recipe for disaster.
Without an escape route, any excess water just pools at the bottom, literally drowning the roots. This soggy, waterlogged environment is the perfect breeding ground for root rot—a nasty fungal disease that is the number one killer of houseplants. A simple hole at the bottom lets that extra water flow out, which is crucial for letting the roots breathe.
A plant's roots need oxygen just as much as they need water. A pot without drainage essentially forces them to hold their breath, leading to a quick and sad decline. Don't risk it—always, always choose a pot with at least one hole.
Fallen in love with a pot that has no hole? No problem. You can still use it! Just keep your plant in its plastic nursery pot (the one with holes) and pop it inside the decorative one. This is called using a "cachepot," and it lets you have the best of both worlds: beautiful aesthetics without compromising your plant's health.
Step 2: Select the Perfect Pot Material
Walking down the pot aisle can feel a bit overwhelming, but the choice usually boils down to three main materials. Each one has its own personality and works better for different plants and watering styles.
-
Terracotta: These classic, earthy-red pots are made from porous clay. That means air and moisture can pass right through the walls, helping the soil dry out more quickly and evenly. This is fantastic for plants that hate having "wet feet," like succulents, cacti, and snake plants. The downside? For a moisture-loving fern, a terracotta pot might dry out a little too fast, meaning you'll have to water more often.
-
Ceramic (Glazed): Glazed ceramic pots are coated with a waterproof layer, so they hold onto moisture much longer than terracotta. This makes them a great pick for plants that prefer to stay consistently damp, like Peace Lilies or Calatheas. They’re also heavy, which adds some much-needed stability for taller, top-heavy plants.
-
Plastic: Lightweight, affordable, and excellent at retaining moisture, plastic pots are a super versatile option. They're perfect for thirsty plants or for those of us who tend to forget to water sometimes. Just remember, because they aren't porous, the soil will stay wet longer, so you have to be extra careful not to overwater.
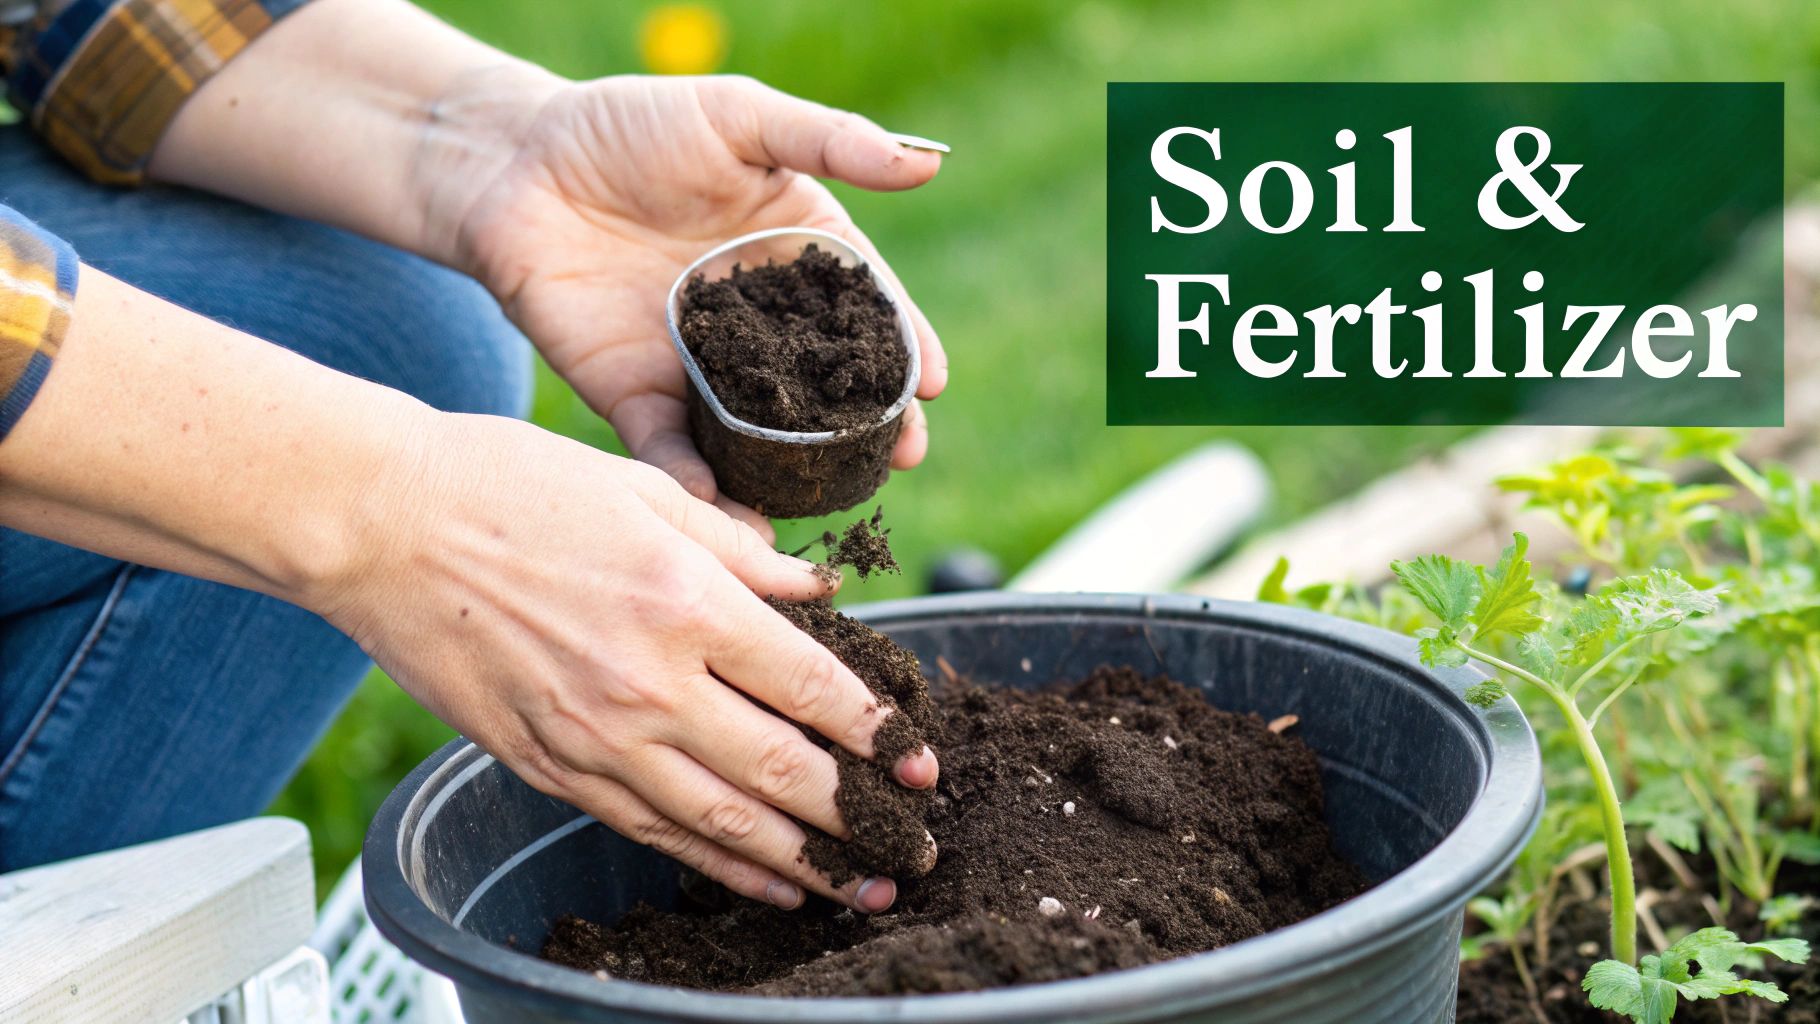
Step 3: Craft the Ideal Soil Mix
Just as important as the pot is what you decide to fill it with. For any beginner, a bagged potting mix from a garden center is a great place to start. Whatever you do, avoid scooping up soil from your garden—it's way too dense, compacts easily in a pot, and can bring in unwanted pests or diseases.
A good potting mix is designed to be light and airy, providing the perfect balance of moisture retention and drainage. Look for mixes that list these key ingredients:
- Peat Moss or Coco Coir: This is the foundation of most potting soils, known for holding onto water and nutrients.
- Perlite or Pumice: Those little white volcanic rocks create air pockets in the soil, which improves drainage and stops the soil from getting packed down.
- Vermiculite: This mineral is a champ at retaining both water and nutrients, releasing them slowly to the plant's roots as needed.
If you’re ready to get your hands a little dirty, creating your own all-purpose mix is surprisingly simple and really rewarding. It gives you total control over the environment your plant lives in.
A 3-Step DIY All-Purpose Potting Mix Recipe:
- Start with two parts of a high-quality peat moss or coco coir base.
- Add one part perlite for excellent aeration and drainage.
- Mix in one part compost or worm castings for a nice, slow-release nutrient boost.
Combine these ingredients thoroughly in a bucket or tub, and you've got a fantastic, well-draining mix that’s perfect for a huge range of common houseplants. This simple blend creates the ideal structure for healthy root development and sets your indoor garden up for a vibrant, happy future.
9 Easy Steps to Decode Light and Water
So, you've got your new plant settled in the perfect pot with fresh soil. Now comes the part that trips up most new plant parents: light and water. It can feel a little intimidating, but I promise it's more about observation than strict rules. Think of it as learning a new language—once you pick up on the cues, caring for your plant becomes second nature.
It’s a common fear, but forgetting to water is rarely the problem. The real culprit? Overwatering is the number one cause of houseplant death. We’ve all been there—killing our green friends with a little too much kindness. The single best habit you can build is learning to check the soil before you even pick up the watering can.
5 Simple Ways to Understand Your Plant's Light Needs
Plant tags with phrases like "bright indirect light" can feel like a riddle. What does that even mean in your living room? Let's break it down. Light is literally your plant's food, fueling the photosynthesis it needs to grow and thrive.
- Figure Out Your Windows: The direction your windows face is the single biggest factor in your home's lighting. Don't guess—just use a simple compass app on your phone to know for sure if you have a south-facing light-blaster or a gentle north-facing glow.
- Translate "Bright Indirect Light": This is the sweet spot for a huge number of popular houseplants. It means a location that’s bright all day, but where the sun's rays don't hit the leaves directly. Picture the light a few feet back from a sunny south-facing window, or right next to an east-facing one that only gets soft morning sun.
- Define "Low Light": Here's a crucial tip: low light does not mean no light. It's a spot that’s far from a window—like a hallway or the back corner of a room—but still gets some ambient light. A north-facing window is a classic example of a low-light source.
- Recognize "Direct Light": This is that intense, unfiltered sunshine you’ll find smack-dab in a south or west-facing window. While it will scorch the leaves of many tropicals, it's exactly what sun-worshippers like succulents, cacti, and palms crave.
-
Use the Shadow Test: This is my favorite trick. On a sunny day, hold your hand about a foot over the spot you want to place your plant.
- A sharp, well-defined shadow means direct light.
- A softer, slightly blurry shadow means bright indirect light.
- A faint, barely-there shadow means low light.
To help you get started, here’s a quick-reference table matching common light levels in a home with plants that will be happy there.
A 4-Tier Guide to Indoor Lighting and Plant Placement
| Light Level | Description (Where to Find It) | Best Plants for This Light |
|---|---|---|
| Direct Light | Right in an unobstructed south or west-facing window. | Cacti, Succulents, Palm Trees, Croton |
| Bright Indirect | Near an east-facing window or a few feet back from a south/west one. | Fiddle Leaf Fig, Monstera, Pothos, Philodendron |
| Medium Light | In the middle of a room, several feet from a bright window. | Dracaena, Prayer Plant, Spider Plant |
| Low Light | In a corner far from windows or near a north-facing window. | Snake Plant, ZZ Plant, some Pothos |
Getting the light right makes a world of difference. If you want to maximize what you already have, you can explore strategies to increase natural light in your house. And if your space is just naturally dark, don't give up! Our guide to the best grow lights for indoor plants can easily supplement what nature isn't providing.
4 Foolproof Steps to Perfect Watering
The biggest game-changer is to ditch a rigid schedule. "Watering Wednesday" might sound organized, but your plant's thirst changes with the seasons, the humidity in your home, and how much light it’s getting. Listening to the plant is always better than listening to the calendar.
- Master the Finger Dip Test: This is the most reliable tool you have—and it’s free! Just stick your index finger about one to two inches into the soil. If it comes out dry with little to no soil on it, it’s time to water. If soil sticks to your finger, it's still moist, so check again in a few days.
- Water Thoroughly, Not Sparingly: When you do water, mean it. Give the plant a good, long drink until water flows freely from the drainage hole. This simple step ensures the entire root ball is hydrated and encourages roots to grow deep and strong instead of staying near the surface.
- Use Room-Temperature Water: This is a small detail that makes a big difference. Blasting your plant's roots with ice-cold or hot water from the tap can shock them. I just fill my watering can after I’m done and let it sit out. By the next time I need it, the water is the perfect temperature.
- Try Bottom Watering: This technique is a lifesaver, especially for plants with fuzzy leaves like African violets or those prone to rot. Just set the pot in a sink or tray with a few inches of water and let it soak up moisture from the bottom for about 20-30 minutes, until the top of the soil is damp.
Remember, it's always better to underwater slightly than to overwater. Plants are much more resilient to a little bit of thirst than they are to sitting in a swampy pot with suffocating roots.
By tuning into these simple cues for light and water, you shift from guessing to knowing. This approach is the foundation of all successful indoor gardening and turns plant care from a chore into a rewarding conversation with your leafy friends.
9 Simple Habits to Keep Your Plants Thriving
Once you’ve got the hang of light and water, the real secret to successful indoor gardening comes down to one thing: consistency. It's the small, simple habits you build into your routine that will make your plants truly flourish, not just survive. These aren't tough chores, either—just little acts of attention that pay off big time.
Think about it like this: you wouldn't expect a pet to do well without regular care, and your plants are no different. By weaving these nine easy habits into your life, you'll start to anticipate your plants' needs and spot potential issues long before they become real problems.
1. Routinely Check for Pests
Learning to be a plant detective is one of the best skills you can pick up. Pests are an annoying fact of life for any plant owner, but catching them early turns a potential disaster into a minor inconvenience.
Whenever you're watering—maybe once a week—take an extra 60 seconds to really look at your plants. Flip over some leaves and check their undersides, a favorite hiding spot for pests. Peek into the little crevices where leaves join the stem. You’re on the lookout for things like tiny webs (spider mites!), fuzzy white specks (mealybugs), or little black flies buzzing around the soil (fungus gnats). Trust me, early detection is 90% of the battle.
2. Wipe Down Dusty Leaves
Your plant's leaves are basically little solar panels, soaking up light to make food. When a layer of dust settles on them, it's like throwing a shade cloth over those panels—it seriously hinders their ability to photosynthesize and feed themselves.
About once a month, just grab a soft, damp cloth and gently wipe down the leaves of your bigger plants. For the smaller ones or those with fuzzy leaves, a soft-bristled brush or a quick, gentle shower with lukewarm water does the trick. It’s a simple task that not only helps your plant "breathe" but also makes it look vibrant and glossy.
3. Rotate Your Plants Regularly
Ever see a plant leaning so hard toward the window it looks like it's about to fall over? That’s called phototropism, and it's a good sign—your plant is actively seeking its light source. But, if left alone, it'll lead to some pretty lopsided, awkward growth.
The fix is incredibly easy: just give the pot a quarter-turn every time you water. This ensures all sides of the plant get a chance to face the sun, encouraging it to grow in a much fuller, more balanced shape. It's a tiny habit that makes a huge visual difference.
4. Know When to Fertilize
The soil in a pot provides structure, but its nutrient supply is finite. Fertilizing is like giving your plant a vitamin boost, replenishing the minerals it needs to push out new leaves and stay vigorous. But this is one area where more is definitely not better.
For most houseplants, you only need to fertilize when they're actively growing, which for us is usually spring and summer. A standard, all-purpose liquid fertilizer diluted to half-strength once a month is a great starting point. Just one crucial tip: always water the plant before you fertilize. Applying it to dry soil can burn the roots.
5. Prune Dead or Yellowing Leaves
Sometimes you have to let go of the old to make way for the new. When a leaf turns yellow or brown, it's done its job. The plant might even be wasting precious energy trying to sustain that dying leaf.
Do your plant a favor and snip off any dead or damaged foliage with a clean pair of scissors or shears. This immediately redirects that energy toward producing healthy, new growth. A little regular pruning keeps your plant looking clean and actually encourages it to become bushier and more robust.
Think of pruning as strategic housekeeping. You're not hurting the plant; you're helping it focus its resources on thriving, which leads to a healthier and more attractive appearance.
6. Check for Root-Bound Signs
As your plant gets bigger on top, its root system is expanding below. Eventually, it can fill up the entire pot, becoming "root-bound." When the roots are a dense, tangled mess, it becomes difficult for the plant to absorb the water and nutrients it needs to live.
How can you tell? Look for roots sneaking out of the drainage holes. Or maybe you've noticed water rushes straight through the pot when you water it. If the plant's growth has stalled, that's another big clue. If you spot these signs, it’s time to repot into a new container that’s just an inch or two wider.
7. Aerate Compacted Soil
Over months of watering, the soil in a pot can get dense and compacted. This pressure squeezes out the tiny air pockets that roots desperately need to breathe and function properly.
A quick fix is to gently aerate the soil. Grab a chopstick or a thin wooden skewer and carefully poke a few holes into the soil. Be gentle and try to avoid ramming into any major roots. This simple action breaks up the compacted earth, letting oxygen and water get down to the root zone where they're needed most.
8. Use Technology to Simplify Care
Let’s be honest, technology can make plant care a whole lot easier, especially when you're starting out. The global smart indoor gardens market, valued at around USD 149.7 million, is set to nearly double to USD 284.8 million by 2033 for a reason. This growth is driven by clever tools like self-watering planters and AI-powered monitors that remove the guesswork. You can learn more about these innovations in smart indoor gardens on the IMARC Group website.
9. Group Plants to Increase Humidity
So many of our favorite houseplants, like lush ferns and dramatic Calatheas, originally come from tropical rainforests. They crave way more humidity than the average home offers. An easy, low-tech way to solve this is to simply group your plants together. As they release water vapor from their leaves (a process called transpiration), they create their own little humid microclimate that benefits every plant in the huddle. It’s a beautifully simple way to keep them happy.
A 3-Step FAQ for Top Indoor Gardening Questions
Every new plant parent has questions. It's part of the fun! When I first started, I spent hours trying to figure out what my plants were trying to tell me. Let's clear up some of the most common hurdles you might face so you can skip the guesswork and get straight to the good stuff.
Think of this as a conversation about the "what ifs" and "whys" that pop up when you're just getting started.
1. How Often Should I Really Water My Indoor Plants?
There’s no magic number, and anyone who gives you a rigid "water once a week" schedule is leading you astray. The only real answer is: check the soil first. How thirsty a plant is depends on everything from the type of plant and its pot size to the light it gets and the humidity in your home.
A snake plant tucked away in a low-light corner might be perfectly happy being watered every 3-4 weeks. Meanwhile, a thirsty fern soaking up sun near a window could need a drink every few days. The single best skill you can learn is trusting your hands over a calendar.
The Finger-Dip Test: This is my foolproof method. Stick your index finger about an inch or two into the soil. If it comes out clean and feels dry, it’s probably watering time. If soil sticks to it and it feels damp, hold off and check again in a few days.
2. What Do "Bright Indirect Light" and "Low Light" Actually Mean?
Plant tags throw these terms around all the time, but they can feel a bit abstract. Here’s how to translate them into real spots in your home.
- Bright, Indirect Light: This is the sweet spot for a huge number of houseplants. It means a place that's bright all day long, but where the sun's rays aren't scorching the leaves. Think of the space right near an east-facing window (which only gets gentle morning sun) or a few feet back from a powerful south or west-facing window. The goal is bright, but not direct.
- Low Light: This definitely doesn't mean no light. A low-light spot is simply a location farther from a window, like a dim hallway or the back corner of a living room. If you can comfortably read a book there during the day without squinting, it’s a low-light area. North-facing windows are a classic source of this kind of gentle, consistent light.
3. Why Are My Plant's Leaves Turning Yellow?
Ah, the dreaded yellow leaf. It's a plant's primary way of telling you something's wrong, but it can be a bit of a mystery. For most beginners, the culprit is overwatering. Too much water literally suffocates the roots, and they can't do their job of absorbing nutrients.
But before you panic, yellowing can also be a sign of other things:
- Underwatering: The soil is bone-dry, and the plant is shedding older leaves to save energy.
- Nutrient Deficiency: If it's been a long time since you've fed your plant, it might just be hungry.
- Pest Problems: Take a close look under the leaves for any tiny unwanted guests.
- It's Just Adjusting: It's totally normal for a plant to drop a couple of leaves after you bring it home. It's just settling in.
Your first move should always be to check the soil moisture. If it’s soggy, let it dry out completely and make sure your pot has a drainage hole. If it’s parched, give it a good, thorough soak.
At Homegrown Garden, we believe anyone can develop a green thumb. From heirloom seeds for your windowsill herb garden to beautiful ceramic pots, we've got everything you need to begin with confidence. Our beginner-friendly kits are designed to set you up for success.
Find your perfect starter kit and start your indoor gardening adventure today.
Once you are comfortable, try growing something you can cook with. Our herb seeds are an easy windowsill start.

