


Ready to grow your own vegetables but don't have a big yard? You've come to the right place. Growing vegetables in containers is one of the most rewarding and straightforward ways to get into gardening. All you really need to get going is a sunny spot, a decent-sized pot with good drainage, and a bag of quality potting soil.
The secret I share with every new gardener is to start small. Pick a few easy-to-grow plants for your first season. This way, you get a taste of success right away, which builds the confidence you need to turn this into a lifelong hobby instead of a one-time frustration.
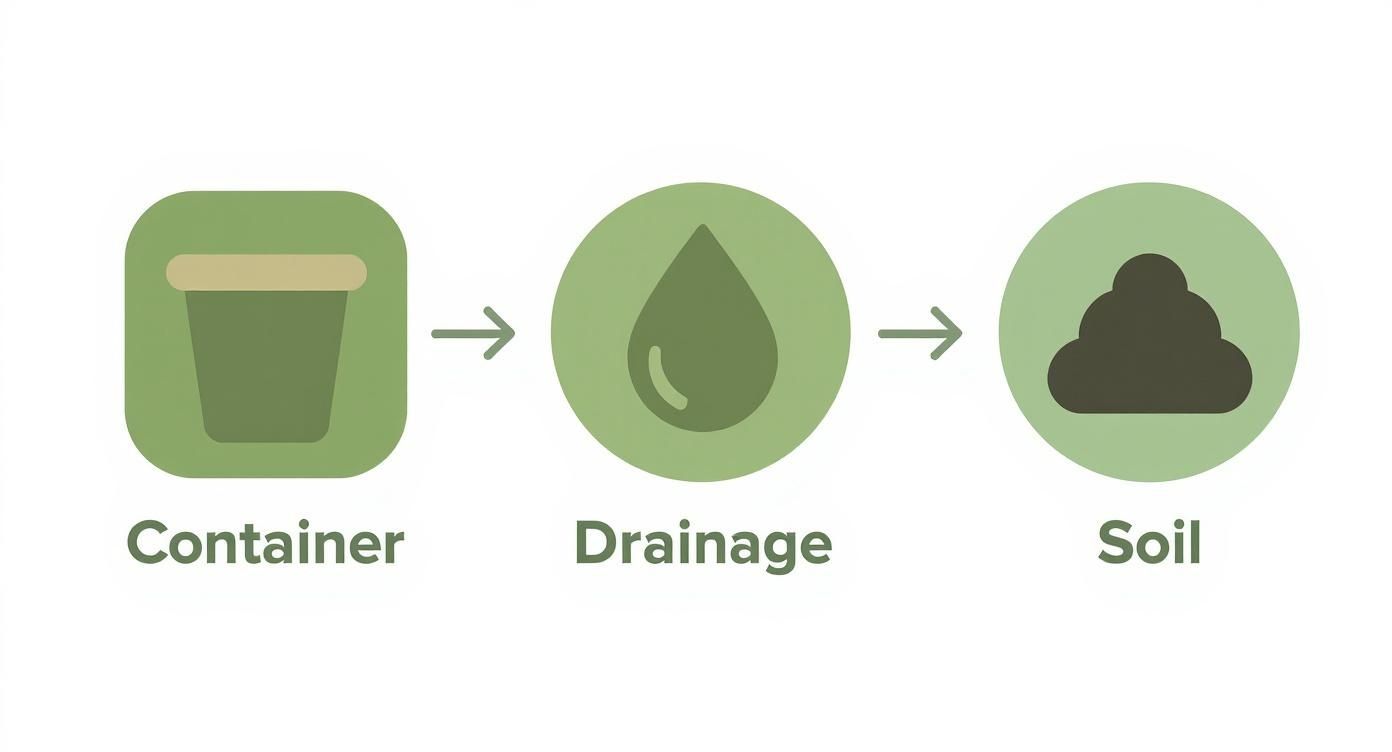
Your First 3 Steps to a Thriving Container Garden
Jumping into gardening can feel overwhelming, but it doesn't have to be. Container gardening is the perfect way to dip your toes in, turning a sunny balcony, a small patio, or even a windowsill into your own little produce stand. Forget needing a huge yard or fancy tools—a simple desire for fresh, homegrown flavor is all it takes.
What I love about this method is the control it gives you. You decide on the soil, you manage the watering, and you can protect your plants from many common garden woes. For a beginner, this is a huge win. It cuts out a lot of the guesswork that comes with traditional gardening, like dealing with poor soil or battling endless weeds.
3 Reasons to Start With Containers
The real magic of container gardening is how accessible and simple it is. It's the perfect way to learn the ropes of plant care without getting in over your head. Here's why I always recommend it for newcomers:
- It's Incredibly Space-Efficient: You'd be amazed how much food you can grow in just a few well-chosen pots. This makes it a perfect fit for apartments, townhouses, and anyone with limited outdoor space.
- Easier Pest and Disease Control: With your plants up off the ground and in their own separate pots, they're much less likely to fall victim to soil-borne diseases or creepy crawlies.
- Total Mobility: That spot you picked not getting as much sun as you thought? No problem. Just pick up the pot and move it. This flexibility is a game-changer for finding the perfect light as the seasons change.
The 5 Pillars of Container Gardening Success
To keep things simple, I've boiled down everything you need to know into five core principles. If you focus on getting these right, you're well on your way to a fantastic harvest.
| Pillar | Why It's Critical | Your First Goal |
|---|---|---|
| The Right Pot | Provides room for roots to grow and ensures proper drainage. | Pick a container at least 12 inches wide and deep with multiple drainage holes. |
| Quality Soil | Supplies nutrients, retains moisture, and supports root health. | Use a fresh bag of high-quality potting mix, not garden soil. |
| Smart Planting | Gives each plant the space and depth it needs to thrive. | Read the seed packet or plant tag for specific spacing and depth instructions. |
| Consistent Care | Regular watering and feeding are non-negotiable for thirsty container plants. | Check the soil moisture daily with your finger; water when the top inch is dry. |
| Plenty of Sun | Most vegetables need at least 6-8 hours of direct sunlight to produce. | Find the sunniest spot on your balcony or patio before you plant anything. |
Mastering these five areas will make all the difference. Think of them as your cheat sheet for a successful and stress-free gardening experience.
You're Part of a Growing Trend
If you're getting excited about growing your own food, you're in good company. The global market for gardening containers is already around $2.5 billion and is expected to grow by 7% each year. This boom is all about people living in cities and wanting a closer connection to where their food comes from. There are even new innovations like smart containers with built-in moisture sensors that are making it easier than ever to get great results.
The single biggest key to success is choosing the right plants for the space you have. A sun-loving tomato plant will never thrive on a shady porch, no matter how much you care for it. Observe your light, then choose your plants.
Starting this journey is about so much more than just putting food on the table; it's about the deep satisfaction of watching something grow from a tiny seed into a delicious harvest. For some creative ways to set up your pots and make the most of your space, check out our guide on inspiring container gardening ideas. Let's get you started on the right foot
7 Best Vegetables for Your First Container Garden

Picking the right plants is probably the most important decision you'll make at the start. When you're new to this, a little success goes a long way in building confidence for the seasons to come.
I've put together this list of seven foolproof vegetables that are not only forgiving for beginners but are also surprisingly productive in pots. Think of these as your ticket to a delicious and rewarding first harvest—they're all about getting you a quick win and making you feel like a seasoned gardener right from the get-go.
1. Salad Greens and Spinach
Lettuce, spinach, and other leafy greens are the undisputed champions of container gardening. Their roots don't run deep, so you don't need a huge pot, and you can harvest them over and over again.
Just snip the outer leaves as you need them, and the plant will keep producing from the center. This "cut-and-come-again" method gives you a steady supply for weeks. A wide, shallow container that’s at least 6-8 inches deep is perfect. You’ll be tossing your own homegrown salad in as little as 30-45 days.
2. Bush Beans
Forget about building complicated trellises. Bush beans are the low-maintenance cousin of pole beans; they grow into a compact, self-supporting plant that’s ideal for a 5-gallon pot. They’re incredibly productive for their small size and grow fast.
You can expect to start picking fresh beans in about 50-60 days. Just pop a few seeds into a large pot, and you’ll have more than enough for several family dinners. They're a fantastic confidence-booster.
3. Radishes
If you’re looking for near-instant gratification, radishes are your answer. These are the sprinters of the garden, going from a tiny seed to a crunchy, ready-to-eat vegetable in as little as 25-30 days.
Pro Tip: Succession Planting
Don't plant all your radishes at once. Instead, sow a small batch of seeds every two weeks. This simple trick ensures you have a continuous supply all season long instead of one giant harvest you can't possibly eat in time.
Radishes are a cool-weather crop, perfect for spring and fall. Just give them a pot that's about 8-10 inches deep so their spicy little roots have room to swell.
4. Peas
There’s truly nothing like the taste of a sweet, crunchy snap pea eaten right off the vine. Both snap peas and snow peas do wonderfully in containers. They need a little something to climb on, but a small trellis or a few bamboo stakes tucked into a 5-gallon pot is all it takes.
To keep things manageable, look for dwarf varieties like 'Sugar Ann' or 'Tom Thumb', which are bred specifically for small spaces. They’re less sprawling but still give you a great yield, usually ready in about 60-70 days.
5. Bell Peppers
Peppers absolutely love the extra warmth that containers provide. A pot warms up much faster in the sun than garden soil does, creating the toasty environment these sun-worshippers crave. A single pepper plant in a 5-gallon container can give you a steady stream of peppers all summer.
Excellent drainage is key, so make sure your pot has plenty of holes. Give them a spot with at least 6-8 hours of direct sun, and they'll reward you with vibrant, sweet peppers in about 70-85 days.
6. Compact or "Patio" Tomatoes
Of course, you want to grow tomatoes! The secret for containers is choosing the right type. Skip the giant, sprawling varieties and look for a determinate or "bush" tomato. These plants grow to a fixed, manageable size and produce their fruit in a concentrated window, so you're not wrestling a monster plant all season.
- Look For: Varieties with names like 'Patio Princess', 'Bush Goliath', or 'Tiny Tim'. Anything labeled "patio," "bush," or "determinate" is what you want.
- Container Size: This is the one rule you can't break. You need at least a 10-gallon pot per plant. Anything smaller will dry out too fast and stunt the plant's growth.
- Harvest Time: You'll be picking your own sun-ripened tomatoes in about 60-80 days, depending on the variety.
7. Herbs Like Basil and Mint
Okay, they aren't technically vegetables, but no container garden feels complete without fresh herbs. They’re incredibly easy to grow, and having them on hand will completely change your cooking. Basil, mint, parsley, and chives are all fantastic, no-fuss options.
Most herbs are happy in smaller pots (1-2 gallons is often plenty to start). But a word of warning: mint is an aggressive grower with ambitions of world domination. Always give mint its own dedicated pot, or it will happily choke out everything else.
3 Steps for Choosing the Right Containers and Soil Mix
Think of your container and the soil inside it as the entire universe for your plant. Getting this foundation right is, without a doubt, the most important part of starting a container garden. It’s not just about picking a pretty pot; you're building a stable, nurturing home where your veggies can truly take off.
This all comes down to two key pieces: the container itself and the all-important soil mix you fill it with. Let's dig in.
Step 1: Find the Perfect Pot
When you walk through a garden center, the sheer number of pots can be overwhelming. Here's a breakdown of 3 common types:
- Terracotta (Clay): These are the classic, beautiful pots you see everywhere. Their best feature is that they're porous, which lets air and water move through the sides. This is great for preventing soggy roots, but it also means they dry out fast, so you'll be watering more often.
- Plastic or Resin: A fantastic choice for beginners. Plastic pots are lightweight, easy on the wallet, and hold moisture really well. They won’t dry out nearly as fast as terracotta, giving you a bit of a safety net with your watering routine.
- Fabric Grow Bags: These are basically heavy-duty fabric bags that have become incredibly popular. They are amazing for root health because they stop roots from circling inside the pot—a process called “air pruning.” They offer fantastic drainage, but just like terracotta, they can dry out quickly in the summer heat.
No matter what material you land on, there is one feature that is an absolute must: drainage holes. Without them, water pools at the bottom, creating a swampy mess that leads to root rot. That’s a quick death sentence for any potted plant.
Step 2: Avoid Backyard Soil
It’s so tempting to just scoop up some dirt from your garden bed to fill your pots. Please, don't do it! This is one of the most common mistakes I see new gardeners make.
Garden soil is heavy. In the confines of a pot, it compacts into a dense, hard brick. This squeezes out all the tiny air pockets your plant's roots need to breathe and makes it nearly impossible for water to drain properly. You end up with a suffocating, waterlogged environment. Always, always start with a fresh bag of potting mix made specifically for containers. For more great advice, check out our essential container gardening tips to sidestep other common pitfalls.
Step 3: Use a Great Potting Mix
A quality potting mix isn't just dirt; it's a carefully crafted recipe. A good one will feel light and fluffy, designed to hold just the right amount of moisture while letting any excess drain right out.
Your potting mix is a miniature ecosystem. It provides the structure, air, water, and nutrients your vegetables need to thrive. Investing in a good mix is investing in a better harvest.
So, what’s actually in the bag? You’ll usually find three main players:
- A Base for Moisture: This is typically peat moss or coco coir (a sustainable option made from coconut husks). It acts like a sponge, holding onto water and nutrients so the roots can access them.
- Something for Aeration: Ingredients like perlite (those little white, styrofoam-like balls) or vermiculite are mixed in to create air pockets. This prevents compaction and ensures roots get plenty of oxygen.
- Nutrients for Growth: Good mixes often include things like compost or aged bark. These ingredients provide a slow, steady supply of food for your plants. A solid grasp of understanding composting principles can give you a deeper appreciation for how these organic materials enrich the soil.
For many beginners, getting the watering schedule right is the biggest headache. If that sounds like you, a self-watering planter could be a total game-changer. These clever containers have a built-in reservoir at the bottom that wicks moisture up into the soil whenever the plant needs it. Online searches for self-watering planters have jumped by over 70%, which shows just how much people value solutions that make gardening easier. You can read the full report on these market trends to see how convenience is shaping the future of gardening.
3 Steps for Mastering Planting, Watering, and Feeding Routines
This is where the real fun begins—getting your hands dirty and bringing your container garden to life. Now that you've got the right container and the perfect soil, it's time to plant. After that, we'll get into the two simple routines that make or break a beginner’s success: watering and feeding. Building these habits is the secret to a thriving, productive garden.
Step 1: Get Your Plants in the Soil
Proper planting sets the stage for everything that follows. It gives your young plants the room they need to stretch out their roots without having to fight for water and nutrients.
Always check the seed packet or plant tag first—it’s your best friend here. It will tell you the ideal planting depth and spacing. A good rule of thumb for seeds is to plant them at a depth of about twice their diameter. For seedlings, you'll want to plant them so the top of their soil ball sits level with the soil in your new pot. Gently firm the soil around the base, then give it a thorough but gentle watering.
This highlights a key truth in gardening: success starts long before a single seed is planted. Mastering these three elements puts you way ahead of the game.
Step 2: Master the Art of Watering Your Containers
Watering is where most new gardeners either give too much love or not nearly enough. Because containers hold a limited amount of soil, they dry out much faster than a traditional garden bed, especially on hot, breezy days.
The best way to know if it's time to water is to use the good old "finger test." Just stick your index finger about an inch or two into the soil. If it feels dry at the tip, it’s time for a drink. If it’s still damp, you can hold off for another day. This one simple trick prevents both wilting from thirst and the dreaded root rot that comes from soggy soil.
When you do water, do it deeply. Pour water slowly and evenly over the soil surface until you see it start to drip out of the drainage holes at the bottom. Morning is the ideal time, as it lets the leaves dry before evening, which helps keep fungal diseases at bay. To dive deeper into timing, you can explore our guide on the best time to water your vegetable garden.
Overwatering is just as dangerous as underwatering. The finger test is your most reliable tool. It takes the guesswork out of the equation and connects you directly with your plant's needs.
Step 3: Demystify Fertilizers and Feeding
The nutrients packed into your initial potting mix will only last for a few weeks. After that, your hungry vegetable plants will need a regular boost. For beginners, it really boils down to two main choices:
- Liquid Fertilizers: You mix these with water and apply them during your regular watering routine. They provide a quick, direct shot of nutrients to the plant's roots. They act fast but also need to be applied more frequently, typically every 2-4 weeks.
- Slow-Release Granular Fertilizers: These are small pellets that you mix into the top layer of your soil. Each time you water, they slowly break down and release a small amount of nutrients over a longer period, often lasting for several months.
A great, simple routine is to start feeding your plants once they have developed their first set of "true leaves" (that’s the second set of leaves to appear). Begin with a balanced liquid fertilizer mixed at half the strength recommended on the package every two weeks.
To help you stay on track, a simple checklist can be a huge help in building these new habits.
Your 4-Step Weekly Garden Care Checklist
| Day | Task | Quick Tip |
|---|---|---|
| Monday | Finger Test & Water | Check soil moisture. Water deeply if the top inch is dry. |
| Wednesday | Pest & Health Check | Look under leaves for any signs of pests or spots. |
| Friday | Finger Test & Water | Check soil again. Hotter days might mean more frequent watering. |
| Sunday | Feed & Tidy Up | If it's feeding week (every 2-4 weeks), add fertilizer. Remove any yellow leaves. |
Following a simple schedule like this turns garden care into a relaxing and rewarding part of your week. You'll quickly get a feel for what your plants need.
4 Keys to Sunlight, Placement, and Working with the Seasons
Think of sunlight as the fuel that powers your vegetable garden. Figuring out how to work with the light you have is a real gardening superpower, especially when you're just starting out with containers. It all comes down to matching the right plants to the right spot so they get the energy they need to produce a great harvest.
1. Be a Sun Detective
Before you even think about planting, spend a day watching your balcony, patio, or windowsill. Take note of where the sun hits and for how long. This simple observation is probably the single most important thing you can do for your future garden.
2. Know Your Sun Types
You'll see "full sun" and "partial sun" on every seed packet. Here’s what that actually translates to:
- Full Sun: This means the spot gets at least 6 hours of direct, unfiltered sunlight every day. This is the gold standard for tomatoes, peppers, and squash.
- Partial Sun or Partial Shade: This describes an area that gets between 4 to 6 hours of direct sun. It's the sweet spot for leafy greens like lettuce and spinach.
3. Use 2 Summer Survival Tricks
The summer sun can be brutal. It can scorch tender leaves and bake the soil dry in what feels like minutes.
A simple piece of shade cloth, draped over a few stakes during the hottest part of the day (usually from about 1 PM to 4 PM), can be a lifesaver. It filters just enough of that intense light to prevent a total meltdown.
Another little trick is to group your pots together. This creates a more humid little microclimate around the plants, which helps slow down water loss from both the leaves and the soil.
4. Squeeze More Out of the Fall
When summer starts to wind down, you can use your garden’s mobility to your advantage. A brick wall or the side of the house that gets blasted with afternoon sun now becomes your best friend.
By moving your pots into these sheltered spots, you can capture that stored heat, which then radiates back onto your plants overnight. This simple shift can protect them from early frosts and keep cool-weather crops like kale and spinach going for weeks longer. For more tips on keeping your garden happy all year, check out a basic guide to year-round garden care.
5 Common Container Gardening Questions Answered
Even with a plan, you're bound to run into a few head-scratchers along the way. That's not just normal—it's part of the fun of learning to grow! Below are some of the most common questions I hear from new container gardeners, with straightforward answers to get you back on track.
1. What Are These Tiny Bugs Flying Around My Pots?
If you're seeing little black, gnat-like flies buzzing around your pots, you've met fungus gnats. They love soil that stays consistently damp. The best way to show them the door is to simply let the top 1-2 inches of soil dry out between waterings. This one change makes the soil a terrible nursery for their larvae and breaks their life cycle.
2. Why Are My Tomato Plant's Leaves Turning Yellow?
Yellow leaves are your tomato plant's way of telling you something's wrong. For beginners, it's almost always a problem with water or food.
- Too much love (water): Are the bottom leaves yellowing first, and does the soil feel heavy and wet? You're likely overwatering. Cut back and let the soil dry out a bit.
- The plant is hungry: If the yellowing is more widespread or new leaves look pale, it's probably a nutrient issue. A quick dose of a balanced liquid fertilizer should perk it right up.
3. Can I Reuse Potting Soil from Last Year?
Yes, you absolutely can—and you should! First, dump the old soil onto a tarp and break up all the clumps, pulling out any old roots. To bring it back to life, mix in fresh organic material. I find a good ratio is about two parts old soil to one part fresh compost. A handful of slow-release granular fertilizer will give it the final boost it needs for the new season.
Think of it like this: your old soil is a good soup stock. It has flavor, but you need to add some fresh vegetables (compost) and seasonings (fertilizer) to turn it back into a nourishing meal for your new plants.
4. How Do I Know When My Vegetables Are Ready to Pick?
This is the best part! Knowing the right moment to harvest is the key to incredible flavor.
- Leafy Greens: For things like lettuce and spinach, you can start harvesting the outer leaves as soon as they look big enough for a salad. This is called the "cut-and-come-again" method.
- Tomatoes & Peppers: Color is your best friend here. They're ready when they’ve reached their final, deep, and uniform color.
- Radishes & Carrots: Check the tops, or "shoulders," of the root right at the soil line. If it looks wide enough to eat, give one a gentle pull.
5. What If I Don't Have a Sunny Balcony?
Don't let a shady spot stop you! While you might have to skip the big sun-lovers like tomatoes and peppers, plenty of delicious vegetables do just fine—and even prefer—a bit of shade (4-6 hours of sun is perfect).
Leafy greens are your best bet:
- Lettuce
- Spinach
- Kale
- Arugula
- Swiss Chard
In fact, these often taste better when they're protected from the scorching afternoon sun.
Ready to put all this knowledge to work with seeds you can trust? At Homegrown Garden, we've hand-picked a collection of high-quality heirloom seeds, easy-to-use kits, and all the supplies you need to grow with confidence. Let us help you get started.
Shop Heirloom Vegetable Seeds and Starter Kits at Homegrown Garden

