


You’re staring at that tray of soil, waiting for the magic to happen. So, how long does it take for tomato seeds to germinate?
The short answer is anywhere from 5 to 10 days. But as any seasoned gardener will tell you, that's just a ballpark figure. In reality, it can be a race to the finish line in just a few days or a slow-and-steady crawl that takes up to two weeks.
Your Complete Tomato Germination Timeline
Watching for those first tiny green sprouts to push through the soil is one of the most exciting moments for any gardener. The waiting game, however, can be nerve-wracking if you don’t know what to expect.
Think of a tomato seed as being in a deep sleep. Your job is to create the perfect "wake-up call," and that almost always comes down to one key factor: warmth. Consistent, gentle warmth is the single most important ingredient for coaxing those seeds to life.
A study of germination rates found that maintaining an ideal soil warmth of around 80°F (27°C) can encourage seeds to sprout in as little as 5 to 6 days. Cooler soil, on the other hand, puts the brakes on the whole process. For a deeper dive into this, Alex Grows Food has a great guide on how to sow tomato seeds.
So, what does this look like in the real world? It all depends on where you set up your seed tray. A tray sitting on a drafty, cool windowsill is going to have a very different schedule than one resting on a purpose-built heat mat.
Tomato Germination Timeline At a Glance
To help you get a clearer picture of what to expect, this table breaks down the typical germination times you'll see under common household conditions.
| Condition | Average Germination Time | Notes |
|---|---|---|
| Ideal (Heat Mat at ~80°F) | 4-6 Days | This is the fast lane. Consistent warmth tells the seed it's safe to sprout immediately. |
| Warm Room (Indoors) | 7-10 Days | A typical indoor room temperature (around 70°F) works well, just a bit slower. |
| Cool Room (Below 65°F) | 10-14+ Days | Germination will be slow and may be less consistent. Seeds are waiting for warmer weather. |
Getting a feel for these timelines helps you set up for success right from the start. By managing the environment, especially the temperature, you’re not just hoping for the best—you’re actively guiding your seeds toward a strong, healthy start.
The 7 Factors That Dictate How Fast Your Tomato Seeds Sprout
Have you ever started a few trays of tomato seeds at the exact same time, only to watch one group pop up in days while the other seems to take forever? It’s not just luck. A seed's decision to "wake up" and start growing is triggered by a very specific set of environmental cues.
Getting these factors right is the secret to predictable, speedy germination. When you understand and control these seven variables, you create the perfect environment for your seeds to burst to life.
1. Soil Temperature
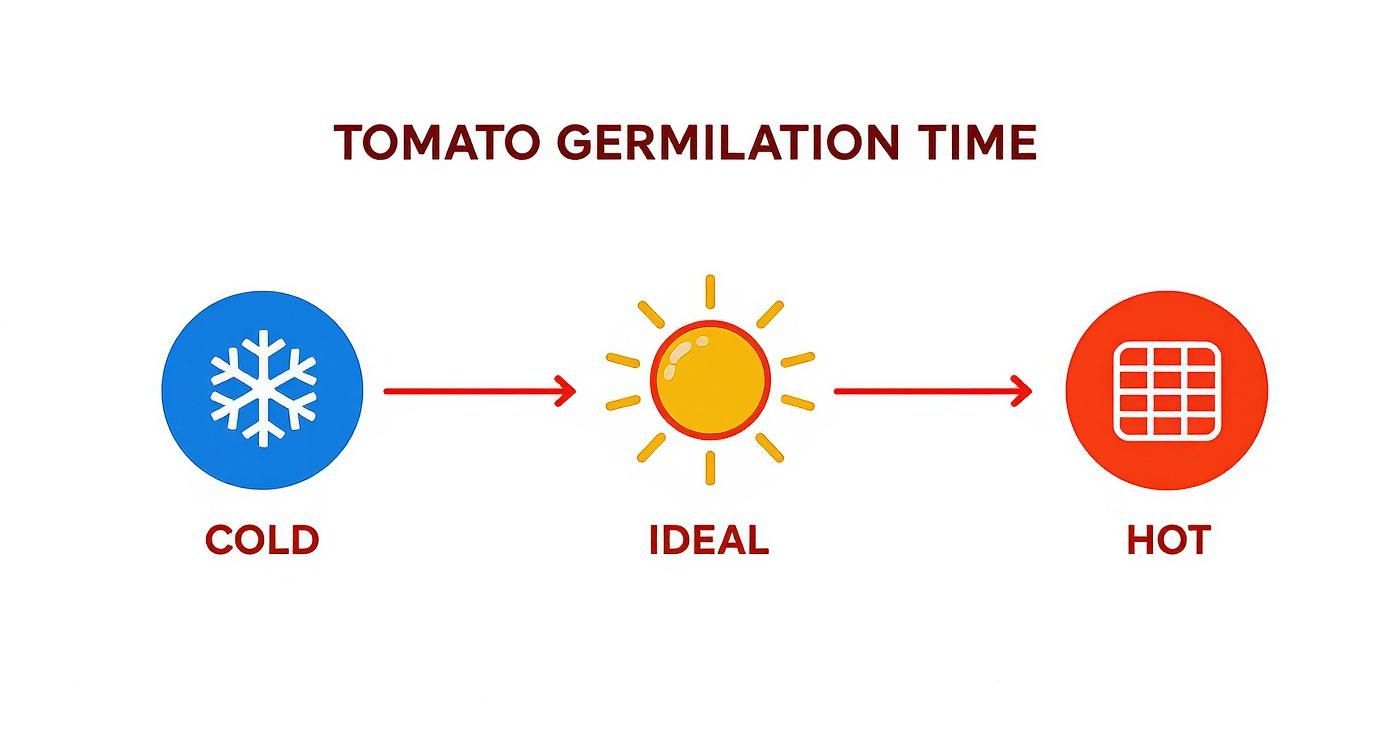
More than anything else, temperature is the undisputed king of germination speed. Tomato seeds are packed with dormant enzymes that only spring into action when things warm up. The absolute sweet spot for the fastest germination is a soil temperature between 75–85°F (24–29°C).
In that ideal range, you can see your first sprouts in as little as 4 to 6 days. Drop that temperature down to a cooler 60–65°F (15–18°C), and the whole process slows to a crawl, often taking up to two weeks.
This infographic really drives the point home, showing just how directly temperature impacts your timeline.
As you can see, a simple seedling heat mat isn't just a gadget; it's the most effective tool for ensuring your seeds sprout quickly and all at the same time.
2. Moisture Levels
Right alongside temperature is moisture. A seed has to absorb water to soften its tough outer coat and kickstart all the growth processes waiting inside. But this is a classic "Goldilocks" situation—it needs to be just right.
- Too Dry: If your soil dries out, even for a short time, the germination process will stall out and may fail completely.
- Too Wet: On the flip side, soil that is soggy and saturated can actually drown the seed by cutting off its oxygen supply, leading to rot.
Your goal is to keep the growing medium consistently damp, kind of like a wrung-out sponge. It should feel moist to the touch but never waterlogged.
3. Seed Age and Quality
Let's be honest: not all seeds are created equal. A seed's viability—its inherent ability to sprout and grow into a healthy plant—fades over time. Fresh seeds, especially those less than four years old, will almost always give you the best and fastest germination rates.
Older seeds can definitely still work, but you'll often find they take longer to sprout and you'll have more duds in the batch. To give your seeds the longest possible shelf life, always store them somewhere cool, dark, and dry.
If you've got an old packet of seeds you're not sure about, try a quick germination test. Just place a few seeds in a damp paper towel, seal it in a plastic bag, and see what percentage sprouts before you commit to planting a whole tray.
4. Tomato Variety
The specific type of tomato you're growing also has a small but noticeable effect. While most common varieties will pop up within that typical 5-to-10-day window, some are just naturally faster or slower than others.
As a general rule, smaller-fruited types like cherry tomatoes (think Sungold or Sweet Million) are known for being vigorous and quick to germinate. In contrast, some of the big, gnarly heirloom beefsteak varieties might take a few extra days to get moving. It's a minor factor, but it's something to keep in mind if you're growing multiple types side-by-side. If you want to dive deeper, this helpful seed germination temperature chart shows how different plants react to warmth.
5. Sowing Depth
This one is simple but absolutely crucial. One of the most common rookie mistakes is planting seeds way too deep. The perfect depth for tomato seeds is just 1/4 inch (about 0.6 cm). That's it.
If a seed is buried too deep, the tiny seedling can use up all of its stored energy just trying to fight its way to the surface and may die before it ever sees the light. Plant it too shallow, and it risks drying out or getting washed away when you water.
6. Growing Medium
The "soil" you choose can make or break your success. Never use heavy, dense soil straight from your garden. It compacts easily, drains poorly, and can be full of pathogens that cause "damping-off," a fungal disease that kills seedlings.
Always, always start with a sterile, light, and fluffy seed-starting mix. This stuff is engineered specifically for the job. It holds just the right amount of moisture while allowing for excellent drainage and airflow, giving your seeds the perfect disease-free start.
7. Light
Here’s a fun fact that surprises a lot of new gardeners: tomato seeds do not need any light to germinate. They actually sprout just fine—sometimes even better—in complete darkness. The magic is all happening underground.
Light only becomes critical the very moment that first little green sprout pokes through the soil. From that point on, you need to provide intense, direct light immediately. If you don't, the seedlings will stretch desperately toward any available light source, becoming weak, pale, and "leggy."
5 Pro Tips to Get Your Tomato Seeds Sprouting Faster
Sure, waiting 5 to 10 days for those first little green sprouts to appear is standard, but why wait if you don't have to? After years of starting seeds, I’ve learned a few simple tricks that really stack the deck in your favor. These techniques often shave days off the process and, just as importantly, get more of your seeds sprouting at the same time.
These five tips are all about creating that perfect, irresistible environment that tells every single seed it's time to grow. By getting the warmth and moisture just right, you can give your future tomato plants a powerful head start.
1. Give Your Seeds a Pre-soak
Think of a tomato seed's outer shell as a suit of armor. Before anything can happen, water has to get through that tough coating. You can give your seeds a huge head start by simply soaking them before you even put them in soil.
It couldn't be easier. Just drop your tomato seeds into a small bowl of lukewarm water for about 4 to 8 hours. Don't go much longer than 12 hours. This one simple step softens up the seed coat, letting the seed hydrate much faster once it's planted. The result is quicker, more uniform germination across your entire tray.
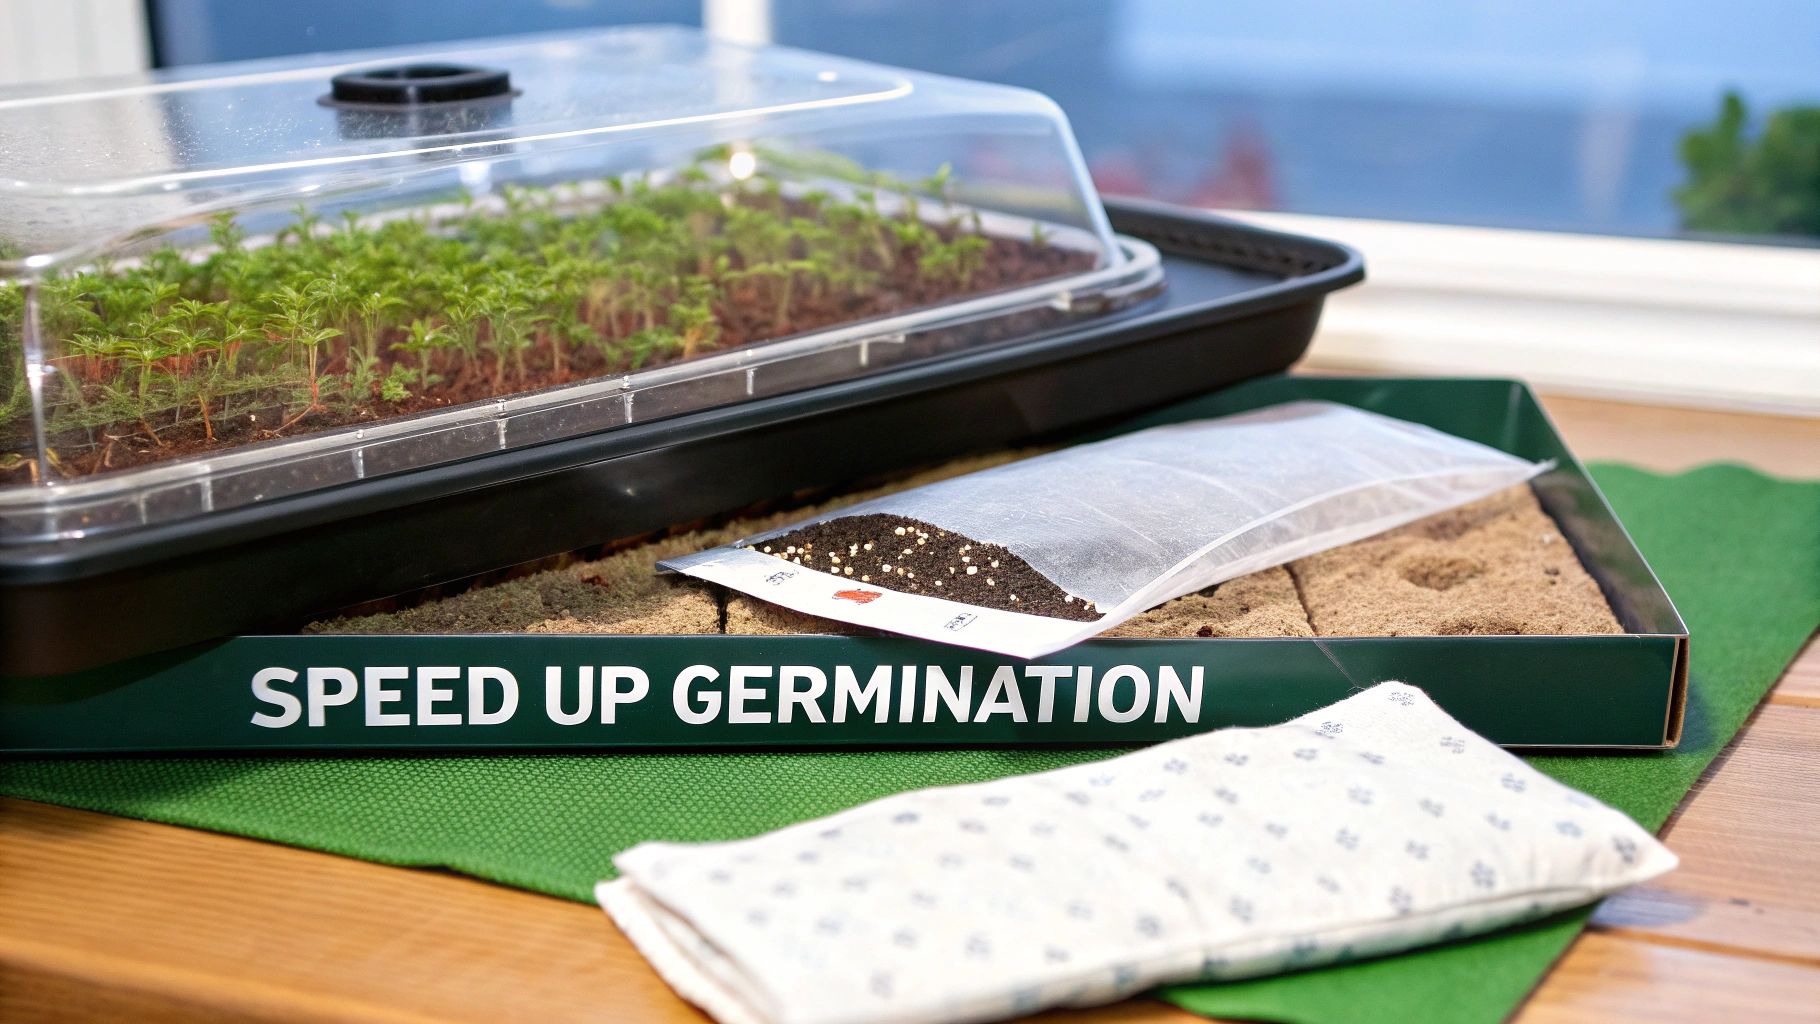
2. Use a Seedling Heat Mat
I can't stress this enough: temperature is the number one driver of germination speed. A warm room helps, but a seedling heat mat is a complete game-changer because it delivers consistent warmth right where it's needed—at the bottom of the tray. It is hands down the most effective tool for speeding up germination.
A heat mat keeps the soil in that ideal 75–85°F (24–29°C) sweet spot, even if the air in the room is a bit chilly. That constant, gentle warmth keeps the seed’s internal engine running at full speed.
With a heat mat, I consistently see tomato seeds pop up in just 3 to 4 days. This small investment pays for itself over and over in reliability and speed.
Once your seeds have sprouted and you see green, you can turn off and remove the heat mat. They won't need that intense bottom heat for the next stage of growth.
3. Create a Mini Greenhouse with a Humidity Dome
Consistent moisture is critical, but the soil surface can dry out surprisingly fast inside a warm house. A humidity dome—which is just a clear plastic cover for your seed tray—is the perfect solution.
It traps moisture, creating a wonderfully humid microclimate. This keeps the air around the seeds moist and the soil surface evenly damp without ever becoming a swamp. It’s the stable, cozy environment every germinating seed dreams of.
4. Master the Paper Towel Method
If you're dealing with older seeds and aren't sure if they're still good, the paper towel method is your best friend. It lets you check for viability before you waste any soil or tray space. As a bonus, it also happens to be one of the fastest ways to see sprouts.
Here's how it works:
- Get a paper towel damp, not sopping wet. You want it moist, not dripping.
- Place the seeds on one half of the towel, giving them a little space.
- Fold the other half over the seeds and slide the whole thing into a zip-top plastic bag.
- Keep it warm. The top of the refrigerator is a classic spot, or you can place the bag on a heat mat.
- Check it daily. Within a few days, you should see tiny white roots poking out. Once you do, gently transplant the sprouted seeds into your soil mix, root-down.
This method takes out all the guesswork and gives your viable seeds a running start before they even hit the dirt.
5. Start with a High-Quality Mix
Finally, don't sabotage all your hard work by using the wrong soil. The most common mistake I see is people using heavy garden soil. It compacts easily, drains poorly, and can be full of fungal spores that cause "damping-off," a disease that’s deadly to new seedlings.
Always, always use a sterile, light, and fluffy seed-starting mix. These blends are specifically designed to hold just the right amount of moisture while allowing for plenty of air circulation. This gives your new seedlings a clean, supportive, and disease-free home to get started in.
Starting Indoors vs. Direct Sowing in the Garden
When it comes to planting tomatoes, one of your first big decisions is where to start the seeds. Are you going to nurture them on a sunny windowsill indoors or plant them straight into the garden soil? The answer really boils down to your local climate and, more specifically, the length of your growing season.
Each path has its own set of trade-offs that directly affect how long your tomatoes take to germinate and get growing. Kicking things off indoors gives you a serious head start, but for those blessed with long, hot summers, direct sowing is a beautifully simple alternative. Let's dig into which method makes the most sense for you.
The Case for Starting Seeds Indoors
For most gardeners, especially those of us dealing with shorter growing seasons, starting tomato seeds indoors is the go-to strategy. Think of it as manufacturing your own little extension to the season—giving yourself an extra 6 to 8 weeks of precious growing time. This ensures your plants are big and strong enough to bear fruit before that first fall frost arrives.
The real beauty of starting indoors is the total control you have. You get to play Mother Nature, using heat mats and humidity domes to keep the soil at that perfect 75-85°F (24-29°C) sweet spot for germination. Sprouting is faster and far more reliable this way. Plus, you’re shielding those tiny, vulnerable seedlings from surprise cold snaps, hungry pests, and diseases right from the get-go.
The head start is everything. By the time your last frost date passes, you’re not planting a seed—you're planting a sturdy, well-developed seedling ready to thrive. This is how you maximize your harvest potential.
Want to nail down the timing? We've got a complete breakdown in our guide on when to start planting tomatoes indoors.
The Simplicity of Direct Sowing
Planting seeds directly into your garden bed is about as straightforward as it gets. But there's a big "if"—this method really only works for gardeners in regions with very long and reliably warm growing seasons. We're talking about places where the soil warms up to at least 60°F (15°C) early in the spring and stays that way.
The appeal is obvious: it's easy. You skip all the gear like seed trays and grow lights. You also get to dodge the whole process of "hardening off," which is the slow, careful dance of acclimating indoor seedlings to outdoor conditions. You just wait for the soil to warm up, pop the seeds in, and you're done.
However, for most people, the risks outweigh the simplicity. Germination is a gamble, completely dependent on the weather. An unexpected cold front can halt everything or even kill the seeds. Your plants will also be much further behind their indoor-started counterparts, meaning your first juicy tomato will arrive much later in the summer.
Indoor Sowing vs Direct Sowing for Tomatoes
So, which is the right call? Let's put the two methods side-by-side to make the choice crystal clear. This table lays out the key differences to help you decide what fits your garden and your goals.
| Aspect | Starting Seeds Indoors | Direct Sowing in Garden |
|---|---|---|
| Best For | Gardeners in most climates, especially those with short growing seasons. | Gardeners in regions with very long, warm growing seasons (e.g., zones 8+). |
| Timing | Start 6-8 weeks before the last frost date. | Plant after all danger of frost has passed and soil is at least 60°F (15°C). |
| Germination | Fast and consistent (5-10 days) due to controlled heat and moisture. | Slower and more variable, highly dependent on weather conditions. |
| Harvest Time | Earlier harvest, maximizing the growing season. | Significantly later harvest. |
| Effort | More initial work: requires trays, soil, light, and hardening off. | Minimal effort: plant seeds and water. |
| Plant Survival | Higher survival rate; seedlings are protected during their most fragile stage. | Lower survival rate; seeds and seedlings are exposed to pests, weather, and disease. |
Ultimately, starting your tomato seeds indoors is the most reliable path to a bountiful harvest for the vast majority of home gardeners. It gives you the control and the head start needed to make the most of whatever growing season you have.
How Seed Freshness Impacts Germination Success
Let's talk about one of the biggest, yet often overlooked, factors in germination: the age and condition of the seed itself. It's easy to grab a packet off the shelf and assume every seed inside is raring to go, but a seed's history matters. A lot.
Think of a seed as a tiny, living plant embryo in suspended animation. It has a finite amount of stored energy to get itself started. Over time, that energy reserve dwindles, which is why older seeds can be sluggish or fail to sprout altogether. This vitality is what we call viability.
The Advantage of Fresh Seeds
Have you ever seen a "volunteer" tomato plant pop up in your compost pile? That’s the power of a fresh seed. Seeds taken straight from a ripe tomato are already hydrated and surrounded by the natural germination-promoting enzymes in the fruit's pulp. They're essentially primed and ready, living in the exact environment nature designed for them to sprout.
This isn't just a gardener's hunch, either. The difference can be pretty dramatic. One study showed that a whopping 82.5% of fresh tomato seeds sprouted within just seven days. Compare that to dried, commercially prepared seeds, which had a germination rate of only 49% in the same timeframe. The fresh-seed seedlings were also more vigorous, with roots growing more than twice as long. You can dig into the specifics of these findings on seed performance if you're curious.
Key Takeaway: While packaged seeds are absolutely reliable, fresh seeds have a natural head start with more moisture and active enzymes, often leading to faster and stronger sprouting.
Storing Seeds for Future Success
Now, this doesn't mean you should toss out your seed collection! Far from it. Commercial seeds are dried for a reason—it prevents mold and stops them from sprouting in the packet, keeping them viable for years when stored properly. The ideal spot is somewhere cool, dark, and dry.
But if you've got a packet of seeds that's been kicking around for a few seasons, it’s a smart move to check if they're still good before you commit a whole tray of soil to them. You can save yourself a lot of time and guesswork by doing a quick viability check. We walk you through a simple method in our guide on how to perform a germination test for your seeds. It's a simple step that can make all the difference.
Why Haven't My Tomato Seeds Sprouted?
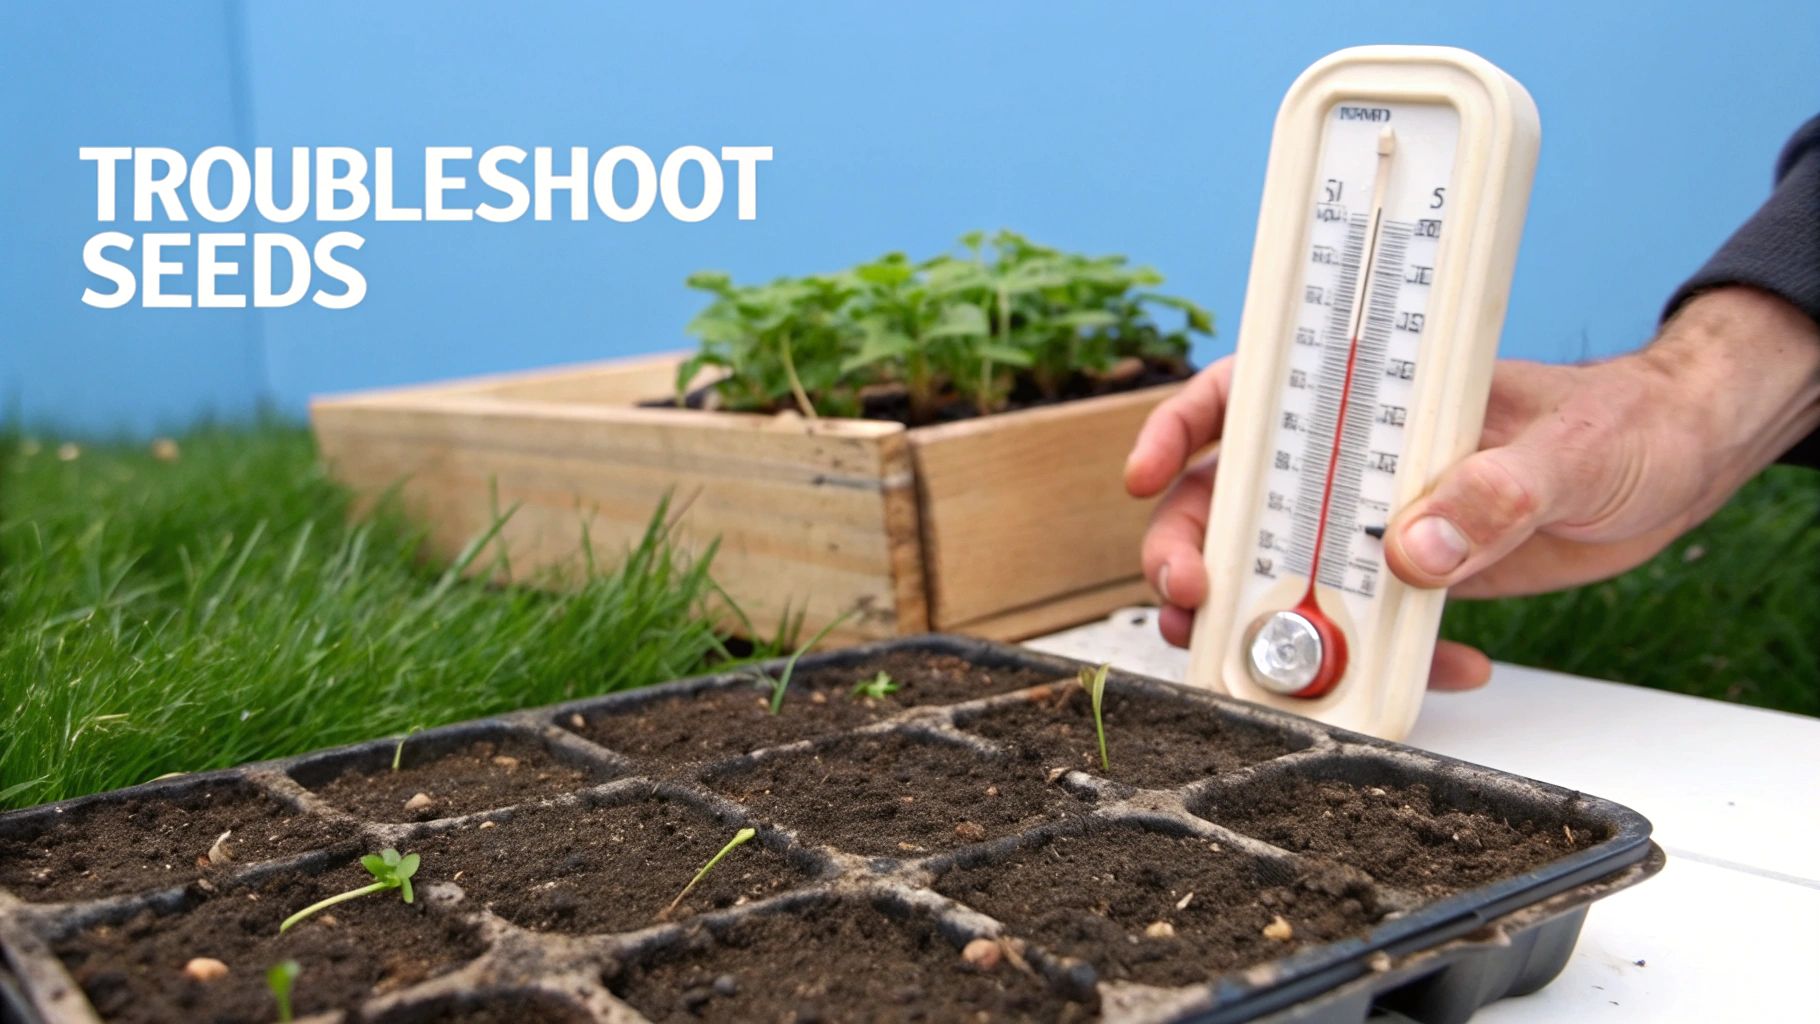
It's one of the most frustrating moments for any gardener: staring at a tray of soil for over a week with absolutely nothing to show for it. It can feel like a total failure, but don't dump that tray just yet. Let's do a little detective work first.
When seeds refuse to sprout, it's rarely a mystery. The cause almost always boils down to one of a few common, and usually fixable, issues. Think of it as a checklist: temperature, moisture, planting depth, and the age of the seeds themselves.
Pinpointing the Problem
Let's walk through the four most common reasons your seeds might be on strike. More often than not, the culprit is right here.
- The Soil is Too Cold: Seeds are smart. They won't wake up from dormancy until they sense the right conditions, and warmth is the biggest signal. If your soil is consistently below 65°F (18°C), they'll just wait, sometimes indefinitely. A simple soil thermometer can tell you for sure. If it's too chilly, a heat mat is the fastest way to fix it.
- Too Much or Too Little Water: Moisture management is a delicate balance. Bone-dry soil means the germination process can't even start. On the flip side, a waterlogged, swampy mix will suffocate the seed and encourage rot before it ever has a chance. You're aiming for the consistency of a well-wrung-out sponge—moist all the way through, but not dripping wet.
- You Planted Them Too Deep: It’s an easy mistake to make. That tiny seed only has a finite amount of stored energy to push its first little leaves up to the light. If you bury it much deeper than the recommended 1/4 inch, it might run out of fuel before it breaks the surface.
- The Seeds are Old or No Longer Viable: Seeds are living things, and they don't last forever. Their ability to sprout, known as viability, drops off year after year. An old packet of seeds might mean slower, more sporadic germination—or none at all.
Factoring in Seed Age and a Bit of Patience
The age of your seeds has a massive impact on how long tomatoes take to germinate. While being patient is always part of the game, knowing what to expect from your specific seeds can save you a lot of anxiety. It's not just a question of if they'll sprout, but when.
Tomato seed germination times can vary dramatically based on their age, how they were stored, and the temperature you provide. In-depth tomato seed germination tests on nearly 1,600 seeds found that fresh seeds (under five years old) usually popped up within 5 to 8 days. But older seeds (over ten years) often took 10 to 20 days—and many still sprouted successfully!
So, finding an old seed packet doesn't automatically spell doom. It just means you need to give them more time and be extra diligent about keeping their environment, especially the warmth and moisture, absolutely perfect. By checking these key factors, you can often turn a tray of duds into a tray of future tomato plants.
Got Questions? Let's Talk Tomato Germination
Alright, let's tackle a few of the common questions that pop up when you're starting tomato seeds. Getting these little details right from the start can really set you up for a fantastic harvest down the road.
Do Tomato Seeds Need Light to Germinate?
Nope, they actually prefer the dark. Tomato seeds will happily sprout in complete darkness, tucked away under the soil.
Light only becomes a non-negotiable factor the second you see that first tiny green shoot break the surface. From that moment on, they need intense, direct light to grow strong and stocky. Without it, you'll get those infamous leggy, stretched-out seedlings that struggle to thrive.
Can I Use Egg Cartons to Start Seeds?
I know it’s a popular trick you see online, but I'd steer clear of it. The truth is, those little cardboard cups are just too small for a tomato seedling’s ambitious root system.
They also tend to get soggy and fall apart, which can create a perfect storm for fungal diseases like damping off. You'll have much better luck—and healthier plants—by investing in proper seed starting trays or making soil blocks.
Once you’ve got a tray full of happy little sprouts, the real fun begins! Nurturing them from tiny seedlings into fruit-producing powerhouses is the next step. For a complete walkthrough of that entire journey, check out this fantastic guide on growing tomatoes like a pro.

