


If you're looking for a way to give your plants the perfect amount of water without the daily guesswork, the best self watering planters are a game-changer. These clever containers handle the hydration for you, sometimes for weeks at a time. It’s a lifesaver for busy plant parents, frequent travelers, and anyone just starting their gardening journey.
7 Key Factors for Choosing the Best Self Watering Planters

But not all self-watering planters are created equal. To find the right fit, you need to look beyond aesthetics and dig into the features that really matter. The best ones are a smart combination of practical design and solid construction, ensuring your plants thrive with minimal fuss.
This hands-off approach makes them a fantastic tool for anyone exploring different container gardening ideas, as it takes the most common point of failure—watering—out of the equation.
Breaking Down the Core Components
Before you start shopping, let’s walk through what separates a great planter from an average one. Here are the seven essential factors I always tell people to look for:
-
Reservoir Capacity: This is simply how much water the planter can hold. A bigger reservoir means you can go longer between refills. It's a trade-off between size and convenience.
-
Watering Mechanism: How does the water get to the roots? Most use a simple wick system, which is incredibly reliable. Others rely on capillary action through porous materials.
-
Material Durability: For outdoor planters, you absolutely need UV-protected materials like high-grade polyethylene that won't crack or fade in the sun. For indoors, quality composites and ceramics are great choices.
-
Overflow System: This is a non-negotiable feature for outdoor pots. An overflow port prevents your plants from drowning during a heavy downpour, saving them from root rot.
-
Water Level Indicator: A simple float or clear window that shows you the water level at a glance. It's a small detail that makes a huge difference, so you're never left guessing.
-
Ease of Setup: A good planter shouldn't require an engineering degree to assemble. It should be intuitive to put together, fill, and start using right away.
-
Plant Compatibility: Think about what you want to grow. Deep-rooted plants like tomatoes need a deeper planter, while shallow-rooted herbs or succulents can thrive in smaller pots.
A well-designed self watering planter mimics nature by letting the plant's roots pull water up from below. This bottom-up approach encourages deeper, healthier root growth and drastically cuts down on water lost to evaporation.
To help you see how these features stack up in the real world, I've put together a quick comparison of some of the most popular and effective models out there.
Comparing the Top Self Watering Planters
This table breaks down the essential features of our top picks, including reservoir capacity, material, key mechanism, and ideal use cases for a quick comparison.
| Planter Model | Reservoir Capacity | Material | Watering Mechanism | Best For |
|---|---|---|---|---|
| Lechuza Classico | 0.7 Gallons | Polypropylene | Wick System | Indoor Houseplants & Herbs |
| Glowpear Urban Garden | 4.7 Gallons | HDPE Plastic | Integrated Reservoir | Outdoor Vegetable Gardening |
| Santino Self-Watering | 0.3 Gallons | UV-Resistant Plastic | Capillary Action | Small Flowers & Succulents |
| Urbanscape Kingston | 15 Gallons | Polyethylene | Wicking Chamber | Large Outdoor & Commercial Spaces |
As you can see, the right choice really comes down to what and where you're planting. A small herb garden on your kitchen windowsill has very different needs than a row of tomato plants on a sunny patio.
7 Tips For What to Look For in a Self-Watering Planter
Before you jump in and buy one of the best self watering planters, it helps to know what you’re actually looking for. Not all of them are built the same, and the little details can make a big difference in how well your plants thrive.
Let's break down the 7 essential features to compare so you can choose a planter that truly works for you and your green friends.
1. It All Starts with the Reservoir
The reservoir is the heart of the whole operation. It’s where the water is stored and how it gets to the soil, and there are two main ways these systems are designed: wicks vs. columns.
Some planters use an integrated column, which is basically a tube that runs down into the reservoir, delivering water directly into the root zone. I’ve found these are great for larger pots because they hold more water and are super easy to refill.
Others use a capillary wick system. This is a simple but effective method where a porous rope or strip of material literally pulls water up from the reservoir into the soil. It’s a gentler, more gradual way to water, which is perfect for smaller pots and plants that don't like to be drenched.
- Integrated Column: This design is a workhorse. It gets water right where it needs to go without disturbing the soil, making it a solid choice for plants with deeper roots.
- Capillary Wick: Wicks are fantastic for compact setups. Just remember that the wicks themselves will need to be replaced every so often to keep them from getting moldy or clogged.
2. How Well Will It Hold Up? Material Matters
The material of your planter isn't just about looks; it's about longevity. A beautiful ceramic composite pot adds a touch of class indoors but can easily chip if you’re not careful. On the other hand, a good quality, BPA-free plastic can handle the sun's harsh UV rays and the occasional knock without shattering.
| Material Type | Durability Factor | Best Use Case |
|---|---|---|
| Ceramic Composite | Moderate | Indoor designer pots |
| UV-Stabilized Plastic | High | Outdoor & high-sun areas |
3. Smart Features: Automation for a Hands-Off Approach
Some modern planters come with smart sensors that take the guesswork out of watering. These systems can tell when the soil is dry and water accordingly, or even hold off when it's humid. It’s this kind of tech that has made self-watering planters so popular.
In fact, the market for smart self-watering systems is growing fast, with a projected CAGR of 12.8% through 2030, largely because it makes gardening so much more accessible. You can dig into more of the data on smart self-watering systems here.
“Automation transforms a standard planter into a dynamic caretaker, adjusting water flow to plant needs.” – Gardening Expert Jane Doe
4. Don't Forget Drainage and Overflow
Proper drainage is non-negotiable. Without it, you’re just inviting root rot. A good self-watering planter will have an overflow port to let excess water escape. When you pair this with a clear water-level indicator, you have a foolproof system that tells you exactly when to water and prevents you from overdoing it.
When you're inspecting a planter, here's what to check:
- Look at where the drainage holes are. You don't want water pooling right at the base of the stems.
- Make sure the overflow point makes sense for your plants. Shallow-rooted plants can't handle a deep water level.
- See if it has removable plugs. These are a lifesaver for cleaning or prepping the pot for winter.
5. Match the Planter to the Plant
This is where your expertise as a plant parent comes in. Different plants have different needs. Succulents and cacti, for instance, hate wet feet. For them, a shallow reservoir with a wick system is ideal because it prevents the soil from ever getting soggy.
On the other hand, thirsty plants like leafy greens and herbs will love a deep-column reservoir that can keep them consistently moist for 2–3 weeks at a time. And if you’re growing something particularly fussy, like a tropical plant, a smart planter with sensors can be a game-changer during a heatwave.
- Succulents and Cacti: Go for a wick setup with a smaller reservoir to avoid root rot.
- Leafy Greens and Herbs: An integrated column is your best bet for steady, long-lasting hydration.
- Tropical and Fussy Plants: A planter with smart moisture sensors will give you the precise control you need.
Matching the features to the plant is the key to making these systems work for you, not against you.
6. Keeping It Clean and Maintained
Nobody wants to spend hours scrubbing pots. Look for designs that are easy to take apart. Removable water gauges and reservoir plugs make seasonal cleaning and winter storage so much simpler.
A quick flush of the reservoir every now and then will prevent algae and mineral salts from building up. I've found that planters with smooth interior walls are much easier to keep clean—a quick rinse with a vinegar solution is usually all it takes.
7. A Quick Way to Compare
When you’re weighing your options, don’t be afraid to get organized. I often make a simple table to score planters based on what matters most to me: cost, ease of use, durability, and maintenance.
- Putting it all in a chart helps you see everything side-by-side and makes the best choice obvious.
Comparing the 4 Main Self-Watering Systems
https://www.youtube.com/embed/xT845t_yqiQ
Self-watering planters aren't all built the same. While the end goal is always a happy, hydrated plant, the way they get there can be surprisingly different. Getting a handle on these designs is the secret to picking the right pot for your specific plants and lifestyle, whether you're caring for a single succulent or a whole jungle on your patio.
The demand for these convenient gardening solutions is booming. The self-watering planter market is on track to hit a value of about USD 850 million by 2025 and is projected to climb past USD 1.5 billion by 2033. This isn't just a trend; it's a real shift in how we approach gardening. You can dig into the numbers yourself in the full market analysis from Data Insights Market.
So, let's look at the four main designs you'll encounter and see what makes each one tick.
1. Wick-Based Systems
This is the classic, most common design you'll find, and for good reason—it's simple and it works. Wick-based systems use a piece of absorbent cord (usually cotton or a synthetic blend) to pull water from a reservoir up into the soil. It all happens through a natural process called capillary action.
Imagine a string dipping into a glass of water; the string gets wet well above the water line. That's exactly how this works. The soil only sips up the moisture it needs, which makes this system incredibly gentle and a fantastic starting point.
- Best For: New plant parents, most small-to-medium houseplants, and especially plants that hate "wet feet," like African violets or many succulents.
- Maintenance: Super low. You might need to clean or replace the wick every couple of years if it gets clogged with mineral salts, but that’s a quick fix.
- Cost: Typically the most budget-friendly option out there.
2. Classic Reservoir Systems
Often called sub-irrigated planters (or SIPs), these are the real workhorses of the self-watering world. They have a water tank built right into the bottom, separated from the soil by a perforated barrier. A small channel filled with soil acts as a natural wick, letting the plant’s roots grow down to access the water as they please.
This design brilliantly mimics how plants find water in nature, drawing it up from the water table. The result is deeper, stronger root systems.
This bottom-up approach is incredibly efficient. Since the water is covered, you lose very little to evaporation. That means you conserve water and refill the reservoir less often.
3. Capillary Mat Systems
Here's a clever solution, especially if you're nurturing a collection of smaller plants. Instead of each pot having its own water source, a group of pots sits on a special absorbent mat. This mat is connected to a larger reservoir and stays consistently damp.
The mat essentially becomes a shared water source, wicking moisture into the bottom of every pot it touches. It’s a favorite trick used in greenhouses to keep seedlings perfectly watered without a ton of effort.
- Best For: Starting seeds from scratch, managing collections of small pots (like herbs or cacti), or any time you need to water lots of little plants at once.
- Maintenance: You'll need to keep the mat clean to prevent algae from growing. It’s also important to make sure the bottom of each pot is making solid contact with the mat.
- Cost: A great DIY option that can be very affordable, especially for a large number of plants.
This infographic can help you map your needs to the right planter style.
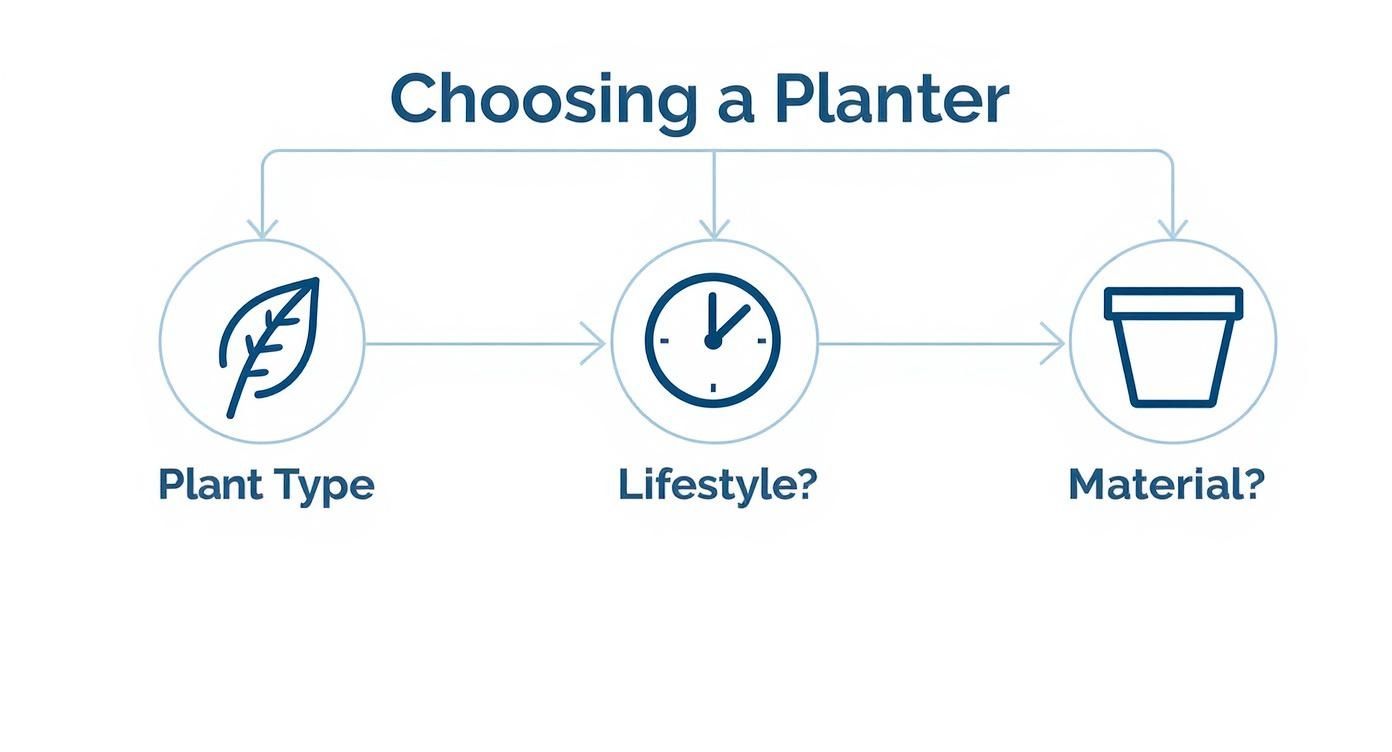
As you can see, a busy schedule might point you toward a classic reservoir system, while the specific needs of a prized plant could make a wick or even a smart planter a better fit.
4. Sensor-Integrated Planters
Welcome to the high-tech side of gardening. These "smart" planters use electronic sensors to monitor what’s happening in the soil—usually moisture levels, but sometimes humidity and light, too.
When the soil gets a little too dry, the system automatically triggers a pump to deliver just the right amount of water. It’s the ultimate solution for anyone who travels a lot or has a plant that demands precision.
- Best For: Tech enthusiasts, people with very expensive or finicky plants (hello, fiddle leaf fig!), and frequent travelers who need peace of mind.
- Maintenance: You’ll have to change batteries or recharge the unit. With more moving parts like sensors and pumps, there's also a bit more that could potentially go wrong compared to a simple wick.
- Cost: These are the most expensive planters by a wide margin, thanks to all the technology packed inside.
Self-Watering System Design Comparison
To make the choice even clearer, let's put these systems side-by-side. This table breaks down how each one stacks up on key factors like how often you'll need to water and which plants are the best fit.
| System Type | Typical Watering Interval | Maintenance Level | Average Cost | Ideal Plant Types |
|---|---|---|---|---|
| Wick-Based | 1-2 weeks | Low | $ | Most houseplants, moisture-sensitive plants (e.g., African violets) |
| Classic Reservoir (SIP) | 2-4 weeks or more | Low | $$ | Thirsty plants, vegetables, outdoor containers, large plants |
| Capillary Mat | 1-3 weeks | Medium | $ | Seedlings, collections of small pots (e.g., herbs, succulents) |
| Sensor-Integrated | 3-6 weeks or more | Medium | $$$$ | Finicky or high-value plants (e.g., orchids), tech-savvy gardeners |
Ultimately, there's no single "best" system—it's all about finding the right match for your plant, your budget, and your lifestyle. Hopefully, this comparison gives you a great starting point for making that decision.
6 Steps for Setting Up Your Planter for Success
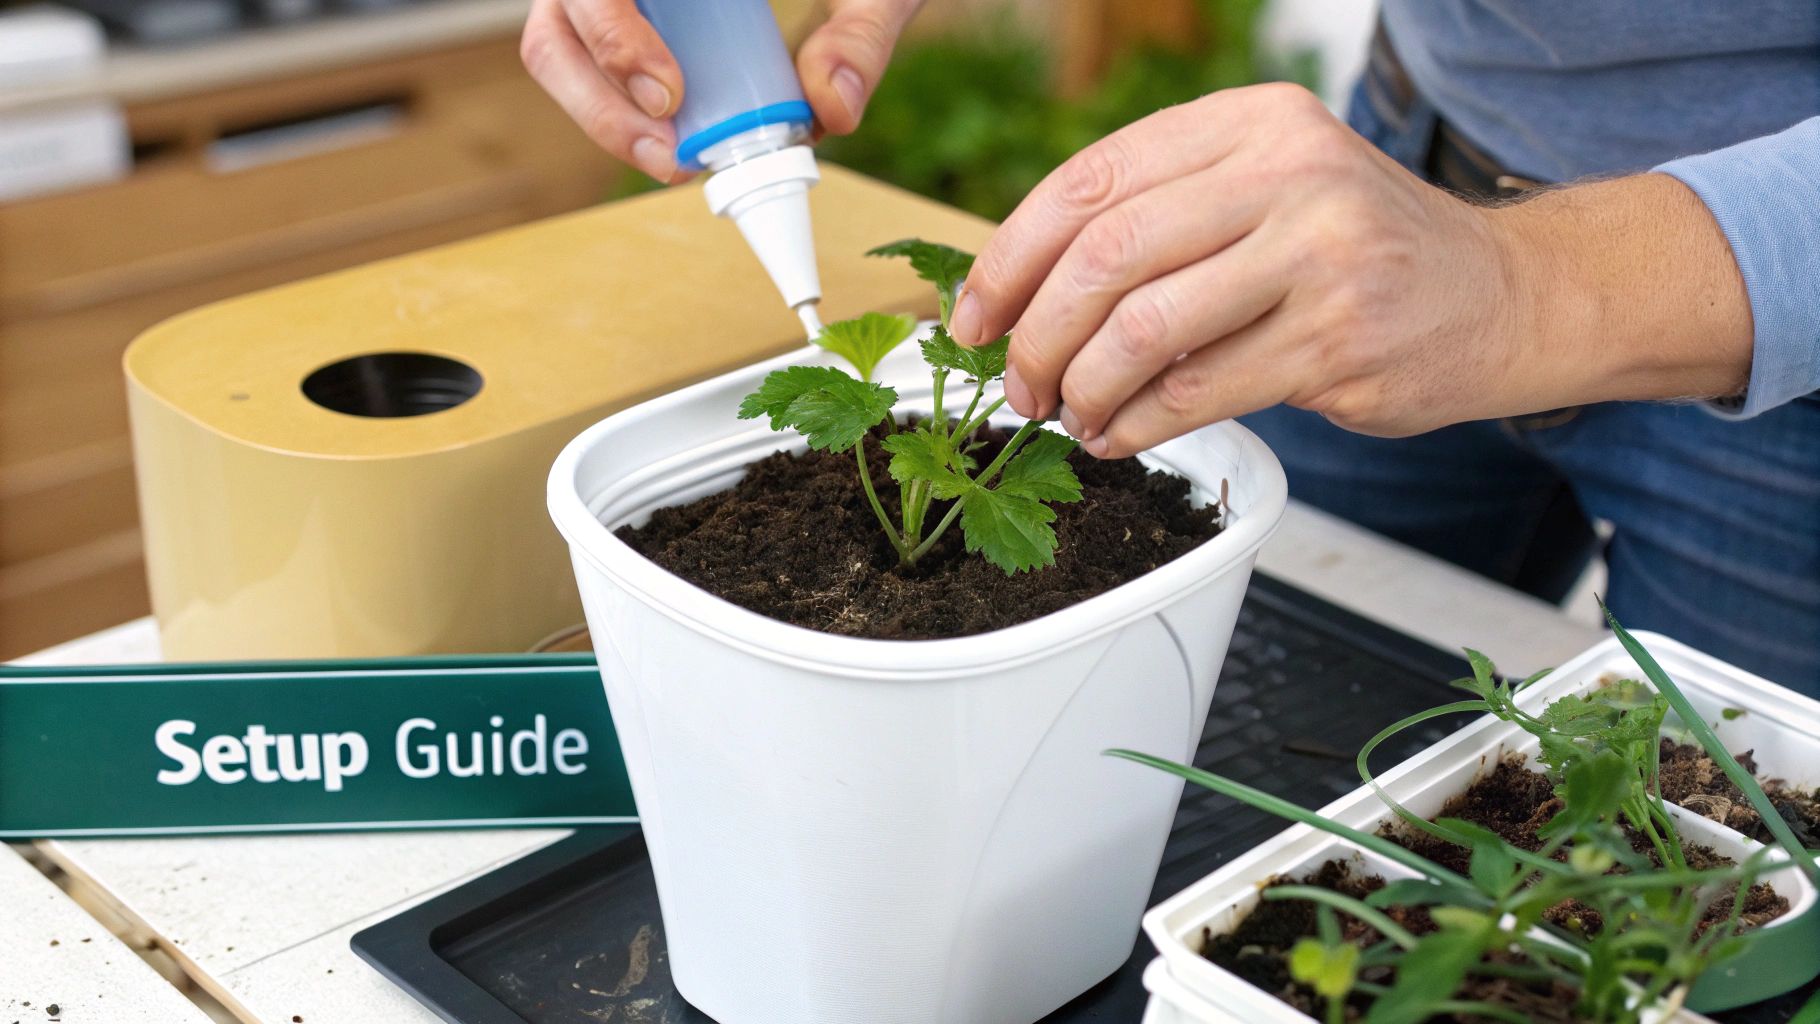
Getting your new self-watering planter set up correctly is the most important step. It’s the difference between a thriving plant and a frustrating experience. A little attention to detail during assembly ensures the reservoir and wicking system work exactly as they should.
Most problems I see, like leaks or dry soil, come from rushing through the setup. A loose connection at the fill port, for instance, can cause a slow leak, defeating the whole purpose of consistent moisture.
1. Initial Assembly Steps
First things first, unpack everything and lay it all out. Check the parts against the manual to make sure nothing is missing.
- Snap the main planter halves together. You should feel a solid click as the grooves align.
- Secure the fill port plug snugly and then insert the wicking chamber.
Taking a moment to confirm each piece fits perfectly will save you a headache later. It's also a good idea to check that the water-level indicator moves freely before you add any soil or water.
2. Priming the Reservoir and Wick
Before you even think about planting, you need to prime the system. This step is non-negotiable if you want that seamless capillary action to work its magic and prevent a dry, clogged wick.
- Fill the reservoir about halfway with clean, room-temperature water.
- Completely submerge the wick in the water to get it fully saturated.
- Let it all sit for about 15 minutes before you start adding soil.
| Stage | Pro Tip |
|---|---|
| Fill Reservoir | Always use room-temperature water to avoid shocking the plant's roots later on. |
| Prime Wick | Gently press on the wick while it's submerged to squeeze out any trapped air pockets. |
A properly primed wick is your guarantee that the planter will do its job, self-regulating moisture for 2–3 weeks before you need to refill it.
Of course, a great planter is only part of the equation. Having quality tools makes everything easier, so it’s worth looking into the best garden tool brands to round out your gardening kit.
And for more great advice on container systems, check out our guide on container gardening tips.
3. Positioning for Optimal Absorption
Where you place your planter matters. Find a spot that gets plenty of bright, indirect light, as this helps the wick deliver moisture at a steady, even pace.
- Always keep the planter on a completely level surface. If it's tilted, water won't distribute evenly.
- Try to avoid letting intense afternoon sun hit the fill port directly, which can heat the reservoir.
- Good air circulation around the plant's leaves is key to preventing fungal issues.
4. Adding Soil and Planting
Your choice of soil is critical. You’ll want a light, well-draining potting mix that won’t compact and clog the wick.
- Start by adding a base layer of soil, gently firming it around the wick to ensure good contact.
- Position your plant right in the center, making sure it's at the correct depth for stability.
- Fill in around the roots, leaving 1–2 inches of space at the top for easy watering and adding mulch if you'd like.
This method prevents the soil from becoming a dense brick, which gives the roots plenty of room to grow strong.
5. Seasonal Adjustments
Your plant’s needs will change with the seasons, especially when it comes to water. Both indoor and outdoor plants will respond to shifts in light and temperature, so you’ll need to adjust your refill schedule.
- Summer: Check the reservoir at least once a week. Plants are thirsty when it's hot and sunny!
- Winter: You can likely cut back on refills by half. Also, move plants away from cold drafts.
- All Year: Give the planter a quarter turn every month so all sides of the plant get even light.
Calibrating your care with the seasons helps your plant thrive all year round.
6. Troubleshooting Common Issues
Even with a perfect setup, you might run into a hiccup now and then. Don't worry, most issues are an easy fix.
- Dry Wick: The wick has probably lost contact with the water. Just pull it out, give it a good soak, and reinsert it.
- Waterlogged Soil: You likely overfilled the reservoir. Pop open the overflow drain and let the excess water escape.
- Stuck Indicator: The float arm might be jammed. A gentle wiggle should be enough to get it moving freely again.
A quick glance at the reservoir level and the wick every so often can stop small problems before they impact your plant's health. It’s all about simple, preventive care.
With these steps handled, your planter is primed and ready to go. Now you're all set to move on to the fun stuff—adding nutrients, choosing companion plants, and fine-tuning the environment for a truly flourishing garden.
5 Ways to Match Planters to Plants and Lifestyles
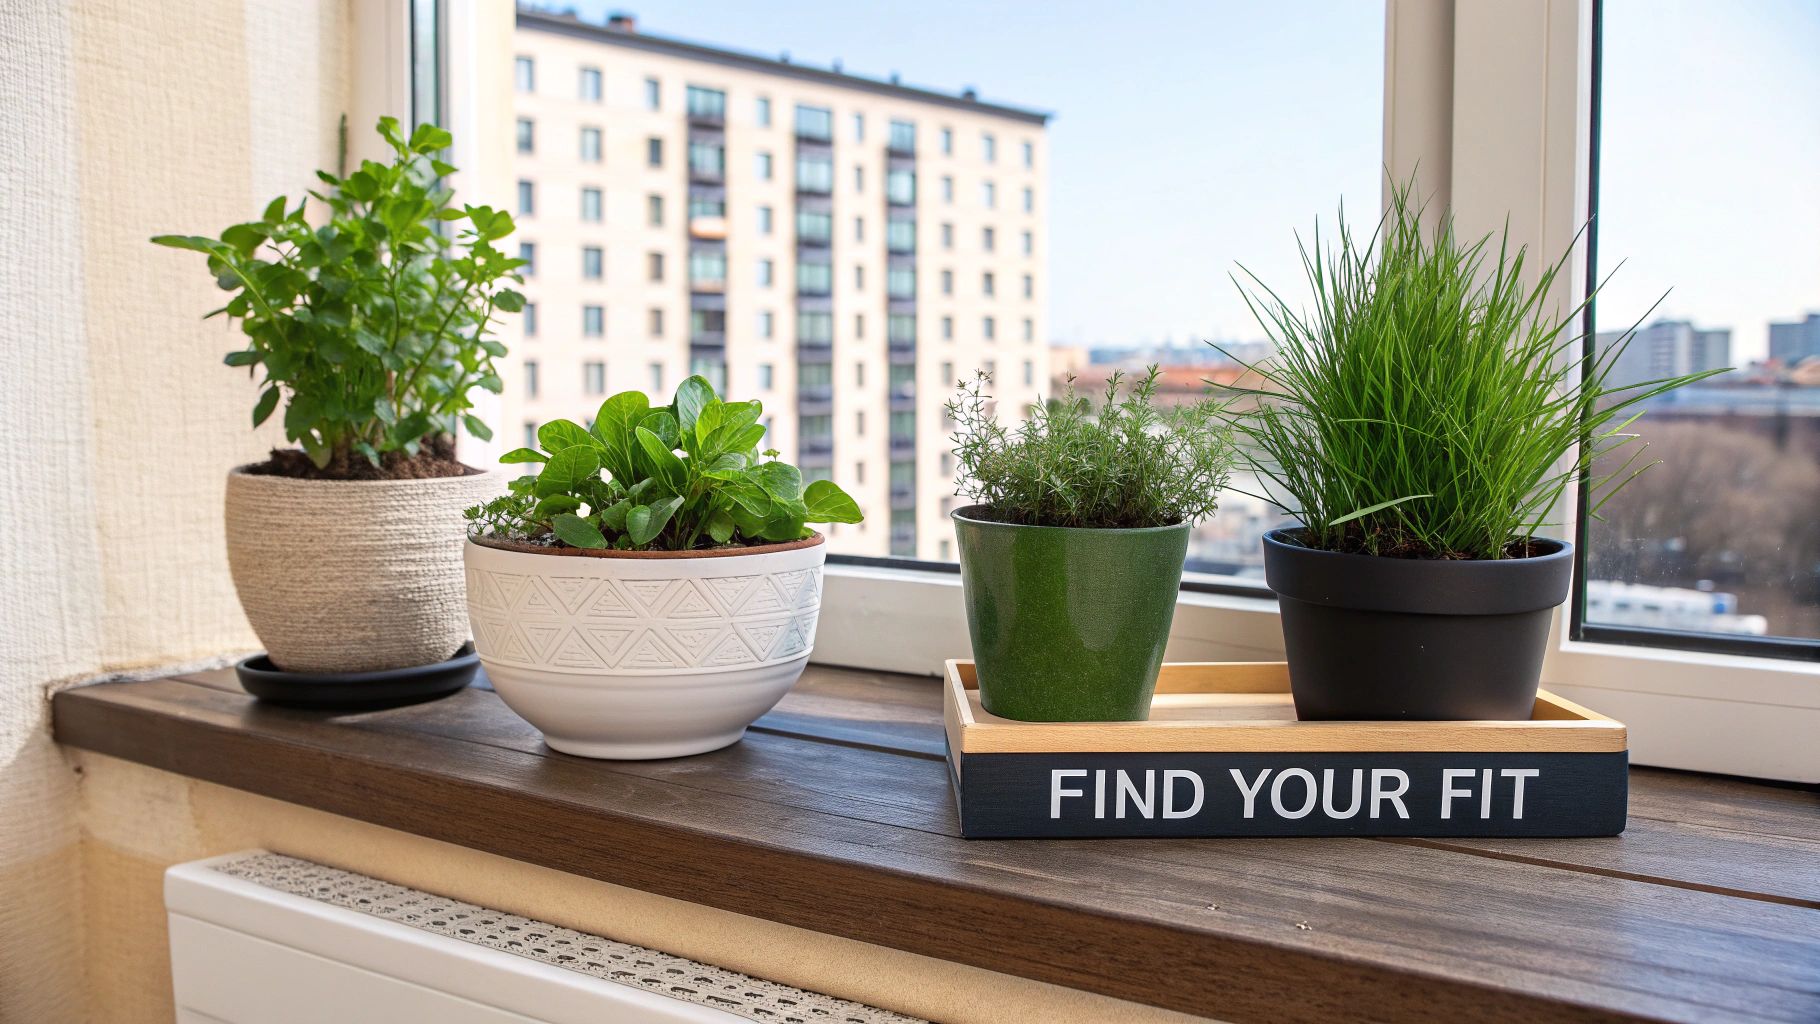
Think of a self-watering planter as more than a pot—it’s a mini-habitat shaped by your routine and your plants’ needs. When you sync daily life with the planter’s delivery, your greenery stays healthy whether you’re in or out.
A jet-setting professional’s low-light fern needs something completely different from a kitchen herb setup. And tropical houseplants demand far more humidity than desert succulents. Let’s explore 5 scenarios for the best fits.
1. For the Frequent Traveler or Busy Professional
You need a reservoir that holds plenty of water and forgets about refills. A sub-irrigated planter (SIP) with at least 1 gallon of capacity can hydrate plants for 2-4 weeks, leaving you stress-free on long trips.
2. For the Beginner Herb Gardener
Fresh basil and parsley without daily watering? A compact wick-based system on your windowsill offers just enough moisture. For more ideas on container veggies, see container vegetable gardening ideas.
3. For the Succulent and Cacti Collector
Overwatering is a cactus’s worst enemy. A shallow reservoir paired with an efficient wick keeps the soil damp but never soggy, preventing root rot while allowing the top layer to dry out.
4. For the Avid Tropical Plant Enthusiast
Calatheas, ferns and their humidity-hungry peers thrive on consistency. A smart planter with moisture sensors adjusts water flow in real time, stopping those crispy leaf edges before they start.
5. For the Outdoor Balcony Gardener
Sudden downpours can turn pots into ponds. Look for UV-stable polyethylene bodies with overflow drains. You still get a generous reservoir, plus a built-in escape hatch for excess rainwater.
Matching Planter Designs To Specific Plant Needs
Different greenery, different thirst levels. A tomato plant will empty a small wick planter in days, while a snake plant might rot in a moist reservoir. Use this table to zero in on the right system:
| Plant Category | Ideal Planter System | Why It Works |
|---|---|---|
| Leafy Greens & Vegetables | Classic Reservoir (SIP) | Deep, steady watering fuels lush, continuous growth. |
| Flowering Annuals | Wick-Based System | Consistent moisture encourages blooms without oversaturating roots. |
| Moisture-Sensitive Plants | Shallow Wick System | Just enough hydration for succulents and cacti, avoiding root rot. |
A self-watering planter should cut down on moisture swings, creating the steady conditions strong roots crave.
No matter how advanced your planter, keep an eye on your plants. If you spot yellowing leaves, understanding why plants turn yellow helps you troubleshoot quickly. Pair your lifestyle and plant choices with the right planter, and you’ll enjoy a vibrant, low-maintenance indoor or balcony garden all year round.
5 Smart Steps for How to Choose and Buy the Right Planter
Once you've got a handle on the different self-watering systems and what your plants really need, you're ready to make a smart purchase. Picking out one of the best self watering planters isn't just a quick buy; it's a long-term investment. It really pays to look past the flashy marketing to find something that will genuinely serve your garden for years to come.
It's no surprise that the global market for these planters is booming. Valued at around USD 450 million in 2024, it's projected to shoot up to nearly USD 1.2 billion by 2033. That explosive growth tells you one thing: a lot of gardeners are discovering how valuable these systems are. If you're curious, you can explore more about this market trend and its projections.
To help you make a choice you won't regret, I’ve broken down the buying process into a practical, five-step guide.
1. Evaluate Material Quality and Durability
A planter’s material is its first line of defense against the elements, plain and simple. If you're shopping for an outdoor pot, keep an eye out for high-density polyethylene (HDPE) or other UV-stabilized plastics. These are specifically engineered to stand up to years of sun without fading, cracking, or turning brittle.
For indoor use, you have a bit more freedom to play with aesthetics, like ceramic composites or stylish recycled plastics. But no matter the material, always give it a good once-over for sturdy construction. A thin-walled pot might look sleek on the shelf, but it’s not going to hold up well.
"A planter's durability is a direct reflection of its material. Investing in UV-protected polyethylene for outdoor planters isn't just a recommendation; it's a necessity for longevity."
2. Decode Customer Reviews and Ratings
Customer reviews are pure gold, but you have to know how to sift through them. Don't get hung up on a single glowing or scathing comment; look for patterns. Are multiple people mentioning a leaky fill port? A flimsy water indicator? Or maybe a specific type of plant that seems to absolutely love that particular pot?
- Look for detailed reviews: The most helpful comments come from people who've owned the planter for at least a few months.
- Filter for your use case: Zone in on reviews from gardeners growing similar plants or using the planter in an environment like yours (say, a hot, sunny balcony).
- Ignore vague complaints: "Didn't work" is useless. "The wick dried out after two weeks" tells you something specific and actionable.
3. Balance Budget with Essential Features
It’s always tempting to grab the cheapest option, but price often reflects quality and key features. Spending a little more on a planter with a robust overflow drain, a reliable water level indicator, and a solid warranty can save you the headache and expense of replacing a failed pot down the road.
Set a budget, but be willing to flex a little for a planter that ticks all your non-negotiable boxes, like tough materials or a large reservoir. The best value isn’t the lowest price—it’s the planter that does its job reliably, season after season.
4. Understand the Warranty and Brand Support
A manufacturer's warranty tells you a lot about how much they stand behind their product. For outdoor planters, a good warranty should cover weather-related damage like cracking and fading for several years. The best in the business will even offer a 10-year warranty.
Before you buy, do a quick search on the brand’s customer service reputation. Are they responsive? Do they offer replacement parts like wicks or plugs? A supportive brand can be a real lifesaver if you ever run into trouble.
5. Identify Eco-Friendly and Sustainable Options
If you’re a sustainability-minded gardener, you're in luck. Many brands now offer planters made from recycled materials. Just look for labels that mention post-consumer plastics or other sustainable sources. These options work just as well but help reduce your environmental footprint.
Choosing an eco-friendly planter is a fantastic way to align your hobby with your values, ensuring your green thumb is helping create a greener planet.
9 Self-Watering Planter Questions, Answered
Got questions about your new self-watering planter? You're not alone. Here are 9 of the most common things people ask, along with some practical advice from my own experience.
1. How often do I need to refill the reservoir?
This is the number one question, and the answer really depends on the size of your pot. A medium-sized planter usually holds enough water for about 2–3 weeks.
Of course, smaller pots will need a top-up more often, maybe once a week. On the flip side, those big outdoor planters can sometimes go an impressive 4–6 weeks before you need to touch them.
2. Can I actually use these planters outside?
Absolutely! Most are built tough enough for both indoor and outdoor life. The key is to look for models made with UV-resistant materials so they don’t get brittle in the sun. Also, make sure it has an overflow drain—that’s non-negotiable for outdoor use to prevent a soupy mess after a rainstorm.
A few quick maintenance tips to keep things running smoothly:
- Glance at the water level indicator every so often. It’s the easiest way to know what’s going on inside.
- Keep the fill port clear of leaves or dirt. Clogs can stop the water flow completely.
- Give the wicking chamber a quick clean every 6 months or so to keep that capillary action working perfectly.
3. Help! My planter seems waterlogged.
Don't panic! The first thing to check is the overflow drain. It's probably just clogged. Pop it open to let the excess water escape. This simple step can save your plant from root rot and get the soil back to a happy moisture level.
I’ve found that a blocked overflow port is the culprit for overwatering 9 times out of 10. Keeping it clear is the most important part of outdoor self-watering planter care.
4. Are self-watering planters good for every type of plant?
They work wonderfully for most common houseplants that enjoy consistent moisture. However, plants that prefer to dry out completely, like many succulents and cacti, can be tricky. For them, I'd recommend a planter with a very gentle, slow-wicking system, or just stick to traditional top-watering.
5. Can I put fertilizer in the reservoir?
Yes, and it’s a great way to feed your plants! Just be sure to use a water-soluble plant food and dilute it to half-strength. Adding it directly to the reservoir delivers a steady, gentle supply of nutrients right to the roots without the risk of fertilizer burn.
Here’s the best way to do it:
- Always mix the fertilizer in a separate watering can first to make sure it’s fully dissolved.
- Pour it into the fill port slowly and carefully.
- About once a year, it's a good idea to rinse out the reservoir to clear out any mineral or salt buildup.
6. What do I do if the wick dries out?
If the wick isn't drawing water, it just needs a reset. Pull it out and give it a good soak in water for about 30 minutes. When you put it back, make sure it’s making solid contact with both the soil and the water in the reservoir.
7. What kind of soil should I use?
A light, fluffy, and well-draining potting mix is your best friend here. Look for mixes that contain perlite, vermiculite, or coarse sand. This texture prevents the soil from getting compacted and allows the wick to do its job efficiently.
8. How much water do these things really save?
Quite a bit, actually. Since the water is delivered underground, you lose far less to evaporation—often cutting surface evaporation by 50%. Studies have shown that this bottom-up approach can reduce your overall water use by up to 30% compared to traditional top-watering.
9. Is tap water okay?
For most plants, tap water is perfectly fine. If you live in an area with very hard water, you might eventually see some white mineral residue building up. If that happens, switching to filtered or rainwater is an easy fix.
With just a little attention, a self-watering planter takes all the guesswork out of watering. You get to sit back and watch your plants thrive.
Ready to find the perfect planter for your home? Explore our top picks at Homegrown Garden: https://www.homegrown-garden.com
Once your planter is set up, fill it with our vegetable seeds and start growing.

