


Growing sweet peas in a pot is one of my favorite ways to bring that incredible scent and classic cottage charm right up to the patio, even if you're short on garden space. The trick isn't complicated, but it all hinges on getting two things right from the start: picking a container that gives their roots room to run and choosing a variety that’s happy with container life.
1. Choose the Right Pot and Sweet Pea Variety

Before you even think about soaking a single seed, let's talk about setting the stage. A successful container of sweet peas is all about the partnership you create between the pot itself and the plants you grow in it. Get this combination right, and you're already halfway to a summer filled with fragrant bouquets.
What many gardeners don't realize is that sweet peas have surprisingly long taproots. They need to dive deep. If those roots hit the bottom of a shallow pot and have nowhere to go, the plant gets stressed. The result? Stunted growth and a disappointing lack of flowers. This is why pot depth is the one thing you can't compromise on.
Why Pot Size Matters
A pot that’s too shallow is the number one mistake I see people make. You need to give those roots the space they crave. Look for a container that's at least 40 cm (16 inches) deep and just as wide. A generous pot holds more soil, which means it won't dry out in a flash on a hot summer day.
The material can be anything from classic terracotta to modern composites, or even some stylish iron planters to create a real feature.
A great rule of thumb comes from the experts. The National Sweet Pea Society recommends a minimum pot volume of 20 litres. That breaks down to about 7 litres of compost per plant for vigorous 'Spencer' types and 5 litres for the more delicate 'Old Fashioned' varieties.
This isn't just about being generous; it's about providing the resources the plant needs to support lush, healthy vines that will flower for months. If you're new to growing in containers, our guide with essential container gardening tips has plenty of extra pointers.
Matching the Variety to Your Container
Sweet peas come in a surprising range of shapes and sizes, and you’ve got to play matchmaker between the plant's habit and its home.
- Climbing Varieties: These are the ones we all know and love, like the frilly, fragrant 'Spencer' types that can easily reach 2 meters (6-8 feet). They absolutely need a large, deep pot (think 20 litres or more) and a sturdy support, like a bamboo cane wigwam, built right in.
- Bush or Dwarf Varieties: Perfect for smaller spaces! Cultivars like 'Cupid' or the aptly named 'Patio Mixed' are brilliant for smaller pots, hanging baskets, and window boxes. They have a more compact, often trailing, habit and don't need much in the way of support.
Matching Sweet Pea Varieties to Pot Sizes
Use this guide to select the right container size for your sweet pea type, ensuring enough room for healthy root development and abundant flowers.
| Sweet Pea Type | Growth Habit | Recommended Pot Size (Per 3 Plants) |
|---|---|---|
| Dwarf/Bush (e.g., 'Cupid') | Compact, trailing, under 30 cm | 25-30 cm wide, 25 cm deep (approx. 10 litres) |
| Semi-Dwarf (e.g., 'Jet Set') | Bushy, climbing to 1 metre | 35-40 cm wide, 35 cm deep (approx. 15-18 litres) |
| Tall Climbers (e.g., 'Spencer') | Vigorous, climbing over 2 metres | 40-50 cm wide, 40 cm deep (approx. 20+ litres) |
By taking a moment to choose a compact variety for a smaller pot or giving a vigorous climber the large container it deserves, you're giving your plants the best possible head start.
2. Nail the Perfect Potting Soil Mix
Once you've picked out the perfect pot, the next move is all about what you fill it with. For sweet peas in containers, the soil isn't just dirt—it's their entire world. Unlike plants in the ground, they can't send roots deeper to find what they need. They rely completely on you for the right mix of food, water, and air.
The biggest mistake I see gardeners make is scooping soil straight from their garden beds. It seems logical, but that soil compacts like concrete in a pot, suffocating roots and creating a drainage nightmare. You need to create a custom mix that gives your sweet peas the rich, fluffy, free-draining foundation they crave. Get this right, and you're setting the stage for months of incredible fragrance and colour.
The Ideal Recipe for Container Sweet Peas
Think of this as baking a cake. Every ingredient has a job, and the right proportions are what make it work. The goal is a mix that holds moisture but never becomes a swampy mess, which is the fastest way to kill container plants.
For a big 20-litre pot, a simple blend works wonders. You're aiming for something that's packed with nutrients but also has great structure. A little effort here pays off massively down the line. We dive deep into the science behind this in our complete guide on how to make potting mix.
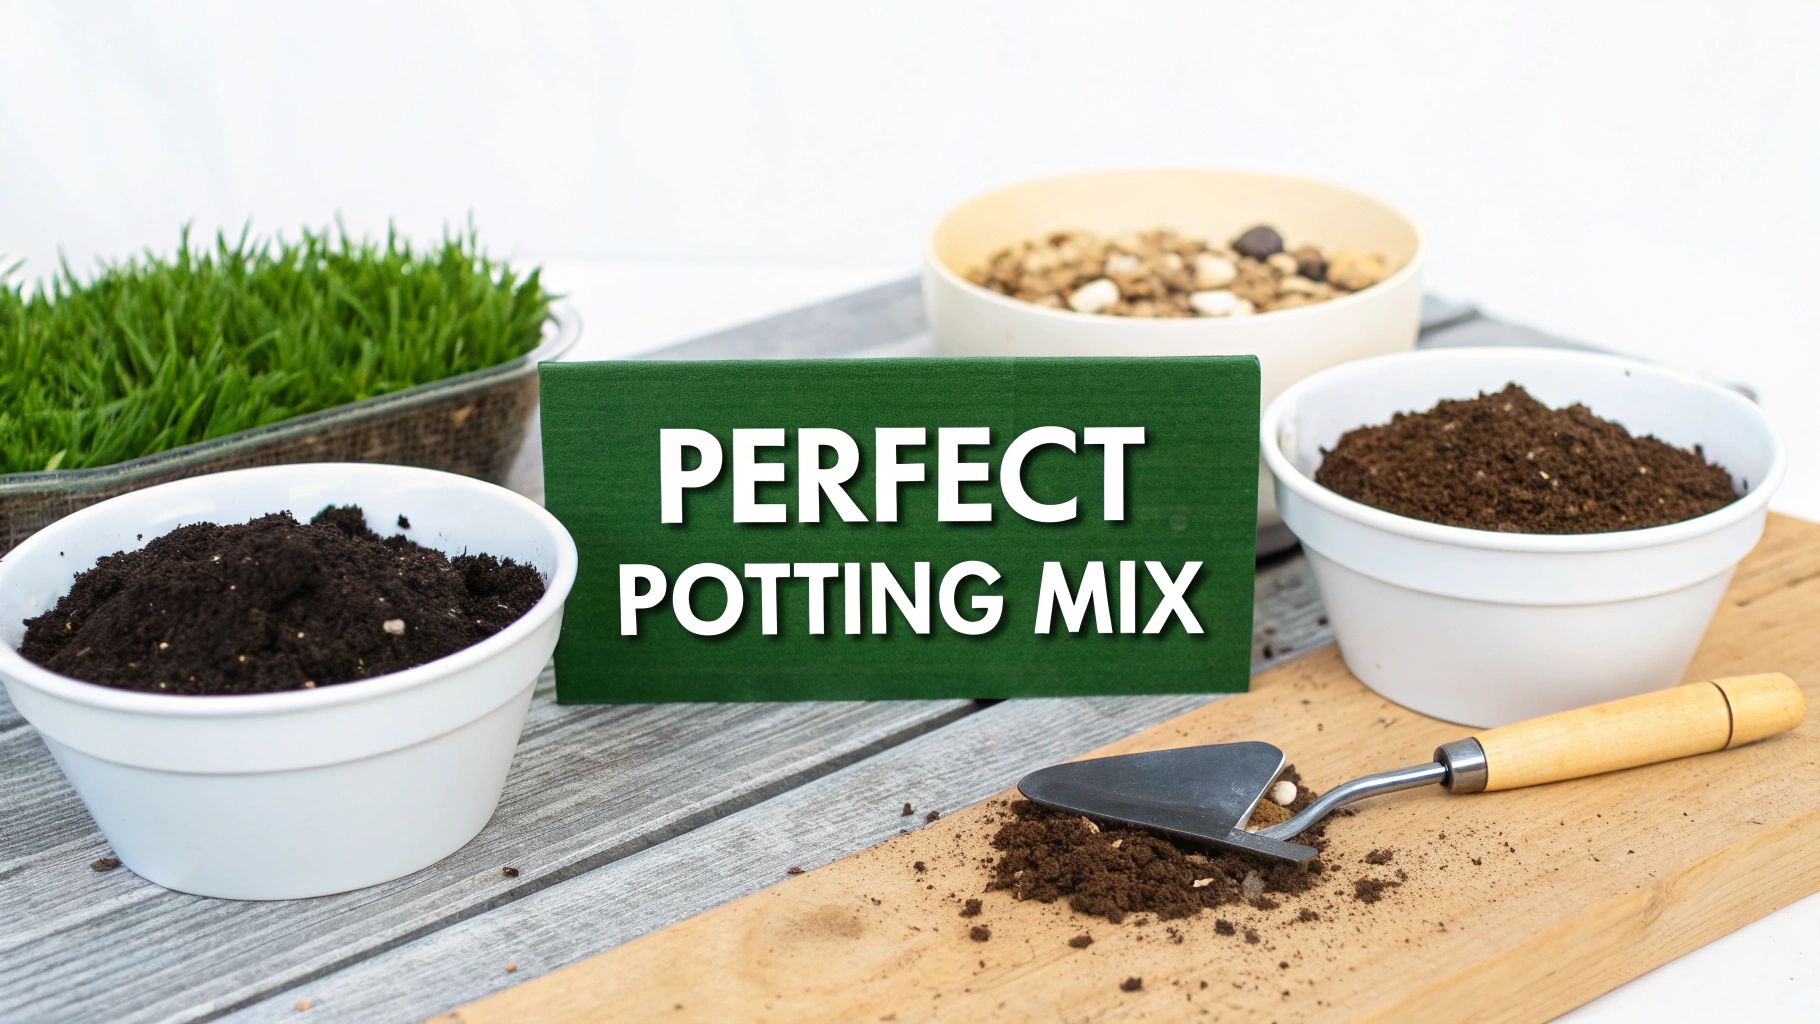
Here’s a fantastic recipe to get you started for one large pot:
- Two parts high-quality peat-free compost: This is the heart of your mix. It provides the rich organic matter and nutrients your sweet peas need to get going.
- One part perlite: Don’t skip this! These little white volcanic rocks are your secret weapon against compaction. They create essential air pockets, ensuring excellent drainage and happy roots.
- One part well-rotted manure or leaf mould: This is the slow-burn energy source. It enriches the soil, improves its texture, and feeds your hungry plants steadily over time.
My Go-To Tip: Mix everything together in a wheelbarrow or on a tarp before it goes into the pot. This guarantees a consistent blend from top to bottom, so every single seed gets the same perfect start.
Give Your Plants a Running Start
Want to really set your sweet peas up for a stellar season? Add a long-term food source from day one. Compost and manure are great, but sweet peas are greedy feeders and will exhaust that initial supply pretty quickly.
Before you plant, mix a balanced, granular slow-release fertilizer right into your soil. This acts like a fully stocked pantry for your plants, providing a steady stream of nutrients over several months. It's a simple step that builds a strong foundation, preventing the sad, yellowing leaves and spindly stems that come from early nutrient shortages. Your sweet peas will have all the fuel they need for a long and spectacular flowering season.
3. Get Your Seeds Started Right
Okay, you’ve got your perfect pot and soil. Now for the really fun part: turning those tiny, rock-hard seeds into a pot brimming with beautiful sweet pea seedlings. Getting sweet peas to sprout is incredibly satisfying, and a couple of little tricks can mean the difference between a few lonely shoots and a thriving container.
The thing about sweet pea seeds is that they have a notoriously tough outer shell. It’s nature’s way of protecting them, but it can also be a barrier to moisture, which is the key that unlocks germination. We just need to give them a little help.
Give Your Seeds a Head Start
To really boost your chances of success, you can "scarify" the seeds. It sounds technical, but all it means is nicking that hard seed coat just enough to let water in.
- How to Scarify: I find the easiest way is to gently rub one side of the seed with a nail file or a small bit of sandpaper. You’re just trying to thin the coat in one tiny spot, not grind it down.
- The Soaking Method: Another great option is to simply soak the seeds overnight in some lukewarm water. You’ll be amazed! They often swell up to nearly double their size, which is a fantastic sign they’re ready to grow.
A word of caution on soaking: don't leave them for more than 24 hours. Any longer and you risk them rotting. If you're hesitant or short on time, just scarifying them is plenty effective on its own.
Sowing in Your Container
When you’re planting in a pot, getting the depth and spacing right is everything. If they’re too crowded, the seedlings will just compete with each other for light and nutrients, leaving you with weak, spindly plants and far fewer flowers.
You want to sow your seeds about 1-2 cm (that’s roughly half an inch) deep. I like to use a pencil or just my fingertip to poke uniform holes into the soil. Drop one seed into each hole and then gently push the soil back over it.
For a large 20-litre pot, I’d recommend planting 5-7 seeds spaced evenly around the outer edge, maybe a couple of inches in from the side. Planting them this way makes it so much easier to pop in your trellis or support structure later without damaging the delicate new roots.
If you really want to dive deep into the art of germination, we have a whole guide full of tips for starting seeds indoors that work wonders for sweet peas, too. Getting these first steps right gives each seedling the foundation it needs for a strong start.
4. Give Them Something to Climb and Encourage More Flowers
Once your sweet pea seedlings really start to take off, it's time to step in and give them some direction. At their core, climbing sweet peas are vines—they’re hardwired to look for something to grab onto. In the limited space of a container, providing support early is the key to avoiding a tangled, unproductive clump of stems later on.
This support structure doesn't have to be anything fancy. Its main purpose is to give those delicate tendrils something to cling to as they stretch toward the sun. It's best to get this framework in place when you first plant the seedlings. That way, you won't risk damaging the fragile, developing root system by shoving supports into the pot later. A little planning now creates that beautiful vertical display you're picturing on your patio.
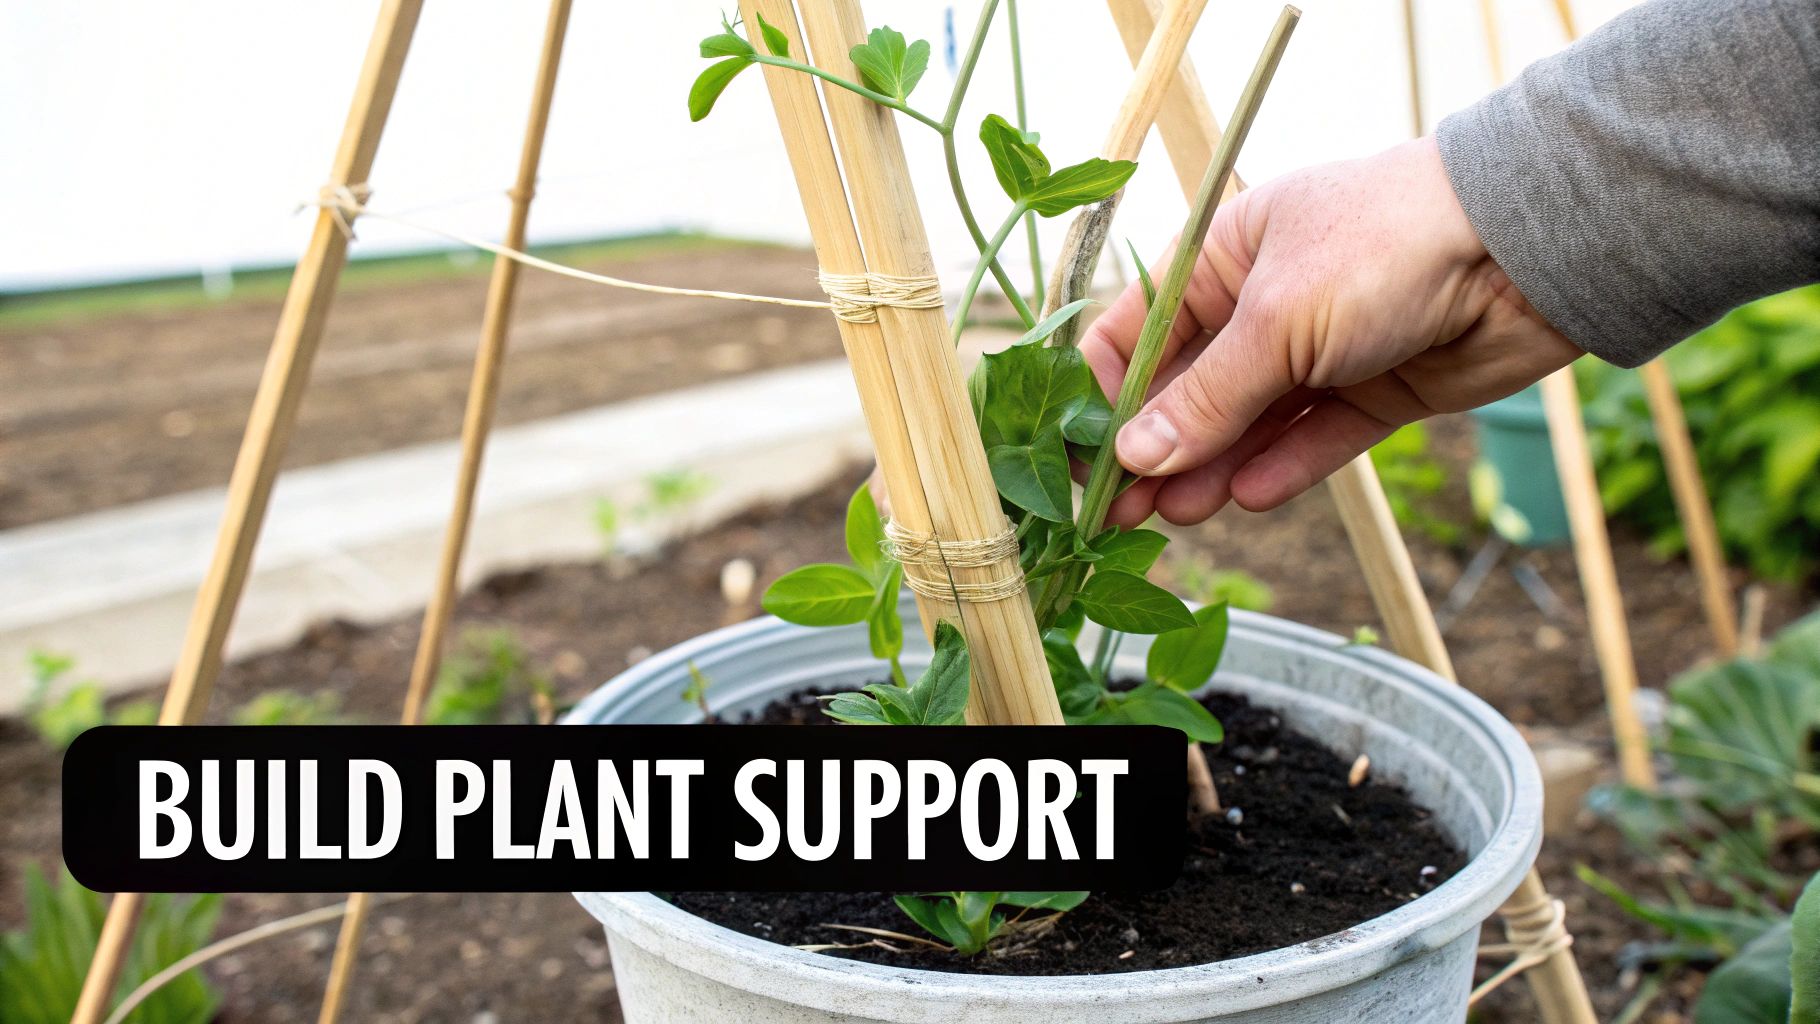
Setting Up a Simple Wigwam
The classic bamboo cane wigwam is probably the easiest and most effective support for sweet peas in a pot. It looks great, works perfectly with a round container, and gives the plants 360-degree access to climb. This simple setup is all you need to create a stunning pillar of flowers.
Here’s how to do it:
- Take 3 to 5 bamboo canes, each about 1.5-1.8 meters (5-6 feet) tall.
- Push them firmly into the soil around the outer edge of your pot, angling them inwards toward the center. Make sure they go deep enough to be stable.
- Gather the tops together and tie them securely with garden twine.
That’s it! As your seedlings grow, you might need to gently wrap their first tendrils around the canes to give them the hint. After that, they’ll usually take over.
The Secret to a Bushier Plant: Pinching Out
While a climbing frame is essential, there’s a little trick that will make the biggest difference in how many flowers you get. It’s called ‘pinching out’, and it’s the secret to turning a single, lanky stem into a lush plant with multiple flowering branches.
The idea is to encourage the plant to send out side shoots from its base. When you snip off the main growing tip, the plant redirects its energy into producing new stems. More stems mean more flowers. It’s a simple way to double or even triple your potential harvest from just one plant.
The perfect time to do this is when your seedlings have 3 to 4 pairs of leaves and are around 10-15 cm (4-6 inches) tall. Just use your thumb and forefinger to pinch off the very top of the main stem, right above a leaf joint. This one tiny action makes a huge difference.
It helps to know what kind of sweet pea you're dealing with. Climbing varieties, which can easily reach 6-8 feet (180-240 cm), benefit the most from pinching because it creates a fuller, more manageable plant. You can read more about different growth habits in Gardenia's guide to Lathyrus odoratus. Taking this one small step not only gives you a more impressive display but also improves air circulation around the plant, keeping it healthier.
5. Master Your Watering and Feeding Game
When you’re growing in containers, watering and feeding are everything. This is where a lot of gardeners trip up, especially with a thirsty plant like the sweet pea. Remember, in a pot, your plants rely on you for every single drop of water and nutrient. A container can go from damp to bone-dry in just a few hours on a sunny afternoon, and a stressed sweet pea will shut down flower production in a heartbeat.
The trick is to be consistent. Letting the soil cycle between parched and waterlogged is a recipe for disaster, as it puts immense stress on the roots. You're aiming for soil that stays evenly moist—but never, ever soggy.
The best tool for this? Your finger.
Forget rigid watering schedules. Just poke your index finger about an inch or two into the soil. If it feels dry at that depth, it's time to water. If you feel any moisture, you can probably wait another day. This simple test is far more reliable than guessing and is your best defense against both dehydration and the dreaded root rot.
Feeding Your Sweet Peas for a Bloom Bonanza
Sweet peas have a healthy appetite, and what they need to eat changes as they grow. I like to think of it like training an athlete—they need one type of fuel for building muscle and another for performing on race day. For sweet peas, the same idea applies to growing leaves versus making flowers.
Early on, the goal is to build a strong, leafy framework. A little nitrogen at this stage helps them get going. Once your plants are well-established and really starting to scramble up their supports, a casual drink of a balanced liquid feed is a good idea.
But here’s the pro tip, the one thing that really makes a difference for a spectacular display.
As soon as you spot those first tiny flower buds forming, it's time to completely change their diet. Stop all nitrogen-rich fertilizers and switch to a high-potassium feed. This is the signal that tells the plant, "Okay, enough leaves, it's flower time!"
This switch is a non-negotiable step for getting a truly impressive number of blooms from your containers. A liquid tomato fertilizer is perfect for this—it’s easy to find and has the exact nutrient profile sweet peas need to pour all their energy into producing waves of fragrant flowers instead of just more green growth.
Here’s a simple feeding routine that I stick to:
- After Planting: Don't feed them yet. The fresh compost has everything they need to get started.
- When They Start Climbing: Give them a half-strength, balanced liquid feed every 2-3 weeks.
- The Moment You See Buds: Immediately switch to a high-potassium liquid feed (tomato food is ideal).
- During Flowering: Keep up with the high-potassium feed every 10-14 days to encourage continuous blooming all season long.
Nailing this watering and feeding strategy is how you get a long, productive, and absolutely beautiful flowering season from your potted sweet peas.
6. Harvest Blooms to Keep the Flowers Coming
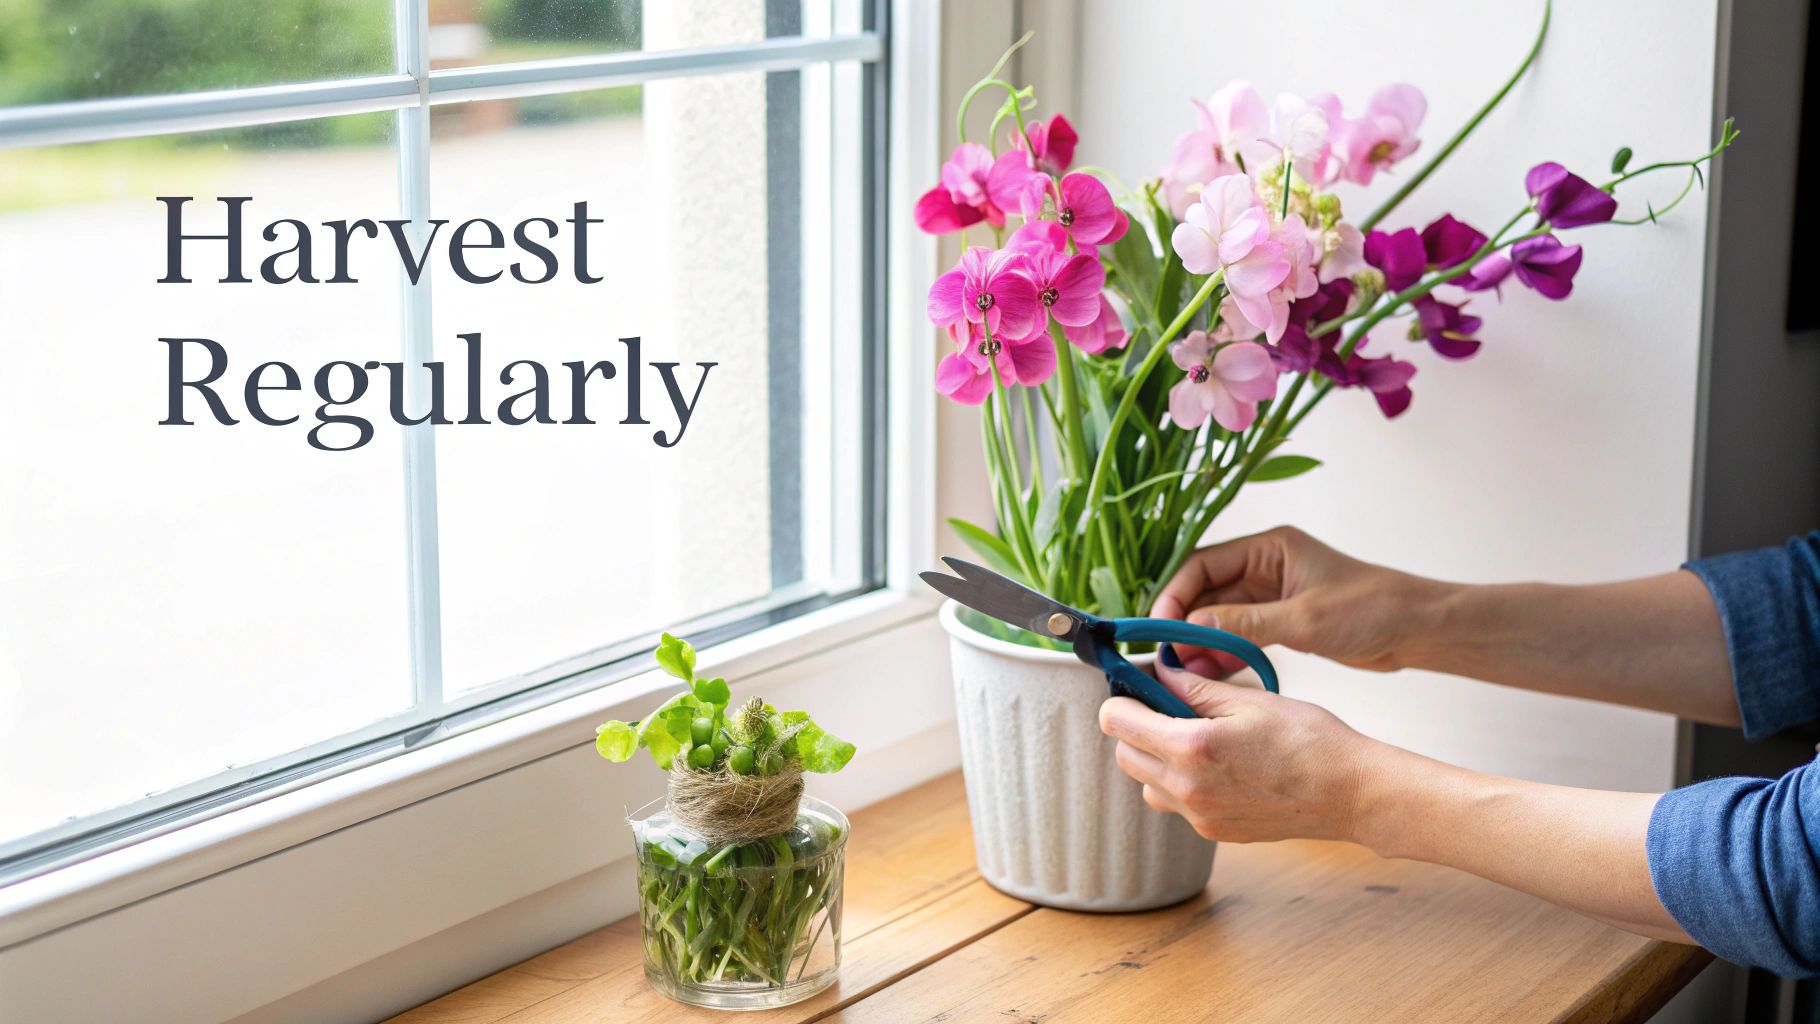
Here's the single most important secret to a long, glorious season of sweet pea flowers: the more you pick, the more you get. That’s not just some old gardener's tale; it's the biological key to keeping those blooms coming.
When you cut the flowers, you're preventing the plant from doing what it desperately wants to do—set seed. This simple act essentially tricks the plant into thinking, "I haven't reproduced yet, I need to make more flowers!"
If you let spent blooms shrivel and form pods, it sends a clear signal to the plant that its job is done, and it's time to shut down flower production. So, get out there and pick, pick, pick!
Best Harvesting Practices
Want the longest possible vase life for those beautiful bouquets? It all comes down to timing. Cut your sweet peas in the cool of the morning, right after the dew has evaporated but before the day's heat sets in.
- When to cut: Look for stems where the lowest flower is wide open, but the very top bud is just starting to unfurl and show a blush of color.
- How to cut: Snip the stem as low down as you can without nicking the main vine. This encourages the plant to send up even longer, stronger stems for your next bouquet.
- What to do next: Plunge the stems immediately into a bucket of cool water as you go. This is crucial for preventing them from wilting.
Pro Tip: Once you bring them inside, re-cut the stems at a sharp angle and strip off any leaves that would end up underwater in the vase. This prevents rot and helps the flowers drink more efficiently, keeping them fresh for days.
Saving Seeds for Next Year
As the season starts to wind down, you can let a few of your best-performing plants go to seed. Just stop cutting from them and watch as the flower pods swell up.
Wait until the pods become papery and light brown right on the vine. Pick them on a dry day, just before they get brittle enough to burst open on their own.
Given that the global supply of sweet pea seeds can sometimes be tricky, saving your own is a fantastic way to preserve your favorite varieties. Thankfully, sweet peas are self-pollinating, so it's quite straightforward. Just shell the peas from the pods, let them air dry completely for a week or so, and then store them in a labeled envelope in a cool, dark, and dry spot.
7. Tackle Common Container Problems
Even with the best intentions, you might run into a few snags when growing sweet peas in pots. Don't let it discourage you! Most issues are surprisingly easy to sort out, getting your plants back on track to producing those incredible blooms. The real trick is catching problems early.
Your plant's leaves are often the first to tell you something's amiss. If you see them turning yellow, especially down at the base of the plant, that's a classic sign of overwatering. Soggy soil is the enemy of container plants and a fast track to root rot. Before you even think about watering, stick your finger in the soil—if it's not dry an inch down, hold off.
On the flip side, yellow leaves can also point to a nitrogen deficiency, but only if the soil isn't waterlogged. If that's the case, a quick dose of a balanced liquid feed should bring the green back to any new growth.
Why Aren't My Sweet Peas Blooming?
It’s one of the most common frustrations: you've got lush, green vines, but not a single flower. This almost always comes down to an imbalance in their diet. Your plants are probably getting too much nitrogen, which tells them to focus on making leaves instead of flowers.
The fix is to change their feeding routine immediately. Stop using your all-purpose fertilizer and switch to a high-potassium feed, like a liquid tomato fertilizer. Give them a dose every 10-14 days. This specific nutrient is what triggers flower production. At the same time, make sure your pot is getting at least six hours of direct sun every day, as too little light will also keep them from budding.
If a plant that was flowering beautifully suddenly stops, it might be trying to set seed. Go on a treasure hunt for any seed pods you might have missed and snip them off right away. This little trick convinces the plant it needs to start making flowers again.
Dealing with Pests and Diseases
Growing in containers doesn't make you totally immune to pests. Aphids, for example, love to cluster on tender new growth and flower buds, sucking the life out of the plant. Often, a strong jet of water from the hose is enough to knock them off. For a more stubborn infestation, an insecticidal soap will do the trick. If you're running into common garden pests, you might find some helpful simple DIY insect control tips.
As the weather warms up, keep an eye out for powdery mildew. This fungal disease looks like a white, dusty film on the leaves and thrives when it's humid and there isn't much airflow. The best prevention is to water the soil directly and try your best not to splash the leaves.
At Homegrown Garden, we believe anyone can grow beautiful flowers. Our hand-picked collection of heirloom sweet pea seeds and top-quality gardening supplies gives you everything you need for a breathtaking container display. Explore our seeds and get started today at https://www.homegrown-garden.com.

