


Don't let a small yard, patio, or even just a balcony stop you from growing your own pumpkins. It's totally possible. The whole secret comes down to three things: picking the right kind of pumpkin, growing it upwards on a trellis, and getting your container setup just right. Nail these, and you'll be well on your way to a fantastic autumn harvest.
1. Understand That Small Spaces Can Yield Big Results
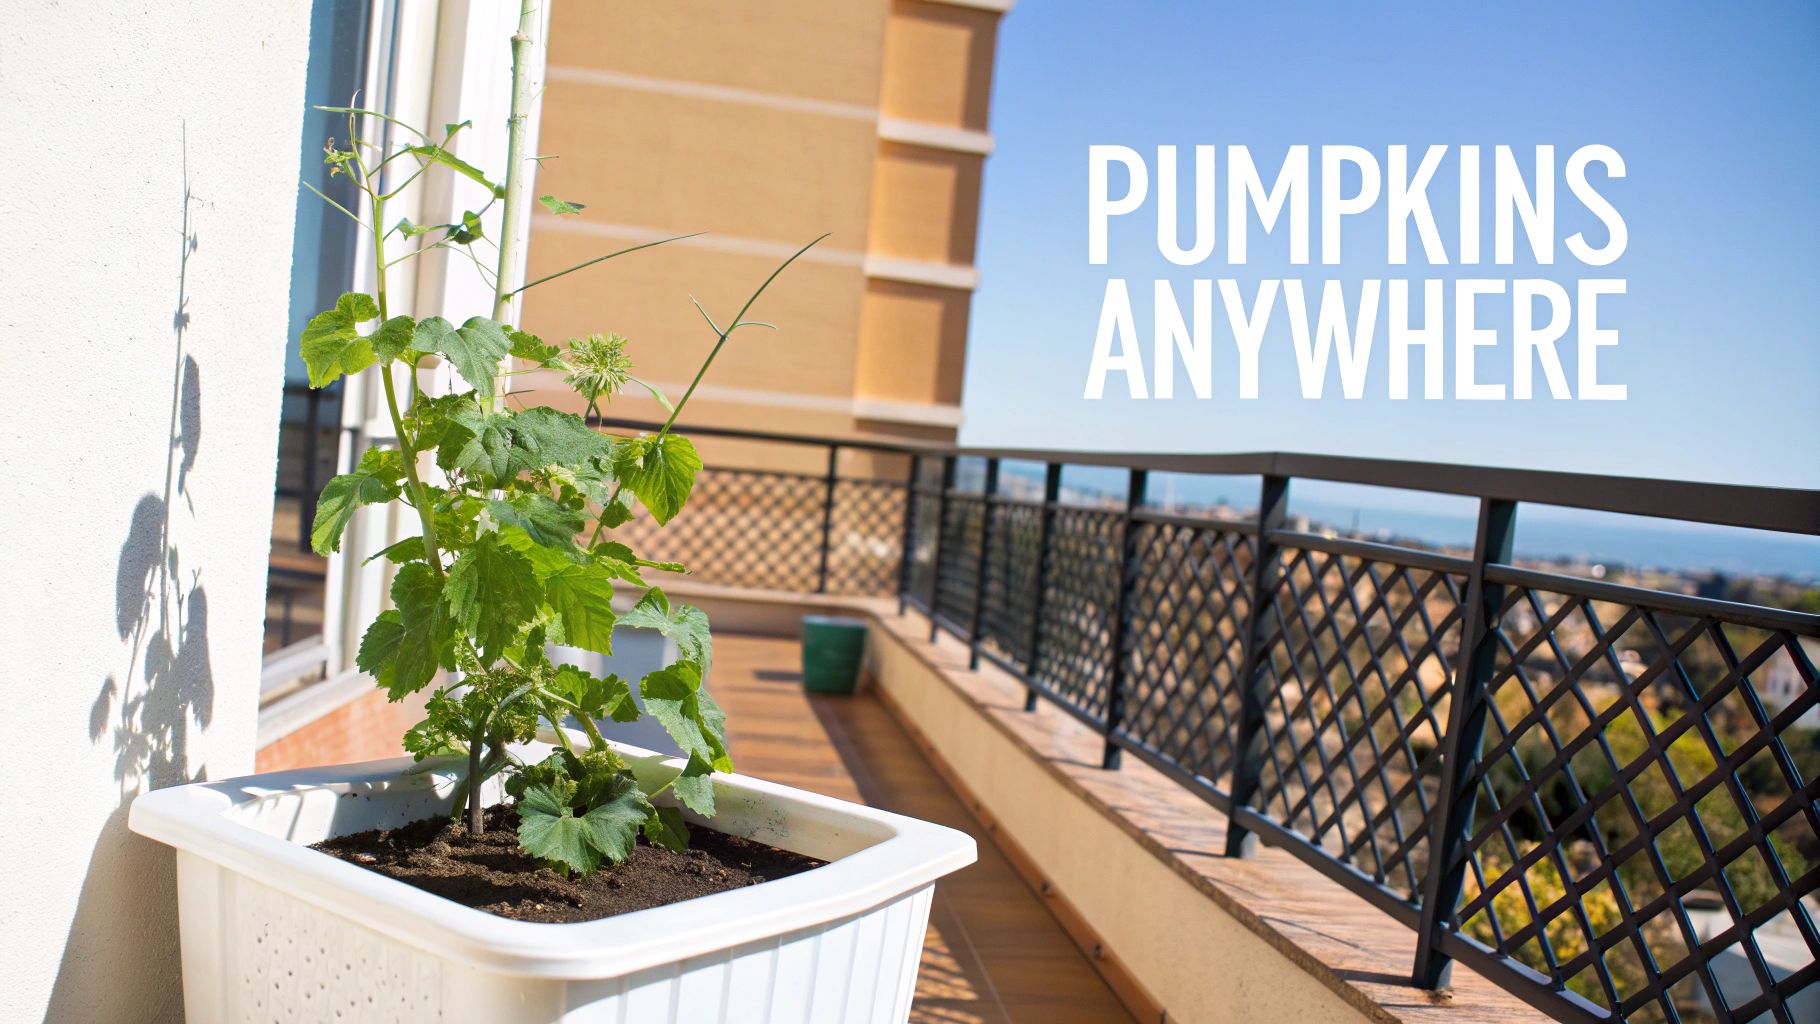
When you picture a pumpkin patch, you probably imagine endless vines sprawling across a giant field. That image can feel pretty discouraging if you're working with a tiny plot of land. But forget that old-school picture. With some clever planning and the right techniques, you can enjoy homegrown pumpkins, no giant yard required.
This isn't just wishful thinking; even commercial growers prove that big yields can come from small plots. Take North Carolina, for example. Many pumpkin farms there are just one to five acres, yet a single acre can crank out up to 1,200 pumpkins. This small-scale approach helped the state's pumpkin industry pull in over $18.2 million in 2023. You can read more about North Carolina's pumpkin farming insights and see how productive compact growing can be.
The Three Pillars of Small-Space Success
To get a great harvest from your patio or balcony, we're going to focus on a simple but powerful framework. Don't get overwhelmed; these are the only three areas you really need to get right.
-
Choose the Right Seeds: Success begins before you even touch the soil. I’ll walk you through the best compact, bush-type, and miniature pumpkin varieties that are bred to perform beautifully in containers without taking over your entire space.
-
Think Vertically: When you can’t spread out, you have to grow up. Using a trellis, an arbor, or even a sturdy tomato cage lets the vines climb. This not only saves a ton of ground space but also adds a stunning green wall to your garden.
-
Master Container Gardening: The right pot and soil mix are game-changers. We’ll cover everything from picking the perfect container (think 10-20 gallons) to mixing a nutrient-rich soil that will keep your pumpkins happy and fed all season long.
To give you a quick overview, here are the core components we'll be focusing on throughout this guide.
Small Space Pumpkin Growing At a Glance
| Strategy | Key Consideration | Best For |
|---|---|---|
| Variety Selection | Choose compact or "bush" types. | Balconies, patios, raised beds. |
| Vertical Growing | Use a sturdy trellis or A-frame. | Any space where ground area is limited. |
| Container Choice | Select a large pot (10-20 gallons). | Renters, apartment dwellers, urban gardens. |
This table is just the starting point. We're about to dive deep into each of these strategies.
Think of this guide as your complete roadmap. We're here to bust the myth that you need a huge field to have a successful pumpkin patch. By the time we're done, you'll have the confidence and the practical steps to start growing, no matter how small your space is.
This approach actually turns your space limitations into an advantage. A small footprint forces you to be strategic and creative, and those are the skills that make you a better gardener. Let’s get started and turn that sunny corner of your balcony into a festive and rewarding pumpkin patch.
2. Choose from the 7 Best Pumpkin Varieties for Compact Gardens
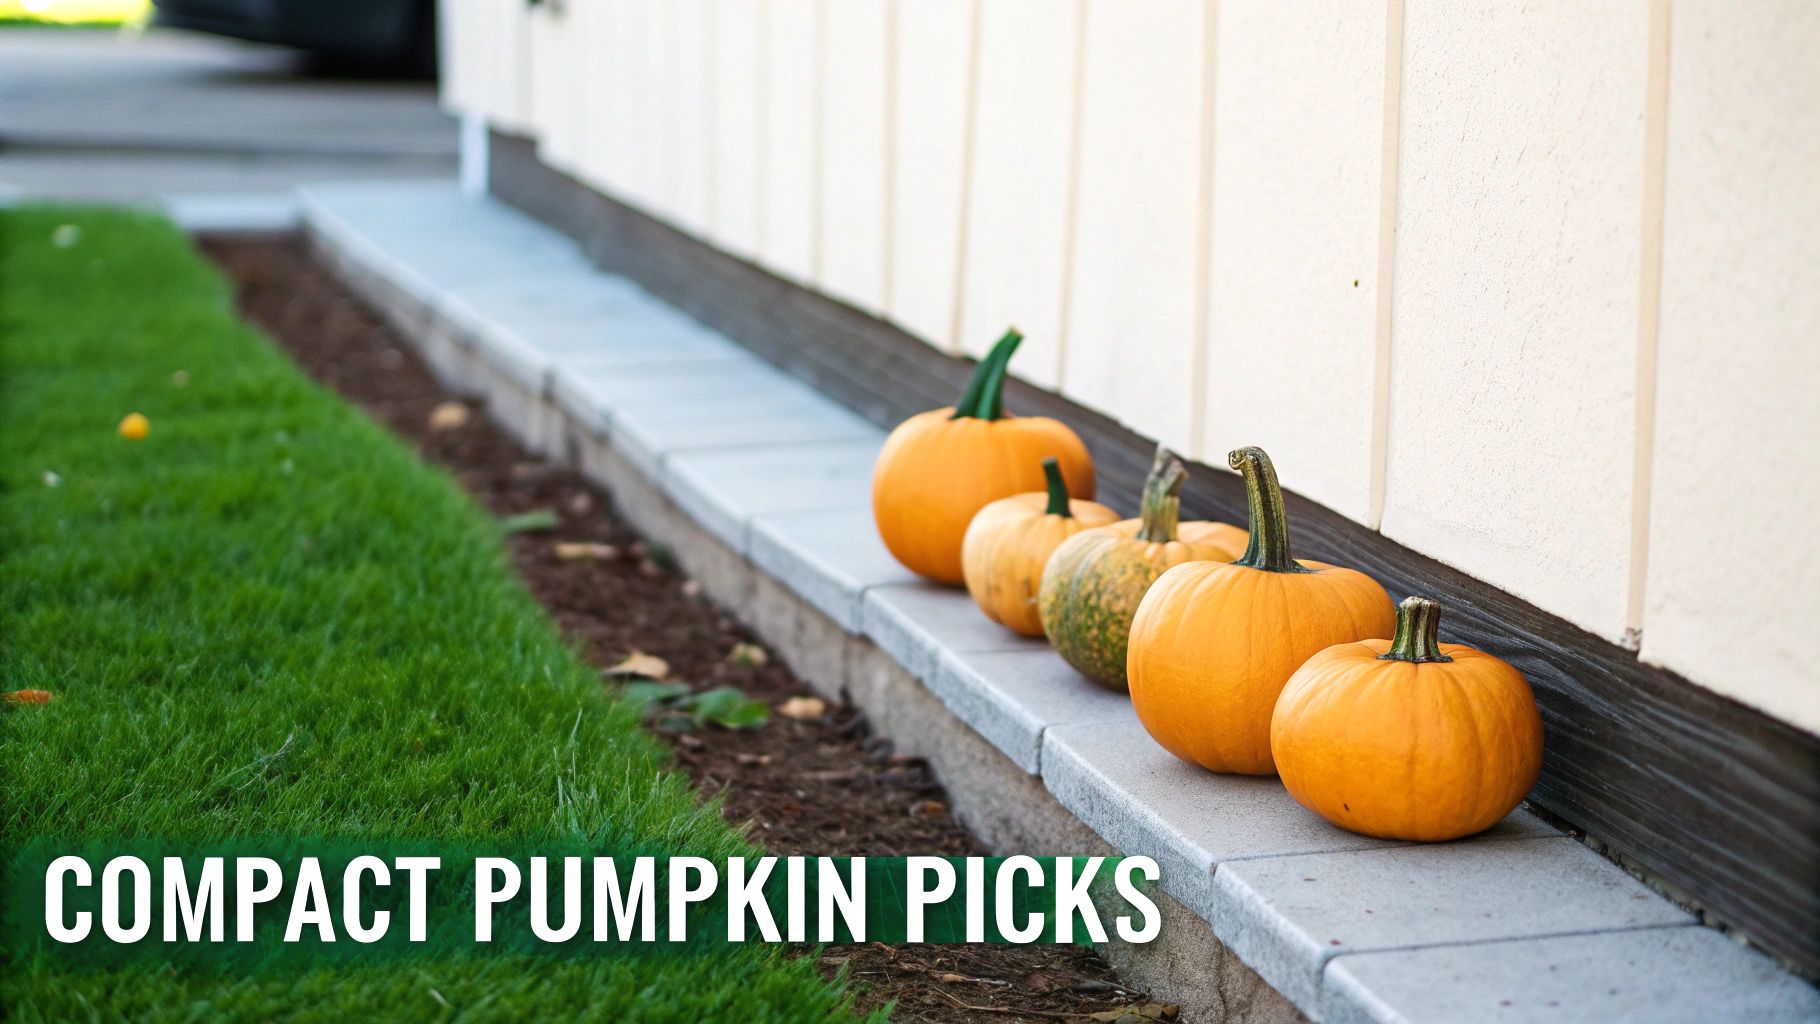
The real secret to a great pumpkin harvest in a tight space has nothing to do with soil or sun—it starts with the seed packet you choose. Forget about those giant, field-hungry varieties that need an acre to stretch out. For those of us with a patio, balcony, or a small garden bed, the heroes are the compact, bush-type, and miniature pumpkins. These are the plants that play nicely in containers and on trellises.
Thankfully, seed breeders have caught on to the small-space gardening boom, so we have more amazing compact options than ever before. While most of the pumpkins you see in stores come from the top nine pumpkin-producing states, a huge part of the pumpkin-growing world is made up of small farms and backyard growers. In 2020, farmers harvested pumpkins from nearly 66,200 acres in the U.S., but that number doesn't even count the countless home gardens. You can learn more about these U.S. pumpkin production trends to see just how popular this crop is.
This is about more than just finding a small pumpkin; it’s about finding a plant with a manageable growth habit that won’t try to take over your entire outdoor living area. So, let’s dig into the seven best varieties that deliver all that autumn magic without the land grab.
1. Jack Be Little: The Classic Miniature
When you picture a tiny pumpkin, 'Jack Be Little' is probably what comes to mind. These little guys are absolutely adorable, fitting right in the palm of your hand. They're also incredibly generous producers; it's not uncommon for a single plant to give you 8 to 10 fruits. Their shorter, more manageable vines make them a perfect candidate for growing in a large pot or on a small trellis.
- Average Weight: A tiny 0.5 lbs
- Best Use: These are almost purely for decoration. Think fall centerpieces, crafts for the kids, or a bowl full of autumn charm on your countertop.
- Growing Tip: Their small size means they mature fast, often ready to pick in just 90-100 days.
2. Small Sugar: The Perfect Pie Pumpkin
If your autumn dreams are filled with homemade pumpkin pie, 'Small Sugar' is the variety for you. This heirloom has been a garden favorite since the 1860s, and for good reason—its flesh is sweet, stringless, and packed with flavor. The pumpkins themselves are a beautiful, classic deep orange.
The vines have a "semi-bush" habit. This means they are far more contained than traditional sprawling types but will still appreciate a trellis to keep things neat and tidy. You can look forward to 2 to 4 delicious pumpkins per plant, each weighing a perfect 5-8 pounds.
3. Baby Boo: The Ghostly White Wonder
Looking for a different aesthetic? 'Baby Boo' pumpkins are real showstoppers. These miniature white pumpkins have a ghostly, elegant look that’s perfect for modern or minimalist fall displays. Much like 'Jack Be Little', they are tiny and grow on compact vines that are well-suited for containers.
A little heads-up: direct, intense sunlight can cause these white pumpkins to turn a bit yellow. If you want to keep that pure, ghostly white color, try to give them some afternoon shade as they ripen or harvest them just a touch early.
4. Wee B Little: The Container Champion
The name says it all. 'Wee B Little' was practically bred for container gardening. This plant produces perfectly round, 1-pound pumpkins on a true bush-type vine. The vines are incredibly short, rarely getting longer than a few feet, which means you don’t have to worry about building a massive trellis.
- Space Saver: This is hands-down one of the best choices if your space is extremely limited.
- Yield: You can expect 4-6 small pumpkins per plant.
- Maturity: It’s also one of the fastest, ready for harvest in about 85-90 days.
5. Winter Luxury: The Netted Delicacy
'Winter Luxury' is another heirloom pie pumpkin, but this one has a unique visual flair. Its skin is covered in a delicate, cork-like netting that gives it a gorgeous, rustic texture. It's famous among bakers for its exceptionally smooth and sweet flesh, making it a go-to choice for gourmet pies and soups.
The vines are a bit longer but are easily trained up a trellis. Each plant will typically give you 3-5 pumpkins, each weighing around 6 pounds.
6. Batwing: The Spooky and Colorful Option
If you want something truly unique for Halloween, 'Batwing' is a fantastic find. This miniature pumpkin is visually striking, with a dark green, almost black top that "bleeds" down over a bright orange bottom, looking just like a bat's wing. It’s a guaranteed conversation starter in any decorative display.
7. Hooligan: The Striped and Speckled Mini
'Hooligan' pumpkins are all about personality. These tiny, 3-inch fruits are a delightful surprise package—each one is different. Some are mottled orange and white, while others are speckled green and yellow. They grow on compact vines and are perfect for adding a splash of unpredictable color and pattern to your harvest.
Top 7 Compact Pumpkin Varieties Compared
Choosing the right pumpkin really comes down to what you want to do with it—bake, decorate, or a little of both. This table breaks down our top picks to help you find the perfect match for your small garden.
| Variety Name | Average Weight | Vine Type | Days to Harvest | Best Use |
|---|---|---|---|---|
| Jack Be Little | 0.5 lbs | Compact Vine | 90-100 | Decoration, Crafts |
| Small Sugar | 5-8 lbs | Semi-Bush | 100 | Pies, Baking, Roasting |
| Baby Boo | 0.5 lbs | Compact Vine | 95 | Decoration (White) |
| Wee B Little | 1 lb | True Bush | 85-90 | Containers, Decoration |
| Winter Luxury | 6 lbs | Vining (Trellis) | 100 | Gourmet Pies, Soups |
| Batwing | 0.5-1 lb | Compact Vine | 90 | Halloween Decoration |
| Hooligan | 0.25 lbs | Compact Vine | 95 | Decorative Mix, Crafts |
No matter which one you pick, you're on your way to proving that you don't need a huge plot of land to grow beautiful and delicious pumpkins.
3. Master Container and Raised Bed Growing
Once you’ve picked out the perfect compact pumpkin variety, the next big step is giving it a proper home. For those of us with limited space, growing pumpkins in containers or raised beds isn't just possible—it's a total game-changer, turning a patio or tiny yard into a productive pumpkin patch.
But it’s not as simple as just tossing a seed in a pot. You have to create the perfect little world for your plant. Think of the container as its entire universe; it needs to provide stability, nutrients, and, crucially, excellent drainage. A pumpkin plant with wet feet is a miserable plant, and it's an open invitation for root rot.
Selecting the Perfect Home for Your Pumpkin
If there's one mistake I see gardeners make over and over, it's choosing a container that’s way too small. Pumpkins have surprisingly big root systems and they are incredibly thirsty plants. A little pot will dry out in a few hours on a sunny afternoon, and it just won't give the roots enough room to support a vine loaded with fruit.
You really need to aim for a container that’s at least 10 to 20 gallons. I know that sounds massive, but trust me, it’s non-negotiable for a healthy plant. A big fabric grow bag, a large terracotta pot, or even a half-whiskey barrel all work beautifully. Just make sure whatever you pick has plenty of drainage holes. If it doesn’t, get your drill out and add some.
If you have a bit more space to work with, raised beds are a fantastic choice. They offer incredible drainage and the soil warms up faster in the spring, which gives your pumpkins a nice head start. For a deeper look into this method, you can learn a lot about vegetable gardening in raised beds and how it gives you complete control over your soil.
Pro Tip: Before you fill it with a single scoop of soil, put your container on a wheeled plant caddy. This simple trick makes it so much easier to move your pumpkin around to chase the sun or protect it from a sudden storm—a huge win for balcony gardeners.
Crafting the Ideal Soil Mix
Pumpkins are what we call "heavy feeders." They're hungry plants that need a ton of nutrients to grow those big, beautiful gourds. Bagged topsoil or dirt from your garden just won't cut it for containers; it’s too dense and will compact over time, basically suffocating the roots. What you need is a soil blend that’s both nutrient-rich and light and airy.
Over the years, I've perfected a go-to recipe that provides the perfect balance of moisture retention, drainage, and nutrition.
- 2 parts high-quality potting mix: This is your foundation, giving the roots a stable medium to grow into.
- 1 part rich compost or well-rotted manure: This is the powerhouse. It delivers a steady, slow-release source of food all season long.
- 1 part perlite or vermiculite: This is the secret to perfect drainage. This lightweight volcanic rock creates tiny air pockets in the soil, keeping it from getting compacted and making sure oxygen gets to the roots.
Mix these ingredients together really well in a wheelbarrow or on a tarp before you fill your pot. This custom blend gives your pumpkin the absolute best start in life. For a deeper dive, we've got plenty more container gardening tips that will help with all your potted plants.
Planting Seeds and Seedlings with Care
Okay, you've got the perfect home and the perfect soil. It's go-time. You can either start with seeds planted directly in the container or transplant a seedling you started inside or bought from a nursery.
-
Planting Seeds: Once all danger of frost is gone, sow 2-3 seeds about an inch deep right in the center of the pot. Give them a gentle watering. After they sprout and get their first set of "true" leaves, pick the strongest-looking seedling and snip the others off at the soil line. Don't pull them out! You could damage the roots of the one you want to keep.
-
Transplanting Seedlings: Pumpkin seedlings are delicate and really hate having their roots messed with, so handle them with care. Dig a hole in your container that’s just a bit bigger than the seedling's root ball. Gently place the plant in the hole, making sure the base of the stem is level with the soil surface, and then fill in the gaps. Water it in well to help it settle into its new home.
4. Grow Vertically to Maximize Your Space
When you've run out of ground space, the only way to go is up. This is where vertical gardening really shines, and it’s a total game-changer for growing pumpkins in tight spots. By training your vines to climb, you can turn a tiny patch of dirt into a lush, productive green wall.
It's all about making the most of what you've got. I once heard about a gardener who used leftover concrete reinforcing mesh to build a simple A-frame. He successfully grew three big pumpkin plants in a space no larger than 30 by 60 centimeters. That’s a huge win, considering each of those plants would normally demand at least two square meters to sprawl out on the ground.
Choosing Your Trellis: A Structure for Success
The first real step in growing pumpkins vertically is giving the vines something sturdy to climb on. What you choose depends entirely on your space and, just as importantly, the type of pumpkin you’re growing. A flimsy trellis will buckle under the weight of a mature, fruit-laden vine, so this is one area where you don't want to cut corners. Always go for strength.
Here are a few reliable options that I’ve seen work well in all sorts of small gardens:
- A-Frame Trellis: This is a classic for a reason. It's incredibly stable, easy to knock together from wood or metal, and gives you two climbing surfaces. It’s a perfect fit for a raised bed or a long, rectangular container.
- Sturdy Garden Arbor: An arbor over a walkway isn't just a pretty garden feature; it’s a super-strong pumpkin trellis waiting to happen. As the vines grow over the top, the pumpkins will hang down like festive, edible ornaments.
- Cattle Panel or Reo Mesh: For a simple, tough, and budget-friendly option, you can't beat a piece of cattle panel or concrete reinforcing mesh. You can lean it securely against a sunny wall or even bend it into an arch between two containers.
For more creative ways to maximize your upward growing potential, check out our guide on vertical gardening ideas for spring.
The image below breaks down the first crucial steps for any container gardening project, which is the foundation for your vertical setup.
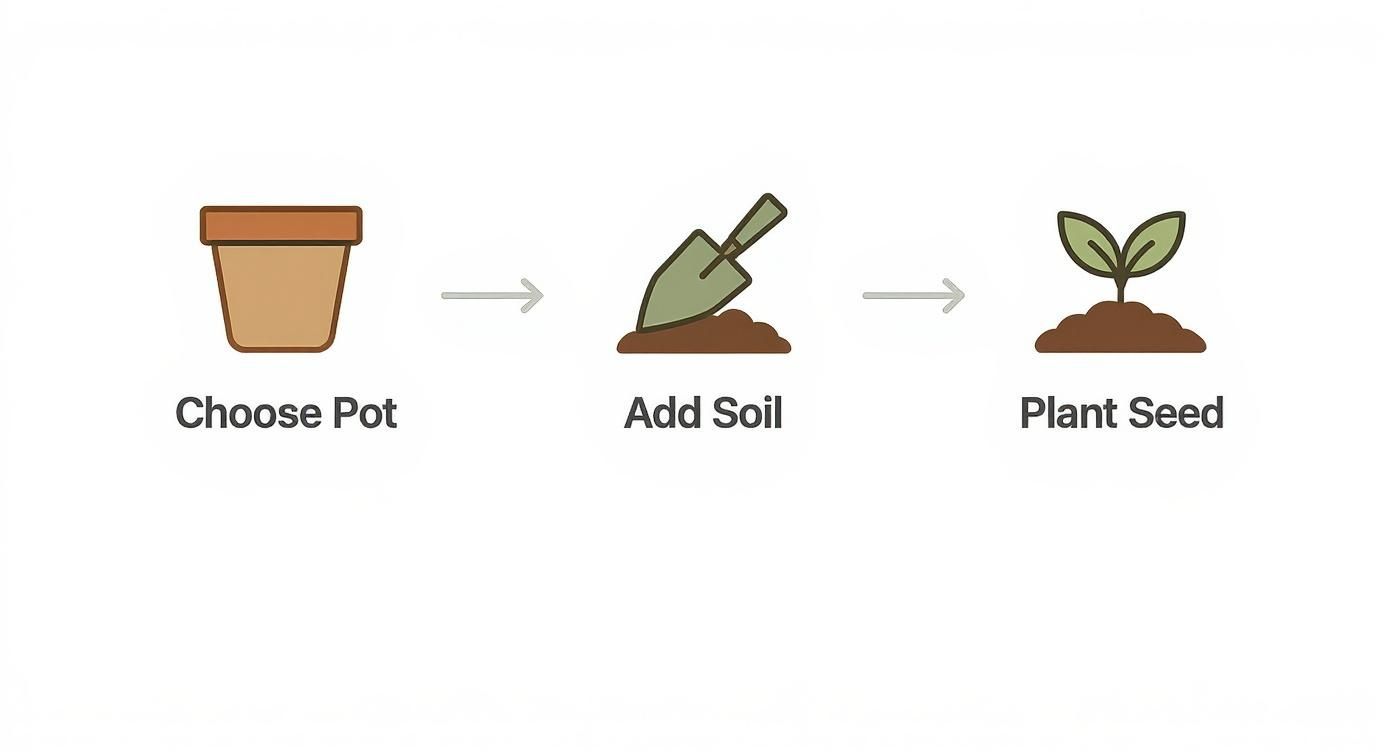
This just goes to show that success starts with the basics: a properly sized pot, the right soil, and good planting technique are all essential before you even think about going vertical.
How to Train Your Pumpkin Vines
Pumpkin vines aren't natural-born climbers like peas or some beans—they need a little nudge in the right direction. It's a simple process of guiding the main vine and its strongest side shoots onto the trellis as they grow. The real key here is to be gentle and consistent.
Once the main vine is about a foot long, start by loosely tying it to the base of your trellis. Be sure to use soft materials that won't cut into the delicate stems. Strips of old t-shirts, soft plant ties, or even strips of pantyhose work perfectly. As the vine grows, keep adding a new tie every foot or so, weaving it up the structure to give it plenty of support.
Don’t try to force a vine to bend where it doesn’t want to go. If you feel it resisting, back off. You'll risk snapping it. The goal is to gently guide its growth path over several days and work with the plant, not against it.
Pop out to the garden every couple of days to check on your plant. Those vines can grow surprisingly fast, and it’s a whole lot easier to train them when they’re still young and flexible.
The Secret to Supporting Your Fruit
This is probably the most critical part of growing pumpkins vertically. As your pumpkins start to form, they get heavy—and fast. A hanging pumpkin can easily snap right off the vine under its own weight long before it’s ripe. To prevent that heartbreak, you need to give each fruit its own personal hammock.
Creating a sling is easy, and you can probably do it with materials you already have lying around.
- Find Your Sling Material: Old t-shirts, mesh onion bags, pantyhose, or pieces of bird netting are all excellent choices. You need something both strong and stretchy that allows for good air circulation to prevent rot.
- Position the Sling: Once a pumpkin reaches the size of a tennis ball, gently tuck it inside your sling.
- Secure It Tightly: Now, tie the ends of the sling securely to the trellis itself—not to the pumpkin vine. This is crucial. The trellis should bear 100% of the pumpkin's weight, taking all that strain off the stem.
Make sure the sling has a little give so the pumpkin has room to expand. With this simple support system in place, you can confidently grow beautiful, healthy pumpkins that will hang securely until they are perfectly ripe and ready to harvest.
5. Use Smart Pruning for a Healthier Harvest
https://www.youtube.com/embed/B3RyOXaqnwo
When you're growing pumpkins in a tight space, you have to think like a manager, not just a gardener. Left to its own devices, a pumpkin plant will pour all its energy into growing a jungle of vines and leaves. Our goal, however, is fruit. By strategically pruning your plant, you're telling it exactly where to focus its resources, which results in fewer but much healthier, bigger pumpkins.
This isn't just a small-space trick; it's the secret behind those astonishingly large pumpkins you see at fairs. Competitive growers have managed to cultivate pumpkins over 1,000 pounds in plots as small as 100 square feet by intensively managing the vines to channel all the plant's energy into a single fruit. Every year, about 10,000 growers participate in official weigh-offs, proving what’s possible with focused care. You can find out more about how these giant pumpkins are cultivated and see just how far this technique can be pushed.
The Simple Art of Pruning Vines
Pruning sounds like a big deal, but for pumpkins, it's actually pretty straightforward. The whole idea is to limit the number of vines so the plant’s energy isn't spread too thin. You want that energy going into your pumpkins, not an endless web of foliage.
Here’s a simple strategy that works every time:
- Protect the Main Vine: Find the thickest, strongest vine growing from the base. This is your primary producer, and you should never, ever cut it.
- Pick a Few Helpers: Allow two or three of the strongest secondary vines (the ones branching off the main one) to keep growing. They'll support additional fruit.
- Trim Everything Else: Any other little vines that sprout—especially the weaker, thinner ones known as tertiary vines—should be snipped off right where they meet a larger vine. This stops the plant from wasting precious resources.
Your goal is to create a simple, open structure. This has a fantastic side benefit: better airflow. Good air circulation is one of the best ways to prevent common fungal diseases like powdery mildew. If you do run into trouble, our guide on natural pest control for plants has some great organic solutions.
The Gardener's Role in Pollination
Out in a big field, bees and other pollinators do all the hard work, shuttling pollen from male to female flowers. But on a balcony or a small patio, you might not have enough buzzing traffic to get the job done. To guarantee you actually get pumpkins, you may need to step in and play matchmaker.
It's an easy and rewarding task once you know how to tell the flowers apart.
- Male Flowers: These guys show up first. You'll spot them on long, thin stems, and if you peek inside, you’ll see a single stamen covered in yellow pollen.
- Female Flowers: These are the ones that matter. They have a noticeable little bulge right at their base—it looks like a tiny, baby pumpkin. They also sit on shorter, thicker stems.
To hand-pollinate, just head out in the morning when the flowers are fresh. Pick a male flower, peel back its petals to expose the pollen-dusted stamen, and gently dab or swirl it all over the stigma inside a newly opened female flower. That’s it! If you were successful, you'll see that tiny pumpkin at the base of the female flower start to swell within a few days.
A No-Fuss Watering and Feeding Plan
Container-grown pumpkins are completely dependent on you for water and nutrients. Sticking to a consistent schedule is the real secret to a great yield.
Watering Wisely
Pumpkins are thirsty plants, especially once they start setting fruit. The best way to check is to poke your finger a couple of inches into the soil every day. If it feels dry, it’s time to water. Give the plant a deep drink right at its base, watering until you see it running out of the drainage holes. Always water the soil, not the leaves—wet foliage is an open invitation for mildew.
Feeding for Fruit
These plants are also heavy feeders and will burn through the nutrients in their container soil pretty quickly. A regular feeding schedule is a must.
- For Early Growth: While the vine is just getting established, use a balanced liquid fertilizer every 2-3 weeks to encourage healthy leaves and roots.
- For Flowers and Fruit: As soon as you see flowers and tiny pumpkins forming, switch to a fertilizer higher in potassium and phosphorus (the "P" and "K," or the last two numbers on the bottle). This tells the plant to focus on fruit development, not just more leaves. Apply this every 2 weeks.
By combining smart pruning, a little help with pollination, and a steady care routine, you can get a fantastic harvest of beautiful homegrown pumpkins, even if your garden is nothing more than a pot on the patio.
6. Know How to Troubleshoot Common Problems
Even the most seasoned gardener runs into a few head-scratchers when trying something new. Growing pumpkins in tight quarters is no different. Let's tackle some of the most common questions I get from fellow gardeners trying to make a big harvest happen in a small footprint.
How Many Pumpkins Will I Actually Get From One Plant in a Pot?
This is probably the number one question, and the honest answer is: it all comes down to the variety you planted. If you're growing a tiny ornamental like a 'Jack Be Little,' it's not crazy to expect 8-10 of those adorable little guys.
But for a classic pie pumpkin like 'Small Sugar,' you're better off aiming for 2 to 4 solid, healthy pumpkins. It’s less about what the plant could produce and more about what the container can support. When you prune the vines strategically, you're telling the plant where to send its energy. Pushing for too many pumpkins in a pot often backfires, leaving you with a stressed-out plant and a bunch of small, green fruits that never quite make it to the finish line.
My two cents: Quality over quantity is the golden rule here. You'll be much happier with three perfect pie pumpkins than eight sad, unripe ones. Focus the plant's efforts, and you'll get a harvest you can be proud of.
What Are the First Signs of Trouble From Pests or Disease?
When your garden is compact, problems can seem to appear overnight. Vigilance is your best friend. The two culprits you’ll most likely face are powdery mildew and squash bugs.
- Powdery Mildew: This stuff is hard to miss—it looks like someone sprinkled talcum powder all over your pumpkin leaves. It's a fungus that loves humidity and stagnant air. The easiest way to keep it at bay is to water the soil, not the leaves.
- Squash Bugs: These critters are masters of disguise. Flip over the leaves and keep an eye out for tiny, bronze-colored egg clusters on the undersides. If you see them, scrape them off immediately. You can also pluck the adult bugs (they're grayish-brown) and drop them into a bucket of soapy water.
Catching these issues early makes all the difference. A few pests are a minor nuisance; a full-blown infestation can take down a container plant in a hurry.
7. Harvest Your Pumpkins at the Perfect Time
Patience is a virtue, especially at harvest time. Picking a pumpkin too early is a one-way ticket to bland flavor and poor storage. Let the pumpkin itself tell you when it’s good and ready.
Look for two key signals. First, the color should be deep and consistent across the whole pumpkin. More importantly, give it a thump and then try to poke it with your fingernail. If you can't dent the rind, that's a great sign. Second, look at the stem right where it connects to the fruit—it should be hard and starting to dry.
When you're ready, grab a clean, sharp knife or a pair of pruners.
- Leave a Handle: Cut the vine, leaving at least a 3-4 inch stem attached to the pumpkin. This isn't just for decoration! A pumpkin with a solid stem can last for months, but one with a broken or missing stem is likely to rot within weeks.
- Don't Use the Stem as a Handle: As tempting as it is, never carry your pumpkin by the stem. It can snap off way too easily. Always scoop it up from the bottom.
- Give it a Quick Cure: Find a sunny, dry spot and let your harvested pumpkins sit for about a week. This process, called curing, hardens the skin even further and helps seal any little nicks, prepping it for a long, happy life in your pantry.
Feeling inspired to start your own small-space pumpkin patch? At Homegrown Garden, we’ve hand-picked a great selection of compact and heirloom pumpkin seeds that are perfect for containers and trellises. You can find the right variety for your garden and grab all the supplies you need to get growing.

