


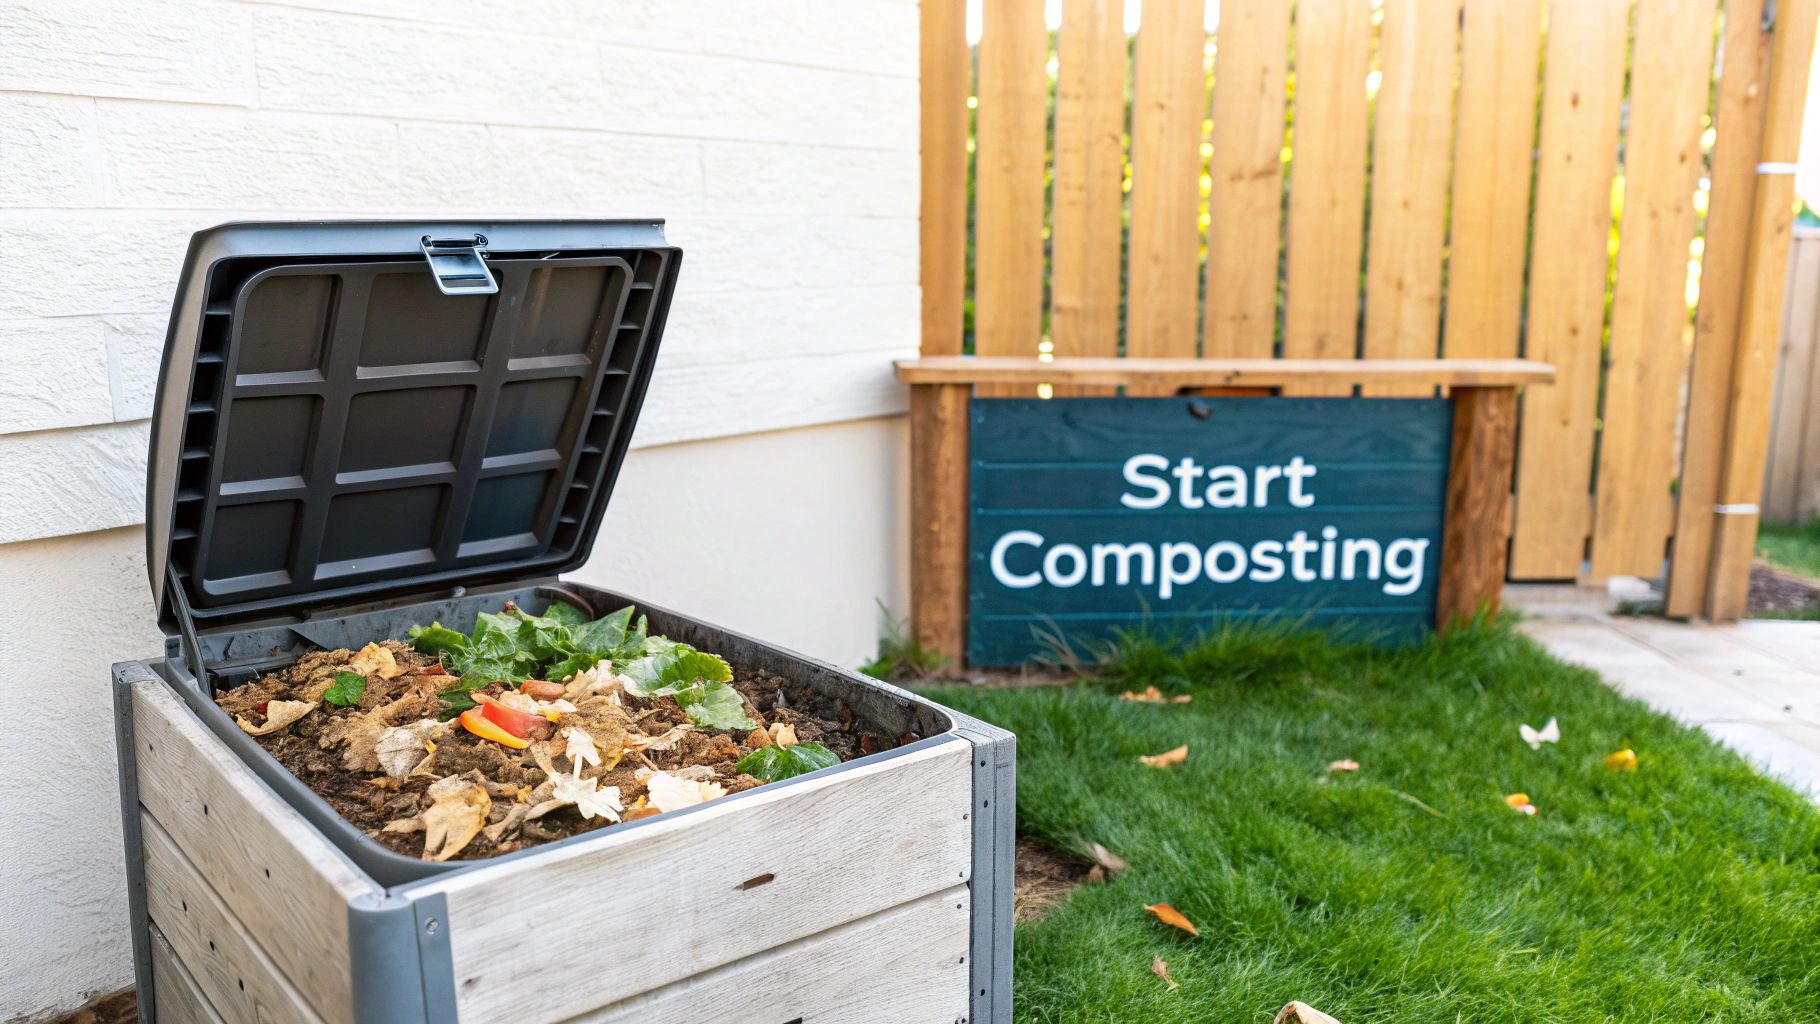
Diving into home composting is far simpler than most people think. At its core, it's about creating the right recipe: you mix your nitrogen-rich "greens" (think kitchen scraps) with carbon-heavy "browns" (like dried leaves), add a touch of water, and make sure it gets some air. That’s it. You’ve just created the perfect home for microbes to break down your organic waste and turn it into garden gold.
7 Things to Know Before You Start Composting at Home
Learning how to compost at home is one of the best things you can do for your garden, and honestly, for the planet. It’s an incredibly rewarding process that shrinks your trash can, breathes life into your soil, and gives you a front-row seat to nature's amazing cycle of decay and renewal. Before you get your hands dirty, a few key insights will help you get started on the right foot and make the whole experience a breeze.
1. Composting Is a Major Environmental Win
It's hard to believe, but the average American tosses out around 485 pounds of waste each year, and a huge chunk of that is organic stuff that could be composted. When that food and yard waste goes to a landfill, it decomposes without oxygen and produces methane, a really potent greenhouse gas. Composting, on the other hand, cuts those emissions significantly—about 10% less per ton. It's a small change in your routine that makes a real difference.
2. It’s All About Balancing Browns and Greens
Think of your compost pile like a layered cake. The "browns" are your dry, carbon-rich materials—dried leaves, twigs, shredded cardboard, and paper. The "greens" are your moist, nitrogen-rich ingredients like fruit and veggie scraps, fresh grass clippings, and used coffee grounds. The secret to a happy, fast-working, and odor-free pile is getting the ratio right. Aim for roughly three parts brown material for every one part green. For a common household item, this guide to composting coffee grounds at home is a great resource.
3. There’s a Composting Method for Every Home
You absolutely do not need a sprawling backyard to make compost. From compact tumblers that fit on a tiny balcony to worm bins that can live under your kitchen sink, there's a composting method out there that will fit your space and lifestyle. The first step is figuring out which approach makes the most sense for you.
To help you decide, here’s a quick rundown of the most common home composting methods.
Composting Methods at a Glance
This table breaks down the different options to help you choose the best fit for your lifestyle, space, and goals.
| Method | Best For | Space Needed | Effort Level | Compost Speed |
|---|---|---|---|---|
| Cold Pile | Hands-off beginners with yard space | Medium to Large | Low | Slow (6-12+ months) |
| Hot Pile | Gardeners wanting fast compost & have space | Medium to Large | High | Fast (1-3 months) |
| Bin/Tumbler | Urban dwellers, small yards, tidiness | Small to Medium | Medium | Medium (2-4 months) |
| Vermicompost | Apartment living, small-scale kitchen scraps | Very Small | Medium | Fast (2-3 months) |
| Bokashi | Composting all food waste (inc. meat/dairy) | Very Small | Medium | Very Fast (ferments in weeks) |
Each method has its pros and cons, but they all lead to the same fantastic result: nutrient-rich compost for your plants.
4. You Don’t Need Fancy Gear to Start
Honestly, you can start composting with nothing more than a pile in a corner of your yard. That said, using a simple container—whether it’s a store-bought bin, a DIY cage made from chicken wire, or a spinning tumbler—can keep things looking tidy and often helps the process along. The only real essentials are your organic materials, a little space, and some patience.
"There are no mistakes in compost, there is only learning. I always encourage people to just start and observe, and you’ll be amazed at what you can do."
5. Finished Compost Is a Soil Supercharger
The dark, crumbly stuff you get at the end is what gardeners lovingly call "black gold," and for good reason. It’s so much more than a simple fertilizer; it's a complete soil conditioner.
- Improves Soil Structure: It breaks up heavy clay so it can drain and helps sandy soil hold onto precious water.
- Boosts Microbial Life: It introduces a whole ecosystem of beneficial microorganisms that protect plants from diseases.
- Provides Slow-Release Nutrients: It gently feeds your plants over time, giving them exactly what they need, when they need it.
6. Composting Directly Benefits Your Garden Plans
That rich, beautiful soil you create is the bedrock of any successful garden. By learning to compost, you're not just getting rid of waste; you're taking the first step toward building a self-sustaining little ecosystem for your plants. If you're currently dreaming up your green space, our guide on how to plan a garden can help you put that future compost to good use.
7. It Actually Saves You Money
Think about it: every bag of compost, potting mix, or fertilizer you don't have to buy from the store is money back in your pocket. You’re taking something you would have thrown away and turning it into one of the most valuable resources a gardener can have. It’s the ultimate win-win.
5 Popular Composting Methods to Choose From
Choosing how you’ll compost at home can feel like a big decision, but it really boils down to what fits your life. There’s no single “best” way to do it. The right method is the one that works with your space, your schedule, and how quickly you want to see that beautiful, dark compost for your plants.
Whether you've got a sprawling backyard or a tiny apartment balcony, a perfect composting match is out there. We'll walk through five of the most popular methods. Think of it as a tour—by the end, you'll have a clear idea of which one will turn you into a composting pro.
1. The Laid-Back Approach: Cold Pile Composting
Cold composting is pretty much the "set it and forget it" of the composting world. You just find a spot in your yard, start a pile of organic materials, and let nature do its thing. There's no stress about getting the ratios perfect or turning it every week. Decomposition just happens, slowly and surely.
This is the perfect route for anyone with some yard space who isn't in a hurry. If you have a bunch of fall leaves, grass clippings, and the occasional kitchen scraps, a cold pile is a no-brainer. Just add to it as you go.
- The upside? It requires almost zero effort and no fancy equipment. It’s incredibly forgiving, which is great for a first-timer.
- The downside? You'll be waiting a while. It can easily take 6 to 12 months, sometimes longer, to get finished compost. An open pile can also attract curious critters if you're not careful about what you add.
2. The Speedy Method: Hot Pile Composting
If you want that black gold for your garden and you want it fast, hot composting is your game. This is a much more active approach where you're basically engineering the perfect environment for heat-loving microbes to go wild. The trick is to build a decent-sized pile (think at least 3 feet wide, long, and tall), get a good mix of "greens" and "browns," keep it damp like a wrung-out sponge, and turn it regularly to get oxygen in there.
This method is a dream for serious gardeners who produce a lot of waste and want a constant supply of top-notch compost for their veggie beds. A well-managed hot pile can heat up to 130-160°F—hot enough to kill off weed seeds and pathogens. The reward for your effort? Finished compost in as little as one to three months.
3. The Tidy and Contained Option: Bin Composting
For those of us who prefer a neater look or are working with less space, a compost bin is a fantastic choice. These are typically stationary containers, often made of wood or recycled plastic, that keep everything enclosed. This design is great for holding in heat and moisture, which speeds things up, and it does a much better job of keeping pests out. Most have a lid on top for adding new scraps and a handy door at the bottom for scooping out the finished stuff.
This is a great middle-ground option, giving you a good balance of efficiency and ease. It's perfect for a townhouse with a small patio or a suburban backyard where an open pile might look messy. You still have to pay some attention to your green/brown balance, but the container makes managing it all feel much less like a chore.
A well-managed compost bin strikes the perfect balance between efficiency and aesthetics. It contains the process, speeds up decomposition by retaining heat, and keeps your garden looking tidy.
4. The Urban-Friendly Choice: Tumbler Composting
Compost tumblers have become the go-to for so many city and suburban gardeners. These are sealed drums on a frame that you can easily turn with a crank or just by spinning the barrel itself. All that turning mixes and aerates the contents, which kicks decomposition into high gear compared to a static pile.
Picture someone with a small patio or balcony. A compact tumbler fits neatly into a corner and can handle kitchen scraps without any mess or odor. Because they're sealed up and off the ground, they're also fantastic at keeping rodents and other pests away.
This shift toward smaller, more efficient composters is happening everywhere. In cities around the world, compact units under 20 liters make up almost half of all sales. It's clear the market is responding to people in smaller homes who want to compost, as you can see in household composter market trend reports.
5. The Indoor Powerhouse: Vermicomposting
What if you have no outdoor space at all? Don't worry, you can still compost! Meet vermicomposting—or, as it's more commonly known, worm composting. This incredibly efficient system uses special red wiggler worms in a bin to break down your food scraps. The final product, called worm castings, is one of the most nutrient-rich soil amendments you could ever hope for.
A worm bin is small enough to tuck under a kitchen sink, in a closet, or on a sheltered balcony. It’s the ultimate solution for an apartment dweller who wants to do something with their fruit and veggie peels without any smell or fuss. The worms do all the heavy lifting; you just have to feed them every so often.
Key Differences at a Glance
| Method | Best For | Effort Required | Space Needed |
|---|---|---|---|
| Cold Pile | Hands-off gardeners | Low | Large |
| Hot Pile | Fast results, large yards | High | Large |
| Bin | Tidy composting, small yards | Medium | Medium |
| Tumbler | Urban dwellers, pest prevention | Medium | Small |
| Vermicompost | Indoor/apartment composting | Medium | Very Small |
At the end of the day, the best composting method is the one you’ll actually stick with. Take a realistic look at your space, how much time you can put in, and what your goals are. Any one of these five methods will successfully turn your "waste" into a priceless resource for your garden.
What Goes In Your Compost Pile (And What Stays Out)
Think of your compost pile less like a trash can and more like a living recipe. Getting the ingredients right is the secret to creating that rich, dark, earthy-smelling "black gold" for your garden. If you get it wrong, you end up with a slimy, smelly mess.
The whole game hinges on balancing two things: nitrogen-rich “greens” and carbon-rich “browns.” Get that mix right, and the tiny microorganisms that do all the hard work will have everything they need to break down your scraps into something amazing.
The Good Stuff: 11 Things to Add to Your Compost
These are the "yes" items for your bin. They provide the perfect blend of nitrogen and carbon to kickstart the decomposition process and keep it humming along.
- Vegetable and Fruit Scraps: This is the bread and butter of kitchen composting. Peels, cores, rinds, and that forgotten lettuce in the back of the fridge are all fantastic sources of nitrogen.
- Coffee Grounds and Paper Filters: Coffee grounds are a surprisingly powerful nitrogen source. Don't worry about the paper filter; you can toss it right in with the grounds.
- Eggshells: It's a good idea to crush them up a bit first so they break down faster. They add a nice dose of calcium, which is great for preventing blossom-end rot on plants like tomatoes and peppers.
- Fresh Grass Clippings: A serious nitrogen booster. Just be sure to mix them in well with plenty of "browns" so they don't turn into a slimy, matted-down layer.
- Yard Trimmings: Freshly pulled weeds (before they go to seed!), green leaves, and deadheaded flowers are all welcome additions.
- Dried Leaves: This is your classic "brown" material. Here's a pro tip: rake and bag up leaves in the fall. You'll have a perfect carbon source to balance out your kitchen scraps all year long.
- Shredded Cardboard and Newspaper: Uncoated cardboard (think toilet paper rolls and egg cartons) and newspaper are excellent carbon sources. Tearing them into smaller pieces gives the microbes more surface area to work on.
- Wood Chips and Sawdust: Just make sure the wood is untreated. These are very high in carbon and are brilliant for adding bulk and creating air pockets in the pile.
- Straw or Hay: Another fantastic "brown" that helps keep your pile from getting too dense and compacted.
- Food-Soiled Paper Towels and Napkins: As long as they aren't soaked in grease or cleaning chemicals, these can go right in.
- Manure from Herbivores: If you have chickens, rabbits, or even a hamster, their manure is a compost supercharger. It's incredibly rich in nitrogen and will really get your pile cooking.
Getting the Mix Right: The Carbon-to-Nitrogen Ratio
You don't need a science degree or a complicated spreadsheet for this. The rule of thumb I've always followed is simple: aim for roughly three parts "browns" (carbon) to one part "greens" (nitrogen) by volume.
So, if you toss in a small bucket of kitchen scraps (greens), try to add about three similar-sized buckets of something like dried leaves or shredded cardboard (browns).
If your pile starts to smell funky—like sour garbage or ammonia—that's your signal that you've got too many greens. The fix is easy! Just stir in a generous amount of brown materials like torn-up paper or wood chips to get things back in balance.
Before you start collecting materials, it helps to know which composting method fits your space. This quick visual guide can help you figure it out.

As you can see, there’s a composting solution for just about everyone, from apartment dwellers to folks with sprawling backyards.
Your Ultimate Composting Cheat Sheet
Keeping track of what’s a "green" and what's a "brown" can be tricky at first. Here’s a quick reference table to make it easy.
| Category | Examples | Role in Compost | Tips |
|---|---|---|---|
| Greens (Nitrogen-Rich) | Fruit & veggie scraps, coffee grounds, grass clippings, plant trimmings, herbivore manure | Provides protein for microbes, heats up the pile | Mix well with browns to prevent odors and slimy layers. Too much green material leads to a smelly pile. |
| Browns (Carbon-Rich) | Dried leaves, shredded cardboard/newspaper, straw, wood chips, sawdust, eggshells | Provides energy for microbes, adds bulk for airflow | Stockpile these in the fall! Shred or tear larger items to help them break down faster. |
| Avoid (Problem Items) | Meat, dairy, oils, pet waste (dog/cat), diseased plants, weeds with seeds | Attracts pests, creates odors, spreads pathogens | These items can ruin your compost and attract unwanted visitors like rats and raccoons. Best to avoid them. |
This cheat sheet is your go-to guide for feeding your compost pile a balanced diet, which is the key to creating that wonderful, nutrient-rich soil amendment.
The No-Go List: 8 Things to Never Put in Your Compost
Knowing what not to compost is just as critical as knowing what to add. Tossing in the wrong things can attract pests, create horrible smells, and even introduce diseases into your garden soil. Steer clear of these.
- Meat, Fish, and Bones: These are an open invitation for pests like rats, raccoons, and flies. They also rot and create some truly awful odors.
- Dairy Products: Like meat, things like cheese, milk, and yogurt are pest magnets and will make your pile smell terrible.
- Oils, Fats, and Greasy Foods: These materials can coat everything, slowing down decomposition to a crawl and creating a rancid, oily mess.
- Pet Waste: Feces from dogs and cats can contain harmful parasites and pathogens. You definitely don't want that anywhere near the food you plan to eat.
- Diseased Plants: Composting diseased plants is a surefire way to reintroduce those same fungal problems or pests right back into your garden beds next season.
- Weeds Gone to Seed: Most home compost piles don't get hot enough to destroy stubborn weed seeds. You’ll just end up spreading them everywhere you use your finished compost.
- Treated Wood or Sawdust: Wood treated with chemicals like arsenic or creosote will leach those toxins straight into your compost.
- Glossy or Coated Paper: The shiny coatings on magazines and some junk mail contain clays and plastics that won’t break down properly.
At the end of the day, the quality of your finished compost comes down to what you put in it. By feeding it the right stuff, you’re creating a powerhouse soil amendment that does way more for your garden than any store-bought fertilizer can. To learn more about how to feed your plants the right way, check out our guide on the top organic vegetable fertilizer options.
7 Ways to Fix the Most Common Composting Problems
Once you’ve got your compost set up and started adding materials, the real work—and fun—begins. Composting isn’t a “set it and forget it” deal. It’s a living process, and a little bit of attention will keep everything humming along.
But let's be realistic: even seasoned composters run into trouble. Don't sweat it. Most of the common issues have surprisingly simple fixes. Think of your pile as a living thing that needs three key ingredients to be happy: air, water, and a balanced diet of "greens" and "browns." Your main job is to make sure it gets enough of each.
Get that right, and you're well on your way to turning a heap of scraps into the "black gold" that will make your garden thrive.
Troubleshooting is just part of the learning curve. Every gardener I know has, at some point, dealt with a stinky pile or wondered why things were taking so long. Here’s a look at the most frequent snags you might hit and exactly how to fix them.
1. My Pile Is Starting to Smell Bad
A healthy compost pile should smell earthy and pleasant, a bit like a forest floor after a good rain. If you’re catching whiffs of ammonia or rotting garbage, that’s your pile telling you something is out of balance.
Almost every time, this means you've got too many nitrogen-rich "greens" (like kitchen scraps) and not enough carbon-rich "browns." The pile has gone anaerobic, which is a technical way of saying the microbes are working without enough oxygen.
The Fix: Grab a bag of brown materials—dried leaves, shredded cardboard, or even some sawdust—and add a generous layer. Then, use a pitchfork or a compost aerator to really mix those new materials into the pile. This instantly restores the balance and gets air flowing again.
2. The Pile Is Way Too Wet and Slimy
I’ll never forget the time I dumped a whole lawn's worth of fresh grass clippings into my bin. A week later, I had a compacted, slimy, and frankly disgusting mess on my hands. This is what happens when you have too much moisture and not enough structure for airflow.
The Fix: The solution here is the same as for a smelly pile: add more dry, bulky "browns." Break up any of those gross, matted clumps with a garden fork and mix in things like straw, torn-up egg cartons, or wood chips. These materials will soak up the excess moisture and create essential air pockets.
3. My Compost Isn't Heating Up
If you're aiming for hot composting but your pile is sitting at air temperature, it’s missing one of three things.
- It's too small. To really generate and hold heat, a hot pile needs some heft. Aim for a pile that’s at least 3 feet wide and 3 feet tall.
- It's too dry. The microbes doing all the work need moisture to survive. Your pile should feel damp, like a wrung-out sponge.
- It needs more nitrogen. The "greens" are the fuel that really gets the microbial engine running hot.
The Fix: If the pile is too small, just add more material. If it feels dry, give it a light spray with a hose while you turn it. And if the balance seems okay but it's still cold, throw in a nitrogen booster like coffee grounds or fresh grass clippings to kickstart the activity.
4. My Pile Has Attracted Pests
Finding critters like soldier fly larvae in your compost is totally normal—they're actually fantastic decomposers. But seeing rats, raccoons, or a swarm of houseflies means something is wrong.
This is almost always caused by exposed food scraps, especially if you’ve added things you shouldn't, like meat or dairy.
The Fix: First rule of thumb: never add meat, bones, or dairy products to a standard home compost pile. When you add your kitchen scraps, always bury them deep down in the center of the pile. Then, cover them with a thick layer of "browns." This simple step makes your compost far less tempting to unwanted visitors.
"Many people worry that compost will smell or attract pests, but if you do it correctly, it won’t. Well-made compost has a rich, earthy smell and looks like very dark soil."
5. Decomposition Is Taking Forever
Is your pile just… sitting there? If it seems like nothing is happening, the culprit is usually one of three things: it’s too dry, it has too much carbon, or you aren’t turning it enough. Carbon-heavy materials like wood chips can take ages to break down on their own.
The Fix: First, check the moisture. If it’s dry, add water. If the moisture level is good, it probably needs a fresh infusion of "greens" to energize the microbes. Finally, make a point to turn the pile every week or two. Regular turning is like fanning the flames of decomposition.
6. I Don’t Have Enough “Brown” Materials
This is a classic problem for urban gardeners or anyone who produces a ton of kitchen scraps but doesn't have a big yard with falling leaves.
The Fix: Time to get creative. Start a collection bin for toilet paper rolls, paper towel tubes, cardboard egg cartons, and any non-glossy junk mail you get. You can also ask local coffee shops for their used coffee grounds and filters—the paper filters count as a brown! In the fall, don't be shy about asking neighbors if you can take their bagged leaves off their hands. Most will be thrilled.
7. My Compost Setup Feels Too High-Maintenance
Let's be honest, sometimes managing a traditional pile can feel like a chore. If you find it's too much work, that doesn’t mean you have to give up. It just means it's time to explore other options.
Fortunately, technology is making home composting easier than ever. Manufacturers are rolling out things like odorless electric composters and smart systems that automate much of the process. These innovations are making composting more convenient for modern life, getting rid of old worries about smells or pests. You can learn more about the rise of household composters and see if one might be a better fit for your routine. A simple compost tumbler or a compact worm bin can also be a fantastic, low-effort alternative.
5 Excellent Ways to Use Your Finished Compost
After all your patience, you've finally reached the best part of home composting—getting your hands on that beautiful, finished "black gold." The wait is over, and your garden is in for a real treat.
You'll know your compost is ready when it's transformed into a dark brown or black, crumbly material that smells earthy and rich, almost like a forest floor after a good rain. Gone are the banana peels and coffee grounds; instead, you’ll have a uniform, soil-like substance.
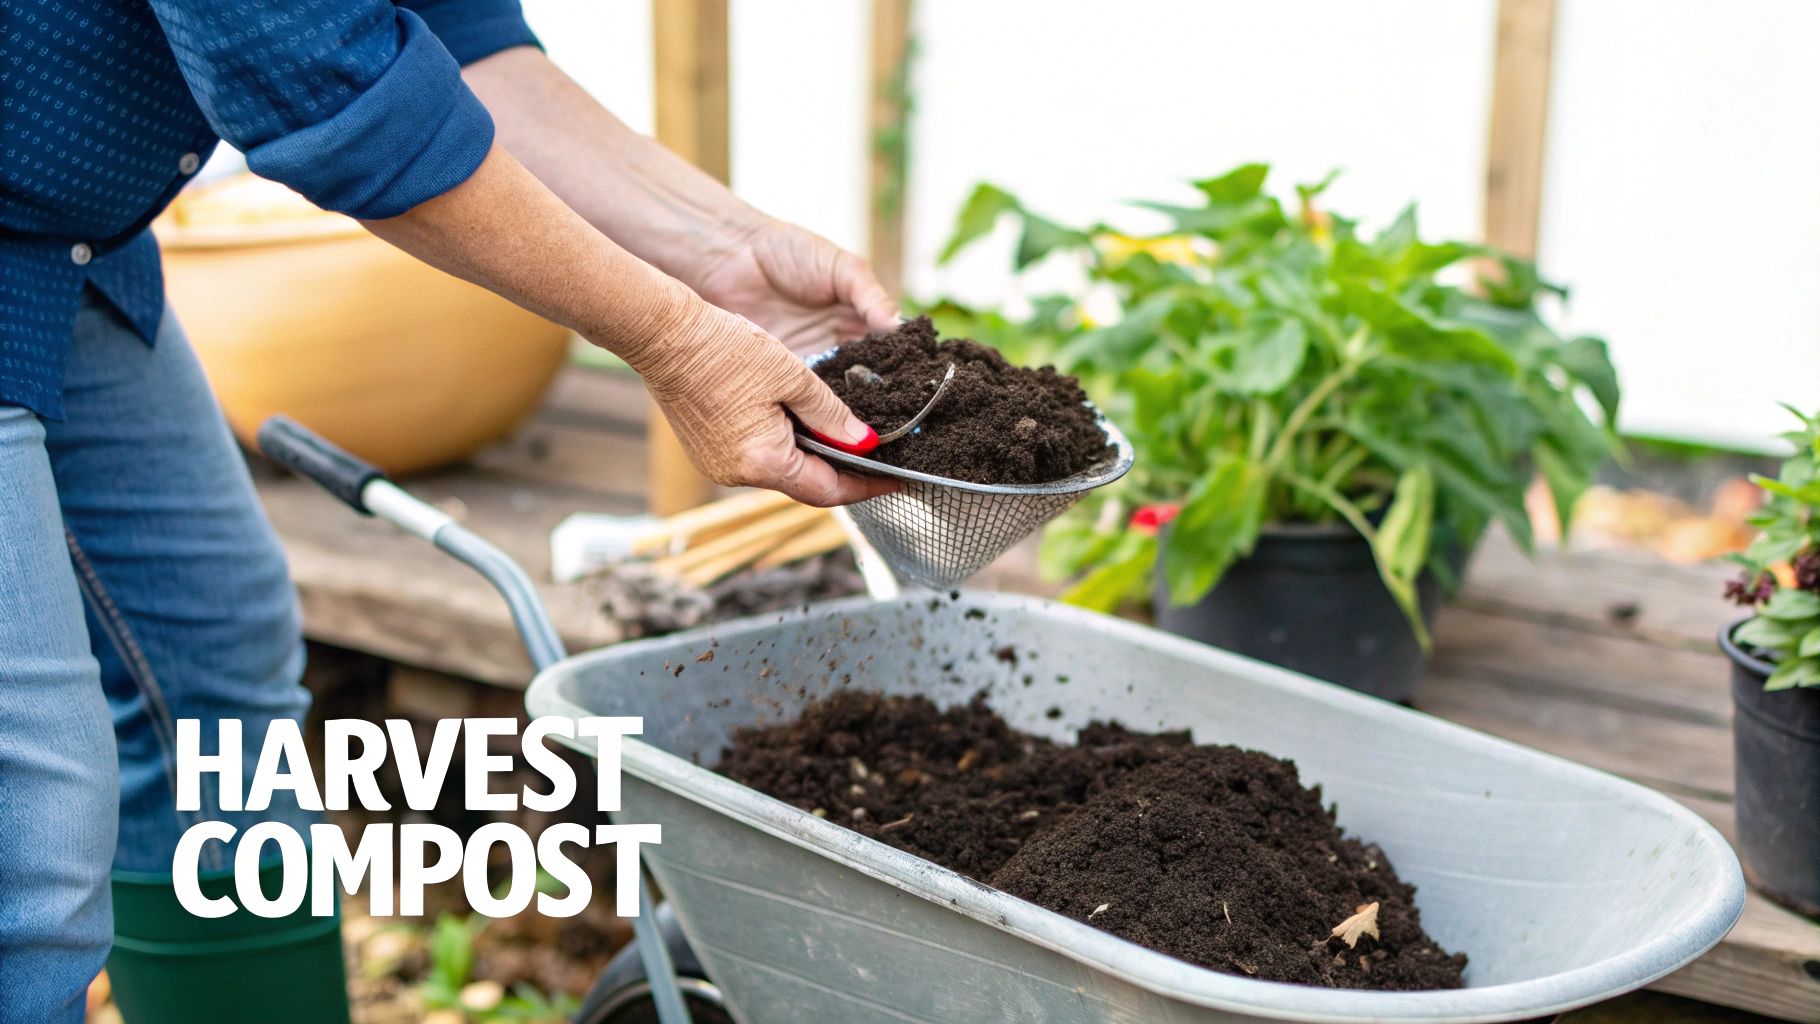
Harvesting and Preparing Your Black Gold
Getting the finished compost out is pretty straightforward. If you're using a bin, the good stuff is always at the bottom, so just open the little door and scoop it out. For piles or tumblers, I find it easiest to just empty the whole thing onto a tarp.
You'll probably spot some stubborn bits that haven't fully broken down, like avocado pits or small twigs. To get a finer, more consistent texture, a lot of gardeners (myself included) like to sift their compost. You can easily make a screen by stapling some 1/2-inch hardware cloth to a simple wooden frame. Just prop it over your wheelbarrow and shovel the compost on top.
- Give it a little shake, and the fine, finished compost will fall right through.
- Toss the larger chunks that get left behind back into your active pile to keep breaking down.
Sifting gives you a smooth, easy-to-use amendment that’s perfect for any garden application.
Here’s a pro tip I swear by: always save a few handfuls of your finished, sifted compost. Mixing this "starter" into your next batch gives it a huge head start by introducing all those beneficial microbes.
This stuff you've made is a powerhouse soil conditioner. It improves soil structure, helps it hold onto moisture, and slowly releases key nutrients. Here are five of my favorite ways to put it to work.
1. Mix It into Potting Soil for Container Plants
Store-bought potting mix can be a bit lifeless and loses its punch pretty quickly. I like to supercharge it by blending about one part finished compost with two parts potting soil. This creates a fluffy, nutrient-dense medium that your container veggies, herbs, and flowers will absolutely love. It also dramatically improves drainage.
2. Top-Dress Your Vegetable Garden Beds
You don’t have to till your whole garden to get the benefits. Top-dressing is a fantastic, no-dig method. Just spread a 1- to 2-inch layer of compost around the base of your established plants. Every time you water, you're washing all that goodness down to the roots. It’s the perfect mid-season pick-me-up for heavy feeders like tomatoes and squash.
3. Amend Soil in Flower Beds and Landscapes
Give your new annuals and perennials the best start possible by working 2 to 3 inches of compost into the top 6 inches of soil before planting. It’s the single most important step in preparing your garden soil. This helps break up heavy clay, gives structure to sandy soil, and makes it easier for roots to establish. The payoff? Brighter, healthier, longer-lasting blooms.
4. Make a Potent Compost Tea
For a quick and direct nutrient boost, you can't beat compost tea. It’s essentially a liquid fertilizer packed with beneficial microbes. Just put a few shovelfuls of finished compost into a burlap sack or an old pillowcase and let it steep in a 5-gallon bucket of water for 24 to 48 hours. Use this liquid "tea" to water your plants at the root or as a foliar spray to help keep diseases at bay.
5. Use It to Start New Lawns
Compost is your secret weapon for seeding a new lawn or patching up bare spots. Before scattering your grass seed, spread a very thin 1/4-inch layer of sifted compost over the soil. It helps keep the seeds moist (which is crucial for germination) and provides gentle nutrients for the new seedlings. Making and using your own compost is one of the most valuable skills you can develop in your Certificate in Home Food Gardening journey, directly boosting your yields and plant vitality.
Common Composting Questions Answered
Even after you get the basics down, a few questions always seem to pop up on the composting journey. It's totally normal. Getting a handle on these common queries will help you feel more confident and head off problems before they even begin. Let's dig into three of the biggest questions I hear from new composters.
How Long Does Composting Take?
This is the big one, and the honest answer is, "it depends." How quickly you get that beautiful, finished compost really comes down to the method you're using and how much you're willing to baby it.
- A hot pile, which you'll need to turn regularly and keep a close eye on the green-to-brown ratio, is the speed demon. You could have finished compost in as little as one to three months.
- A cold pile is the lazy gardener's friend. It’s more of a "set it and forget it" method, but you'll be waiting a lot longer—anywhere from six months to over a year.
Things like chopping up your scraps into smaller pieces, keeping the pile consistently moist (like a wrung-out sponge), and turning it for air all make a huge difference in speeding things up.
Can I Still Compost in the Winter?
You bet! While everything slows down when the temperatures drop, your compost pile doesn't just clock out for the season. Think of it more like it's going into hibernation. The microbial party quiets down, but it doesn't stop completely.
Feel free to keep adding your kitchen scraps all winter long. They won't break down much right away, but they'll be ready and waiting for when things warm up in the spring.
I like to think of a winter compost pile as a holding tank. Just keep layering in your materials. Once the first warm spell hits, all that stockpiled organic matter will be primed to decompose in a hurry.
A great tip is to insulate your pile from the worst of the cold. Tucking it in with a thick blanket of straw or a big mound of dried leaves can trap heat and give those microbes a cozier home.
Do I Need to Buy Worms or Special Activators?
For a typical backyard pile, bin, or tumbler, the answer is a firm no. You absolutely do not need to buy worms or any of those commercial "compost starters." The microorganisms, fungi, and insects that do all the heavy lifting are already hitching a ride on the materials you're adding and are present in the soil.
The confusion usually comes from vermicomposting. That's a whole different ball game where you use a special bin (often indoors) with specific types of worms, like red wigglers, to process food scraps. It’s a fantastic system, but it’s not the same as a traditional outdoor pile.
As for so-called activators? A healthy pile with a good mix of greens and browns, the right moisture, and enough air creates its own magic. If things seem a little sluggish, just toss in a shovel full of finished compost or even a scoop of rich garden soil. That’s all the "activator" you'll ever need to get a thriving colony of microbes working for you.
At Homegrown Garden, we believe that creating your own nutrient-rich soil is one of the most rewarding steps in gardening. Explore our collection of heirloom seeds, starter kits, and expert guides to put your homemade compost to good use. Find everything you need for your next project at https://www.homegrown-garden.com.
Put your finished compost to work. Start a bed with our vegetable seeds.

