


To scarify a seed, you're essentially just giving it a helping hand. The goal is to nick, scratch, or weaken its tough outer shell just enough for water to get inside and kickstart the germination process. A quick scrape with sandpaper or a little snip with nail clippers is often all it takes to mimic what happens in nature and coax a stubborn seed to life.
Why Some Seeds Need a Nudge to Grow
Have you ever planted seeds, followed all the rules, and then... nothing? It’s a classic gardener's headache. But more often than not, it isn't something you did wrong. It’s actually a brilliant survival strategy built right into the seed.
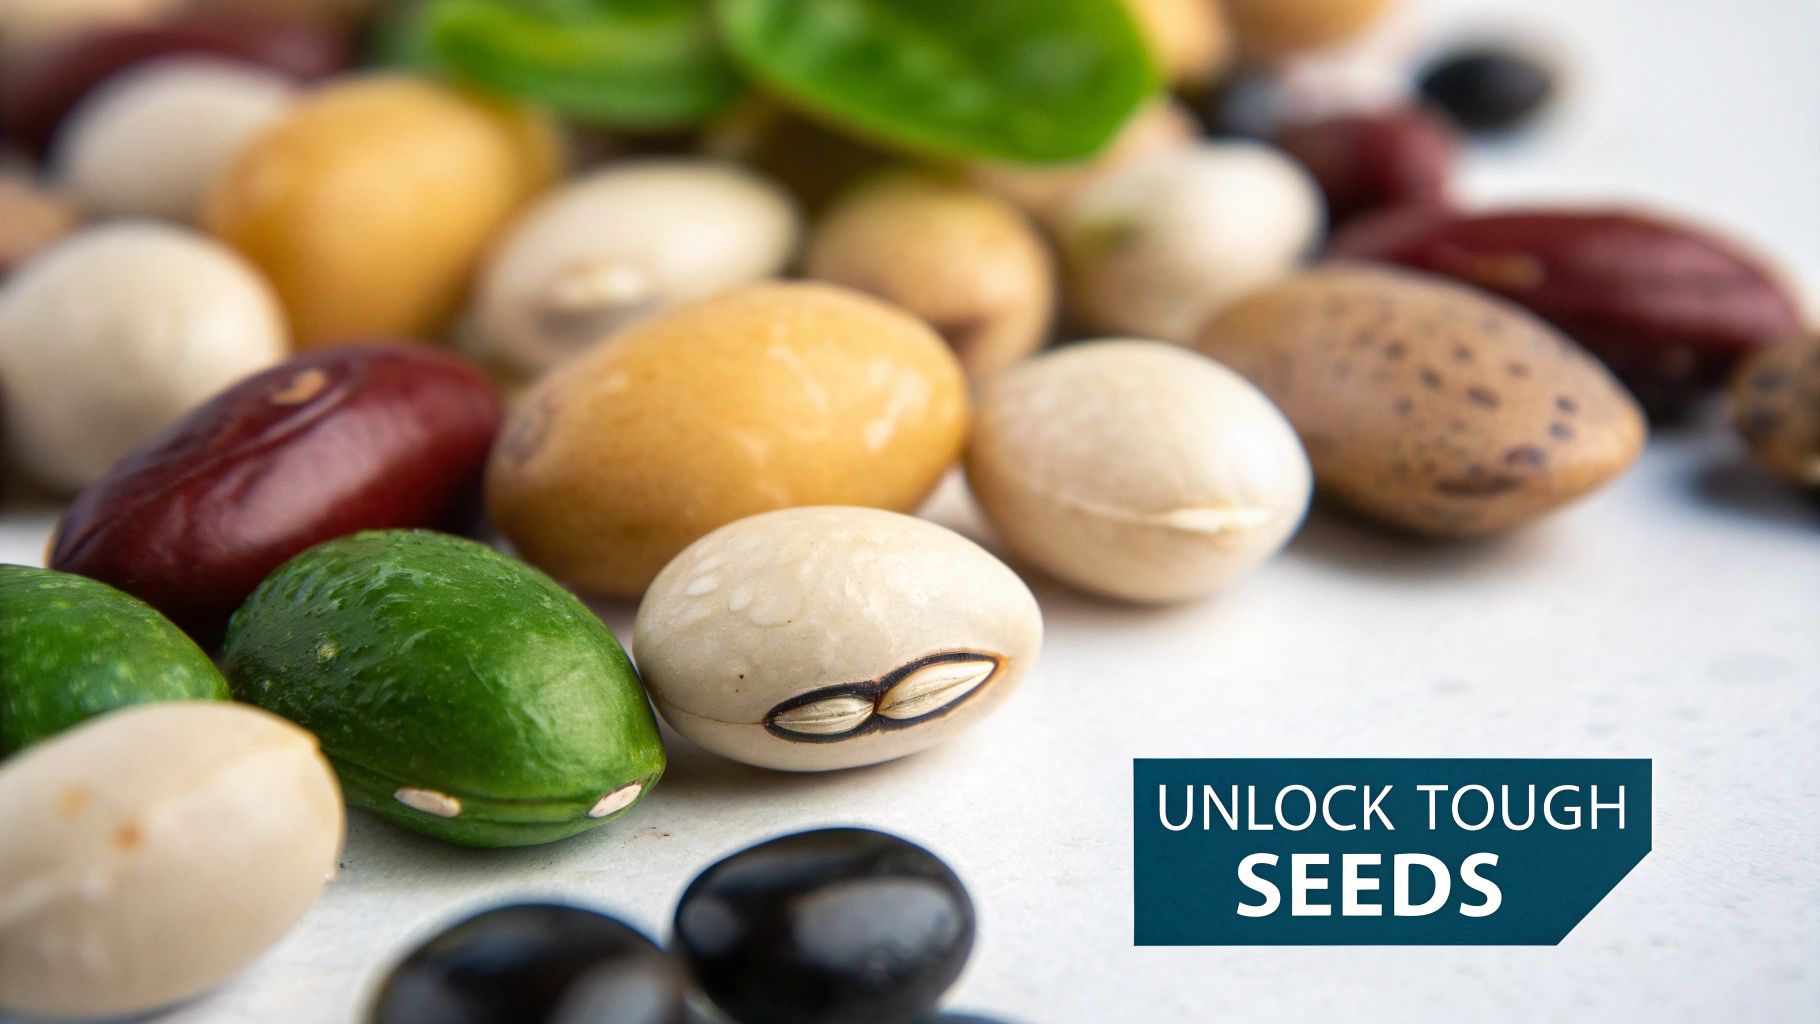
Many plants, like lupines, morning glories, and sweet peas, produce seeds with incredibly tough, waterproof shells. Think of it as a tiny suit of armor. This natural defense is designed to keep the little embryo inside safe and dormant until the conditions are just right for it to grow. Without that tough coat, a seed might sprout during a freak warm spell in January, only to be zapped by the next hard frost.
Nature's Built-In Delays
In the wild, that protective coating is crucial for survival, and it serves a few key purposes.
- Surviving a Trip: Many seeds are meant to be eaten. Their tough coats let them pass straight through an animal's digestive system. The stomach acids do the work of weakening the shell, and the seed gets deposited in a brand-new spot, complete with its own little pile of fertilizer.
- Weathering the Storm: Hard-shelled seeds can hang out in the soil for a long time—through freezing winters, dry summers, and heavy rains—without rotting or sprouting too early.
- Waiting for the Grind: Out in the world, a seed coat gets worn down naturally over time by rubbing against soil particles, the expansion and contraction of freezing and thawing, or even the work of microbes.
When we scarify seeds, we're just speeding up these natural events. Instead of waiting seasons for nature to do its thing, we’re giving the seed a clear signal that it's safe to wake up and grow. It really works, too. Mechanical scarification can boost germination rates by a staggering 70-90%. For example, studies on Acacia seeds show that a simple sandpaper treatment can take their germination rate from around 20% to over 80%.
A Quick Clarification: It's easy to mix up scarification with stratification. They're both ways to wake up sleepy seeds, but they solve different problems. Scarification is for breaking a hard outer shell. Stratification, on the other hand, involves giving seeds a cold, damp period to mimic winter. We have a whole guide on how to stratify seeds if you want to dive deeper.
Learning this simple technique opens up a whole new world of plants you can grow from seed, letting you fill your garden with unique and beautiful varieties.
Gearing Up: Your Seed Scarification Toolkit
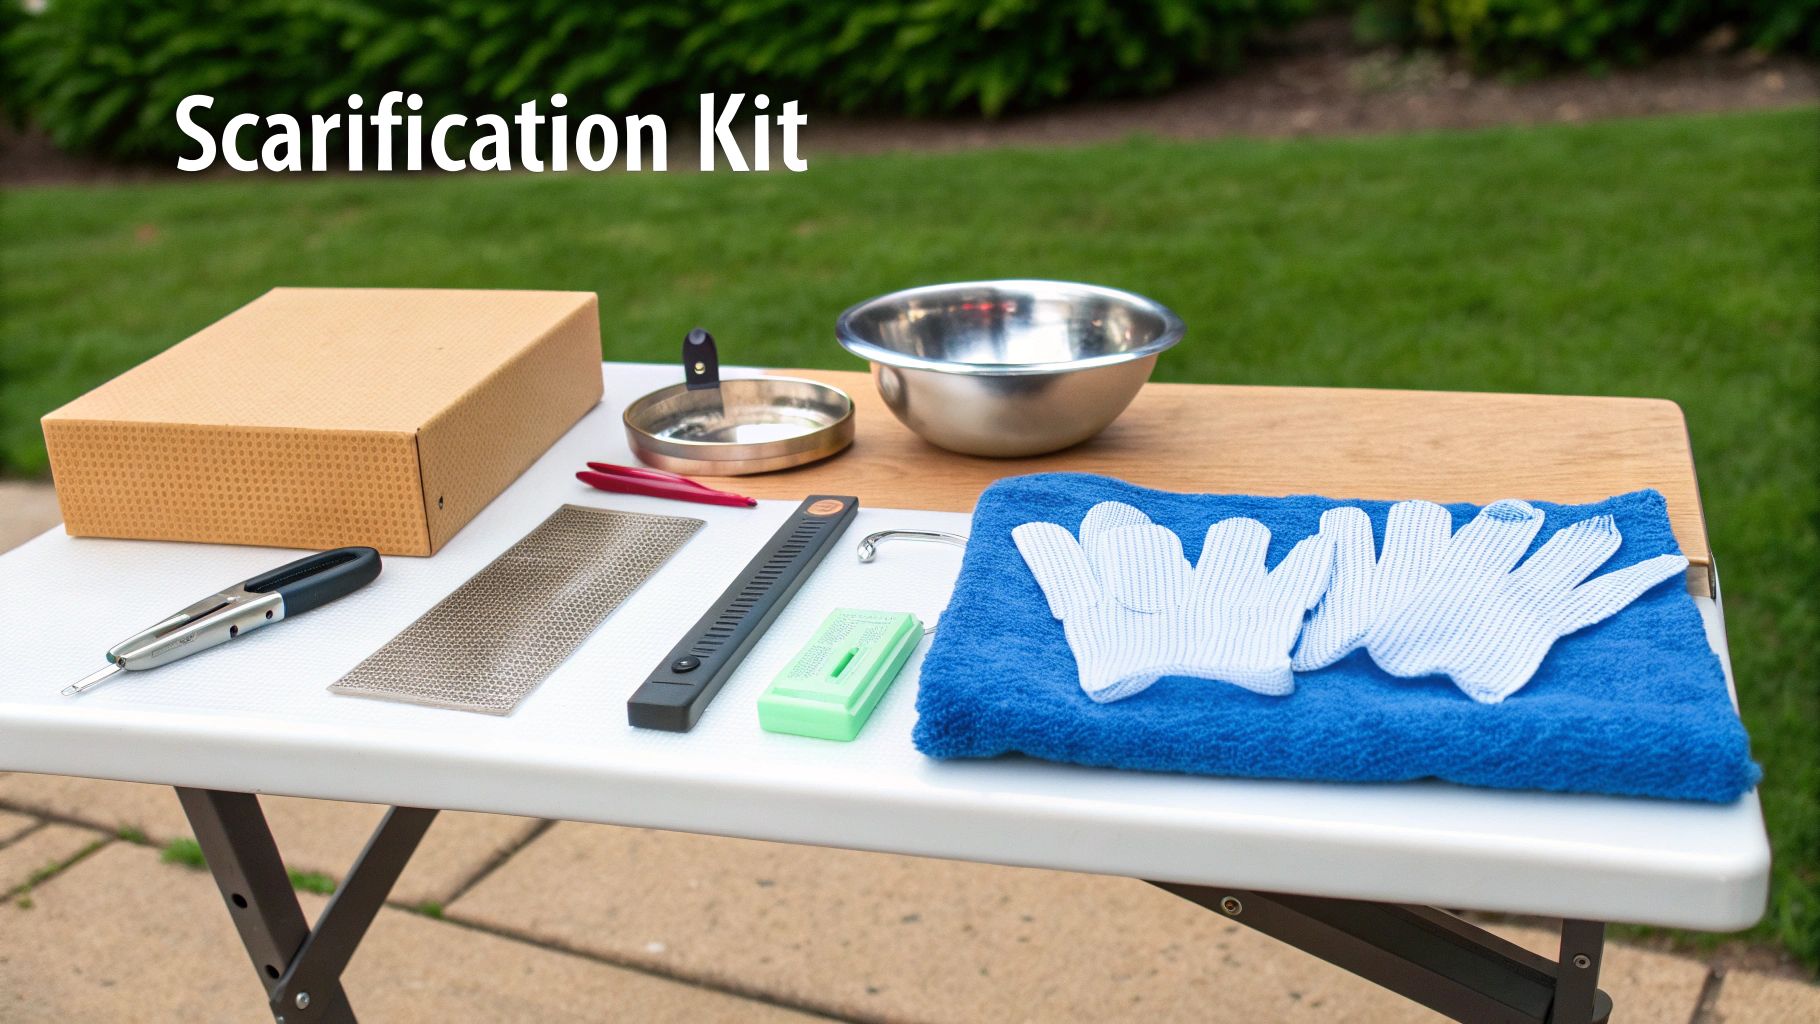
Before you jump into the actual work of waking up those stubborn seeds, a little prep goes a long way. Trust me, getting organized first is the key to a smooth process. You don't want to be scrambling for a tool while holding a handful of tiny seeds that seem determined to roll off the table and vanish forever.
I like to set up a dedicated "scarification station." It doesn't have to be fancy—a clean countertop or even just a large tray will do. This simple step helps you keep track of your tools and, more importantly, your precious seeds.
Must-Haves for Mechanical Scarification
This is the method most gardeners start with because the tools are so straightforward. You probably have most of this stuff already. The real trick is picking the right tool for the seed you’re working with.
- Sandpaper (Various Grits): A medium grit, something around 100-120, is my go-to for common seeds like morning glories or sweet peas. It’s a good idea to also have a finer grit for smaller seeds and a coarser one for the really tough guys, like canna lily seeds.
- Nail Clippers or a Small File: These are fantastic for getting a precise nick on the hard coats of beans, peas, or nasturtiums. You're just aiming for a tiny opening to let water in, not a huge crack, so control is everything here.
- Small Glass Jar with a Lid: This is a great time-saver if you have a bunch of small seeds to process. Just line a jar with sandpaper, toss the seeds in, and give it a good shake for a few minutes.
My favorite trick? I always lay down a light-colored dish towel or a piece of felt on my workspace. It completely stops seeds from bouncing away and makes them way easier to spot. Nothing is more frustrating than losing a special seed to the floor.
Supplies for Hot Water and Chemical Treatments
If you’re tackling seeds that need a hot water soak or a mild acid bath, your kit will need a few extra items to handle the heat and keep you safe.
For a hot water soak, you'll need:
- A heat-proof bowl or a sturdy mug.
- A kitchen thermometer is essential. You need to get the water just right—usually between 170-190°F (77-88°C). Too cool and it won't work; too hot and you'll cook your seeds.
- A small strainer makes it easy to fish the seeds out after they've had their bath.
For mild acid scarification, safety is non-negotiable:
- Safety Goggles: Protect your eyes from any potential splashes. Don't skip these.
- Gloves: Keep the acid off your skin to avoid irritation.
- Glass containers are a must, as some acids can eat through plastic or react with metal.
Setting Up Your Workspace
Once you've gathered your gear, lay it all out and organize it by which method you're using. This little bit of prep makes the whole process feel less like a chore and more like a fun garden project. A tidy station doesn't just make you more efficient; it sets you up for a better germination rate down the line.
Speaking of which, once your seeds are scarified, they'll need a great place to sprout. Having the right containers ready is the next step, and you can find some fantastic choices in our guide to the best seed starter kits to give them the perfect start.
7 Ways to Scarify Seeds for Your Garden
Alright, let's get to the fun part—actually roughing up those seeds. The key is to physically or chemically break, scratch, or thin the seed coat just enough to let water in. Think of it as opening a tiny window for life to get started. Here are 7 effective methods, starting with the most common hands-on techniques.
Method 1: Use Sandpaper for a Consistent Scuff
This is my go-to technique for most medium-sized seeds with tough, but not rock-hard, coats. It works beautifully for sweet peas, morning glories, and lupines. Sandpaper gives you a nice, controlled abrasion that mimics the natural wear and tear a seed would get from shifting around in the soil for months.
Just grab a sheet of medium-grit sandpaper (around 100-120 grit) and gently rub the seed over it with a bit of pressure. A few firm swipes are usually all it takes. Your goal is to scuff the surface until you see a slight change in color, which tells you you've worn through that tough outer layer.
The most important thing to remember is where you scuff the seed. Try to avoid the hilum—that’s the little scar where the seed was attached to its parent plant, sometimes called the "eye." It's a vulnerable spot. Any other part of the seed coat is fair game. After you’ve done this, you'll notice the seeds plump up much faster when you soak them, which is a great sign you did it right. Getting these initial steps dialed in can make a huge difference, and you can learn even more in our comprehensive guide on how to germinate seeds faster.
Method 2: Nick Seeds with Nail Clippers
For larger seeds that are easy to hold, like nasturtiums, beans, or canna lilies, a simple pair of nail clippers is surprisingly precise. This method lets you create a very specific, tiny opening in the seed coat, giving water a direct path inside.
Hold the seed firmly between your thumb and forefinger. Find a spot on the edge of the seed, far away from the hilum, and make a very small chip or "nick" in the hard shell. You only need to apply enough pressure to break through the outer coat without cutting deep into the seed itself.
Gardener's Tip: I've found that clippers with a straight, file-like edge give me more control than the standard curved ones. You’re aiming for a tiny chip, not to slice the seed in half. You should hear a faint snap as the coat gives way. As soon as you see the lighter-colored interior, stop. You're done.
This is a fantastic technique for seeds that are too big or oddly shaped to sand effectively. It's quick, satisfying, and lets you prep each seed perfectly for planting.
Method 3: Tame Tough Seeds with a Metal File
Sometimes you come across seeds that are just ridiculously hard—I’m talking about things like Kentucky coffeetree, honey locust, or certain acacia seeds. Sandpaper and clippers just won't cut it. This is when a small metal file becomes your best friend, giving you the power to get through those rock-like shells.
To be safe, secure the seed in a small clamp or hold it with pliers to keep your fingers out of the way. Then, using firm, steady strokes, file a small area on the seed coat. Just like with sandpaper, you're looking for that subtle change in color that tells you you've broken through the outer layer.
- Pick the Right File: A small, fine-toothed file, like one from a jeweler's set, gives you the best control.
- Go Slow: It's easy to overdo it. Use short, deliberate strokes and check your work often.
- Avoid the Embryo: Always file the side or edge of the seed, staying well away from the hilum.
This method takes a bit more elbow grease, but it’s the most reliable way to handle the real tough guys of the seed world. It can turn a seed that seems impossible to sprout into a thriving new plant for your garden.
Method 4: Shake Seeds in a Jar with Sand
So, what do you do when you have to scarify a huge number of small seeds, like bluebonnets or a native wildflower mix? Nicking them one by one would take all day. Luckily, there’s a clever trick for this, sometimes called the "tumble method," that lets you prep hundreds at once.
The process is brilliantly simple. You just need a jar with a tight-fitting lid and some coarse sand or fine gravel.
- Add the Abrasive: Fill the jar about a quarter of the way with your coarse sand.
- Add the Seeds: Pour the seeds right on top of the sand.
- Shake It Up: Screw the lid on tight and shake the jar vigorously for a minute or two. The seeds will tumble around, rubbing against the sand and each other, which scuffs up their coats beautifully.
When you're done, just pour the whole mix through a fine mesh strainer to separate your seeds from the sand. This bulk method is a massive time-saver and gives all your seeds a consistent treatment, setting them up for a more uniform germination.
Method 5: Use a Hot Water Soak
For seeds with exceptionally hard or waxy coatings, like black locust or certain members of the legume family, a hot water soak is a classic for a reason. It works. The sudden shock of heat is often the only thing that can punch through their waterproof armor, letting moisture in so the seed can finally swell up.
The real key here is getting the temperature just right. You need the water hot enough to breach the seed's defenses, but not so hot that you accidentally cook the delicate embryo inside.
- Heat Your Water: Bring a small pot of water to a boil, then immediately take it off the heat. Let it sit for a minute or two until it cools to between 170–190°F (77–88°C). A kitchen thermometer is your best friend for this step—don’t guess!
- Pour and Soak: Pop your seeds into a heat-proof container like a mug or a glass bowl, and pour the hot water over them.
- Wait and Watch: Let the seeds soak for 12 to 24 hours. The water will gradually cool down to room temperature.
You’ll know it was a success when the seeds have visibly swollen, sometimes to double or even triple their original size. If you have any that still look small and hard after the soak, they’re still dormant. You can try nicking them with a file before re-soaking, or just plant the ones that responded.
Method 6: Give Them a Gentle Warm Water Bath
Not every seed needs a shock to the system. Some, like parsley, beet, or spinach, have coats that aren't necessarily rock-hard but are packed with germination inhibitors. These are natural chemicals that tell the seed to stay dormant until they're washed away by consistent moisture.
A simple warm water soak is the perfect way to rinse these inhibitors away and give the seeds a gentle nudge.
Just place these seeds in a bowl of warm (not hot) tap water for 8 to 12 hours before you plan to sow them. This gives those inhibitors plenty of time to dissolve, signaling to the seed that conditions are finally right for growth. After their bath, they’re ready for planting.
Expert Tip: After any kind of water soak—hot or warm—it’s vital to plant your seeds right away. Once that protective coat has been compromised and the seed is full of water, it becomes vulnerable to mold and rot if left sitting out.
Method 7: Try a Safe Spin on Chemical Scarification
In commercial agriculture, botanists often use concentrated sulfuric acid to scarify seeds that evolved to pass through an animal's digestive system. That’s obviously too dangerous for a home garden, but we can borrow the core principle using a much safer acid you probably have in your pantry: vinegar.
This trick can work wonders on seeds with very thick, stubborn coats that just won't respond to anything else. The gentle acidity of plain white vinegar can slowly soften that tough outer layer over time.
- Prepare the Soak: Put your seeds in a small glass jar, since acid can react with some plastics and metals.
- Add Vinegar: Pour in enough standard white vinegar to completely submerge the seeds.
- Soak Carefully: Let them sit for several hours, but be sure to check on them frequently. The goal is just to soften the coat, not dissolve the whole seed!
- Rinse Thoroughly: Once you're done soaking, drain the vinegar and rinse the seeds under cool running water for at least a minute to get rid of any lingering acid.
- Plant Immediately: Just like with the other soaks, these seeds need to get into the soil without delay.
The global seed coating market, which depends on scarification, was valued at USD 2.81 billion in 2024. In North America, which makes up nearly 40% of that market, these techniques are essential for high-value crops. You can learn more about these agricultural innovations in this comprehensive market report.
What to Do After Scarifying Your Seeds
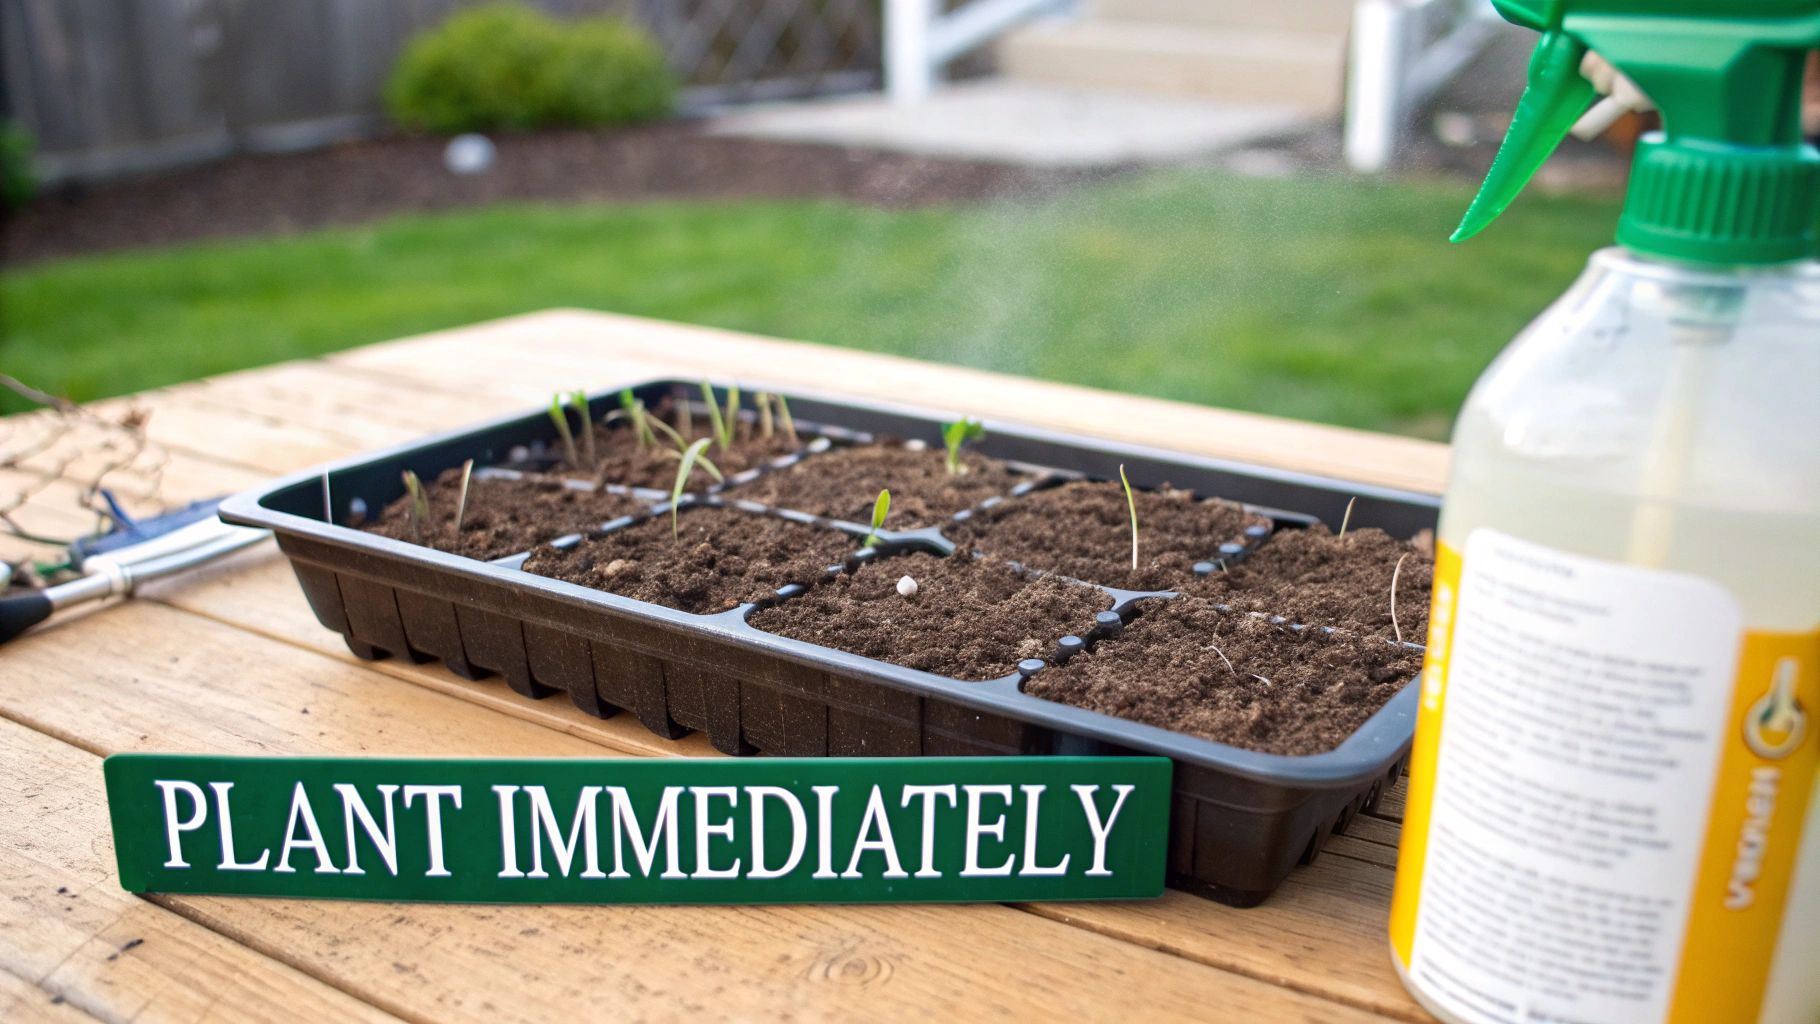
You’ve done the tricky part—nicking, soaking, or scuffing that stubborn seed coat. But the next step is just as critical, and timing is everything. Once you scarify a seed, you've essentially removed its natural armor, leaving it exposed and ready to absorb water.
This is exactly what you want, but it also means the clock is ticking. You must plant your seeds immediately after treatment. A scarified seed left out in the open is incredibly vulnerable to drying out or, worse, developing mold and rot. Think of it as opening the door for germination; you need to get that seed into its new home before anything else wanders in.
Creating the Perfect Germination Environment
Now that your seeds are prepped and ready, your focus shifts to giving them the perfect conditions to sprout. A few key elements will give your newly awakened seeds the best possible start, turning all your careful scarification work into healthy, thriving seedlings.
First up is your growing medium. You need something that’s both sterile and light. I always reach for a dedicated sterile seed-starting mix. It’s your best bet because it’s free from the fungal spores that cause "damping-off," a heartbreakingly common disease that kills young seedlings. Regular potting soil is just too heavy and can compact, making it a struggle for delicate new roots to push through.
The right sowing depth is another piece of the puzzle. A good rule of thumb is to plant seeds at a depth roughly twice their own width. For those dust-like tiny seeds, this might mean just barely covering them with a light dusting of your mix. This ensures they have enough stored energy to push through the surface and find the light.
Managing Moisture, Temperature, and Airflow
With your seeds planted in the right medium and at the correct depth, maintaining a balanced environment becomes your top priority. Moisture, warmth, and air are the three pillars that support successful germination after you’ve learned how to scarify seeds.
Proper moisture is non-negotiable. The soil should feel like a well-wrung sponge—consistently moist, but never waterlogged. Overwatering is a classic mistake that can suffocate seeds by filling all the air pockets in the soil, which quickly leads to rot. I find that using a spray bottle for gentle misting or bottom-watering the trays are the best ways to keep things perfect without washing the seeds around.
A Note on Germination Speed: Don't get discouraged if you don't see sprouts overnight. Even after scarification, germination times can vary widely. Some fast-growers might pop up in a few days, while others can take 10 days or more. Patience truly is a gardener's most valuable tool here.
Heat is a great germination accelerator. Many seeds prefer soil temperatures between 70-80°F (21-27°C) to get going. A simple heat mat placed under your seed trays is a fantastic way to provide this consistent warmth, especially if you're starting seeds indoors in a cooler room.
Finally, don't forget about air circulation. Stagnant, humid air is an open invitation for fungal diseases. Once your seeds have sprouted, it's a good idea to remove any humidity domes and place a small, gentle fan nearby. This breeze not only helps prevent disease but also strengthens the seedlings' stems, preparing them for life in the great outdoors.
Questions and Troubleshooting Scarification
Even seasoned gardeners run into a few head-scratchers when it comes to scarifying seeds. It's a bit of an art, and every seed is a little different. Let’s walk through some of the most common questions that pop up, so you can tackle your next seed-starting project like a pro.
How Do I Know if My Seeds Even Need Scarification?
First things first, check the seed packet. Most good suppliers will tell you right there if scarification is needed. If you don't have instructions, a quick search for "[plant name] germination" will usually get you an answer.
But you can also just look at the seed itself. Does it have a thick, hard, or waxy-looking coat? Think about seeds like lupines, sweet peas, or morning glories—they’re practically armored. If you press your thumbnail into the seed and can't make a dent, that’s your biggest clue.
My favorite trick: Pop a few seeds into a glass of water and leave them overnight. If they’ve plumped up and look swollen in the morning, they’re good to go without any help. If they look exactly the same after 24 hours, it's time to break out the tools.
Is It Possible to Scarify a Seed Too Much?
Oh, absolutely. This is probably the most common mistake people make. Remember, the goal is just to create a tiny scratch for water to get in, not to perform major surgery on the seed. It's always better to do too little than too much.
Here are a few pointers to know when to stop:
- Sandpaper or a Nail File: As soon as you see the color of the seed coat change, even slightly, you're done. You’ve just broken through that tough outer layer to the lighter-colored part underneath.
- Nail Clippers: You're just aiming for a tiny nick. The second you see that pale interior, stop. Going any deeper can kill the embryo inside.
- Hot Water: The biggest risk here is literally cooking the seed. Stick to water that's hot but not boiling—around 170-190°F (77-88°C) is the sweet spot. And don’t leave them soaking for longer than the recommended time.
When in doubt, err on the side of caution. A tiny nick is often all it takes to wake a seed up.
I Scarified My Seeds, So Why Didn't They Sprout?
This is the frustrating part, I know. You did everything right, but nothing happened. Don't give up! When scarified seeds fail, it's usually for one of a few reasons.
First, revisit your technique. It’s possible the nick wasn't quite deep enough to let water penetrate. I've dug up seeds before that looked exactly as they did the day I planted them—a sure sign they never got a drink. On the other hand, if a seed turns to mush, it was probably damaged during scarification and rotted in the soil.
But it might not be the scarification at all. Other culprits are often to blame:
- Cold soil: Most seeds need warmth to trigger germination.
- Watering issues: Soil that’s constantly soggy or bone-dry will kill a seed.
- Planting too deep: The little seedling runs out of energy before it can reach the light.
- Bad seeds: Let's face it, not every seed in a packet is viable, especially if it's a few years old.
Before you blame your scarifying skills, take a look at these other environmental factors. More often than not, that’s where the problem lies.
Ready to put your new skills to the test? At Homegrown Garden, we offer a wide selection of heirloom flower, vegetable, and herb seeds that are perfect for your next gardening adventure. Explore our curated seed collections and find everything you need to grow a beautiful and productive garden.

