


So, you're eager to get a jumpstart on your garden this year? I get it. Waiting for those first green shoots to appear can feel like an eternity. The good news is that you don't have to leave it all to chance. The secret to germinating seeds faster isn't some complex scientific formula—it's about giving them a clear signal that it's time to wake up and grow.
If you want the quickest method, here it is: pre-soak your seeds for 12-24 hours before planting them in a consistently warm, moist spot. That one-two punch is often all it takes to convince a dormant seed that conditions are perfect for sprouting.
What Makes Seeds Sprout Faster?
To really master rapid germination, it helps to understand what’s happening inside that tiny seed coat. Think of a seed as a perfectly self-contained plant-in-waiting. It has a tiny embryo and its own packed lunch (called the endosperm), all just waiting for the right wake-up call. Our job is to provide that call by delivering the three things every seed craves: moisture, warmth, and oxygen.
Every seasoned gardener learns that speeding up this process is less about luck and more about control. When you manage these core elements, you’re not just tossing seeds in dirt and hoping for the best. You're becoming an active participant, creating the ideal nursery to coax life out of them ahead of schedule.
The Power of Pre-Soaking
Giving your seeds a good soak before they ever touch soil is probably the most effective trick in the book. This technique, sometimes called "priming," essentially kickstarts the germination process on your countertop.
When you immerse a seed in water, it rehydrates the dormant cells and fires up the enzymes needed to break down its stored food. This provides the fuel for that first powerful growth spurt. You're basically getting the engine running before the race even starts.
This isn't just a backyard garden hack; it's a technique used in large-scale agriculture for a reason. Farmers in Japan, for instance, have used seed soaking methods that can boost germination rates by as much as 20-30% and shave several days off the sprouting time. You can learn more about how pre-soaking is a proven method in agricultural settings to improve crop outcomes.
My favorite analogy: Soaking a seed is like giving a sleepy person a cup of coffee. It provides that initial jolt of energy needed to wake up and get moving, dramatically cutting down the time you spend waiting for green shoots to appear.
The Most Critical Factors at a Glance
Before we get into the nitty-gritty of specific techniques, let's zoom out. If you can master just these three elements, you'll see a huge improvement in how quickly your seeds sprout.
- Moisture: This is non-negotiable. Consistent hydration is what softens the tough outer seed coat and tells the embryo inside that it's time to start growing.
- Temperature: Think of warmth as an accelerator. It speeds up all the chemical reactions happening inside the seed. Most common garden seeds have a "sweet spot" temperature that encourages the fastest growth.
- Oxygen: Don't forget that seeds are living things—they need to breathe! Using a light, airy soil or germination mix ensures they get enough oxygen and don't end up suffocating or rotting in soggy conditions.
To give you a clear roadmap, I've put together a table that summarizes these crucial elements.
Key Factors for Faster Germination
This table breaks down the most critical factors for accelerating seed germination and why each one matters so much for getting those sprouts to pop up quickly.
| Factor | Why It's Important | Quick Tip |
|---|---|---|
| Moisture | Softens the seed coat and activates the internal growth processes. | Pre-soak seeds for 12-24 hours. Keep your growing medium consistently damp, like a wrung-out sponge. |
| Warmth | Acts as a catalyst, speeding up the metabolic rate of the seed. | Use a heat mat to maintain a steady soil temperature between 70-85°F (21-29°C) for most common seeds. |
| Oxygen | Seeds need to respire to fuel their growth; lack of oxygen can lead to rot. | Use a light, fluffy seed-starting mix. Avoid compacting the soil, which can cut off air supply. |
Focusing on getting these three things right will solve most of your germination headaches. It’s the foundation upon which all other techniques are built.
Giving Your Seeds a Head Start with Pre-Treatment
Before your seeds even dream of touching soil, you have a golden opportunity to give them a serious advantage. I like to think of a seed as being in a deep, protected slumber, wrapped in a tough outer shell. Pre-treatment is your gentle nudge to wake it up. It’s all about breaking down those natural defenses to kickstart water absorption, which is the single most important trigger for germination.
For many common garden seeds, the process is incredibly simple. A basic pre-soak is often all it takes. I do this for most of my vegetables and annual flowers—think tomatoes, peppers, and zinnias. Just pop them in a bowl of lukewarm water for 12 to 24 hours. This simple bath sends a clear signal: water is abundant, and it's safe to start growing.
Of course, not all seeds are that easygoing. Some, like the notoriously stubborn morning glory, nasturtium, or lupine, have shells that are practically waterproof. For these tough customers, a simple soak won't cut it. You need to get a bit more hands-on.
Breaking Down Barriers with Scarification
Scarification sounds a bit dramatic, but it really just means physically compromising the seed coat to let that crucial moisture inside. You don’t need any fancy equipment; things you already have around the house work perfectly.
My go-to method is using a small piece of fine-grit sandpaper. I'll just gently rub a few seeds between two pieces until I see the shiny outer coat turn dull. A nail file works just as well. For larger seeds, you can even carefully nick the coat with a sharp knife, making sure to stay away from the small dimple (the hilum) where the embryo lies.
The idea isn't to obliterate the seed, but simply to create a tiny doorway for water. This one small step can be a total game-changer, turning seeds that might have taken weeks to sprout (or never sprouted at all) into eager seedlings.
Naturally, this all assumes you're starting with quality seeds in the first place. Before you invest time in pre-treatment, it's wise to make sure your seeds are even viable. This infographic gives you a quick rundown on how to check.
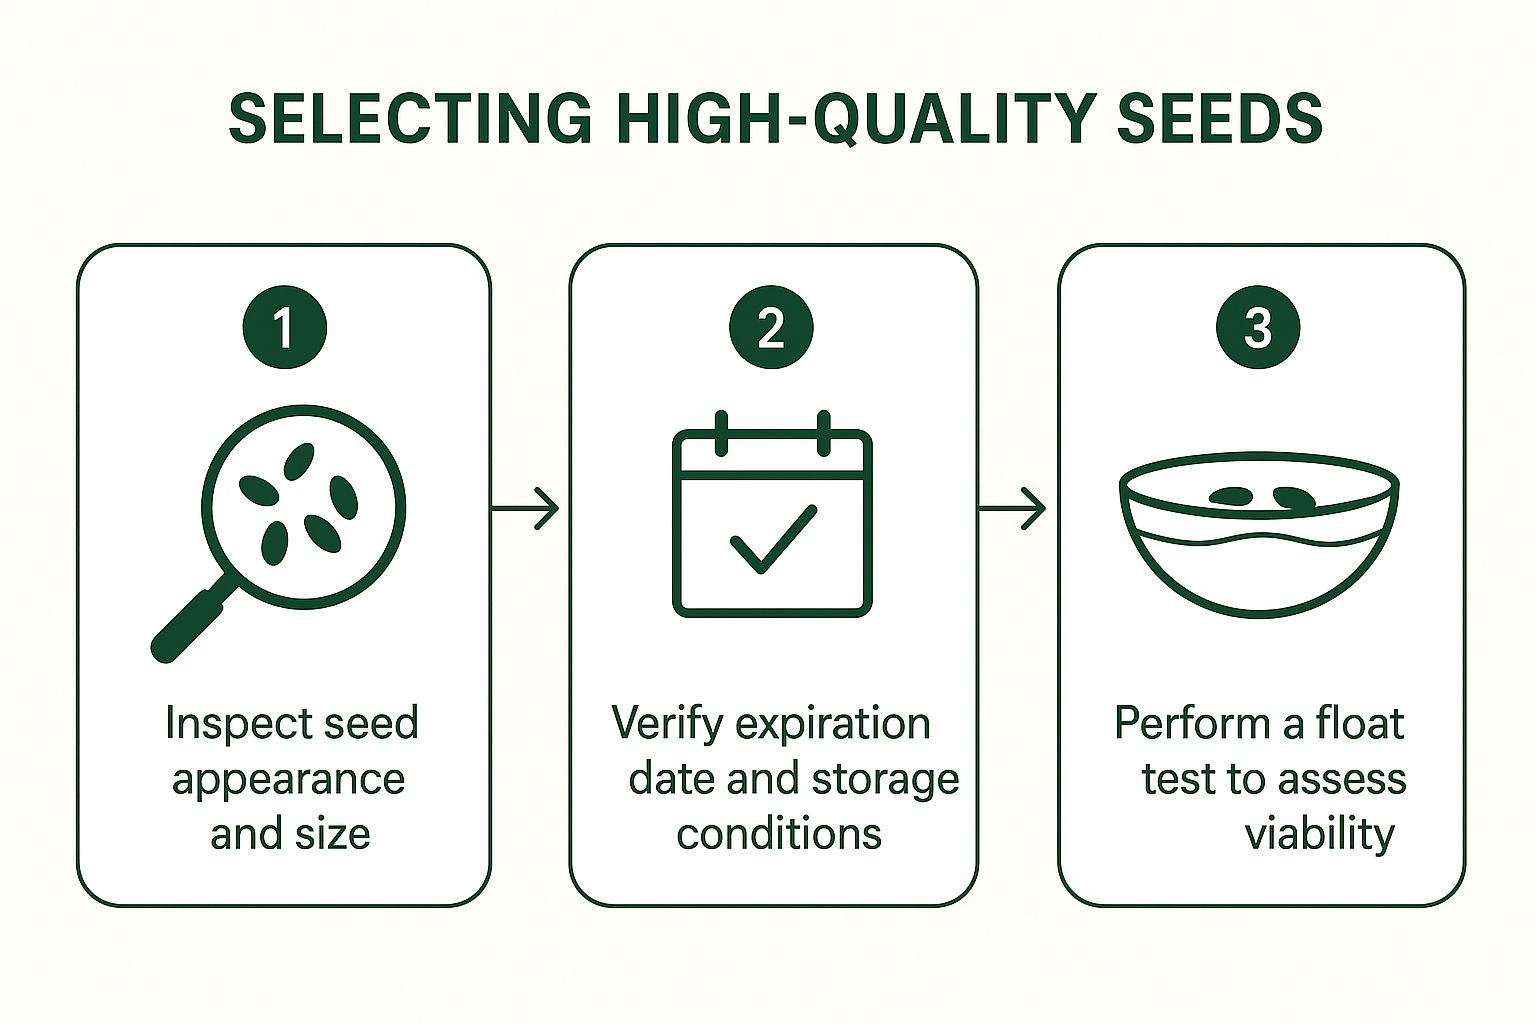
As you can see, a quick inspection for age and a simple viability test can save you a lot of frustration down the road. There’s nothing worse than waiting on seeds that were never going to make it.
Simulating a Winter Chill with Cold Stratification
So, what about seeds from plants that evolved in colder climates? Many beautiful perennials, native wildflowers, and certain trees have a brilliant survival strategy: a built-in dormancy that stops them from sprouting just before a harsh winter. To break this dormancy, they need to experience a period of cold, damp conditions. We can replicate this process, known as cold stratification, right in our own homes.
It’s easier than it sounds. Here’s a tried-and-true method I use every year:
- First, mix your seeds with a bit of a damp medium. You don’t want it sopping wet, just moist. I find that sand, vermiculite, or even a folded paper towel works great.
- Next, seal this mixture in a plastic bag. Don't forget to label it with the plant name and the date!
- Finally, place the bag in your refrigerator for the required time, which can be anywhere from 4 weeks to 3 months, depending on what you're growing.
This chilly, damp nap effectively tricks the seeds. They think they've just survived a long winter, so when you finally take them out and introduce them to warmth, they’re primed to burst forth, thinking spring has finally sprung.
A classic example is milkweed. If you're growing it for monarch butterflies, you'll find that a 30-day cold stratification period drastically improves your germination rates. Skip this step, and you might only get a handful of sprouts for all your effort.
By selecting the right pre-treatment for your specific seeds—be it a simple soak, a bit of scarification, or a planned cold stratification—you really take the reins of the germination process. It’s one of the most powerful ways to get a jump-start on the growing season.
Creating the Perfect Sprouting Environment

Once your seeds are prepped and ready to go, your focus needs to shift to their surroundings. You're essentially creating the perfect little nursery for them to wake up in. And of all the environmental factors you can control, temperature is the most powerful lever you can pull to get things moving faster.
Most seeds have a specific "sweet spot" when it comes to temperature. Keeping them consistently warm within that ideal range can easily shave days, sometimes even a week, off your germination time. For the majority of common garden vegetables and flowers, that magic window is usually between 70-85°F (21-29°C).
This isn't just a hunch from seasoned gardeners; it's a core principle of agriculture. Precise temperature control is what triggers the enzymatic activity needed for the seed's embryo to grow. Commercial operations, like large-scale hydroponic farms, often see germination rates topping 90% simply by dialing in the perfect, stable temperature. You can borrow some of these same professional tips, as outlined in guides like this one on seed germination for farmers, and apply them right in your own home.
Practical Ways to Add Consistent Warmth
You definitely don't need a fancy, high-tech greenhouse to nail this. Over the years, I've found a few simple but incredibly effective ways to provide that gentle, steady warmth that seeds crave.
My absolute go-to tool, and one I recommend to every new gardener, is a seedling heat mat. It’s a game-changer. These mats are designed to warm the soil from below, providing the exact kind of consistent heat that encourages rapid sprouting. They're energy-efficient and take all the guesswork out of the process.
Don't have a heat mat? No worries. A little creativity goes a long way. Try one of these spots:
- On top of your refrigerator: The warmth radiating from the back of the appliance is often just right.
- Near a radiator or heat vent: Just make sure it’s not a direct blast of hot, dry air. You're aiming for gentle, ambient warmth.
- The top of a water heater: The closet where your water heater lives can be a surprisingly cozy and stable spot for a seed tray.
Key Takeaway: The secret ingredient here is consistency. Big temperature swings from day to night can really slow down germination. A steady, warm spot sends a clear signal to the seed that it's safe to start growing.
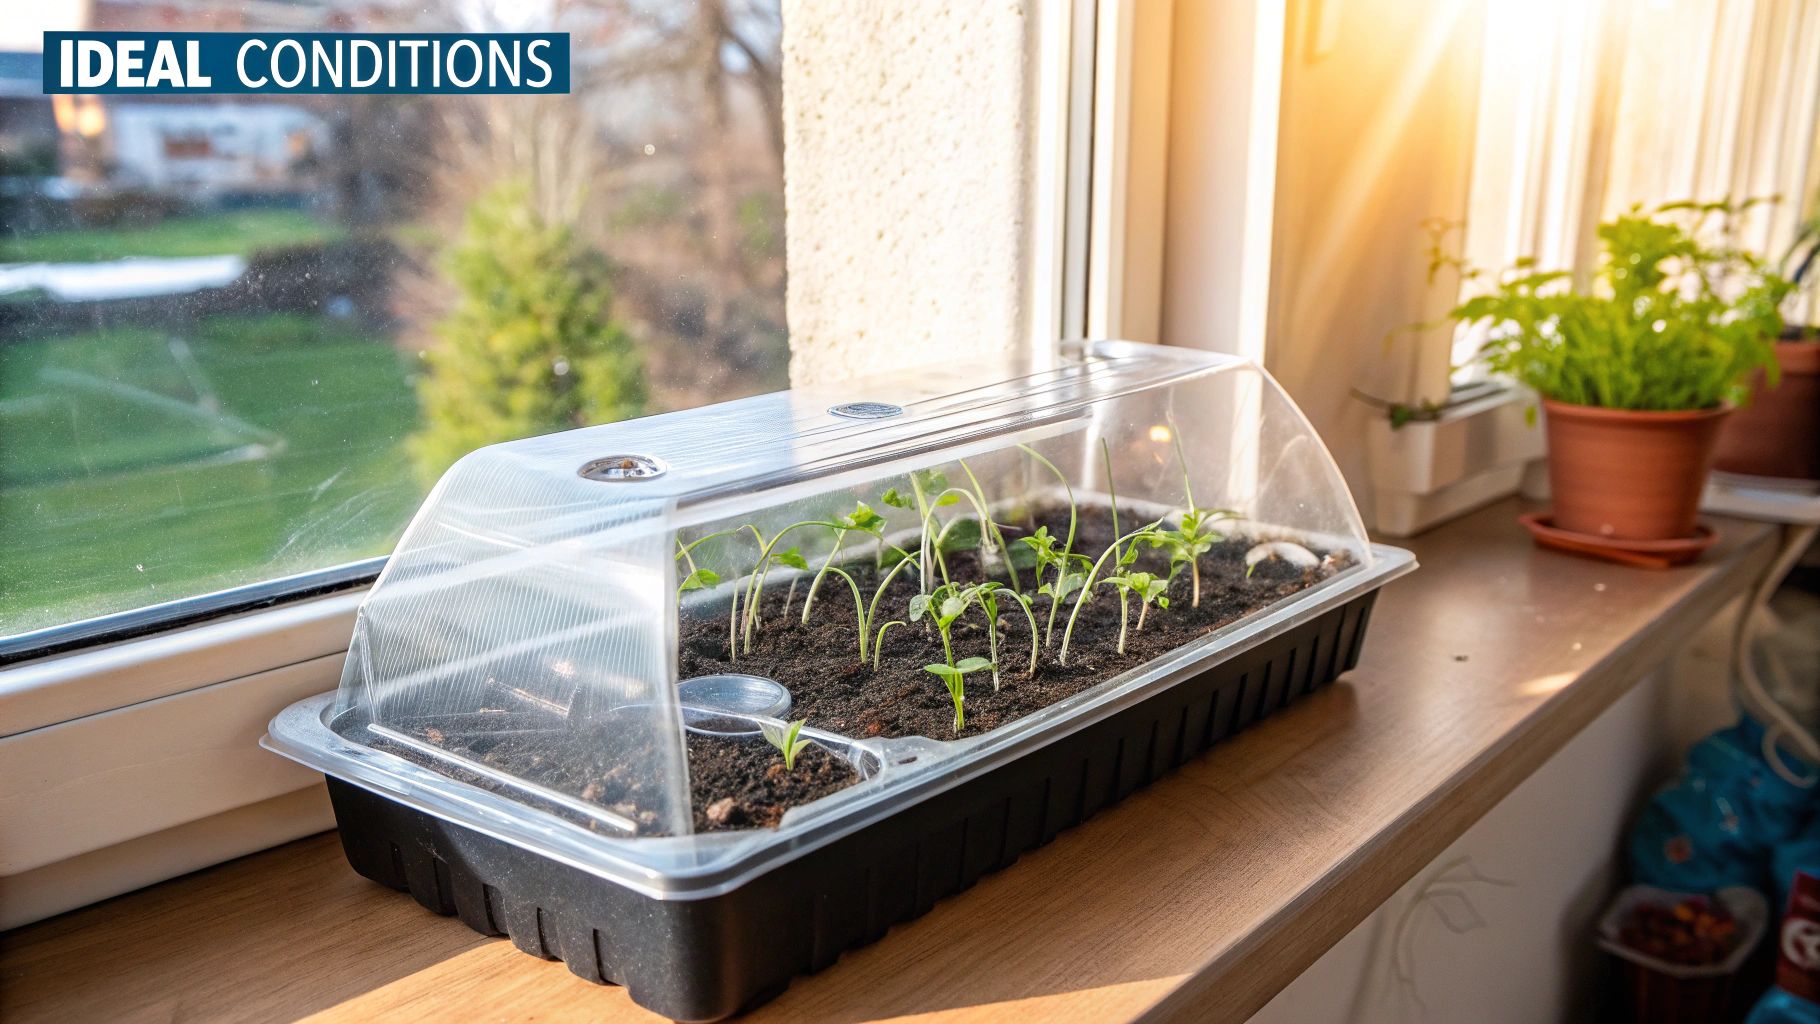
Mastering Moisture with a Mini Greenhouse
Warmth is only half the battle; moisture is its critical partner. You want your growing medium to stay consistently damp—think of a well-wrung-out sponge—but never, ever soggy. Waterlogged soil is the fastest way to rot your seeds before they even have a chance.
The best method I've found for maintaining this perfect balance is to create a "mini greenhouse." All you need is a clear plastic humidity dome placed over your seed tray. If you don't have a purpose-built dome, simple plastic wrap stretched taut over your pots works just as well.
This simple trick traps humidity, which means the soil surface won't dry out and you'll have to water far less often. Just be sure to lift the cover for a few minutes each day. This allows for a bit of fresh air exchange and helps keep mold at bay. Getting your timing right is also important, so be sure to check our guide on when to start seeds indoors to sync your efforts with your local planting calendar.
The Overlooked Role of Light
Finally, let's clear up a common point of confusion: light. Do seeds actually need light to sprout? The answer is a classic "it depends."
- Some seeds need light to germinate. These are typically very small seeds, like lettuce, dill, and snapdragons. For these, you'll want to sow them right on the surface of the soil, pressing them in gently but leaving them uncovered.
- Most seeds prefer darkness. The vast majority of seeds, from tomatoes and peppers to squash and beans, germinate best when tucked away in the dark. Plant these at the depth recommended on the seed packet.
Of course, once any of your seeds have sprouted, the game changes. At that point, all of them will need bright, direct light to grow into strong, stocky seedlings.
Choosing Your Seed Starting Medium
The medium you start your seeds in can make or break your entire gardening season. It's a foundational choice, and honestly, it’s one of the most critical. I’ve seen so many enthusiastic gardeners try to cut corners by just scooping soil from their garden beds. Unfortunately, this almost always ends in disappointment.
Garden soil is just too heavy and dense for tiny, delicate seedlings. Once you water it, it compacts, squeezing out the air pockets that new roots desperately need. On top of that, it’s usually teeming with fungi and bacteria that can cause diseases like damping-off, which will wipe out a tray of seedlings overnight.
The secret to success is using a sterile, soilless seed-starting mix. This isn't just regular potting soil. It's a specially formulated blend designed to provide the perfect trifecta of moisture retention, aeration, and gentle support. A quality mix gives your seeds everything they need to sprout and develop strong roots without the risk of becoming a waterlogged brick.
Key Components of a Quality Mix
When you grab a bag of seed-starting mix, you’ll notice it feels incredibly light and fluffy. That’s by design. The ingredients are chosen for very specific jobs.
- Peat Moss or Coco Coir: This is the heart of the mix. Both are fantastic at holding onto water and nutrients, creating a reservoir for your seeds. I've personally shifted toward using coco coir more often. It's a renewable byproduct of the coconut industry and rehydrates much more easily than peat moss, which can be tough to get wet again once it dries out completely.
- Perlite or Vermiculite: These are the little white or silvery specks scattered throughout the mix. Perlite is popped volcanic glass that looks like tiny bits of styrofoam and is excellent for creating air channels. Vermiculite is a mineral that also improves aeration but holds a bit more moisture than perlite does.
This combination creates a medium that’s light, airy, and drains beautifully—the perfect defense against fungal problems. If you're looking for more guidance on your setup, check out our tips for starting seeds indoors for advice on lighting and containers.
The goal is to create a growing environment that holds moisture like a sponge but still allows air to reach the roots. A quality soilless mix does this perfectly, giving your seeds the best possible start in life.
Beyond Traditional Mixes
While a bagged soilless mix is my workhorse for starting most seeds, other methods can be incredibly effective, especially if you want to germinate seeds faster.
The paper towel method, for example, is a fantastic trick. It's my go-to for checking the viability of older seed packets or for getting a jump on big seeds like peas, beans, or sunflowers. Just lay your seeds on a damp paper towel, fold it over, slip it into a plastic bag to keep the moisture in, and place it somewhere warm. It’s so rewarding to see those little roots pop out in just a few days! Once they do, you gently transplant them into your starting mix.
You might also come across these other great options:
- Peat Pellets: These are little compressed discs that swell up when you add water. They’re super convenient and minimize transplant shock since you just plant the whole pellet.
- Rockwool Cubes: A staple in the hydroponics world, these inert cubes offer amazing moisture control and aeration. They're a bit more technical but are perfect for seeds that require very precise conditions.
Ultimately, your choice of medium sets the stage for everything that follows. By skipping the heavy garden soil and choosing a sterile, fluffy alternative, you’re providing the ideal environment for your seeds to burst to life.
What to Do When Germination Goes Wrong

Even the most seasoned gardeners face setbacks. It's just part of the process. You can follow every step perfectly and still find yourself staring at an empty seed tray or watching your brand-new seedlings suddenly fail. Don't panic. Learning to spot and solve these common issues is what separates a good gardener from a great one.
One of the most frustrating problems is "damping off." You'll see your seedlings looking great one day, only to find them collapsed and withered at the soil line the next. This gut-punch of a problem is caused by a fungus that absolutely loves cool, overly wet soil and still air. When it comes to damping off, prevention is your best strategy.
The moment your seeds sprout, get some air moving. I make it a habit to remove the humidity dome for a few hours each day to let things breathe. A small, gentle fan in the room—not pointed directly at the tiny plants—also does a fantastic job of improving air circulation and stopping that fungus before it can ever get a foothold.
Figuring Out Why Seeds Never Sprouted
What about the seeds that never even break the surface? Before you toss the whole tray and give up, take a moment to play detective. The culprit is usually something simple and easy to fix for the next round.
When my seeds are a no-show, here’s my personal troubleshooting list:
- Seed Age & Viability: Did these seeds come from a packet you found in the back of a drawer from three years ago? A seed's ability to sprout drops off sharply with age. If you're using older seeds, it’s worth doing a quick viability test on a damp paper towel first.
- Planting Depth: This is a classic rookie mistake. If you plant a seed too deep, it will use up all its stored energy trying to reach the light and give up before it breaks the surface. My rule of thumb is to plant a seed no deeper than twice its own width.
- Incorrect Temperature: Did you skip the heat mat? Most seeds are waiting for a signal of consistent warmth to begin their journey. Cold, damp soil is a recipe for rot, not germination.
Remember, gardening is all about learning from experience. Every seed that doesn't sprout teaches you something valuable for the next time. Don't let it discourage you; just adjust your approach and try again.
Solving Problems After a Successful Sprout
Sometimes you get past that first hurdle, only to run into new challenges. A fuzzy white mold on the soil surface is a common sight, and it’s almost always a sign of too much water and not enough airflow. Just carefully scrape it off, let the top of the soil dry out, and boost the ventilation.
"Leggy" seedlings are another frequent issue. These are the ones that grow tall, pale, and spindly, looking like they could fall over in a stiff breeze. This is a desperate cry for light. They're stretching to find a stronger source. The fix is easy: move your grow light much closer to the tops of the seedlings. If you want to dive deeper, check out these 10 tips for sowing and germination to really dial in your setup.
And once you move outside, a whole new set of variables comes into play. You might find your beautiful seedlings have vanished overnight, thanks to burrowing pests. If you live in an area with this pressure, looking into specific gopher garden pest control can be the only way to save your hard work.
Your Questions on Germination Answered
Even after laying out all the steps, I know there are always those nagging little questions that pop up. It's often the small details that trip us up and make all the difference in getting those seeds to sprout quickly. Let's tackle some of the most common ones I get asked by fellow gardeners.
Can I Use Boiling Water for Scarification?
Honestly, this is a dangerous game to play with most seeds. While boiling water does have a place for a few super-tough, woody seeds like black locust, it will almost certainly cook the delicate embryo inside your average vegetable or flower seed. You have virtually no control, and one mistake means a dead seed.
A much safer bet is to use warm water for your pre-soak, aiming for a cozy 105°F (40°C). If you need to mechanically scarify, I always go for a gentle rub with fine-grit sandpaper or a careful nick with a nail file. This way, you can weaken the seed coat just enough without threatening the life inside.
What if I Can't Plant Soaked Seeds Right Away?
I get it, life happens. The ideal scenario is always to plant pre-soaked seeds immediately. Once they've taken on water, the germination clock has officially started, and they are raring to go.
If you absolutely have to delay, here’s the emergency plan: drain them completely so they aren't sitting in a puddle. Pop them into a sealed plastic bag with a barely damp paper towel and stick the whole thing in the fridge. The cold temperature slows their metabolism way down, kind of like hitting a pause button on their growth.
Important Tip: Treat this as a last resort for only a day or two, max. The longer those activated seeds wait to get into soil, the more of their precious energy reserves they burn, which can lead to weaker sprouts or no sprouts at all.
Does Adding Hydrogen Peroxide to the Soak Actually Help?
Yes, this is one of my favorite little tricks! It can give you a real edge, especially if you've had trouble with fungus or damping off in the past. Adding a very weak solution of hydrogen peroxide—I stick to a ratio of about one teaspoon per cup of water—does a couple of useful things. It infuses the water with extra oxygen and can also help soften the seed coat a little faster.
Beyond that, it acts as a mild disinfectant, knocking out fungal spores that might be hitching a ride on the seed's surface. A great natural alternative is to use cooled chamomile tea for your soaking liquid. Chamomile has fantastic anti-fungal properties and is a gentle way to protect your future seedlings.
How Can I Test if My Old Seeds Are Still Good?
Before you waste time, soil, and hope on a questionable packet of old seeds, do a viability test. The paper towel method is my go-to because it's simple and you know exactly what you're working with.
- Start by counting out exactly 10 seeds from the packet.
- Lay them out on one half of a damp (not sopping wet!) paper towel.
- Fold the other half over the seeds to cover them.
- Gently slide the folded towel into a Ziploc bag and seal it up.
- Keep the bag somewhere consistently warm, just like you would for germination.
Check on it after the typical germination period for that specific plant. If you open it up and see seven have sprouted, you’ve got a solid 70% germination rate and can sow accordingly. If only one or two have popped, you have your answer—it's time to invest in a fresh packet for the season.
Ready to put these tips into action with some top-notch seeds? Homegrown Garden has a fantastic selection of heirloom vegetable, flower, and herb seeds, plus all the kits and gear you need to get your garden thriving. Start your growing journey with seeds you can count on.

