


Ready to give your garden a serious head start? The best way to do that is with a complete seed starting system. I'm talking about a full setup: cell trays, a watering tray, and that all-important humidity dome to create a mini-greenhouse for your future plants.
Kits like the Burpee SuperSeed or the Jiffy Professional Greenhouse Kit are fantastic all-in-one solutions. They take the guesswork out of germination, which is why both total beginners and seasoned gardeners swear by them.
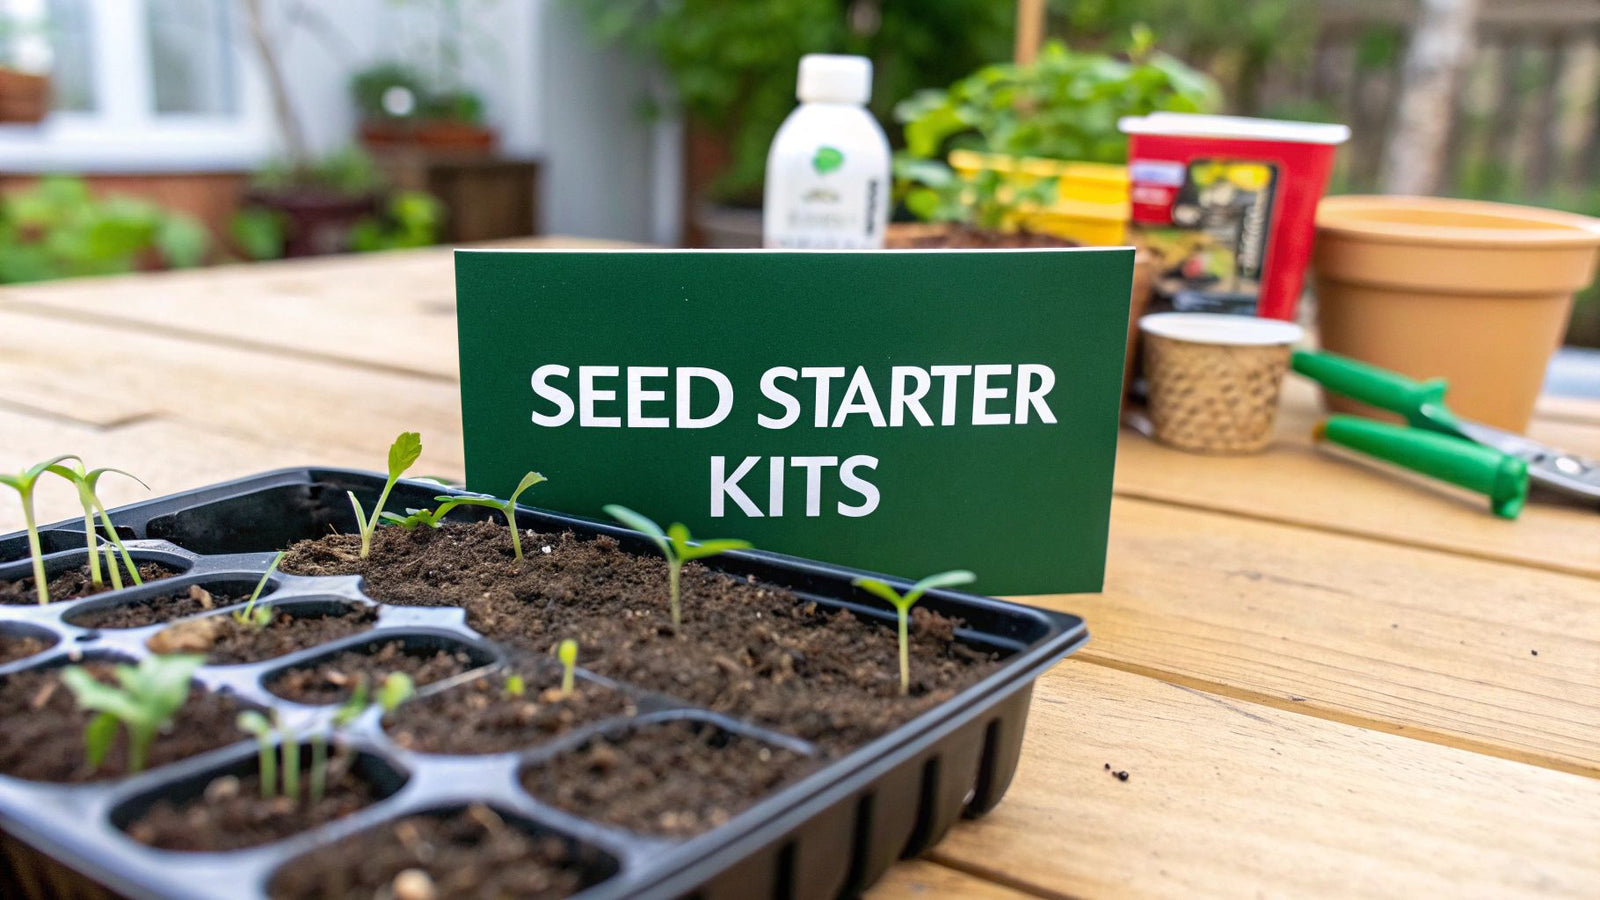
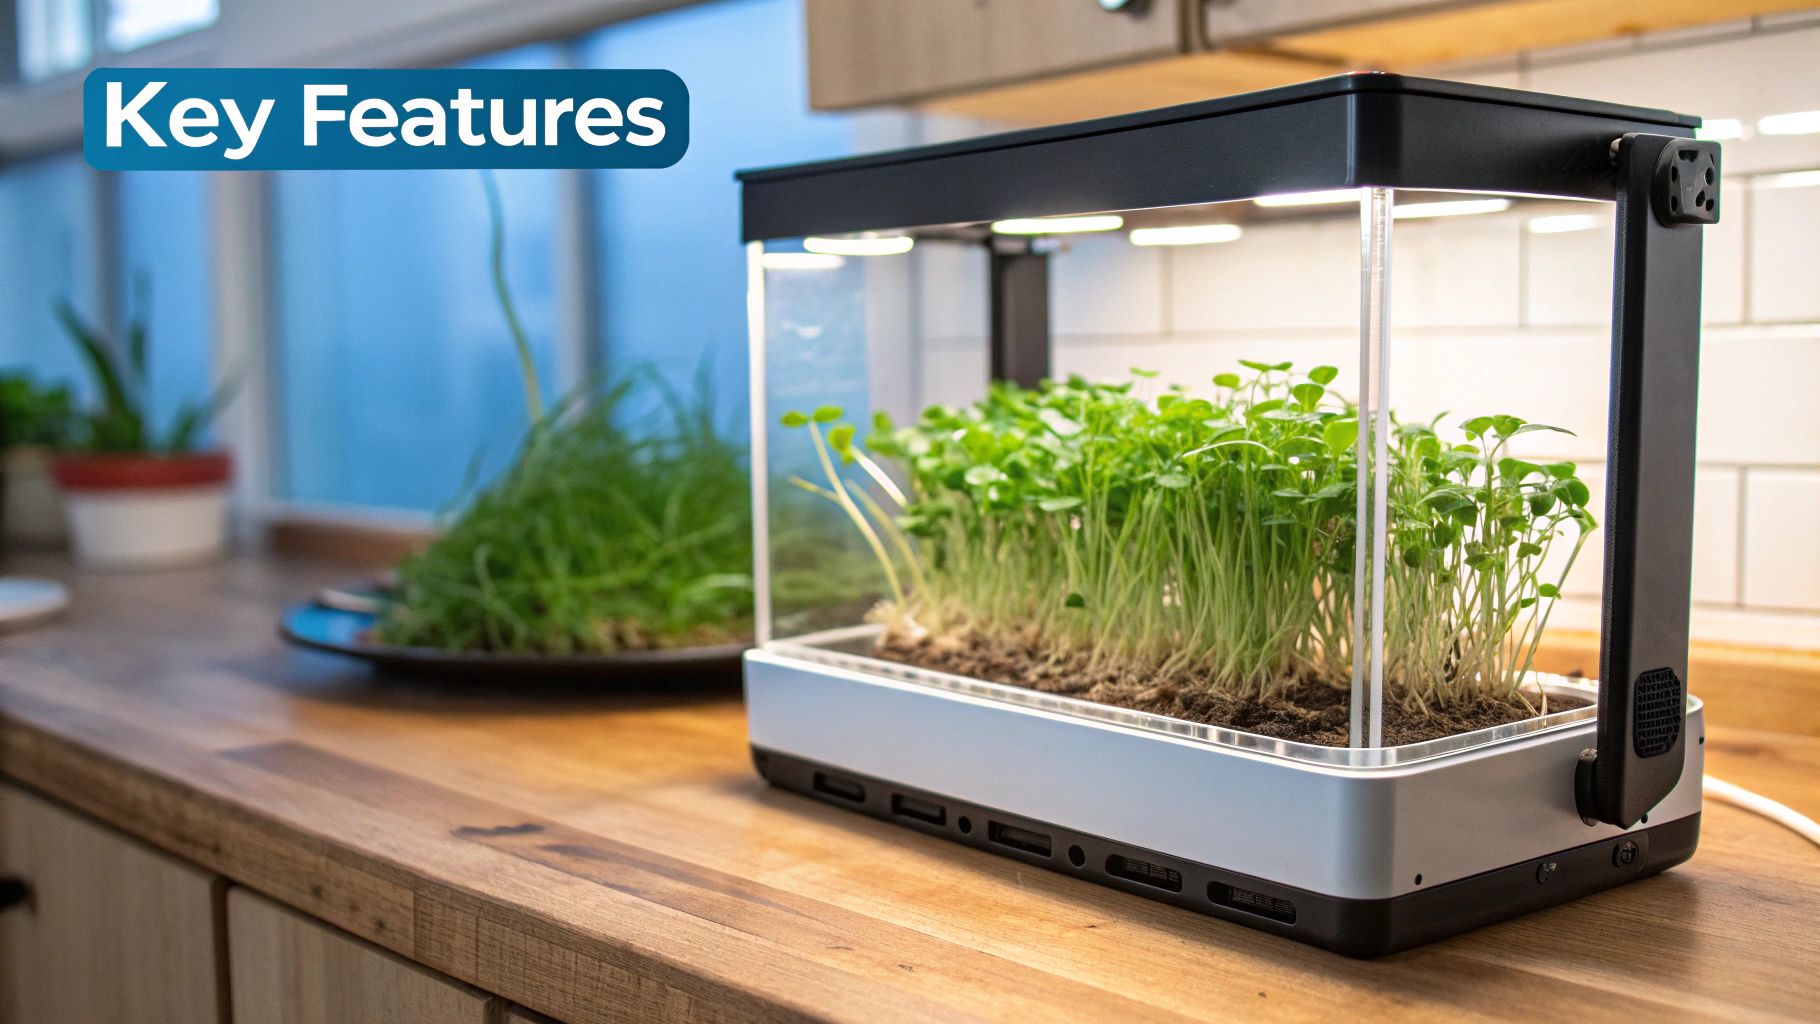
Your Quick Guide to the 7 Top Seed Starter Kits
Starting seeds inside is one of the best tricks in the gardening book. It gives you a huge jump on the growing season, which means stronger plants and, more importantly, earlier harvests.
But let's be honest, not all kits are the same. Some are built like tanks, meant to be used year after year, while others are made from biodegradable materials you can plant right into the soil. Finding the right one really comes down to what you need—how many seeds you're starting, how much space you've got, and your personal gardening style.
To help you cut through the noise, we've picked out the best of the best. Think of this as your cheat sheet for finding the perfect kit, whether you're a first-timer who needs something foolproof or a pro looking for a clever, space-saving design.
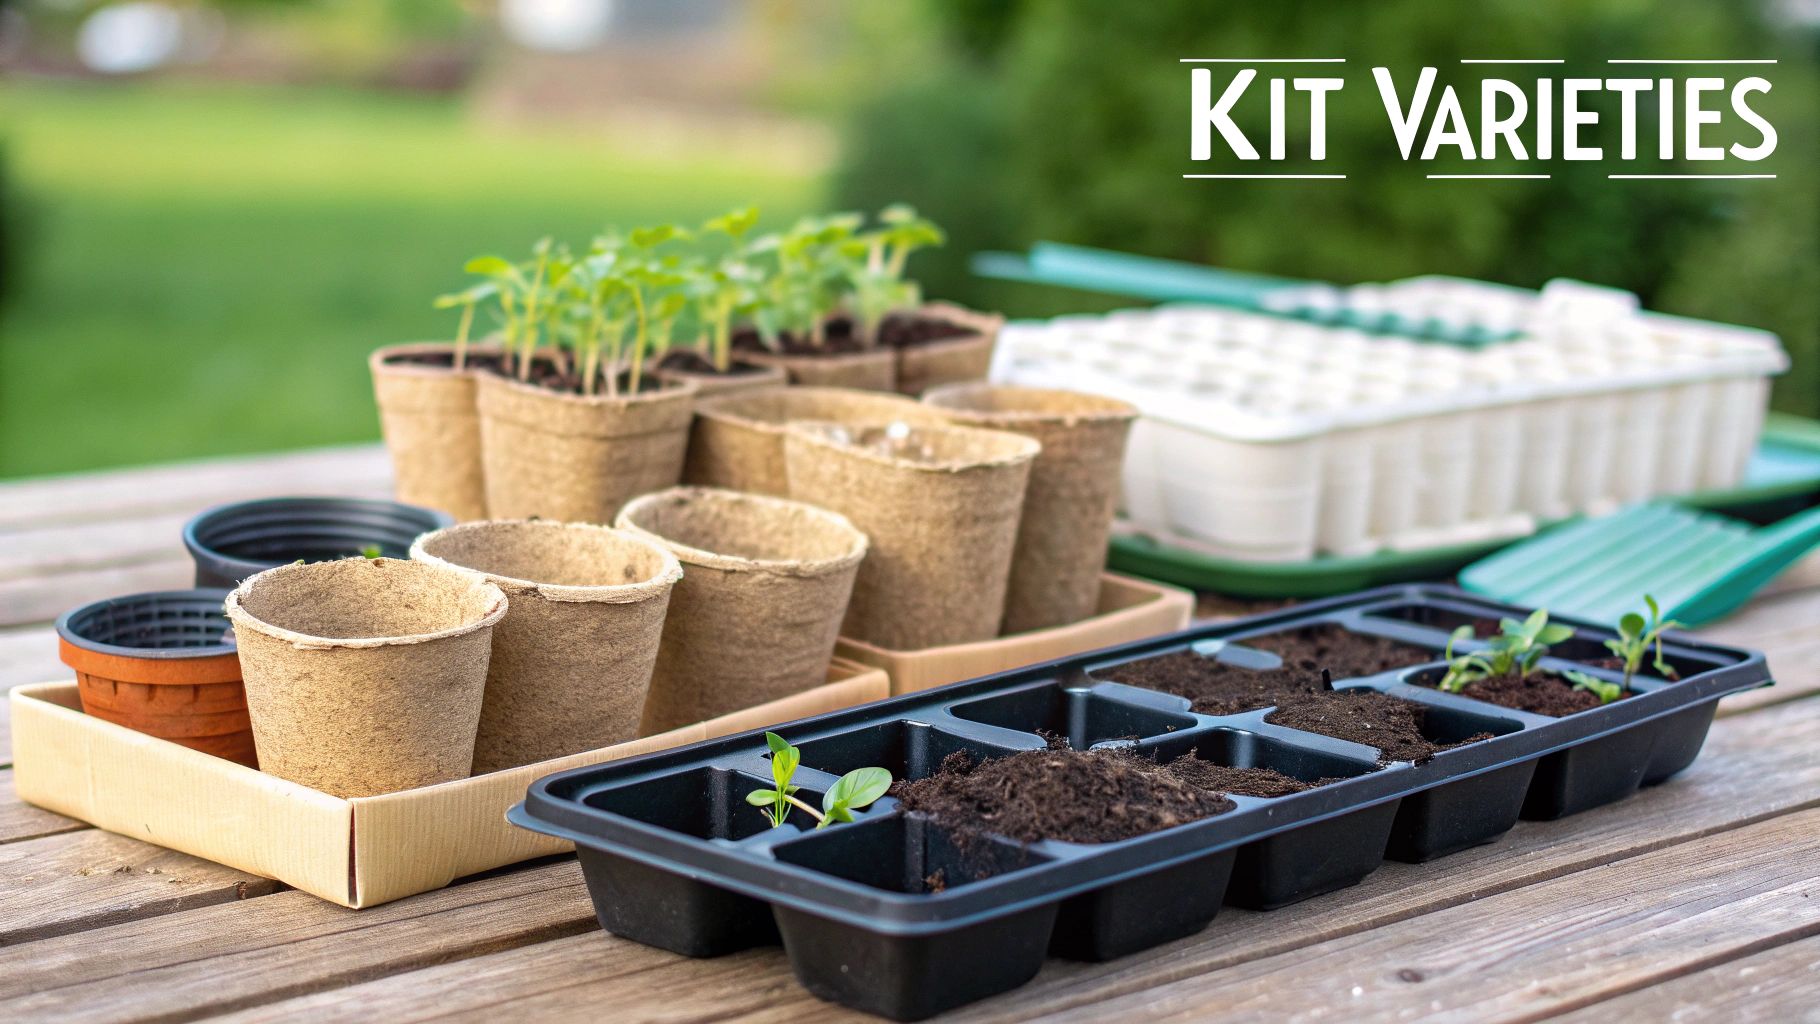
Comparing the Top 7 Kits at a Glance
Every kit on our list has a little something special. Some are brilliant at creating that perfect, humid microclimate with a snug-fitting dome, while others get high marks for being eco-friendly. The trick is to line up a kit's strengths with your own garden goals.
For example, if you're gardening in a small apartment, a compact, self-watering kit might be a lifesaver. But if you're starting a whole vegetable patch from seed, you'll want a heavy-duty system that can handle hundreds of seedlings. Taking a look at a few different starter grow kits is the best way to see what clicks for your projects.
A successful garden begins long before you break ground. The controlled environment of a quality seed starter kit is your first and most important tool for nurturing vulnerable seeds into robust, garden-ready plants.
Our Top 7 Seed Starter Kits at a Glance
To make this super simple, we've put together a quick comparison table of our favorite seed starter kits. It highlights what makes each one special, so you can make a fast decision based on what really matters to you.
| Kit Name | Key Feature | Ideal For | Material | Includes Accessories? |
|---|---|---|---|---|
| Burpee SuperSeed Dome | Extra-tall humidity dome | Tall seedlings like tomatoes | Reusable Plastic | Yes (Dome, Tray) |
| Jiffy Peat Pellet Kit | All-in-one peat pellets | Beginners seeking simplicity | Biodegradable Peat | Yes (Pellets, Dome, Tray) |
| Gardener's Supply Self-Watering | Self-watering capillary mat | Busy or forgetful gardeners | Recycled Plastic | Yes (Mat, Dome, Tray) |
| SunBlaster NanoDome Kit | Built-in grow light track | Low-light indoor spaces | Durable Plastic | Yes (Dome, Light Track) |
| Bootstrap Farmer 1020 Trays | Heavy-duty, durable build | Serious, high-volume gardeners | Extra-Thick Plastic | No (Sold Separately) |
| PotMaker Paper Pot Press | DIY, eco-friendly pots | Eco-conscious gardeners | Recycled Paper | No (Tool Only) |
| Aerogarden Sprout | Hydroponic, soil-free system | Year-round indoor herb gardens | Plastic | Yes (Lights, Nutrients) |
From the ultra-durable to the brilliantly simple, one of these kits is sure to be the perfect launching pad for your garden this year.
The 3 Things That Make a Great Seed Starter Kit
When you're trying to pick the best seed starter kit, it helps to know what separates a great one from a merely okay one. Forget the flashy packaging for a moment. A quality kit is all about creating a perfect, controlled environment where a tiny, dormant seed can confidently sprout into a strong seedling.
Think of it as building the ideal nursery for your future plants. Every component in a kit has a crucial job. The tray holds the seedlings, the dome traps precious moisture—each piece works in harmony to give your seeds everything they need, minus the unpredictable weather, pests, or diseases they'd face outside. Once you get what each part does, you can make a much smarter choice.
It's no surprise that these kits have become so popular. The home gardening boom has fueled massive interest, with the global market for these tools valued at around USD 1.87 billion. As more people discover the joy of growing their own food, this trend is only getting bigger. You can see just how much the market is expanding on Data Insights Market.
The 3 Pillars of a Successful Kit
At its heart, a seed starter kit is a simple system built to manage three critical elements for germination: moisture, warmth, and aeration. A well-designed kit nails the balance between these factors, creating a stable world where seeds feel safe to sprout.
First, you have the cell tray. This is like a collection of tiny, individual apartments for your seeds. Keeping them separate is key—it prevents their roots from tangling and makes transplanting a breeze later on. Each cell provides a self-contained space for a seedling to build a healthy root system without fighting its neighbors.
Next up is the humidity dome. This clear plastic lid is the kit's secret weapon. It acts like a mini-greenhouse, trapping heat and moisture to create the warm, humid atmosphere that tells seeds it's time to wake up and grow.
The 3 Essential Components and Their Functions
Beyond the main structure, a few features are non-negotiable if you want your seedlings to get the best possible start. Without them, you're just inviting common problems like root rot or weak, "leggy" growth.
Here’s what to look for in any quality kit:
- Proper Drainage: This is a must. Every single cell needs a hole at the bottom. If water pools up, it will drown the delicate new roots by cutting off oxygen, creating a perfect breeding ground for fungus.
- A Solid Watering Tray: This is the tray that sits under the cell tray. It does more than just keep your countertops clean by catching drips. It enables "bottom watering," a technique where you let the soil absorb water from below. This encourages roots to grow down deep in search of moisture, building a much stronger foundation.
- A Vented Humidity Dome: A solid dome is good, but a vented one is better. Those little adjustable vents give you control over airflow. This helps prevent fungal problems and lets you gradually get your seedlings used to the drier air of the outside world before you transplant them.
A great seed starter kit doesn't just hold soil; it manages an entire ecosystem. It's a controlled environment engineered to give a vulnerable seed everything it needs to overcome the challenges of its earliest and most fragile stage of life.
The Foundation: The Growing Medium
Finally, what your seeds sprout in is just as important as the container. Most kits include a growing medium, usually as compressed pellets that puff up when you add water. The two you'll see most often are peat and coco coir.
- Peat Pellets: The classic choice, made from sphagnum peat moss. They are fantastic at holding moisture and provide a sterile, fine-textured home that’s perfect for tiny seeds.
- Coco Coir Pellets: Made from coconut husks, this is a wonderful, sustainable alternative. Coco coir offers excellent aeration and water retention, and it's naturally resistant to pests and diseases, making it a great eco-friendly option.
Choosing a kit that brings all these elements together is your key to success. When you understand how each part contributes, you can confidently pick one of the best seed starter kits and turn your gardening plans into a thriving reality.
11 Key Factors to Consider Before You Buy
Walking into the world of seed starting can feel a bit like being a kid in a candy store—so many choices! How do you possibly pick the one that will actually help you grow a garden, not just a tray of sad-looking sprouts? The secret is to think less about the "best" kit and more about the right kit for you.
Your perfect setup really comes down to what you want to grow, how much space you've got, and your personal gardening style. Let’s walk through the 11 things I always consider. This will help you cut through the noise and find a kit that sets you up for success from day one.
First, this infographic really nails down why a good starter kit is worth the investment. It’s not just about convenience.
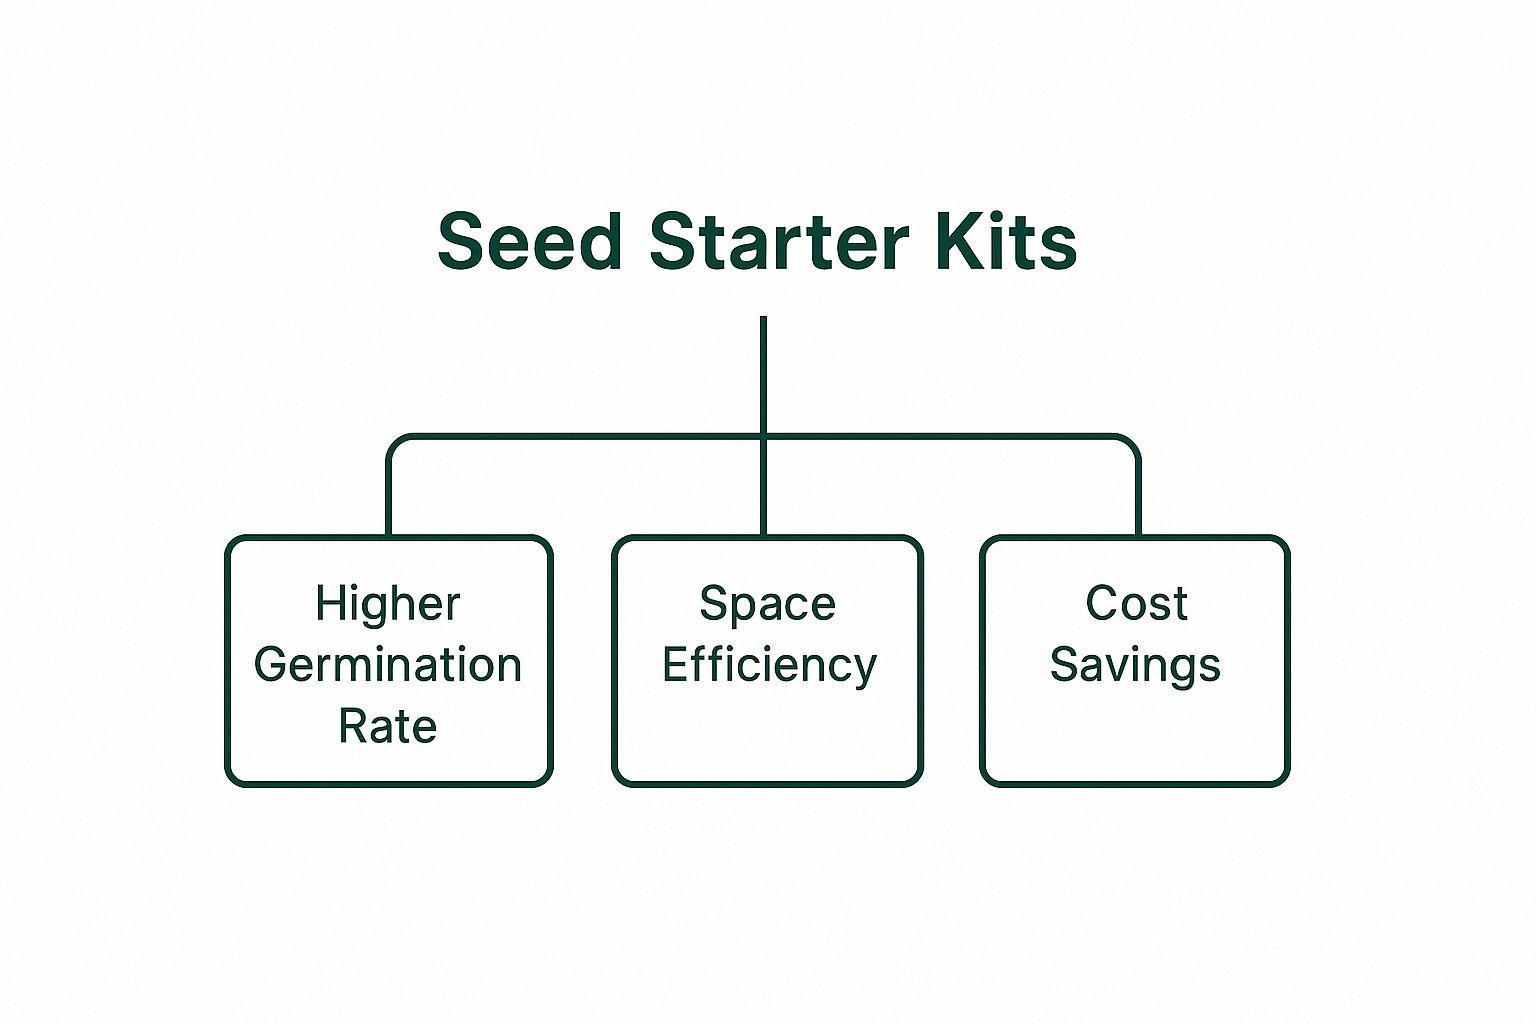
As you can see, it all boils down to better germination, making the most of your space, and even saving money in the long run. One smart purchase can make all the difference.
1. Material Durability and Reusability
Your first big choice is the material. You'll generally find kits made from flimsy disposable plastic, sturdy reusable plastic, or biodegradable stuff like peat and coir.
- Reusable Plastic: I’m a huge fan of thick, durable plastic kits. They’re a fantastic long-term investment. Clean them up and store them properly, and they’ll last for years, making them way more cost-effective over time.
- Biodegradable Pots: These are brilliant for plants that hate having their roots disturbed. Made from peat, coir, or even recycled paper, you can plant the entire pot straight into the garden. This dramatically reduces transplant shock.
2. Size and Cell Count
Think about what you're planting. A tray with 72 tiny cells is perfect if you’re starting a boatload of small seeds like lettuce or onions in a compact space. But bigger plants like tomatoes or peppers will feel cramped in those tiny cells almost immediately.
If you’re growing anything that needs a bit more legroom to develop a healthy root system, go for a kit with fewer, larger cells—something like a 36 or 48-cell tray is a great middle ground.
3. Drainage and Aeration
This one is absolutely non-negotiable. Good drainage is the line between healthy seedlings and a tray of mushy, rotted stems. Every single cell or pot must have holes in the bottom.
Without proper drainage, you’re basically inviting "damping off," a fungal disease that’s a death sentence for young seedlings. Those holes let excess water escape and, just as importantly, allow oxygen to get to the roots.
4. Humidity Dome Height and Ventilation
A humidity dome is your best friend for getting seeds to sprout, as it traps moisture. But not all domes are created equal. A taller dome is a huge plus—it gives your seedlings plenty of headroom to grow before you have to take the lid off.
Also, look for domes with adjustable vents. These little openings are critical for controlling airflow and slowly getting your plants used to the drier air of your home.
5. Included Accessories
Some of the best starter kits come with everything you need right in the box, which is a lifesaver for beginners.
A complete kit takes the guesswork out of gathering supplies. It ensures every component is designed to work together, from the cell tray to the watering mat, creating a cohesive system for optimal growth.
Check if the kit includes extras like a heat mat (a game-changer for peppers and tomatoes), a self-watering capillary mat, or even built-in grow lights. They might cost more upfront, but they can save you a headache and some cash compared to buying everything separately.
6. Overall Dimensions and Your Space
Before you hit that "buy" button, grab a tape measure. Seriously. Figure out exactly where you’re going to put this thing—a windowsill, a shelf, a table—and measure it.
The standard "1020" tray (named for its rough 10" x 20" size) is super common, but you need to make sure it actually fits, especially if you plan on lining up a few of them side-by-side.
7. Growing Medium Compatibility
What are you planning to fill the cells with? Many kits come with their own little compressed pucks of peat or coir, which are super convenient. But if you're like me and prefer to mix your own starting medium, make sure the kit is just the trays. A simple DIY mix of coco coir, perlite, and vermiculite gives you total control over your seedlings' environment.
8. Self-Watering Features
If you’re a busy person (or just a bit forgetful), a self-watering system is a lifesaver. These kits typically use a special mat that wicks water up from a reservoir below, giving your plants a slow, steady drink. This "bottom-watering" method is fantastic for encouraging deep, strong root growth without ever drowning your seedlings.
9. Long-Term Value vs. Upfront Cost
It’s easy to be tempted by the cheapest kit on the shelf, but try to think long-term. That flimsy, bargain-bin tray might not even make it through one season. Spending a little more on a heavy-duty, reusable kit will almost certainly save you money over the years.
The demand for quality gear is growing, too. The market for seed germination trays was valued at USD 1.2 billion and is expected to climb to USD 2.5 billion by 2033. That tells you people are realizing that quality matters. You can check out more market insights from DataHorizzon Research.
10. Ease of Cleaning and Storage
If you go the reusable route, think about the cleanup. Trays with smooth, simple surfaces are a breeze to wash and sterilize between seasons. Those with tons of little nooks and crannies can be a real pain. Also, look for a sturdy design that won't get brittle and crack after being stored in the garage all winter.
11. Specialized Features like Heat Mats or Lights
Finally, think about your own home's environment. If your house is on the cool side, a heat mat placed under the tray will make a world of difference for heat-loving plants like tomatoes, peppers, and eggplants.
And if you don't have a big, bright, south-facing window, a kit with a built-in grow light is an absolute must. Without enough light, your seedlings will get weak and "leggy" as they stretch desperately for the sun.
7 Steps to Set Up Your New Seed Starter Kit
There’s a special kind of excitement that comes with unboxing a brand new seed starter kit. It’s a box brimming with promise, a blank slate for your future garden. Let’s walk through the setup process step-by-step to make sure your seeds get the absolute best start.
Following these simple steps isn't just about getting it done; it's about building your confidence and avoiding those common pitfalls like planting too deep or overwatering. A solid setup is the foundation for strong, healthy plants down the road.
The 7 Steps to a Perfect Seed Starting Setup
Getting your kit ready is surprisingly straightforward. I’ve broken it down into seven simple stages to get your mini-nursery up and running.
-
Prepare Your Growing Medium: First things first, let's get the soil ready. If your kit came with those compressed peat or coco coir pellets, just pop them into the tray cells and add some warm water. It's surprisingly fun to watch them puff up! In a few minutes, they’ll swell to fill the cells. I like to gently fluff the tops with a fork to make sure the soil is nice and airy.
-
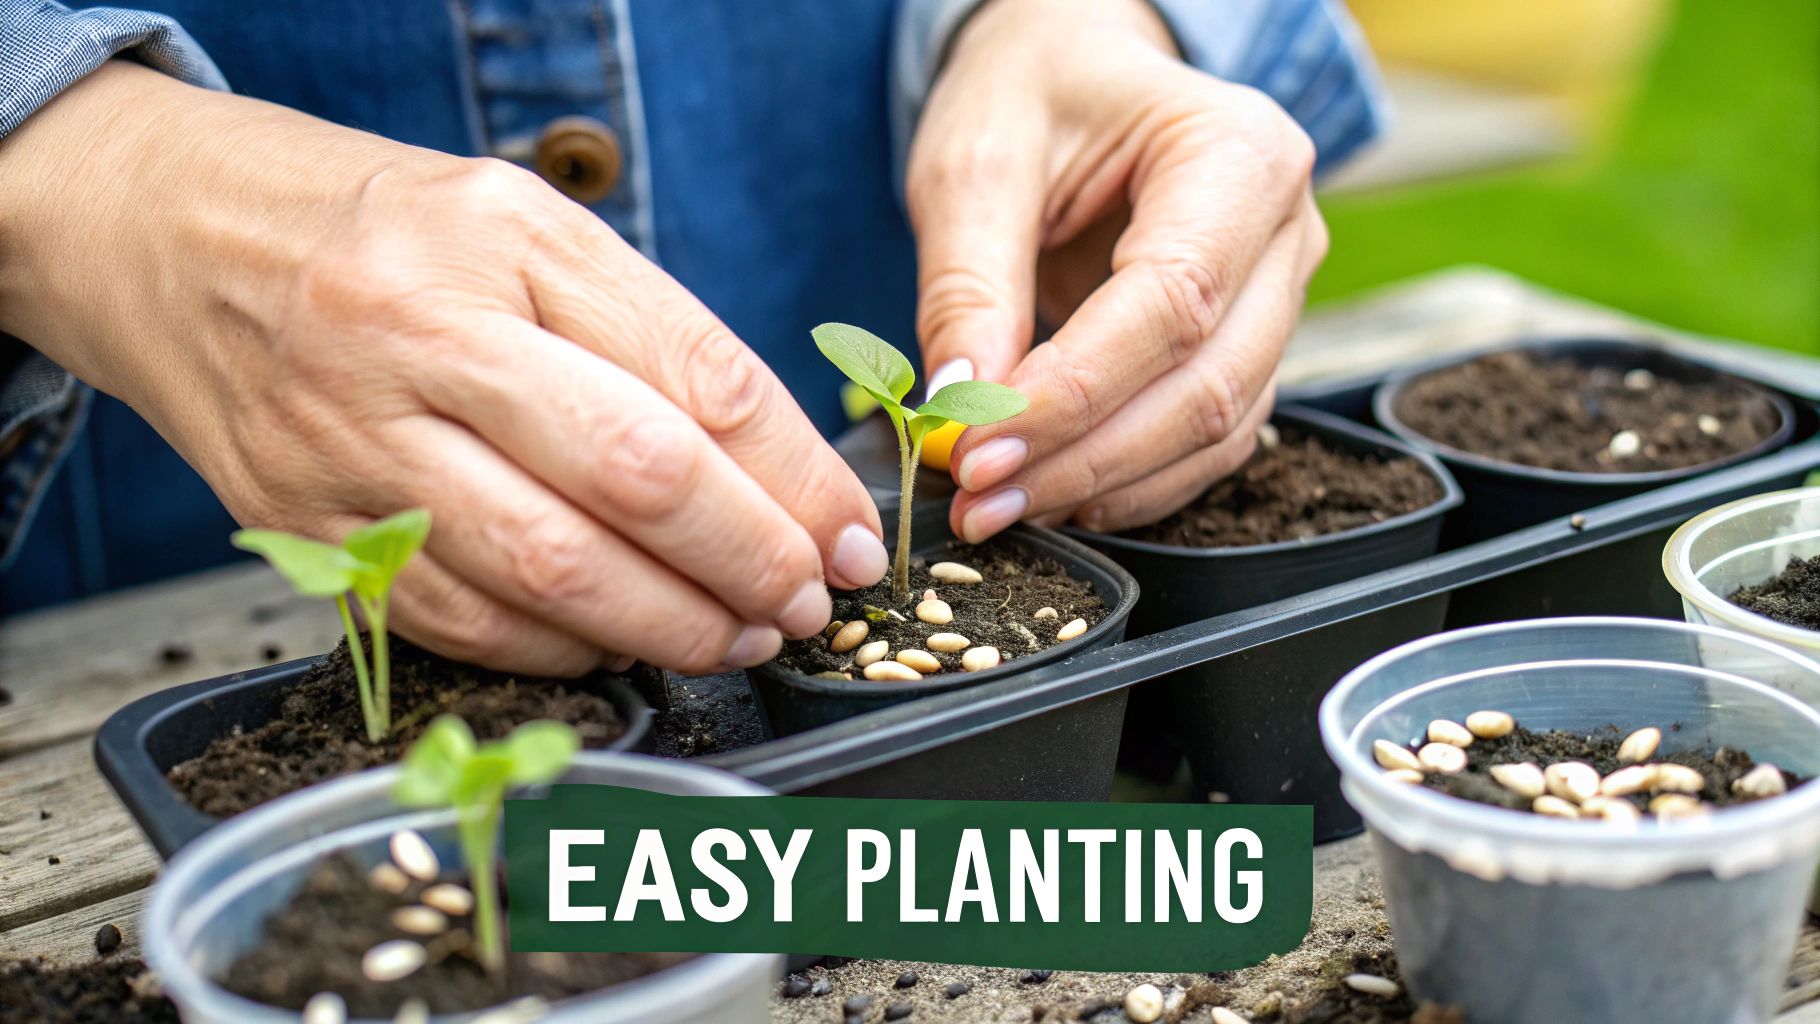
Sow Your Seeds: Time for the main event. A good rule of thumb is to plant a seed about twice as deep as it is wide. For tiny seeds like lettuce, just pressing them gently onto the soil surface is plenty. Bigger seeds, like peas or beans, need to be pushed a little deeper into the medium to get properly settled.
-
Label Everything Immediately: If you take away only one tip, let it be this one. Before you do anything else, label every cell or row with the plant variety and the date. Waterproof plant tags are great, but even a piece of masking tape on the side of the tray works. Trust me on this—you will not remember what you planted where.
-
Provide a Gentle First Watering: The growing medium should already be damp, but a light misting from a spray bottle helps settle the seeds. This ensures good seed-to-soil contact, which is the trigger for germination. Avoid pouring water directly on them, as you can easily wash your carefully placed seeds away.
-
Create a Humid Environment: Pop the clear plastic humidity dome over the top of the tray. This simple cover is what transforms your kit into a mini-greenhouse, trapping moisture and warmth to create the perfect little ecosystem for sprouting. If your dome has vents, keep them closed for now.
-
Find the Right Location: Place your kit in a consistently warm spot. Most seeds are happiest germinating in temperatures between 65-75°F (18-24°C). At this early stage, warmth is far more important than light. The top of a refrigerator or a shelf near a heat source usually does the trick.
-
Monitor and Wait: Now comes the hard part: patience. Peek at your kit daily to make sure the soil is still moist but never soggy. Depending on the type of seed, you could see the first little green sprouts pop up in a few days or a couple of weeks.
A proper indoor seed starting setup is all about creating a consistent environment. When you control the moisture, warmth, and eventually light, you take the guesswork out of the equation and give every single seed its best chance to thrive.
And just like that, you've taken the first real step toward a bountiful garden. This controlled little world you've created gives your delicate seeds the protection they need to power through their most vulnerable stage, safe from the whims of mother nature.
7 Ways to Keep Your Seedlings Healthy and Strong
There’s nothing quite like the thrill of seeing those first little green shoots poke through the soil. But don't get too comfortable—this is where the real work begins. Your seedlings are basically newborns now, and they need consistent, careful attention to grow from fragile sprouts into plants that are tough enough for the garden.
The next few weeks are absolutely critical. Getting into a simple routine for light, water, and air will make all the difference between success and a tray of sad, withered potential. This is how you turn that initial victory into a garden full of thriving vegetables and flowers.
And you're not alone in this. Home gardening has exploded in popularity. The U.S. garden seeds market, which is the heart of the seed starter kit world, is expected to climb from USD 1.20 billion to around USD 1.52 billion by 2030. Vegetable seeds are really driving that trend. You can dig deeper into these numbers over at Mordor Intelligence.
The Big 3 Needs: Light, Water, and Air
Once your seeds sprout, their needs shift in a big way. The game is no longer just about warmth and moisture; it’s about creating a balanced environment for photosynthesis and strong, steady growth. Nailing these three elements is your new full-time job as a plant parent.
Think of it this way: germination was the launch sequence. Now, you have to provide the right fuel and flight conditions to keep the rocket from fizzling out.
- Light: Your tiny plants are hungry for it. They need a solid 14-16 hours of bright, direct light every single day. A sunny windowsill almost never cuts it, which is why you see so many pale, "leggy" seedlings stretching desperately toward the glass. A good grow light is your best friend here.
- Water: The goal is consistent moisture, not a swamp. Soggy soil is one of the fastest ways to kill seedlings. You want the soil to feel like a well-wrung-out sponge—damp, but not dripping wet.
- Air: Good air circulation is your secret weapon against fungal diseases. The dreaded "damping off" can wipe out an entire tray overnight, and a little bit of airflow is often all it takes to prevent it.
7 Steps to Nurture Your Seedlings
Okay, with those basics in mind, let’s get practical. Here are the seven essential steps to guide your seedlings from their very first true leaves all the way to being ready for their new home in the garden.
- Bring on the Light: The moment you see green, take that humidity dome off. Get the tray under a grow light and position the light just 2-3 inches above the seedlings. This close proximity gives them the intense light they crave without burning them.
- Water from the Bottom Up: Don't pour water over the top of your delicate seedlings. You risk damaging their stems and promoting mold. Instead, pour water directly into the bottom tray and let the soil wick it up from below. This encourages the roots to grow down deep to find moisture.
- Get the Air Moving: A small fan set to low for an hour or two a day works wonders. This gentle breeze strengthens the stems and helps the soil surface dry out a bit, which is a major deterrent for fungus.
- Thin the Herd: This part feels a little brutal, but it's one of the most important steps. If you have multiple seedlings in one cell, you have to choose the strongest one and snip the others at the soil line with a pair of small scissors. This gives the "winner" all the space, water, and nutrients it needs to thrive.
- Start a Gentle Feeding: Once you see the first set of "true leaves" (that’s the second set of leaves that appear, and they’ll look like a miniature version of the adult plant's leaves), it's time for their first meal. Use a balanced, water-soluble fertilizer diluted to quarter-strength just once a week.
- Rotate the Trays: Even with a great grow light, some spots might be brighter than others. Give your tray a 180-degree turn every couple of days. This ensures all your seedlings get equal light exposure and grow straight and even.
- Harden Them Off: This is the final exam before graduation. About 7-10 days before you plan to plant them outside, you need to start getting them used to the great outdoors. Start with just an hour in a shady, protected spot, then gradually increase the time and exposure to sun and wind each day.
Hardening off is like training an athlete for the Olympics. You can't just take a seedling from its cushy, climate-controlled room and toss it into the unpredictable world of wind, rain, and direct sun. This slow, steady process prevents transplant shock and gives them the best possible chance of survival.
4 Common Questions About Starting Seeds Indoors
Diving into seed starting is a ton of fun, but let's be honest, it brings up a lot of questions. Even with the best seed starter kit on your counter, you're bound to run into a few head-scratchers along the way.
This is your go-to spot for those "what if" and "how do I" moments. Getting a clear answer can make the difference between a frustrating setback and a thriving tray of baby plants, ready to take on the world.
1. When Is the Best Time to Start Seeds Indoors?
This is the big one. Get the timing right, and you’re golden. Start too early, and you'll end up with overgrown, root-bound plants that are miserable before they even see the garden. Start too late, and you lose that precious head start on the season.
The perfect start date isn't a one-size-fits-all answer—it all comes down to where you live and what you're planting.
- The 6-8 Week Rule: As a solid rule of thumb, plan to sow seeds indoors about 6 to 8 weeks before your area's average last frost date. This is the sweet spot for many popular veggies like tomatoes, peppers, and eggplant.
- Check the Packet: Your seed packet is your best friend. It has specific timing advice tailored to that exact plant variety.
- Know Your Frost Date: Your entire seed-starting calendar hinges on one key date: your last average frost. A quick search for an online frost date calculator for your zip code will give you the anchor point you need.
For a deeper dive, check out our guide on when to start seeds indoors. It’ll help you map out your entire planting schedule with confidence.
2. Do I Really Need a Grow Light for My Seed Starter Kit?
It’s tempting to just use a sunny windowsill, I get it. But if you want to avoid a classic beginner's mistake, a grow light is one of the single best investments you can make. A window just doesn't provide the consistent, overhead light that seedlings crave.
To grow strong and stocky, seedlings need 14-16 hours of bright, direct light every single day. Without it, they get "leggy"—stretching desperately towards the window, resulting in long, pale, and flimsy stems. Those weak plants have a tough time surviving once they're transplanted outside.
Think of a quality grow light less as a luxury and more as an insurance policy. It guarantees your little plants get the intense, full-spectrum light they need to build strong stems and healthy leaves, setting them up for success from day one.
3. What Is Damping Off and How Can I Prevent It?
Damping off is a gardener's nightmare. It’s a fungal disease that can wipe out a tray of perfectly healthy-looking seedlings almost overnight. It attacks the tiny stem right at the soil line, causing it to rot and the plant to topple over. The culprit fungi just love cool, soggy soil and stagnant air.
The good news? It's highly preventable.
- Get the Air Moving: Once your seeds have sprouted, take off the humidity dome for a few hours a day or open the vents. A small fan on a low setting provides excellent air circulation, which fungi hate.
- Don't Overwater: Let the top of the soil dry out a bit between waterings. Bottom-watering is your best bet here, as it keeps the soil surface from staying constantly wet.
- Use Sterile Soil: Always, always start with a fresh, sterile seed-starting mix. Never scoop soil from your garden, as it can be loaded with the pathogens that cause this disease.
4. How Do I Know When My Seedlings Are Ready to Transplant?
Knowing when to move your seedlings into bigger pots or out into the garden is a crucial skill. The goal is to do it when their root system is strong enough for the move but before they get cramped.
The clearest signal is the appearance of their first "true leaves." The very first pair of leaves you see are called cotyledons (or seed leaves)—they are simple and oval-shaped. The next set of leaves that grow are the true leaves, and they’ll look like tiny versions of the adult plant's leaves.
Your seedlings are typically ready to move when they:
- Have at least two to three sets of true leaves.
- Are a few inches tall with a stem that looks sturdy, not spindly.
- Have a healthy root system that holds the soil together when you gently slide the plant out of its cell.
Remember, before they go into the garden for good, you must "harden them off" for 7-10 days. This process of gradually exposing them to outdoor sun and wind is essential for preventing transplant shock and preparing them for life outside.
Ready to start your own beautiful garden from seed? At Homegrown Garden, we offer a curated selection of heirloom seeds and the very best seed starter kits to get you growing. Explore our collections and find everything you need for a successful season. Check out our full range of products at https://www.homegrown-garden.com.
Once your kit is set up, you will need seeds to fill it. You can browse our heirloom vegetable seeds to get your season started.

