


If you want to get a jump start on the growing season, speeding up seed germination is the way to go. It all comes down to giving your seeds the perfect wake-up call with consistent moisture, warmth, and oxygen. Simple tricks, like pre-soaking them overnight, can soften up tough outer shells. Using a basic heat mat helps maintain that ideal soil temperature, basically telling the seeds it's safe to sprout.
The Science Behind Faster Seed Germination
Think of a seed as a tiny, dormant plant, perfectly packaged and waiting for the right signals to burst to life. To wake it up quickly, you just need to replicate the ideal conditions of a perfect spring day. Once you understand the "why" behind what makes seeds sprout, you'll have a much better handle on getting them to germinate on your schedule.
Breaking Down the Barriers
At its heart, every seed is protected by an outer layer called a seed coat. For some plants, like beans, peas, or morning glories, this coat is incredibly tough and designed to protect the fragile embryo until the time is right.
Pre-soaking is a classic technique that helps soften this protective barrier. This allows water to get inside and kickstart all the internal processes that lead to a sprout.
A seed's primary goal is survival. By providing optimal conditions, you're essentially telling the seed that its chances of survival are high, encouraging it to break dormancy and begin growing without delay.
The Critical Role of Temperature
Warmth is probably the single most important trigger for fast germination. It’s the signal that activates enzymes within the seed, which then convert stored starches into usable energy for growth. Without consistent warmth, this whole process slows to a crawl, and germination can take weeks instead of just a few days.
Most common garden seeds have a sweet spot when it comes to temperature. For warm-weather crops like tomatoes and peppers, that can be as high as 85°F (29°C). For a detailed breakdown, it's always a good idea to consult a comprehensive seed germination temperature chart to really nail the conditions for what you're growing.
Essential Elements for Success
Beyond warmth and moisture, a few other factors are absolutely key if you want to germinate seeds quickly:
- Oxygen: Seeds are living things, and they need to breathe! They require oxygen to turn their food stores into energy. This is exactly why a light, fluffy seed-starting mix is far better than dense garden soil, which can get waterlogged and literally suffocate the seed.
- Moisture: This one is non-negotiable. If a seed starts to absorb water and then dries out, the germination process stops, often for good. You're aiming to keep your growing medium consistently damp, kind of like a wrung-out sponge—never soggy.
- Light (or Darkness): This trips up a lot of new gardeners. Some seeds, like lettuce and many tiny flower seeds, actually need light to germinate. Others need complete darkness. It’s a small detail, but checking the back of your seed packet can save you a lot of frustration.
11 Proven Techniques for Rapid Sprouting
Once you’ve got a handle on the basic needs of a seed, you can start playing around with techniques that give you an edge and push past the standard wait times. These methods aren't rocket science, but they are incredibly effective ways to get your seeds to sprout quickly and reliably.
From mimicking winter's chill to gently helping water break through a tough seed coat, each technique is really just a way of signaling to the seed that conditions are absolutely perfect for it to wake up and grow.
1. Speed Up Germination by Soaking Seeds
One of the simplest tricks in the book is a good old-fashioned pre-soak. This works wonders on seeds with thick, tough outer shells—think bigger seeds like beans, peas, and squash.
Just let them sit in room temperature water for 6 to 12 hours. This softens that hard coat, allowing moisture to seep in and kickstart the whole germination process.
I learned this lesson the hard way. I once struggled with some stubborn sugar snap pea seeds that took an eternity to sprout. The next season, I soaked them overnight before planting, and it was a night-and-day difference. Nearly all of them were up within three days.
This quick visual breaks down just how simple the pre-soaking process is. It’s a key first step for any gardener looking to get a jump on the season.
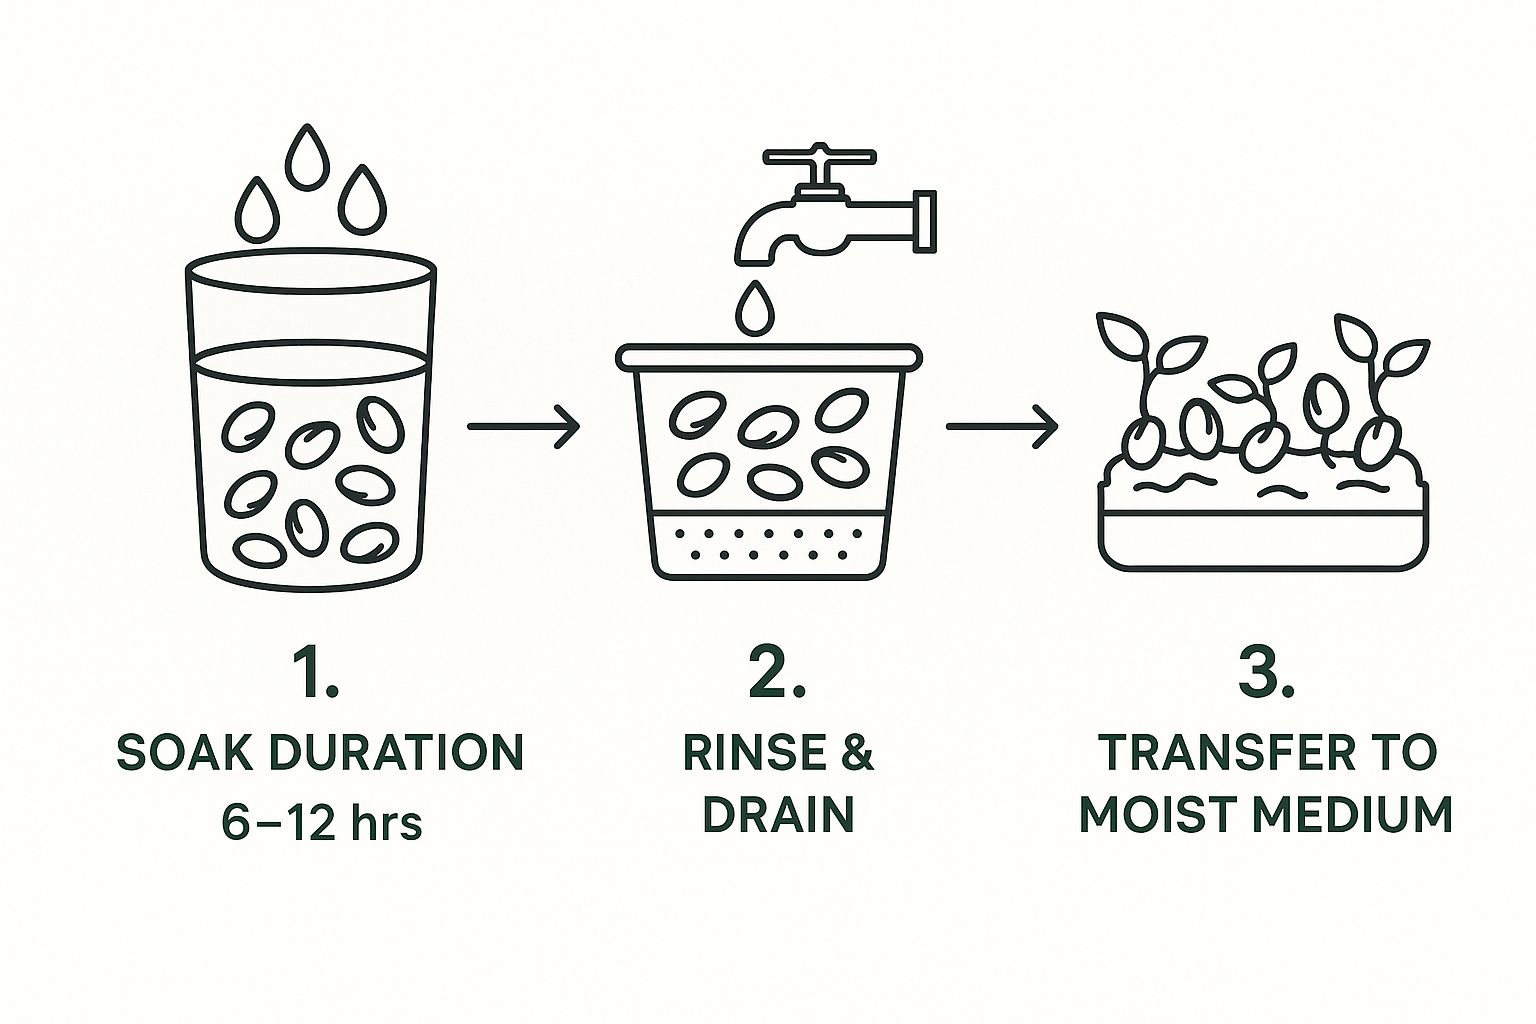
As you can see, it’s as easy as soak, rinse, and plant, but this tiny bit of prep work can shave days off your germination time.
2. Nick Tough Seeds with Scarification
Some seeds are just built differently. They have rock-hard coats designed to withstand seriously harsh conditions. I'm talking about seeds like morning glories, lupines, and even parsley. For these tough guys, a simple soak won't cut it. They need a little extra help, and that's where scarification comes in.
This technique is all about intentionally nicking or scratching the seed coat. You can gently rub the seeds with a piece of sandpaper or carefully create a small nick in the shell with a nail file. The whole point is to create a tiny opening for water to get inside without hurting the delicate embryo.
3. Simulate Winter with Cold Stratification
Ever wonder why some seeds won't sprout no matter what you do? Many perennials, herbs, and wildflowers—like lavender, milkweed, and coneflowers—have a built-in dormancy clock. They are programmed not to sprout until they've gone through a cold, moist period that mimics winter. You can trick them by using cold stratification.
It's easy to do. Just place your seeds in a damp paper towel or some moist sand, seal them in a plastic bag, and label it. Then, pop it in the fridge for anywhere from a few weeks to a couple of months, depending on what the plant needs. This "fake winter" tells the seeds that spring has arrived when you finally plant them in warm soil.
4. Use a Heat Mat for Consistent Warmth
Temperature swings are a top reason for slow or failed germination. For plants that love the heat—like peppers, tomatoes, and eggplants—a seedling heat mat is an absolute game-changer. These mats provide a gentle, consistent warmth from below, keeping the soil at that perfect temperature, which is often around 75-85°F (24-29°C).
Before I got a heat mat, my pepper seeds would sometimes take up to three weeks to show any signs of life. Now, with a mat, they reliably sprout in under 10 days.
5. Try the Paper Towel Method
The paper towel method is fantastic for checking the viability of old seed packets or for handling tiny, delicate seeds. All you do is place the seeds between the layers of a damp paper towel, slide the whole thing into a plastic bag, and keep it somewhere warm.
This creates a perfect little high-humidity greenhouse. You can literally watch the seeds sprout and then carefully transfer them to your soil mix.
Pro Tip: When moving your sprouted seeds from the paper towel, be incredibly gentle. That first little root, called the radicle, is extremely fragile. I recommend using tweezers to move them so you don't snap it off.
6. Brew a Batch of Chamomile Tea
Fungus is the enemy of new seedlings. An issue called "damping off" can wipe out a whole tray of sprouts seemingly overnight. A weak brew of chamomile tea can act as a natural, mild anti-fungal to help prevent this.
Just brew a cup, let it cool completely, and then use it to either soak your seeds or water your seed starting mix. It’s a simple, organic way to give your vulnerable seeds a bit of protection.
7. Provide an Oxygen Boost with Hydrogen Peroxide
A diluted hydrogen peroxide solution can give your seeds a surprising kickstart. It does two things: it helps break down tough seed coats and adds an extra oxygen molecule, which is crucial for the seed's respiration during germination.
- Mix one part 3% hydrogen peroxide with four parts water.
- Let your seeds soak in this solution for about 30 minutes right before planting.
- This trick is especially useful for reviving older seeds that might be losing their viability.
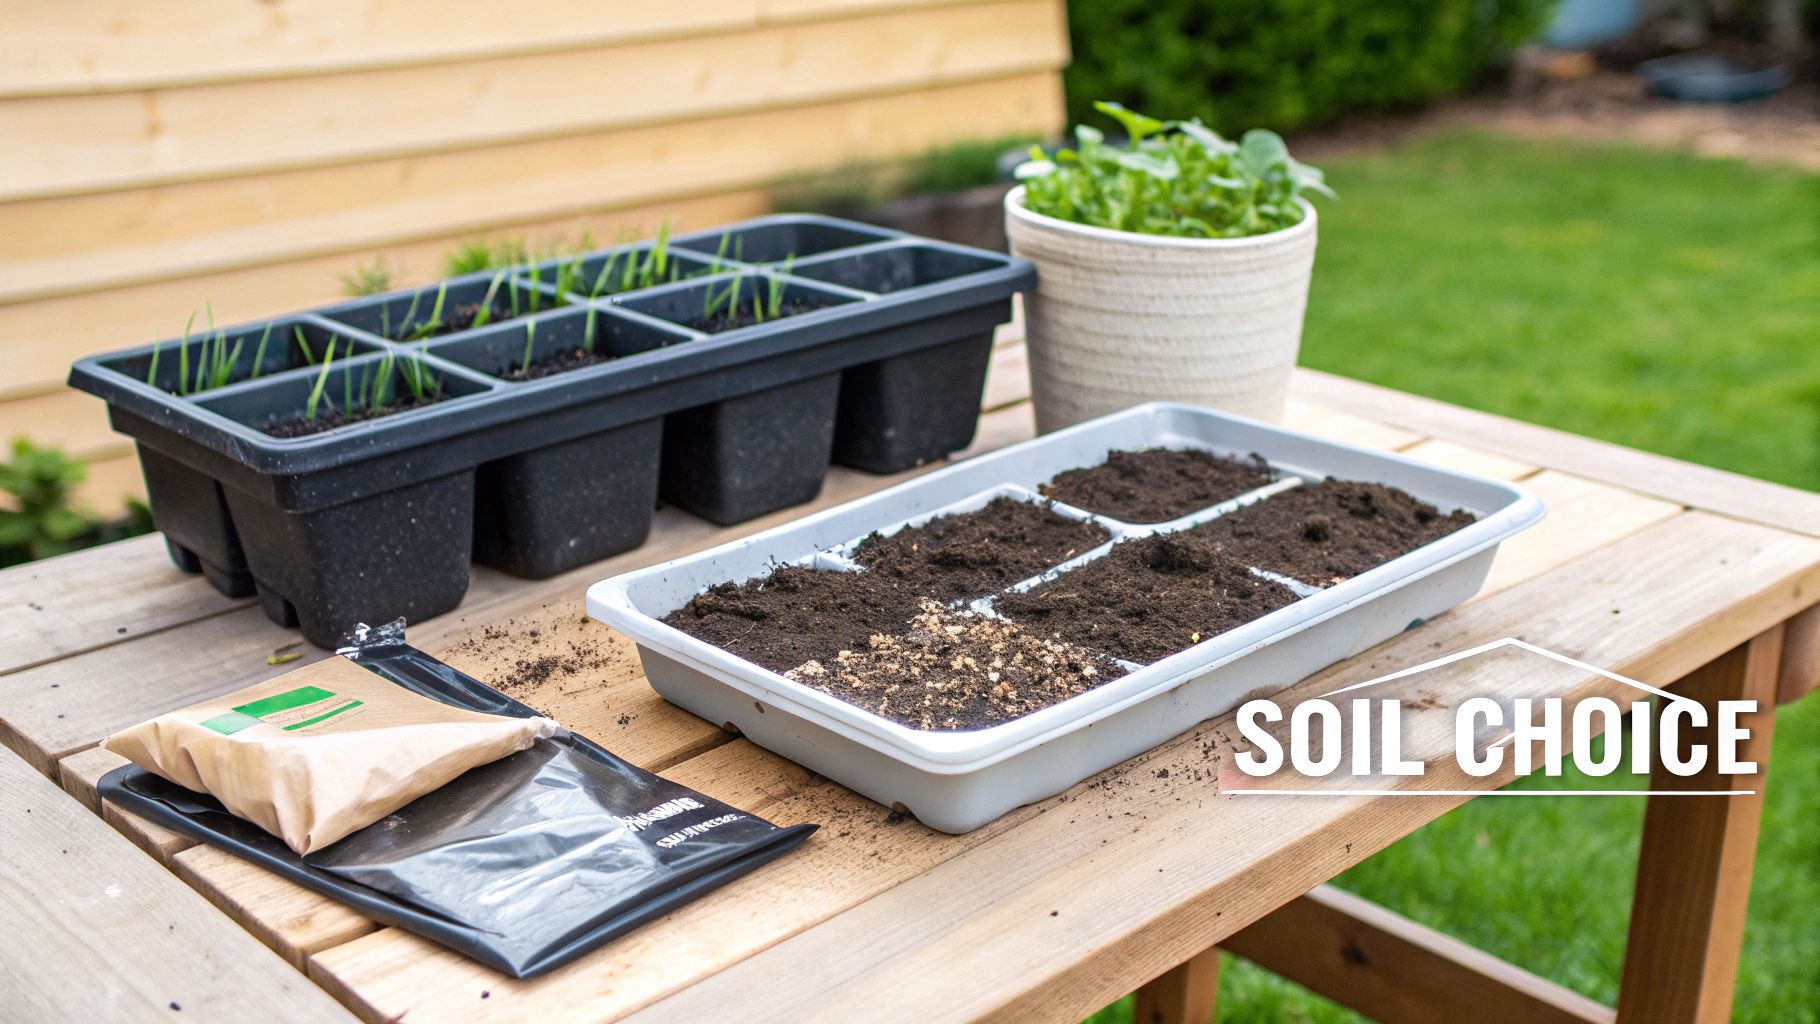
8. Choose the Right Growing Medium
While it's not a germination technique itself, your growing medium is absolutely critical. A good seed starting mix is light, airy, and sterile. It’s designed to hold moisture without getting waterlogged, ensuring your seeds get the oxygen they need to breathe. Whatever you do, avoid using heavy garden soil, which can easily compact and suffocate your seeds before they even have a chance.
9. Pre-Sprout Seeds for a Head Start
Similar to the paper towel method, pre-sprouting is all about getting the seeds to germinate before they even touch the soil. This gives you complete control and lets you see exactly what's happening. The moment you spot that tiny root emerge, you know you have a viable seed that's ready to go into a pot. This is my go-to method for expensive or rare seeds where I want to make sure every single one counts.
10. Prime Your Seeds for Success
In the world of commercial agriculture, seed priming is a standard practice for achieving fast, uniform germination across thousands of plants. The global seed germination accelerator market is growing because priming techniques can cut germination time by 20-30%. It involves soaking seeds in a special solution that gets the internal germination process going but stops it just before the root pops out.
11. Keep It Simple for Beginners
Finally, if you’re just starting out, don't feel like you have to do all of this at once. For anyone new to gardening, a solid beginner's guide to starting a garden is the best place to begin. Most of the time, simply mastering the basics of good moisture and consistent warmth is all you really need for success with common vegetable and flower seeds.
Why High-Vigor Seeds Are Your Secret Weapon
We can talk all day about soaking, warming, and other tricks to get seeds to pop, but if you want to know the real secret to germinating seeds quickly, it starts with the seed itself. They simply aren't all created equal. The single most important factor, and one most gardeners overlook, is what's known as seed vigor.
Think of it as a seed's built-in battery pack and sheer will to live.
A high-vigor seed is like an athlete coiled at the starting line, just waiting for the gun to go off. A low-vigor seed? It’s already tired, struggling to even get moving when conditions are perfect. High-vigor seeds have the raw power to bust through crusty soil, fight off damping-off disease, and still sprout even when you mess up the watering schedule a bit.
Beyond the Germination Percentage
You’ve seen the germination percentage on every seed packet. A 90% germination rate sounds great, right? It just means that in a perfect lab setting, nine out of ten seeds should sprout. But here’s what it doesn't tell you: how fast they'll sprout or how tough those seedlings will be.
That number on the packet is a poor predictor of how seeds will actually perform in your garden, with its fluctuating temperatures, inconsistent moisture, and other real-world challenges. Vigor is what determines the speed and uniformity of germination—two things absolutely critical for a successful start. If you want to dive deeper into the science, you can explore the research on seed vigor and field emergence.
How to Find High-Vigor Seeds
So, how do you stack the deck in your favor and start with the best seeds possible? It's less about quantity and all about quality.
- Buy from Reputable Suppliers: Choose seed companies that are known for their strict quality control and fresh inventory. The good ones often run their own vigor tests behind the scenes.
- Check the "Packed For" Date: This is a huge one. Always, always check the date on the packet. Fresher seeds almost invariably have more vigor. A seed's energy fades over time, so that five-year-old packet of tomato seeds might still sprout, but you'll likely get spindly, weak seedlings.
- Store Your Seeds Properly: If you have seeds left over, treat them right. Keep them in a cool, dark, and dry place. An airtight container in the fridge with a silica descant packet is the gold standard for preserving their energy for next season.
High vigor is the difference between a tray of seedlings where every plant pops up at the same time and grows at the same pace, and a tray with stragglers that get shaded out by their stronger neighbors. That uniformity is a total game-changer.
Ultimately, focusing on vigor requires a small shift in thinking. Instead of just asking, "Will my seeds sprout?" the better question is, "How well will they sprout?"
If you have seeds stored from past years, a quick germination test for seeds will give you a good idea of what you're working with. Starting with the strongest seeds you can find gives you a massive head start, leading to a healthier garden with a lot less work down the road.
Creating the Perfect Germination Environment
Alright, you've prepped your seeds. Now comes the part where we create the perfect little nursery for them to wake up in. Think of it as building a tiny, five-star hotel for your seeds where everything they need—moisture, warmth, and the right light conditions—is ready and waiting. Getting these three things right is the secret to getting those seeds to pop.
First, let's talk about water. Your goal is to keep the seed-starting mix consistently damp, like a well-wrung-out sponge, but never, ever soggy. Too much water is just as bad as too little; it can actually drown the seed by cutting off its oxygen supply, which often leads to rot. Not what we want.
I’ve found that a simple spray bottle is the best tool for this job. It lets you gently mist the soil surface without washing away those tiny seeds you so carefully placed.
To really lock that moisture in and save yourself a ton of work, a humidity dome is a game-changer. It's just a clear plastic lid that fits over your seed tray, but it creates a perfect mini-greenhouse effect. This simple trick keeps the humidity high and drastically cuts down on how often you need to grab that spray bottle.
Mastering Temperature and Light
Next up: heat. This is probably the single most important factor for speed. Most seeds have a sweet spot when it comes to temperature, and if you can provide that consistent warmth, they'll sprout much faster.
Cool-season crops like lettuce and spinach are pretty content with temperatures around 65-70°F (18-21°C). But the real heat-lovers, like tomatoes and especially peppers and eggplants, are much fussier.
These guys want things toasty, demanding soil temperatures around 80-85°F (27-29°C). Without that extra warmth, they can take weeks to show any signs of life, or they might not sprout at all. The easiest and most reliable way to deliver this is with a seedling heat mat placed right under your tray. It provides that gentle, consistent bottom heat they crave.
For a deep dive into putting it all together, our guide on the perfect indoor seed starting setup has you covered.
Finally, we need to solve the light-or-dark puzzle. This trips up a lot of new gardeners, but it’s actually pretty straightforward once you know the rules.
- Some Seeds Need Light: A handful of seeds, usually the really tiny ones like lettuce, petunias, or snapdragons, need a little light to kickstart germination. You'll want to sow these right on the surface of the soil and just gently press them in to make good contact. Don't bury them!
- Most Seeds Need Darkness: The vast majority of garden vegetables—think tomatoes, peppers, beans, and squash—germinate best in total darkness. For these, just follow the planting depth instructions on the seed packet. That little bit of soil cover is all the darkness they need.
By actively managing these three elements—consistent moisture, optimal temperature, and the right light exposure—you're taking all the guesswork out of the equation. You're giving your seeds the exact signals they've been waiting for to burst into life.
Common Germination Mistakes to Avoid
We've all been there. You do everything right, but your seeds just sit there, refusing to sprout. It's frustrating, but more often than not, the culprit is a small, easy-to-fix mistake. Getting seeds to pop quickly is as much about avoiding the pitfalls as it is about following the right steps.
Let's walk through some of the most common hangups I see and how you can sidestep them for a much better success rate.
Planting Seeds Too Deep
This is hands-down the most frequent mistake, especially for new gardeners. A seed only has a finite amount of energy packed inside it to fuel its journey up through the soil and into the light.
If you plant it too deep, that tiny seed can burn through all its fuel before its first leaves ever see the sun. This is particularly true for incredibly small seeds like lettuce, poppies, or petunias.
A reliable rule of thumb is to plant a seed only about twice as deep as its diameter. For dust-like seeds that actually need light to germinate, you shouldn't bury them at all. Just gently press them onto the surface of the soil so they make good contact.
Getting the Moisture Just Right
Watering is a real balancing act. It's so easy to kill seeds with kindness by overwatering. When the soil is completely waterlogged, there’s no room for oxygen—and seeds absolutely need to breathe to start growing. Soggy conditions are a fast track to rot.
On the flip side, letting the growing medium dry out completely is a death sentence. Once that germination process kicks off, the seed is committed. If it dries out, the process halts, and the seed usually dies.
Your goal is to keep the soil feeling like a well-wrung-out sponge: consistently damp, but never sopping wet.
I can't stress this enough: The number one reason seeds fail isn't because they're "bad seeds." It's almost always due to inconsistent conditions. Give them a stable environment, and you've already won half the battle.
Other Critical Errors to Sidestep
Beyond water and depth, a few other things can stop your seeds dead in their tracks. Keep an eye out for these.
- Using Old, Stale Seeds: Seeds don't last forever. Their viability—the ability to sprout—drops off over time. Sure, some seeds can last for years in perfect storage, but their germination rate and the vigor of the seedlings will decline. Always check the "packed for" date on the packet.
- Ignoring Soil Temperature: This is a big one. Every seed has its own "happy place" when it comes to temperature. If you try to start heat-loving peppers in cold, early-spring soil, they'll just sit there and likely rot. Likewise, planting cool-weather crops like spinach in soil that's too warm can actually prevent them from sprouting at all.
- Providing Inconsistent Heat: Big temperature swings are confusing for a seed. A steady, gentle warmth tells a seed it's safe to grow. This is why a simple seedling heat mat is one of my favorite tools; it provides that consistent bottom heat that warm-season crops crave.
Your Top Seed Germination Questions, Answered
Even with the best plan, questions always pop up when you're trying to get seeds to sprout. A few quick answers can be the difference between a tray full of life and one that's a total dud. Let's dig into some of the most common things gardeners ask when they’re in a hurry to get growing.
What’s the Absolute Fastest Way to Sprout a Seed?
If you're racing against the clock, the winning combo is definitely the paper towel method on a seedling heat mat. It’s a simple setup that delivers exactly what most seeds need: constant moisture, high humidity, and just the right amount of warmth.
When you tuck your seeds into a damp paper towel and seal them in a plastic bag, you’re basically creating a personal greenhouse for each one. Then, by placing that bag on a heat mat cranked to the sweet spot (usually 75-85°F for things like tomatoes and peppers), you kick the whole process into high gear. It’s not unusual to see tiny roots poking out in just a matter of days.
Does Boiling Water Actually Work for Germination?
It can, but you have to be extremely careful. This technique, called hot water scarification, is reserved for seeds with seriously tough, almost armor-like coats. Think of seeds like morning glory, lupine, or certain types of acacia that need a real shock to their system before they'll let any water in.
Warning: This is not a method to try on a whim. If you pour boiling water on something delicate like a lettuce seed or a pepper seed, you'll just cook it. Only use this technique if the seed packet or a trusted source explicitly calls for it.
How Do I Know if My Old Seeds Are Still Good?
Nothing is more frustrating than planting a whole tray of seeds only to realize they were duds. You can avoid that disappointment with a quick viability test before you even touch a bag of soil. It’s really just a small-scale version of the paper towel method.
Here's how to do it:
- Line up exactly ten seeds from an old packet on a damp paper towel.
- Fold it over, slide the whole thing into a plastic bag, and label it with the seed type.
- Stash the bag somewhere warm for the normal germination window, which is often around 7-10 days.
Once time is up, take a peek and count how many have sprouted. If you see seven sprouted seeds, you've got a 70% viability rate. That's still pretty good! Just be sure to plant them a bit more densely than you normally would to make up for the ones that won't make it.
At Homegrown Garden, we believe a great garden starts with great seeds. Explore our curated collection of heirloom seeds and find everything you need to get growing today at our online shop.

