


Starting your garden from seed inside is one of the most rewarding things you can do. It's how you get a serious head start on the growing season and open the door to a whole world of plant varieties you just can't find at the local garden center.
To really nail indoor germination, you need to become a master of a tiny, controlled environment. The secret sauce is a simple but crucial trio: consistent moisture, steady warmth, and—once you see green—plenty of light. Get these right, and you're well on your way to a garden full of strong, healthy plants.
Your 11-Step Guide to Indoor Seed Starting Success
Think of starting seeds indoors as more than just a smart gardening hack. It's a way to connect with the whole process on a deeper level. By giving your plants the perfect start from day one, you stack the odds heavily in your favor. This guide will walk you through everything, step-by-step, to show you that with a little know-how, anyone can pull this off.
1. Understand Why You're Starting Seeds Indoors
Control. That’s the big win here. You’re no longer gambling against unpredictable spring weather—no more worrying about a late frost zapping your seedlings or a downpour washing them away. This level of control pays off big time.
Most common garden seeds, for instance, pop open when the soil is a cozy 65°F to 75°F (18°C to 24°C). Keeping things in that sweet spot indoors can get you germination rates as high as 90% for things like tomatoes and peppers. Compare that to the 60-70% you might see when sowing directly outside, and the advantage is clear. The University of Georgia's Field Report has a great breakdown on these optimal conditions.
But it’s not just about better odds. There are a few other fantastic reasons to start your garden inside:
- Grow Something Special: You can finally try those unique or heirloom varieties that nurseries never seem to stock.
- Save Some Cash: A single seed packet costs a fraction of what you'd spend on individual plant starts, especially if you have a big garden planned.
- Beat the Calendar: If you live in a place with a short growing season, starting indoors is your ticket to an earlier and longer harvest.
Honestly, the best part of starting seeds indoors is that moment you see the first tiny green shoot push through the soil. It's a simple, amazing thing to witness, and it kicks off the whole season with a real sense of accomplishment.
2. Gather Your 5 Seed Starting Essentials
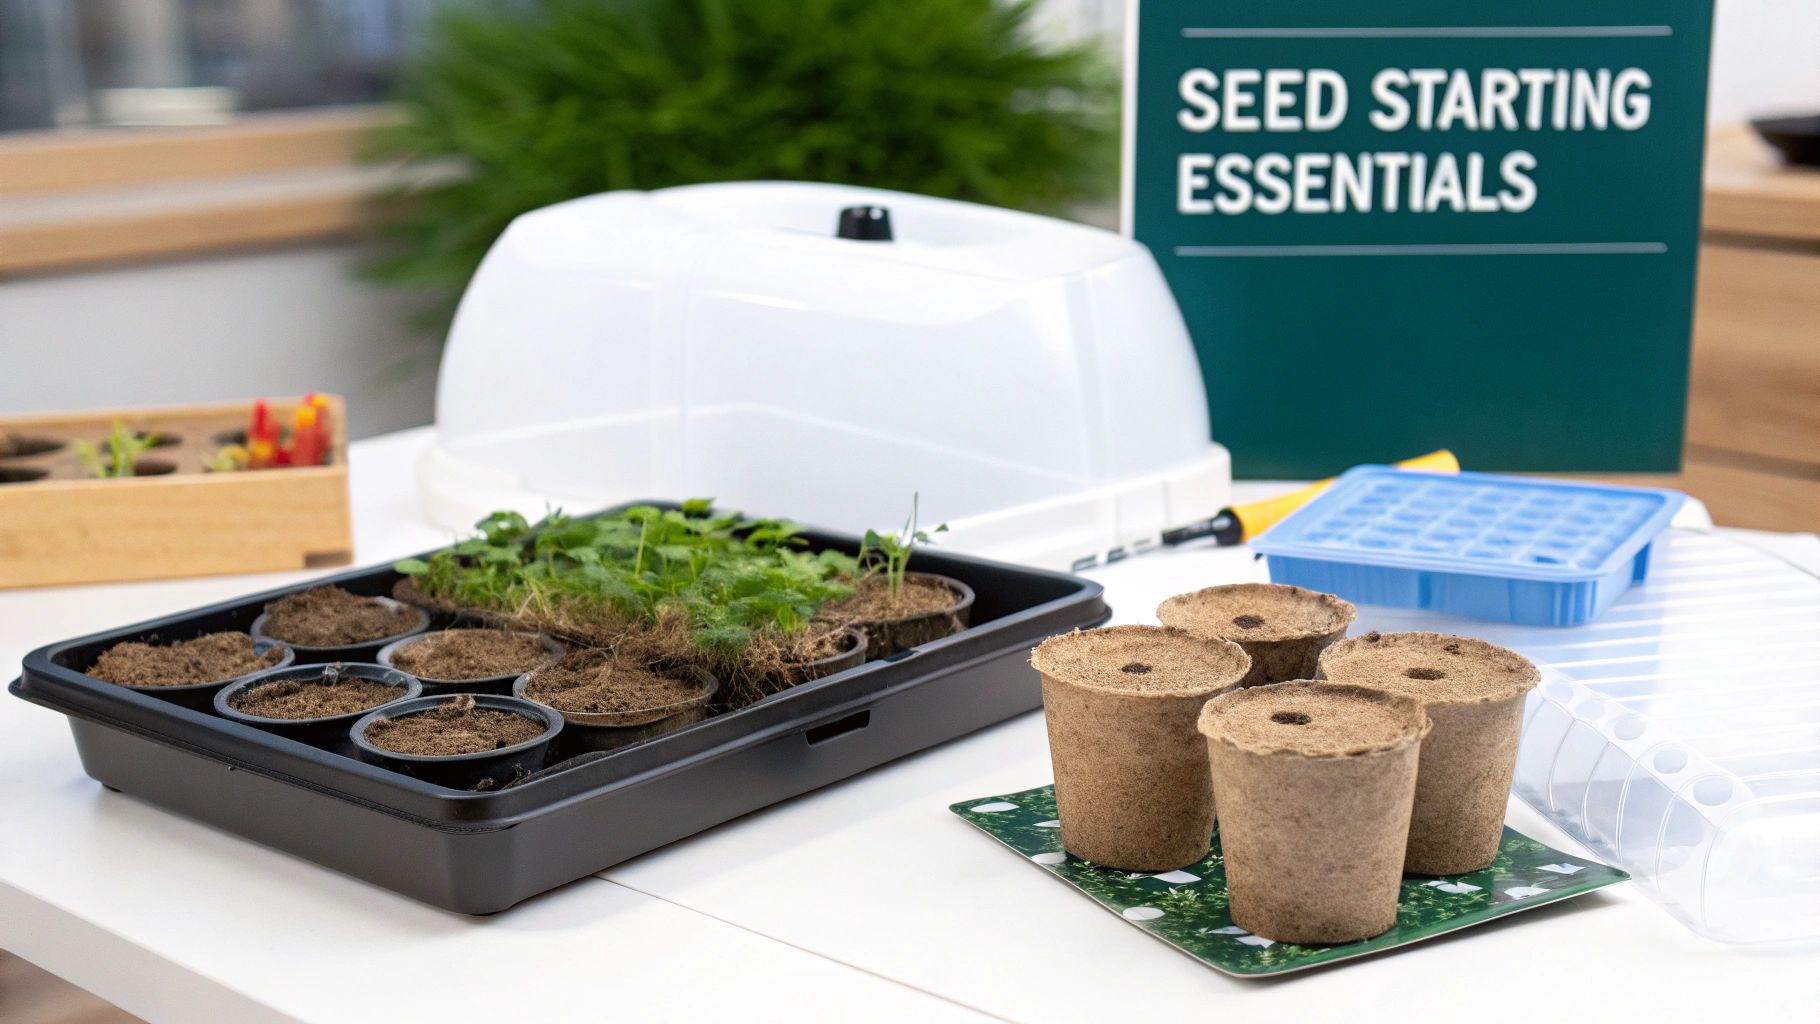
Before you can even think about coaxing seeds to life, you’ve got to get your setup right. Setting the stage for success now prevents so many headaches later. Think of it as building a solid foundation for the garden you’ll be enjoying all season long.
Use the Right Growing Medium
The soil you choose is probably the single most important decision you'll make at this stage. I can't stress this enough: don't use soil from your garden. It’s far too heavy, compacts like concrete around tiny roots, and often contains pathogens that can wipe out your delicate seedlings.
What you need is a specialized seed starting mix.
These mixes are specifically designed to be light, fluffy, and sterile. The airy texture lets fragile new roots navigate easily, and being sterile is your best defense against damping-off—a nasty fungal disease that's fatal to new sprouts. A quality mix usually combines peat moss, perlite, and vermiculite to strike the perfect balance between moisture retention and airflow.
The perfect consistency for your growing medium should feel like a well-wrung-out sponge—damp, but not soggy. This gives seeds the moisture they need to swell and sprout without drowning them.
Choose Your Containers and Trays
You've got a ton of options for containers, and honestly, the "best" one often comes down to personal preference, budget, and what you're growing.
- Plastic Cell Trays: These are the workhorses of seed starting. They're affordable, reusable, and come in all sorts of cell sizes so you can match the container to the plant.
- Peat Pots: The big advantage here is that they're biodegradable. You can plant the whole thing—pot and all—right into the garden. This is a lifesaver for fussy plants like cucumbers or squash that hate having their roots disturbed.
- Soil Blocks: If you're looking to avoid plastic, a soil blocker is a fantastic tool. It presses your damp soil mix into dense little cubes, which encourages fantastic root growth and eliminates waste.
Whatever you choose, make sure it has drainage holes. This is non-negotiable. Without proper drainage, water sits at the bottom, and your seeds will rot before they even have a chance to sprout.
Grab Your 3 Essential Supporting Tools
A couple of extra pieces of gear can make a world of difference and seriously boost your germination rates. These tools are all about creating a stable, cozy environment where seeds feel safe to grow.
A humidity dome, which is just a clear plastic cover for your seed tray, is brilliant. It traps moisture and warmth, creating a perfect little mini-greenhouse that really helps trigger germination.
For heat-lovers like tomatoes, peppers, and eggplants, a seedling heat mat is a complete game-changer. It provides gentle, consistent warmth from below, which can shave days or even weeks off germination time. Most seeds are happiest when the soil is somewhere between 70-80°F (21-27°C).
And finally, something so simple but so crucial: plant labels. Trust me, you will forget what you planted where. A few simple stakes will save you a world of guessing games later on. For a deep dive into putting it all together, check out our guide on creating the perfect indoor seed starting setup.
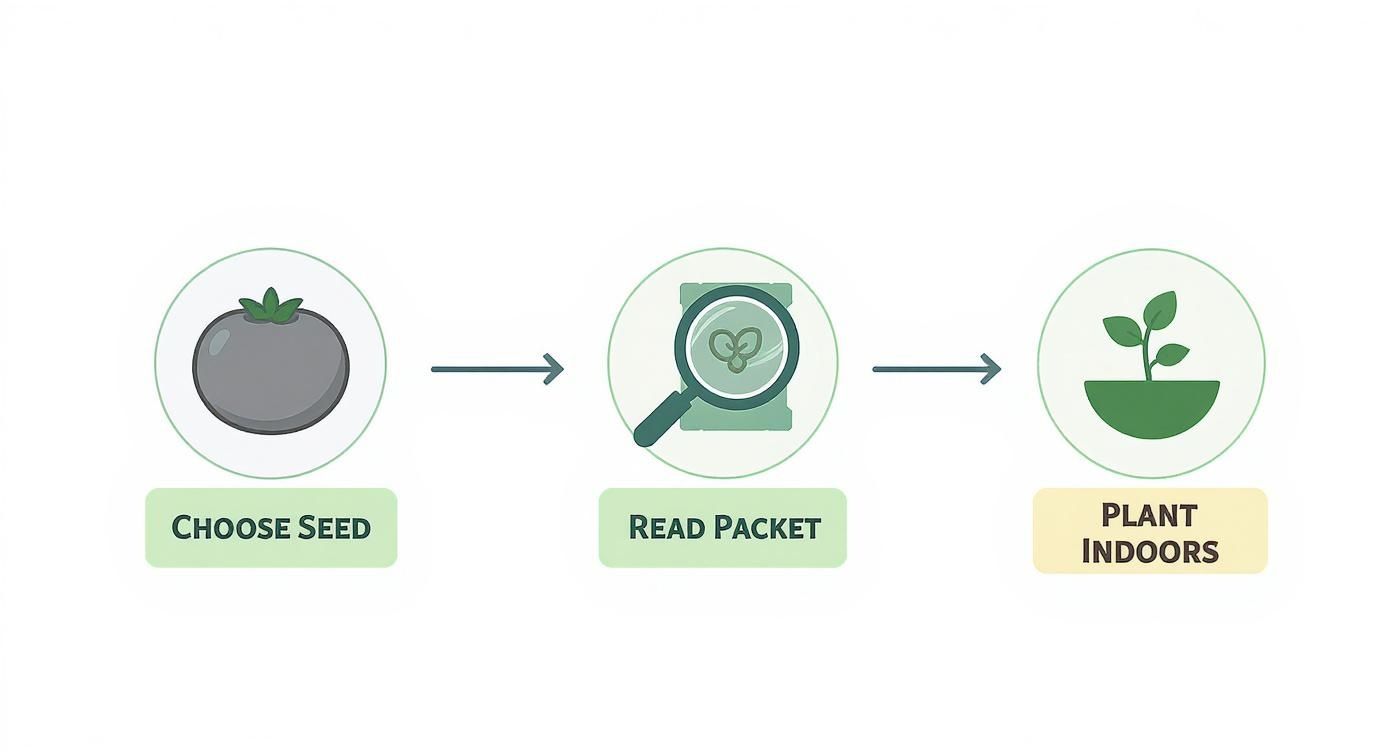
3. Pick the Right Seeds for an Indoor Start
Choosing the right seeds is probably the most important decision you'll make at this stage. Not every plant enjoys being started indoors, so if you want to learn how to germinate seeds like a pro, you need to pick varieties that will actually benefit from the head start.
Some plants practically demand to be started inside. I’m talking about those with long growing seasons, like your favorite tomatoes, peppers, and eggplant. Giving them a few extra weeks indoors means you'll actually get a harvest before the first frost hits. Herbs like basil and parsley are also perfect candidates.
Then you have the plants that absolutely hate having their roots messed with. Root veggies are the main culprits here—think carrots, radishes, and parsnips. They grow one long, central taproot, and if that gets damaged during transplanting, you'll end up with stunted or forked vegetables. These guys are always best sown directly into the garden.
What Your Seed Packet Is Trying to Tell You
That little seed packet is your best friend. It’s packed with all the info you need to succeed, so don't just glance at the photo! Flip it over and take a minute to really understand what it’s saying.
Here’s what to look for:
- Days to Germination: This is your timeline. It tells you roughly how long before you should see the first signs of life, which helps you know if you're on the right track.
- Planting Depth: This is a big one. The old rule of thumb is to plant a seed about twice as deep as it is wide. But some tiny seeds actually need light to sprout, so you'll just gently press them into the soil surface.
- Sowing Instructions: This section reveals any special treatment the seeds might need. Some require a cold spell (stratification) to wake up, while others need complete darkness.
- Days to Maturity: This number is key for planning your entire garden season. You can count backward from your average first frost date to figure out your ideal start time. If you need a hand with that math, our article on when to start seeds indoors will walk you through it.
Choosing seeds well-suited for an indoor start isn't just a suggestion—it's the foundation of a successful season. You're selecting plants that benefit most from a controlled environment, which prevents common frustrations and leads to stronger, more resilient transplants.
Starting seeds indoors is a game-changer for so many gardeners. With nearly 80% of the world's food production depending on seeds, getting germination right really matters. It's no surprise that up to 70% of home gardeners in North America now start crops indoors to beat the clock on shorter growing seasons. You can read more about these trends on Growcycle.com.
4. Perfect Your Seed Sowing Technique
Alright, you've got your supplies and you've picked out your seeds. Now for the fun part—getting them sown. This is where the magic really starts, and paying attention to a few small details now will make a huge difference in your germination success.
First things first, let's talk about your growing medium. You can't just plant seeds in dry, dusty soil. You want the mix to be perfectly damp to wake the seeds up, but not so sopping wet that they rot before they even get a chance. The goal is the consistency of a wrung-out sponge.
To get this right, just dump your seed-starting mix into a tub or bucket. Slowly add some warm water and mix it all up with your hands. Keep adding a little water at a time until a handful of the mix feels moist but doesn't drip when you give it a squeeze. Pre-moistening like this is a pro-tip; it ensures water is distributed evenly from the start.
5. Get Sowing Depth and Spacing Right
One of the easiest mistakes to make is planting seeds too deep. A tiny seed only has so much stored energy, and if it has to struggle to reach the surface, it might run out of steam and never make it. This simple infographic walks you through the initial setup.
The best advice I can give is to always read the seed packet. Seriously. It's your cheat sheet, telling you the exact depth needed for that specific plant.
If the packet is missing or vague, a solid rule of thumb is to plant a seed about two to three times as deep as it is wide. Think about a tomato seed—it only needs about a quarter-inch of soil on top. For incredibly fine seeds, like poppies or petunias, you might just press them gently onto the surface of the soil. Many of these tiny seeds actually need light to germinate, so burying them is a no-go.
Spacing is just as important. Crowded seedlings have to fight for light and nutrients, which results in weak, leggy plants that struggle later on. A good practice is to sow just one to two seeds per cell or small pot.
I always plant two seeds per cell. It's cheap insurance. Not every single seed will sprout, so this doubles my chances of getting at least one healthy seedling in every spot. If both come up, I just take a small pair of scissors and snip the weaker-looking one at the soil line. It feels ruthless, but it allows the stronger one to get all the resources and thrive.
Common Seed Sowing Depths and Germination Times
To give you a head start, I've put together this quick reference table for some garden favorites. It’s a great way to see at a glance how different seeds have different needs.
| Plant Type | Sowing Depth | Light for Germination? | Avg. Germination Time (Days) |
|---|---|---|---|
| Tomato | 1/4 inch | No | 5-10 |
| Pepper | 1/4 inch | No | 7-14 |
| Lettuce | 1/8 inch or surface | Yes, for some varieties | 7-10 |
| Marigold | 1/4 inch | No | 5-7 |
| Zinnia | 1/4 inch | No | 4-7 |
| Petunia | Surface sow | Yes | 7-10 |
| Broccoli | 1/4 inch | No | 5-10 |
| Cucumber | 1/2 inch | No | 3-10 |
Keep in mind, these are averages. Warmer soil will generally speed things up, while cooler temps can slow them down. Always refer back to your specific seed packet for the most accurate information.
6. Don't Forget to Label Everything
This last step sounds so basic, but trust me, you'll be kicking yourself later if you skip it. Label your trays before you even put a single seed in them. Grab a waterproof marker and some plastic plant stakes and write down the plant variety and the date you sowed it.
Here’s why this is non-negotiable:
- You can track germination times. Knowing when you planted helps you figure out if things are on track or if a particular tray is taking too long to sprout.
- You won't mix things up. After a few weeks, a tray of baby peppers can look an awful lot like a tray of baby tomatoes. Good labels eliminate the guesswork.
- You can provide tailored care. As they grow, different seedlings will have different needs for light and water. Labels ensure everyone gets what they need.
It takes maybe 30 seconds to do, but this simple habit prevents a whole lot of confusion down the road and sets you up for a successful start.
7. Get the Germination Environment Just Right
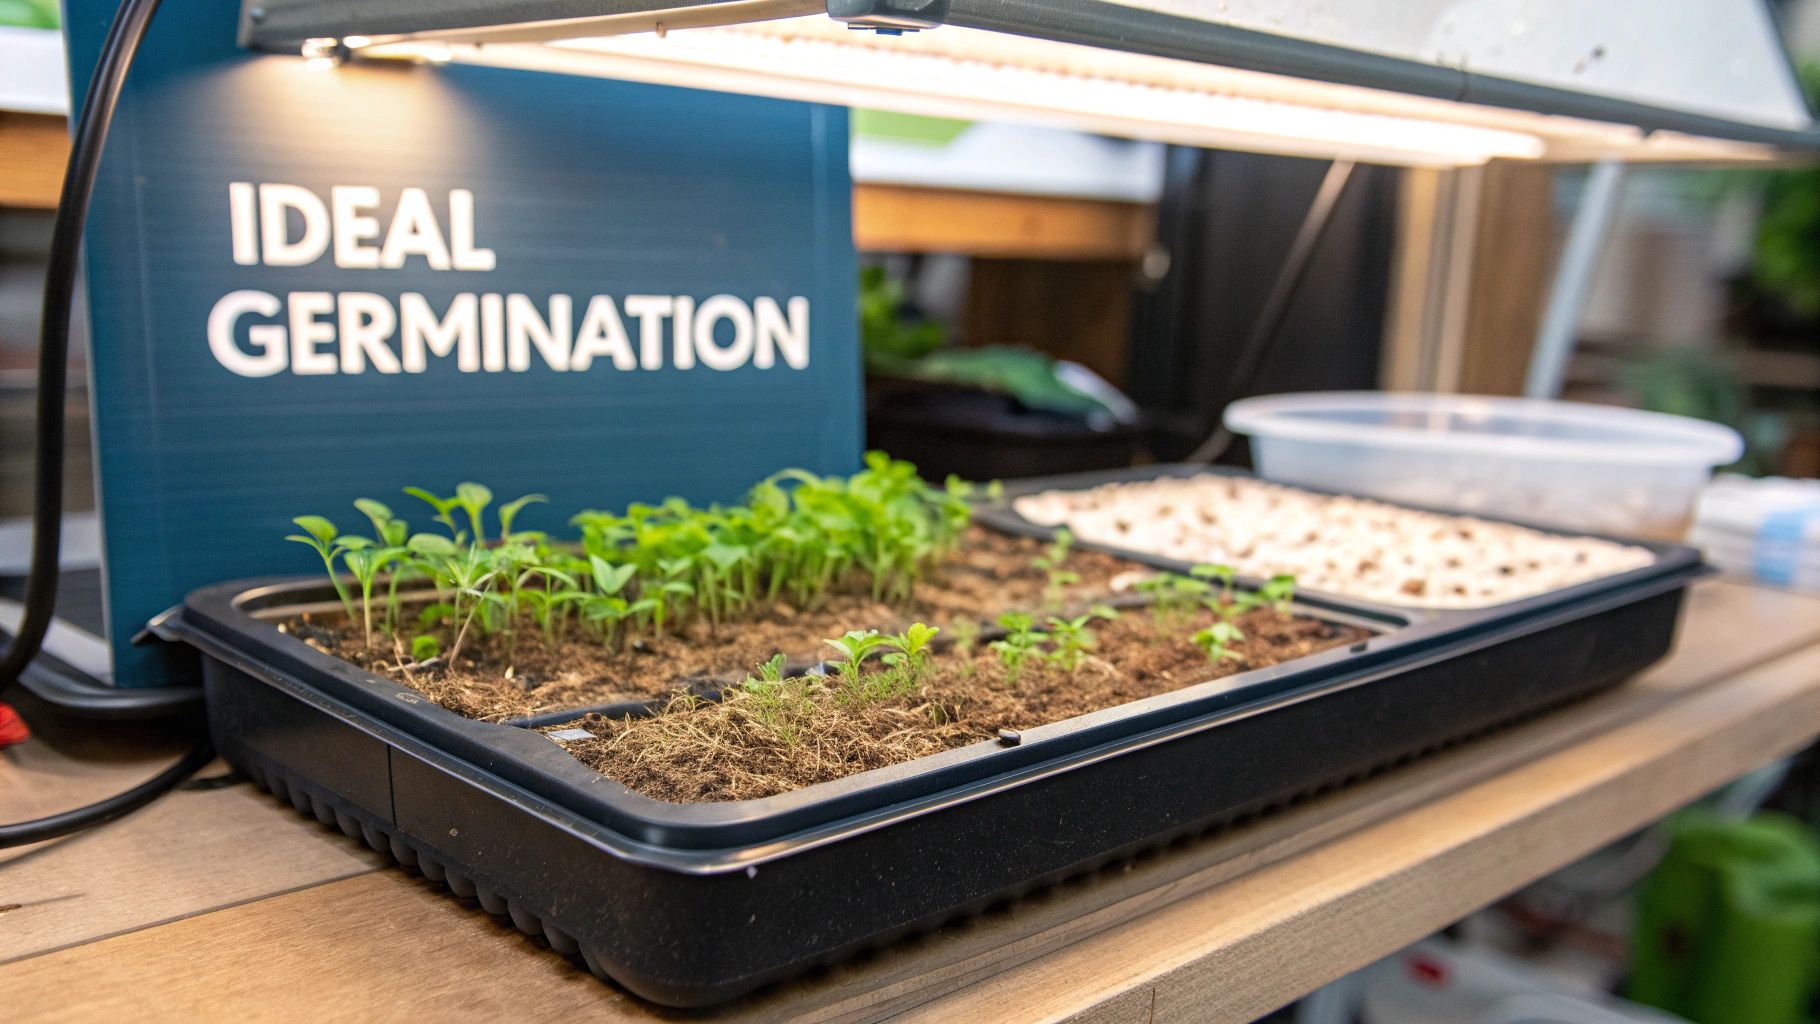
Alright, your seeds are sown. Now, your job shifts from sower to caretaker. Think of yourself as running a cozy nursery, creating the perfect little world that tells those seeds it's time to wake up.
Success from here on out really boils down to three things: consistent moisture, the right amount of warmth, and—at the perfect moment—a whole lot of light. Nailing these elements is what separates a tray of healthy sprouts from a tray of duds.
Keep Things Consistently Moist
Moisture is the first cue that tells a seed to break its slumber. Your goal is to keep the soil damp like a wrung-out sponge, but never, ever soggy. Overwatering is probably the number one mistake I see people make; it can easily suffocate the seeds or invite diseases like damping-off.
To get it right, forget about using a watering can. It's too aggressive and will wash your tiny seeds around. Go for a gentler touch instead.
- A Fine Mister is Your Friend: A simple spray bottle set to a fine mist is perfect. It lets you lightly dampen the soil surface without disturbing anything. A quick spritz once or twice a day usually does the trick.
- Try Bottom-Watering: This is my go-to method. Just set your seed trays inside a larger tray that doesn't have holes, and pour an inch of water into the outer tray. The soil wicks the moisture up from below, getting water right to the roots without soaking the delicate new stems. After 20-30 minutes, take the seed tray out.
- Use a Humidity Dome: That clear plastic lid that comes with most seed starting kits is a game-changer. It traps moisture and warmth, creating a mini-greenhouse that dramatically cuts down on how often you need to water. Just remember to prop it open or remove it for an hour a day for fresh air once you see sprouts.
Understand the Power of Warmth
Most seeds need a bit of warmth to get the germination party started. While they might eventually sprout at room temperature, adding some gentle heat can really speed things up, especially for heat-lovers like tomatoes, peppers, and eggplants.
A seedling heat mat is worth its weight in gold here. You just place it under your seed tray, and it provides a steady, gentle warmth from below, encouraging seeds to sprout faster and more evenly. Most common garden seeds are happiest when the soil is between 70-85°F (21-29°C).
A heat mat can take germination time from two weeks down to just a few days for some plants. It’s a small investment that gives your garden a powerful head start.
But hold on—not all seeds want a warm bed. Cool-weather crops like spinach, lettuce, and kale actually prefer cooler soil, somewhere around 55-65°F (13-18°C). Using a heat mat on these can actually stop them from sprouting. To find the sweet spot for everything you're growing, our seed germination temperature chart is a great resource, breaking down the ideal temperatures for dozens of plants.
Know When to Bring in the Light
This is a big one, and it’s where a lot of new gardeners get tripped up. The vast majority of seeds need complete darkness to germinate. They're meant to be buried, after all.
The rules change the instant you see that very first green shoot peeking out of the soil. At that moment, you need to act fast. Immediately take off the humidity dome, turn off the heat mat, and give those sprouts a strong, direct light source.
This part is non-negotiable. Without bright, immediate light, your seedlings will get "leggy"—stretching into long, pale, and weak stems as they search for the sun. A sunny windowsill almost never cuts it. Your best bet is a dedicated grow light. You’ll want to position it just 2-3 inches above the tops of the seedlings and leave it on for 14-16 hours a day. Keeping the light that close ensures your plants grow stout and strong, not tall and flimsy.
8. Care for Seedlings and 9. Harden Them Off
There's nothing quite like seeing those first green shoots pop through the soil. It's a fantastic moment, but don't get too comfortable—your work as a plant parent is shifting into a new phase. Now, the goal is to transform those delicate sprouts into tough seedlings ready for the great outdoors.
Think about it: your seedlings have been living in a five-star hotel with perfect temperatures and zero wind. The garden is a different world entirely. The transition from your cozy setup to the wild outdoors can be a brutal shock, so we need to prepare them for it. This means nurturing strong growth indoors first, then slowly introducing them to the elements.
Nurture Strong Indoor Growth
Once your seeds have officially sprouted, their needs change. For starters, good airflow becomes crucial. A small, oscillating fan set on low for a couple of hours a day works wonders. This gentle breeze not only helps prevent fungal diseases like the dreaded damping-off but also mimics natural wind, encouraging your seedlings to grow stronger, stockier stems.
Now comes the tough part: thinning. If you planted two seeds per cell and both came up, you have a difficult choice to make. It feels wrong, I know, but you have to pick the stronger-looking seedling and snip its weaker sibling right at the soil line with clean scissors. Never pull it out, as you risk damaging the delicate roots of the plant you want to keep.
This one small, ruthless act is one of the best things you can do for your plants. It ensures the survivor gets all the water, light, and nutrients it needs to become a truly robust transplant.
About two weeks after germination, your seedlings will develop their first set of "true leaves" (the second pair that appears). This is your signal to give them their first meal. Mix a balanced liquid fertilizer to quarter-strength—a full dose will scorch their sensitive roots. Feed them with this weak solution once a week to give them a steady supply of nutrients for healthy growth.
Master the 7-Day Hardening Off Process
Hardening off is the essential practice of slowly getting your indoor-grown plants used to life outside. If you skip this, you’re risking sunburned leaves, wind-snapped stems, and transplant shock that can kill your plants. This gradual, 7 to 14-day process is their final training before they graduate to the garden.
Here’s a sample schedule to guide you. Remember to pay close attention to the weather—on very hot or windy days, you may need to scale back their time outside.
- Day 1: Find a sheltered, shady spot and leave the seedlings out for just one hour. Then, bring them back inside. Easy does it.
- Day 2: Let’s double it. Two hours outside, still in a protected, shady location.
- Day 3: Bump them up to three or four hours outside. You can start introducing them to a little bit of gentle morning sun now.
- Day 4: They're getting tougher. Give them five hours outside with a bit more direct morning light, but still protect them from the harsh afternoon sun.
- Day 5: Now they’re ready for about six to seven hours outdoors, including more direct sunlight.
- Day 6: Time for a full day of work. Leave them outside from morning until evening, but bring them in for the night.
- Day 7: Graduation day! As long as there’s no frost in the forecast, your plants can now stay outside overnight and are ready to be transplanted into the garden.
By taking the time to manage this transition carefully, you give the strong seedlings you worked so hard to grow the best possible chance to not just survive, but thrive in their new home.
10. Troubleshoot Common Seedling Problems
Even the most seasoned gardeners run into a few hiccups when starting seeds indoors. Don't sweat it—every problem is a learning experience. Let's walk through some of the most common issues you might see and figure out how to get your seedlings back on track.
My Seeds Didn't Sprout. What Gives?
Staring at a tray of empty soil is beyond frustrating, but don't dump it just yet. The reason is usually pretty simple, and it's almost always one of these four things.
- The soil is too cold. This is a big one, especially for heat-lovers like tomatoes and peppers. They're waiting for soil temps to hit that sweet spot of 70-85°F (21-29°C) before they'll even think about waking up. A chilly room can keep them dormant indefinitely.
- They dried out. A seed needs to stay consistently moist to kickstart the germination process. If the soil surface dries out completely, even for a short time, the process stalls.
- You planted them too deep. Think of a seed as having a tiny packed lunch. If you plant it too deep, it can burn through all its energy reserves trying to reach the light and run out of steam before it ever breaks the surface.
- The seeds are just old. Seed viability isn't forever. If you're using a packet that's been kicking around for a few years, you're naturally going to have a lower success rate. It's not you, it's them.
What’s This White Fuzzy Stuff on My Soil?
Seeing a layer of white, fuzzy growth on your soil can be alarming, but it's usually harmless. It’s a common mold that pops up when there's too much moisture and not enough air moving around.
While the mold itself won't hurt your plants, it's a huge warning sign that conditions are perfect for a much bigger problem: damping-off disease. The fix is easy—get a small fan to create a gentle breeze and let the top of the soil dry out a bit more between waterings.
Why Are My Seedlings So Tall and Skinny?
Ah, the classic "leggy" seedling. This problem has a one-word answer: light. Seedlings that aren't getting enough bright, direct light will stretch desperately for any source they can find, resulting in long, pale, and flimsy stems that can barely support themselves.
Despite what you might think, a sunny windowsill is almost never enough for strong growth.
The only real solution here is a dedicated grow light. You need to position it just 2 to 3 inches above the tops of your seedlings. That close proximity provides the intense light they crave to grow stout and strong, not tall and weak.
11. Learn to "Read" Your Seedlings
Your little plants will tell you exactly what's wrong if you know what to look for. Keep an eye on their color and how they're standing to catch issues early.
| Symptom | What It Probably Means | How to Fix It |
|---|---|---|
| Yellowing Leaves | You're overwatering, or they're hungry. | Let the soil dry out more between waterings. If you see true leaves, it's time to feed them with a quarter-strength liquid fertilizer. |
| Purple Stems | This often points to a phosphorus deficiency, which is usually caused by cold soil (the roots can't absorb it). | Warm things up. A heat mat is ideal, but moving the tray to a warmer spot in the house can also do the trick. |
| Stem Collapses at the Soil Line | This is damping-off, a fungal disease that's unfortunately fatal. | There's no saving a seedling with damping-off. The best you can do is start a new batch with fresh, sterile soil and be extra vigilant about air circulation. |
Learning to spot these signs is half the battle. Once you know what to look for, you can correct course quickly and keep your garden on track for a successful move outdoors.
At Homegrown Garden, we believe anyone can experience the joy of growing their own food. Our heirloom seeds and all-in-one kits are designed to give you everything you need, along with the guidance to make it happen. Explore our collection and start your growing journey today.

