


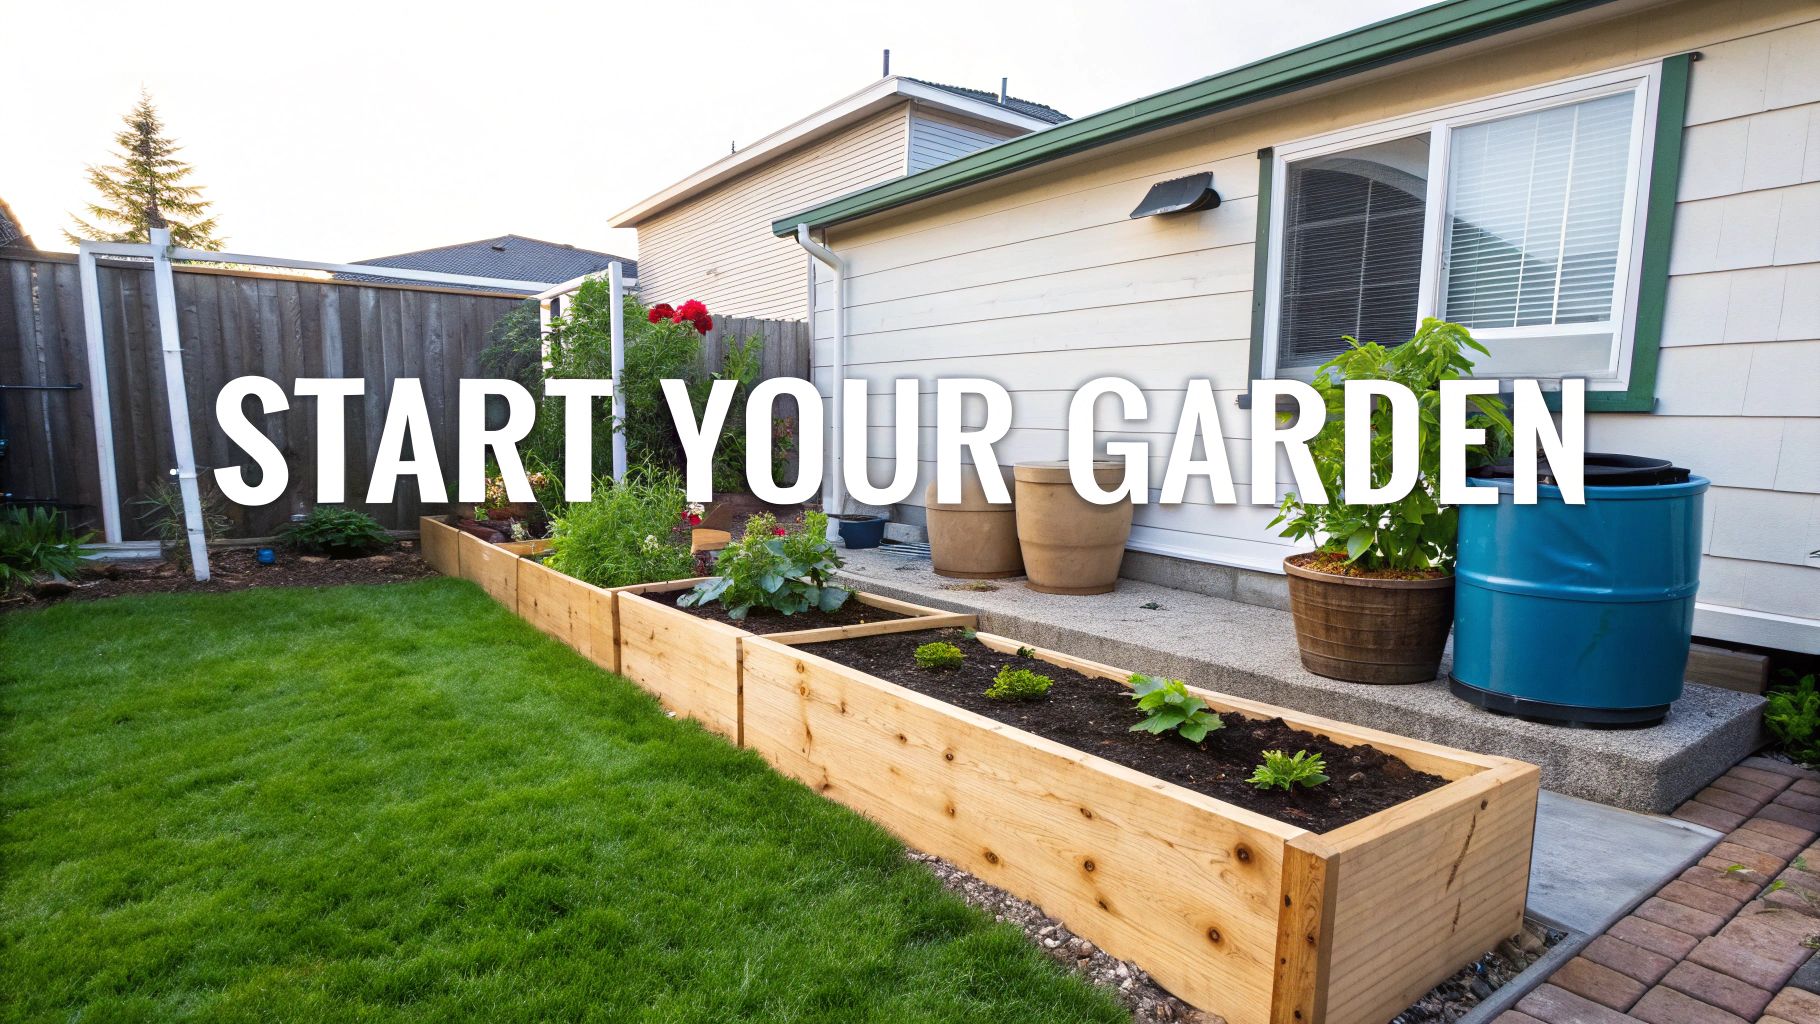
Starting a garden is way less intimidating than most people think. It really just boils down to a handful of smart decisions made right at the start.
If you can get the fundamentals down—like picking a sunny spot, deciding on the type of garden you want, and getting your soil right—you're already halfway to a successful harvest.
Your First Steps to a Thriving Garden
Getting your hands dirty for the first time is a fantastic feeling. It’s your chance to connect with nature and, eventually, enjoy the fruits (or vegetables) of your labor. The planning you do now is genuinely the most important part of the entire process. A little bit of forethought saves a ton of headaches later.
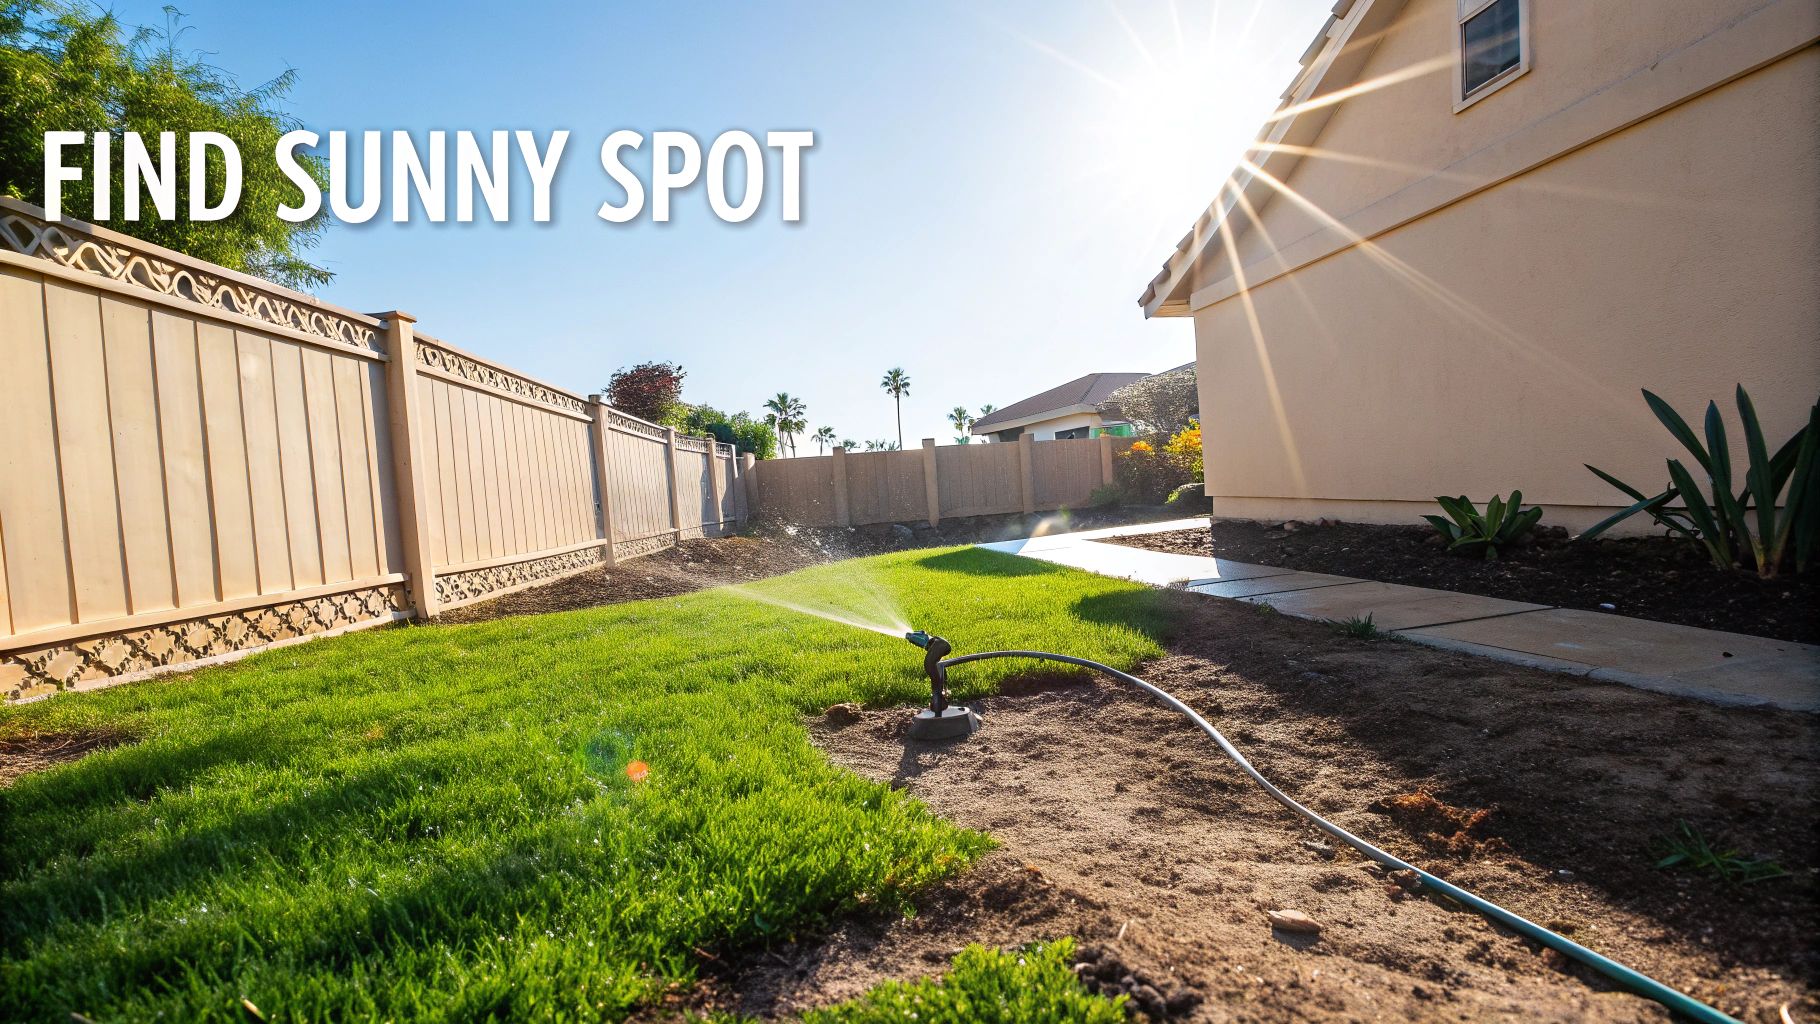
Before you break ground, just take a day to watch your yard. Seriously. The biggest non-negotiable for most plants, especially veggies and colorful flowers, is sunlight. Find a spot that gets a solid six to eight hours of direct sun each day. This one thing will make or break your garden.
Making Your Key Decisions
Once you’ve found your sunny patch, it’s time to think about how you want to garden. This decision really comes down to your space, your budget, and how much bending you want to do.
- In-Ground Gardens: This is the classic way to go. If you have a decent-sized yard and the soil isn't solid clay or rock, it's the most cost-effective option. Just be prepared for some upfront work clearing grass and improving the soil.
- Raised Garden Beds: These are a game-changer for beginners. Raised beds give you complete control over your soil, and the drainage is phenomenal. Plus, they save your back and warm up earlier in the spring, which can give you a nice head start.
- Container Gardening: Don't have a yard? No problem. Containers are your best friend on a balcony, patio, or even a sunny windowsill. They offer total flexibility but do require more frequent watering since they dry out quickly.
To help you sort through these initial choices, here’s a quick breakdown of what you need to consider.
Key Decisions for Your First Garden
This table summarizes the essential choices you'll need to make when starting your garden, helping you plan effectively from day one.
| Decision Point | Key Considerations | Best For Beginners |
|---|---|---|
| Location | Must get 6-8 hours of direct sunlight daily. Needs to be close to a water source. | A sunny spot near your back door or patio. |
| Garden Type | Space available, budget, soil quality, physical limitations. | Raised beds or containers for control and ease of use. |
| Plant Selection | Your local climate (frost dates), what you actually like to eat, sun/shade needs of the plant. | Easy-to-grow plants like lettuce, bush beans, or herbs. |
Making these decisions thoughtfully will put you on the right track before you even buy a single seed.
Planning is more than just picking a spot; it's about creating a system that works for you. A well-thought-out garden is easier to maintain, more productive, and ultimately more enjoyable.
The final piece of the puzzle is getting to know your local climate. You need to know your area's first and last frost dates, as this will be your guide for when to plant everything. This info helps you pick plants that will actually be happy where you live.
For a much deeper dive into mapping everything out, check out our guide on how to plan a garden. And as you think bigger, water becomes a crucial factor; it can be helpful to start understanding the role of large plastic storage tanks in farms for managing water efficiently, especially if you see a larger garden in your future.
7 Tips for Finding the Perfect Garden Location
Choosing where to put your garden is probably the single most important decision you'll make at the outset. It’s about so much more than just finding an empty patch of grass; the right spot sets the stage for everything that follows, from lush, healthy plants to how much you actually enjoy spending time in your new space.
A lot of new gardeners just pick a sunny-looking spot and start digging. But taking a little time to observe your yard first can save you a world of frustration later. Before you even think about turning over soil, use these seven tips to scout the absolute best location for your garden.
1. Become a Sun Tracker
This is the golden rule, and there's no getting around it. The vast majority of vegetables, herbs, and flowers need at least six to eight hours of direct sunlight every day to really produce.
Don't guess at this. Spend a full day, from morning to evening, watching your potential spots. Make a note of when the sun first hits the area and when it finally dips into shade. You might be surprised how much the shadows cast by your house, a fence, or that big oak tree shift throughout the day. A spot that’s blazing hot at noon could be in deep shade by 3 PM.
2. Stay Close to Your Water Source
Trust me on this one: hauling heavy watering cans across your yard on a hot July afternoon gets old really, really fast. Set yourself up for success by placing the garden as close as you can to an outdoor spigot.
This simple bit of planning will make a huge difference in your daily routine, especially during those long, dry spells. If your sunniest spot is a bit of a trek, it's worth investing in a good quality, extra-long hose or even a simple drip irrigation system. It'll make watering less of a chore and more of a pleasure.
3. Look for Level Ground
Starting on a relatively flat surface is always the easiest route. It helps ensure water soaks in evenly and prevents your precious topsoil and nutrients from washing away in a heavy downpour.
If your yard has a bit of a slope, you can absolutely make it work by building terraces or tiered beds, but that's a much bigger project. For a beginner, a level spot simplifies everything from building raised beds to planting and weeding.
4. Test Your Soil's Drainage
Plants hate having "wet feet." Soil that stays waterlogged is a recipe for root rot, which is one of the most common and fatal problems for garden plants.
Here’s an easy way to check. Dig a hole about a foot deep and a foot wide, then fill it to the top with water. Let it drain completely. Now, fill it up again and time how long it takes for the water to disappear. If it’s gone within a few hours, your drainage is fantastic. If there's still water standing in the hole after 12 hours, you've got a drainage issue to solve, likely by adding organic matter or opting for a raised bed.
The perfect location is a blend of science and convenience. It must meet your plants' non-negotiable needs for sun and water while also being a place you can easily access and enjoy every day.
Getting the location right is a huge first step. In the United States, about 55% of households enjoy gardening, showing just how rewarding it is. A well-planned garden isn't just for you, either—it can potentially boost property resale values by 10-20%, making your location choice a smart investment.
5. Avoid High-Traffic and Windy Spots
Your garden needs a little peace and quiet to flourish. Try not to place it right next to the path where kids and pets are constantly running, as plants can easily get trampled.
Likewise, try to find a spot that has some protection from strong winds. A wind tunnel can snap delicate stems, dry out the soil incredibly fast, and even discourage pollinators like bees from stopping by. A nearby fence, a wall of your house, or some existing shrubbery can act as a great natural windbreak.
6. Steer Clear of Big Trees and Shrubs
This is a classic rookie mistake. Planting too close to large trees puts your little garden in a tough spot. The tree's massive root system will outcompete your plants for every drop of water and nutrient in the soil. Not to mention, the tree's canopy will block that essential sunlight.
A good rule of thumb is to position your garden well outside the tree's "drip line"—the imaginary circle on the ground directly under the furthest reach of its branches.
7. Think Realistically About Your Space
You don't need a massive backyard to have a fantastic garden. The key is to work with what you have.
- Balconies and Patios: These spaces are perfect for container gardening. You can grow an incredible amount of herbs, salad greens, and even compact tomatoes in a few well-chosen pots. For more ideas, check out our guide to starting a balcony vegetable garden.
- Sunny Windowsills: Don't underestimate a bright, south-facing windowsill! It’s the perfect spot for a small indoor herb garden that keeps fresh flavors right at your fingertips.
- Controlled Environments: If you want to garden year-round, you could even explore options like premium quality garden rooms or glass conservatories for the ultimate controlled environment.
3 Steps for Getting Your Soil Ready
Once you’ve scouted the perfect sunny location, it’s time to shift your focus underground. This is where the real magic happens. So many gardening dreams live or die based on the quality of the soil, so let's get it right from the start.
Think of your garden soil less as inert "dirt" and more as the living, breathing pantry that will feed your plants. Giving it some attention now will pay you back tenfold with healthier plants, fewer pests, and a far more impressive harvest.
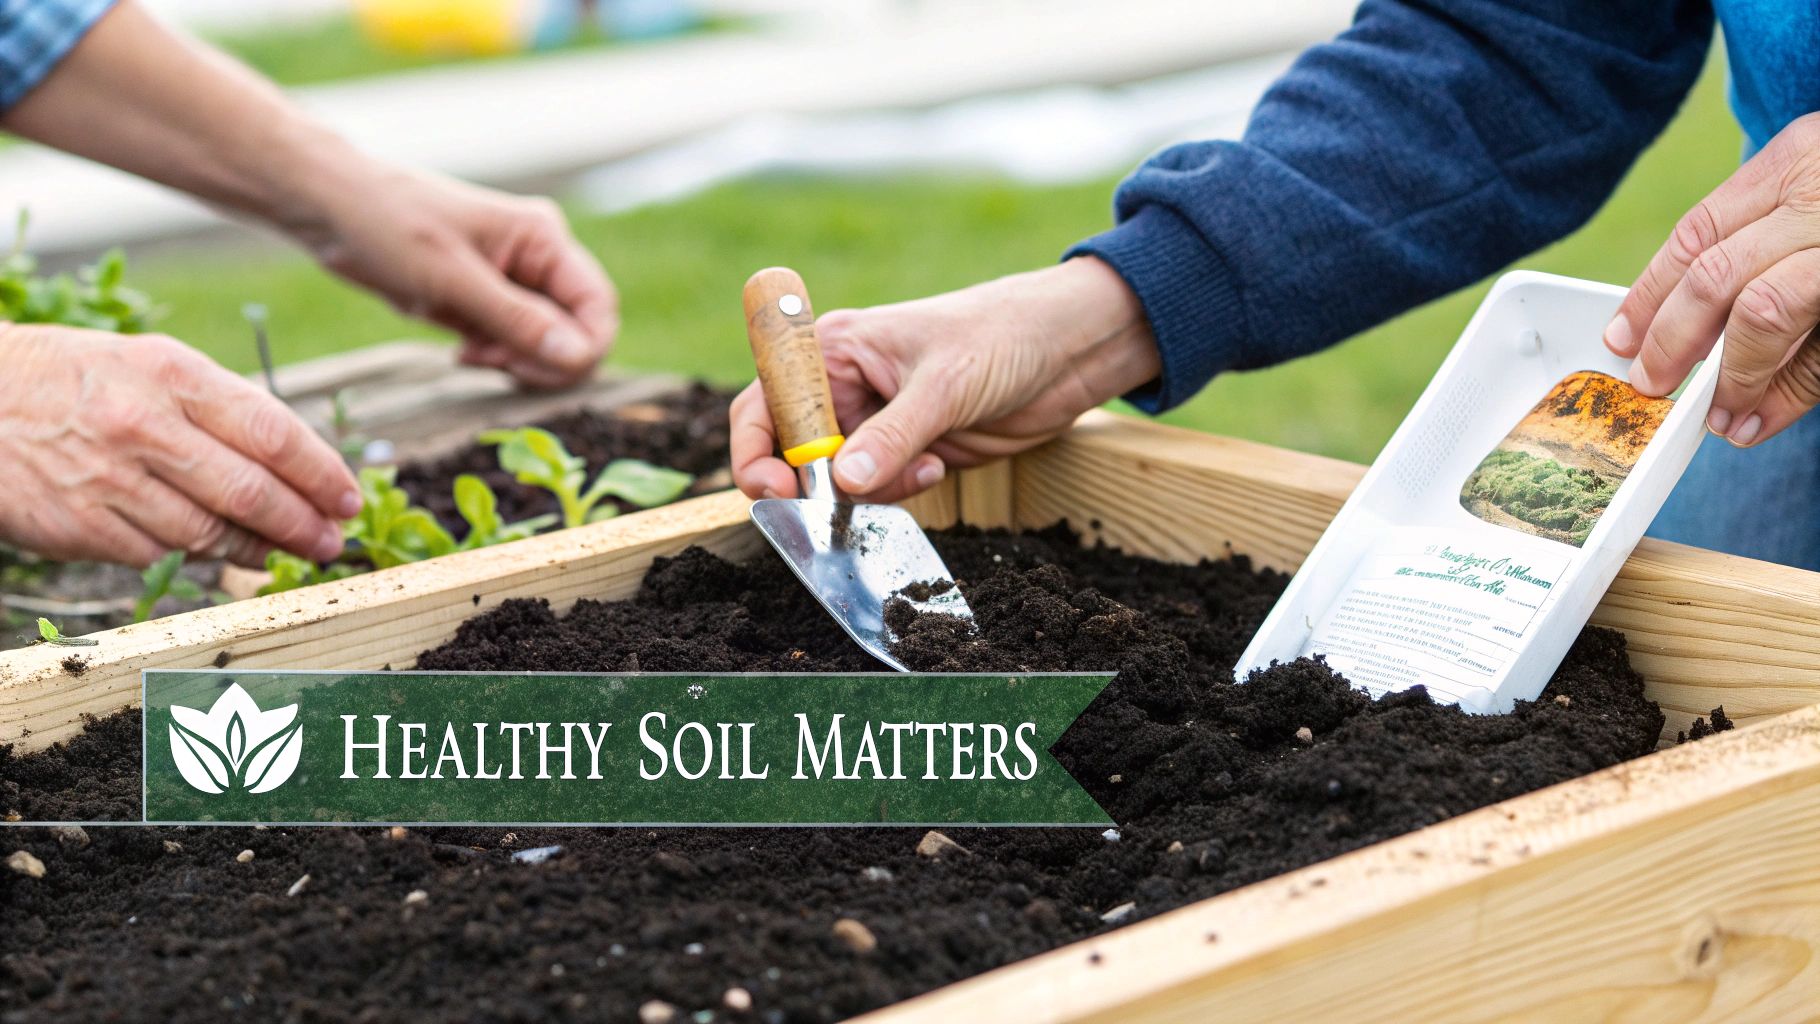
1. Test Your Soil Type
Before you can improve your soil, you need to know what you’re starting with. The easiest way to find out is with a simple squeeze test. Grab a handful of slightly damp soil (not muddy, not dusty) and make a fist.
- Clay Soil: Does it form a tight, slick ball that stays together when you open your hand? You've got clay. It’s nutrient-rich, which is great, but it can be a real pain—it drains slowly and turns into concrete when it dries out.
- Sandy Soil: Does it feel gritty and immediately crumble apart? That’s sand. It drains like a sieve, which means water and precious nutrients often wash right past your plants' roots.
- Loam Soil: Did it hold a loose shape but crumble easily when you poked it? Jackpot! You’ve hit the gardener’s gold standard—loam. It's that "just right" mix of clay, sand, and silt.
Don’t sweat it if your soil isn't perfect loam. Very few of us start with it. The good news is that no matter what you have, the solution is almost always the same.
2. Add Organic Matter
No matter your soil type, adding organic matter is the single best thing you can do. It's the universal fixer-upper for garden soil.
Think of it as a sponge. In heavy clay, organic matter pries open the dense particles, creating air pockets and improving drainage. In loose sand, it does the opposite, holding onto moisture and nutrients that would otherwise vanish.
Your goal is simple: build a soil that is dark, crumbly, and teeming with life. Adding compost is the fastest way to get there, transforming poor soil into a rich foundation for your plants.
So, what counts as good organic matter?
- Compost: This is the absolute best. It's a buffet of nutrients and beneficial microbes. You can buy it by the bag or even make your own.
- Aged Manure: Sourced from animals like cows or horses, this stuff is fantastic for soil structure. Just make sure it’s well-rotted (aged at least six months), or it can be too "hot" and burn your plants.
- Leaf Mold: It's exactly what it sounds like—decomposed leaves. It’s a wonderfully simple way to improve your soil's ability to hold water.
3. Prepare Your New Garden Bed
Once you have your soil amendments, it’s time to get them into the ground. There are two popular schools of thought on this.
The Traditional Tilling Method This is the classic approach. You use a tiller or a sturdy garden fork to loosen the top 8-12 inches of soil. As you work, spread a 2-3 inch layer of compost or other organic matter over the area and mix it in thoroughly. This method gets your bed ready for planting almost immediately.
The No-Dig Method Also called "lasagna gardening," this is my personal favorite for building incredible soil with minimal back-breaking work. You simply layer materials right on top of your lawn or weedy patch.
- Start with a base layer of cardboard to smother everything underneath.
- Add a thick layer of "browns" (dried leaves, straw).
- Next, add a layer of "greens" (fresh grass clippings, kitchen scraps).
- Finish with a 4-6 inch layer of good compost or high-quality garden soil.
You can plant right into that top layer. Over the season, the layers below will break down, creating an unbelievably fertile, living soil for years to come.
Here's a critical tip: if you're growing in pots, planters, or raised beds, never use soil from your yard. It's far too heavy and will compact into a solid brick, suffocating your plant's roots and preventing proper drainage.
For any kind of container gardening, you absolutely need to use a dedicated potting mix. These are lightweight, soilless blends designed to stay fluffy, drain well, and give roots the air they need to thrive.
For a deeper dive, you can learn all about preparing garden soil for different scenarios in our more comprehensive guide.
2 Ways to Choose Your Plants: Seeds vs. Seedlings
Alright, you've scouted the perfect sunny spot and your soil is ready to go. Now for the best part—deciding what you'll actually grow! This is where your garden vision starts to come alive. One of the first big choices you’ll face is whether to start from scratch with seeds or get a jump on the season with young plants, called seedlings.
Honestly, there’s no right or wrong answer here. It really boils down to your patience, your budget, and what you’re hoping to get out of the experience. Each approach has its own rhythm and rewards.
1. Starting from Seed
There's something magical about starting from seed. You get to witness the entire miracle, from a tiny, dormant speck to a sprawling vine loaded with fruit. From a practical standpoint, seeds are incredibly budget-friendly. A single packet can cost just a few dollars and give you dozens of plants, far more than you could buy as seedlings for the same price. Plus, the variety is staggering—seed catalogs are filled with unique heirloom tomatoes and funky-colored carrots you’ll never see at your local big-box garden center.
The catch? It takes time and a bit more TLC. You’ll need to start many seeds indoors weeks before the last frost, carefully tending to them until they're sturdy enough to handle the great outdoors.
2. Buying Seedlings
On the flip side, buying seedlings is all about instant gratification. It’s like skipping the first few chapters of a book and jumping straight to the action. These little plants have already made it through their most fragile stage, giving you a head start of several weeks. For a first-time gardener, seeing established green plants in your garden right away is a massive confidence boost. The trade-off, of course, is a higher price per plant and a much more limited selection.
So, which path should you take? Let’s break it down.
Seeds vs. Seedlings: Which Is Right for You?
Choosing between starting with seeds or buying established seedlings is a classic gardener's dilemma. This table compares the two methods to help you figure out what makes the most sense for your new garden.
| Factor | Starting from Seeds | Buying Seedlings |
|---|---|---|
| Cost | Very low cost per plant. | Significantly higher cost per plant. |
| Variety | Huge selection of unique and heirloom types. | Limited to what local nurseries stock. |
| Time | Requires a longer growing season and more patience. | Provides an instant garden and faster harvest. |
| Effort | Involves starting indoors, transplanting, and more care. | Easiest option; simply plant and go. |
| Best For | Gardeners on a budget, those wanting variety, and patient growers. | Beginners, gardeners with short seasons, and those seeking quick results. |
In the end, you don't have to choose just one. Most experienced gardeners I know do a little of both. They might start easy-growers like radishes and beans directly from seed in the garden, but then splurge on a few sturdy tomato and pepper seedlings from the nursery to guarantee a solid harvest.
The choice between seeds and seedlings isn't just about cost or convenience; it's about aligning your gardening journey with your personal goals and timeline. A mix of both approaches often provides the perfect balance for a successful first season.
11 Foolproof Plants for Your First Garden
For your first garden, the goal is to build confidence. Nothing does that better than success! Picking plants that are known for being easygoing and productive is the smartest move you can make. These 11 plants are famous for being beginner-friendly and are perfect for filling up your first garden bed or a few containers.
- Lettuce: Grows fast, and you can snip off leaves as you need them for a continuous harvest.
- Radishes: The ultimate instant-gratification crop. You can go from seed to salad in just three weeks.
- Bush Beans: Incredibly productive and, unlike their pole-bean cousins, don't need a complicated trellis.
- Zucchini/Summer Squash: These are notoriously prolific. Seriously, one or two plants is probably all you need!
- Peas: A fantastic cool-weather crop that’s a joy to pick and snack on right off the vine.
- Carrots: Don't be intimidated! They are surprisingly easy to grow from seed sown directly in the garden.
- Swiss Chard: A beautiful, hardy leafy green that looks as good as it tastes and keeps producing for months.
- Basil: A must-have herb that loves sunny spots and does wonderfully in containers.
- Mint: This one is practically indestructible. Just be sure to plant it in a pot to keep its aggressive roots from taking over your whole garden!
- Cherry Tomatoes: Far less fussy and much easier to manage than the big slicing varieties.
- Marigolds: These cheerful flowers not only add a pop of color but also help keep some common garden pests away.
This desire to get our hands in the dirt is part of a much bigger movement. The global gardening market was valued at around USD 120 billion in 2024 and is expected to keep growing. Residential gardening makes up over 45% of that market, driven by a global passion for fresh, home-grown food and beautiful living spaces. You can discover more insights about the growing gardening market and its surprising economic impact.
9 Essential Garden Care Tips for Beginners
So, your plants are in the ground and your garden is officially born. That's a huge step! Now comes the fun part—the daily and weekly rhythm of tending to your new green space. Consistent care is what turns a simple patch of dirt into a thriving, productive oasis, and it's much easier than you might think.
By getting a handle on a few core practices, you'll keep your plants healthy, vibrant, and tough. These nine tips cover the absolute must-knows, from watering the right way to dealing with pests without harsh chemicals. Let's make sure your garden thrives all season long.
1. Master the Art of Watering
This is where most new gardeners trip up—either watering too much or not enough. The secret is to water deeply but not too often. A light sprinkle every day just encourages shallow, weak roots that can't handle a hot spell.
Instead, aim to give your garden about one inch of water per week, whether that comes from rain or your hose. Get the water right to the base of the plants, preferably in the morning, which helps reduce evaporation and keeps water off the leaves where fungal diseases can start. The best tool you have is your finger: stick it two inches into the soil. If it's dry, it's time to water.
2. Mulch Your Garden Beds
Honestly, mulching is one of the single best things you can do for your garden's health. Spreading a 2-3 inch layer of organic mulch like straw, shredded leaves, or wood chips works like magic.
Think of it as a protective blanket. It smothers weeds by blocking sunlight, keeps the soil from drying out on hot days, and even moderates the soil temperature. Plus, as organic mulch breaks down, it slowly feeds your soil, improving its structure over time.
3. Feed Your Plants Wisely
While your prepared soil gives plants a great head start, some of them are heavy eaters. Think tomatoes, squash, and zucchini—they get hungry! But you don't need complicated chemical fertilizers for a fantastic harvest.
A simple, balanced organic fertilizer applied every 4-6 weeks is usually all it takes. Another great trick is to "side-dress" your plants with a fresh layer of compost mid-season. Just scratch it into the soil around the base of the plant to give it a power boost right when it needs it to keep producing.
4. Stay on Top of Weeds
Weeds are more than just ugly; they're thieves, stealing water, sunlight, and nutrients from your plants. The trick to winning the war on weeds isn't one giant battle—it's consistent, small skirmishes.
Spending just 10-15 minutes pulling weeds a couple of times a week is so much easier than a single, back-breaking session once a month. Pro tip: pull them when the soil is damp and they're still small. They'll pop right out.
The daily or weekly rituals of watering, weeding, and observing are what truly connect you to your garden. This consistent attention allows you to spot potential issues early and respond before they become major problems.
5. Practice Smart Pest Management
It's a bit jarring to see pests munching on your hard work, but hold off on reaching for chemical sprays. A healthy garden has a natural rhythm and balance. You can actually invite the good guys—like ladybugs and lacewings that eat pests—by planting flowers like marigolds and cosmos nearby.
For common annoyances like aphids, a surprisingly effective solution is a sharp blast of water from the hose to knock them off. You can also use companion planting to your advantage. For instance, planting basil next to tomatoes is a classic trick known to help deter pesky tomato hornworms.

This visual guide shows how seeds offer amazing variety, while seedlings give you a head start for a faster harvest—two great paths to the same delicious destination.
6. Prune for Better Growth
Pruning can sound a little intimidating, but think of it as just giving your plants a strategic haircut. Snipping off dead or yellowing leaves helps the plant focus all its energy on making more flowers and fruit for you.
- Vining plants: On tomatoes, pinch off the "suckers"—those little shoots that pop up where a side stem meets the main one. This can lead to bigger, tastier tomatoes.
- Herbs: For bushy herbs like basil, trimming it regularly encourages it to grow fuller and produce more leaves.
7. Provide Support for Tall Plants
Some of the best garden veggies need a little help standing up. Vining crops like tomatoes, cucumbers, and pole beans will be much happier and more productive with a trellis, cage, or stake to climb on.
The key is to install these supports when you first put the plant in the ground. If you wait until it's bigger, you risk damaging its roots. Good support also improves air circulation around the plant, which is a huge help in preventing disease, and it keeps your beautiful fruit off the ground and away from critters.
8. Observe Your Garden Daily
One of the most powerful gardening tools you have is your own two eyes. Seriously. Make a habit of taking a slow walk through your garden every day. Look closely at the leaves, feel the soil, and just notice what's new.
This simple daily check-in is how you'll catch a problem—the first sign of a pest, a wilting leaf—when it's small and easy to fix. It's also the best way to really learn the unique personality and needs of your garden.
9. Harvest at the Right Time
And now for the best part—the reward! Harvesting regularly is actually a critical part of keeping the garden productive. For many plants like beans, zucchini, and most herbs, the more you pick, the more they'll produce.
If you let a zucchini turn into a giant baseball bat, the plant thinks its job is done and might stop making new ones. Learn what peak ripeness looks like for each of your veggies and enjoy the incredible flavor of something you grew yourself. You're not alone in this passion, either. In fact, 55.9% of gardeners globally planned to expand their gardens in 2025. You can discover more insights about modern gardening trends and see how you're part of a growing movement.
Got Questions? We've Got Answers
Even with the best-laid plans, you're bound to have a few questions once you get your hands dirty. That's not just normal; it's part of the fun of learning! Let's tackle some of the most common head-scratchers that pop up for new gardeners.
How Much Should I Be Watering?
This is the big one, and the real answer is, "it depends." Forget rigid schedules. The goal is to give your garden about one inch of water per week, but that can come from a good downpour or your hose.
The best tool you have is your own finger. Seriously. Just stick your index finger about two inches into the soil next to your plants. If the soil feels dry and doesn't cling to your finger, it's time for a drink. If it feels moist, you can probably hold off for another day or so.
Keep in mind, plants in containers are a different story. They dry out way faster than plants in the ground, especially on hot, breezy days. You might find yourself needing to water them every single day.
When you do water, aim for a deep, slow soak right at the base of the plants. This encourages the roots to grow down deep and strong. Watering in the morning is always your best bet—it gives the leaves time to dry out before evening, which is a huge help in preventing pesky fungal diseases.
What Are Some Foolproof Veggies for a First-Timer?
For your first garden, you want some easy wins. Picking plants that are eager to grow and produce will build your confidence and keep you excited. You can't go wrong with these.
Here are a few of my go-to recommendations for beginners:
- Leafy Greens: Things like loose-leaf lettuce, spinach, and Swiss chard are fantastic. They grow fast, and you can often just snip off the outer leaves for a salad, and the plant will keep on producing from the middle.
- Root Veggies: Radishes are famous for their speed—you can go from seed to snack in as little as three weeks! Carrots are also surprisingly simple to grow from a packet of seeds.
- Bush Beans: These are little workhorses. They're incredibly productive and don't need the elaborate trellises that their pole-climbing cousins require.
- Zucchini & Summer Squash: These plants are almost legendary for how much they produce. Be warned: just one or two plants will likely give you more than enough for your family all summer long.
- Cherry Tomatoes: If you want to grow tomatoes, start here. They are so much less fussy than the big slicing varieties and are a pure joy to grow in a big pot on a sunny patio.
What's the Difference Between an Annual and a Perennial?
Getting this concept down will completely change how you plan your garden for the long haul. It all comes down to a plant’s lifespan.
Annuals are the "live fast, die young" crowd. They complete their entire life cycle—from seed, to flower, to making new seeds—all in one growing season. Then, when the first hard frost hits, they’re done. Think of most of your classic veggies (tomatoes, peppers, squash) and vibrant flowers like marigolds and zinnias. You’ll need to replant these every single spring.
Perennials, on the other hand, are in it for the long run, living for three or more years. The top growth might die back in the winter, but the root system stays alive underground, ready to send up fresh shoots every spring. Lavender, hostas, and coneflowers are classic examples. These are the plants that form the backbone of your garden.
A savvy strategy for any garden is to use a mix of both. Your perennials provide reliable structure and come back year after year, while annuals give you the freedom to experiment with new colors and flavors each season.
How Can I Keep Weeds Out Without Using Chemicals?
You absolutely can have a tidy garden without reaching for a bottle of herbicide. The secret is a one-two punch of prevention and persistence.
Your best friend in the fight against weeds is mulch. Spreading a 2 to 3-inch layer of organic mulch (like straw, shredded leaves, or wood chips) around your plants is a game-changer. It smothers existing weeds and blocks sunlight, preventing new weed seeds from ever getting started.
For the stubborn few that do poke through, the trick is to get them while they’re small and weak. Hand-pulling is still the most satisfying and effective method. It’s so much easier to spend 10 minutes weeding a couple of times a week than to face a daunting, overgrown mess once a month. A little pro-tip: weeds slip out of damp soil like a dream, so the best time to do it is right after a rain or a good watering.
Feeling inspired to get your own garden started? At Homegrown Garden, we have everything you need to turn that inspiration into a reality, from our beginner-friendly seed kits to detailed guides. Come explore our collections and find the perfect plants to bring your garden to life.

