


Picture this: you're making pasta sauce and, instead of reaching for a jar of dried herbs, you snip a few fresh basil leaves right from a plant on your windowsill. Maybe you’re mixing a mojito and need some fresh mint. That’s the simple, wonderful reality of growing your own herbs indoors. It's an easy way to get a little closer to your food, cut back on waste, and inject a serious flavor boost into everything you cook.
How an Indoor Herb Garden Changes the Game
Think of an indoor herb garden as your own personal living pantry. It’s more than just a few pretty pots on a shelf; it’s a total upgrade for your kitchen. No more last-minute trips to the store for a single ingredient, and no more watching those plastic clamshells of store-bought herbs slowly wilt in the back of your fridge.
Having fresh ingredients right at your fingertips makes cooking so much more spontaneous and fun. It's easy to find recipes based on ingredients you have on hand when you've always got the finishing touch ready to go. And honestly, the difference in taste between a sprig of thyme you just cut and the dusty stuff from a jar is night and day. It can take a simple meal and make it feel special.
It’s About More Than Just Food
Growing herbs inside creates a connection to what you’re eating that you just don't get otherwise. There's something deeply satisfying about nurturing a tiny seed into a thriving plant that you can then harvest and enjoy. It’s a small piece of nature brought right into your home, and the benefits go well beyond the kitchen.
- Unbeatable Flavor: Freshly picked herbs pack a potent, vibrant punch that dried versions just can't compete with.
- Zero Waste: You snip exactly what you need, right when you need it. Goodbye, forgotten, slimy herbs in the crisper drawer.
- A Touch of Green: Herb gardens are a functional and beautiful way to liven up your space, adding a splash of green decor that also happens to clean the air.
This isn't just a niche hobby anymore. The global indoor plant market, which includes kitchen staples like basil and mint, was valued at USD 20.68 billion and is expected to hit USD 30.25 billion by 2032. It’s a clear sign that more and more people are catching on to the joy of home cultivation, especially those of us with limited outdoor space. You can dig into the numbers in the full global indoor plants market report.
The best part about an indoor herb garden is how simple it is. You don't need a huge backyard or years of gardening experience. All it really takes is a sunny spot and a little attention to start reaping the rewards.
Herbs are a fantastic starting point, but they're just the beginning. If you're curious about what else you can grow, take a look at our guide to 11 easy edible indoor plants. At the end of the day, starting an indoor herb garden is a simple, rewarding project that pays you back with fresher flavors, less waste, and a greener home.
The 11 Best Herbs for a Thriving Indoor Garden
Getting started with an indoor herb garden all comes down to choosing the right plants. Let's be honest, some herbs are just plain easier to keep alive than others, especially when you're just starting out. Below, I’ll walk you through 11 of the most reliable and flavorful herbs that I've found do exceptionally well indoors.
Think of it this way: you can either keep running to the store for plastic-wrapped herbs, or you can have fresh, amazing flavor right on your windowsill. It’s a pretty simple choice.

This little chart shows just how easy it is to bring that homegrown taste right into your kitchen.
The Aromatic Classics
These are the herbs you probably reach for most often. They're popular for a reason—they're versatile, flavorful, and thankfully, quite forgiving.
1. Basil
The absolute king of kitchen herbs. Basil’s sweet, peppery flavor is the heart of so many Italian dishes. The trick to a happy basil plant is giving it loads of sun (6+ hours a day) and pruning it from the top. This simple act encourages it to grow out, not just up, giving you a much bushier plant.
- Best Uses: Essential for homemade pesto, Caprese salads, and any tomato sauce. It's also fantastic torn over a fresh pizza.
- Quick Tip: When you prune, snip the stem right above a spot where two leaves are branching out. You'll literally see two new stems start to grow from that point.
2. Mint
Mint is famous for two things: its incredible refreshing scent and its tendency to take over everything. Indoors, that aggressive growth is actually a huge plus—it means the plant is tough and bounces back super fast after you harvest from it.
One piece of advice I give everyone: always, always plant mint in its own pot. Its roots, called runners, will aggressively spread and completely suffocate any other herbs you've planted with it. Trust me on this.
3. Chives
With their delicate onion-y kick, chives have to be one of the least demanding herbs you can grow. They’re surprisingly tolerant of lower light and their grass-like leaves seem to shoot back up almost overnight after a trim.
- Best Uses: Snipped over scrambled eggs, baked potatoes, soups, or mixed into cream cheese and dips.
- Quick Tip: Harvest by snipping the leaves about an inch from the soil. This signals the plant to send up fresh new growth from the base.
4. Parsley (Flat-Leaf or Curly)
Parsley brings a clean, bright flavor that can wake up almost any dish. It’s a steady, unfussy grower that’s perfectly happy with medium light and consistently moist soil. In my experience, flat-leaf (or Italian) parsley has a much more robust flavor, while the curly variety is great for a classic garnish.
The Mediterranean Sun-Lovers
If you've got a window that gets blasted with sun all day, these are the herbs for you. They evolved in hot, dry climates and actually prefer a little neglect.
5. Oregano
That pungent, peppery herb that defines Mediterranean and Mexican food. Oregano absolutely loves basking in sunlight and hates having wet feet, so let its soil dry out completely between waterings. It’s a perfect match for a south-facing windowsill.
6. Thyme
Thyme's tiny leaves pack a huge earthy, slightly floral punch that works wonders in savory dishes. Just like oregano, it needs bright light and soil that drains well. This makes it incredibly drought-tolerant and a great choice if you sometimes forget to water your plants.
7. Rosemary
With its incredible pine-like scent and bold flavor, rosemary is a true powerhouse. It demands at least six hours of direct sun every single day and needs excellent drainage. The number one mistake I see people make with rosemary is overwatering it. Let it dry out!
- Best Uses: Perfect for roasting with chicken, potatoes, or lamb. You can also use whole sprigs to infuse olive oil.
- Quick Tip: Rosemary wants to be a woody shrub. Pruning it regularly not only keeps it a manageable size but also encourages the tender new growth that has the best flavor.
8. Sage
Known for its soft, velvety leaves, sage has a savory, slightly peppery flavor that we all associate with Thanksgiving stuffing. It loves full sun and, like its Mediterranean cousins, prefers its soil on the dry side.
More Flavorful Favorites
Once you have the basics down, these herbs are fantastic additions that bring unique flavors to your cooking.
9. Cilantro
Cilantro has that bright, citrusy, love-it-or-hate-it flavor that's essential in Mexican, Thai, and Vietnamese cooking. It can be a little dramatic, as it loves to "bolt" (go to flower) when it gets too warm. The key is to harvest it frequently to keep it producing leaves.
10. Dill
With its feathery fronds and distinctive tangy taste, dill is amazing with salmon, potatoes, and homemade pickles. The one thing to know about dill is that it grows a long central root, called a taproot, so give it a deeper pot than you think it needs.
11. Lemon Balm
A member of the mint family, lemon balm is a joy to have around for its bright, citrusy aroma alone. It's incredibly easy to grow and makes a wonderfully calming tea. And just like its minty cousin, it’s a bit of a bully, so it’s best to give it a pot all to itself.
To help you get started, I've put together a quick reference chart for the top 5 easiest herbs from this list.
Quick Guide to the 5 Easiest Indoor Herbs
Use this reference chart to quickly compare the light, water, and harvesting needs of our top 5 easiest herbs to help you choose the best plants to start with.
| Herb | Light Needs (Hours/Day) | Watering Frequency | Best Harvest Method |
|---|---|---|---|
| Basil | 6+ hours (bright, direct) | When top inch of soil is dry | Snip stems above a leaf node |
| Mint | 4-6 hours (indirect or direct) | Keep soil consistently moist | Cut stems back regularly |
| Chives | 4-6 hours (indirect or direct) | When top inch of soil is dry | Snip leaves 1-2 inches from base |
| Parsley | 4-6 hours (bright, indirect) | Keep soil consistently moist | Harvest outer stems first |
| Thyme | 6+ hours (bright, direct) | Allow soil to dry out completely | Snip the top 2-3 inches of stems |
This table should give you a great starting point for picking a few winners for your windowsill. Happy growing
3 Steps for Getting the Environment Just Right
Growing healthy, flavorful herbs indoors is all about creating a little slice of their ideal outdoor world, right inside your home. Think of yourself as a good host, providing everything your leafy guests need to feel comfortable and thrive.
When you get the foundation right from the start—the pot, the soil, and the location—you sidestep most of the common problems people run into. This initial setup is truly the difference between a lush, aromatic kitchen garden and a few sad, struggling plants.
1. Choose the Right Pot
If there's one non-negotiable rule in container gardening, it's drainage. Herbs absolutely hate having "wet feet," and sitting in soggy soil is the quickest way to root rot, a usually fatal condition. Make sure any pot you choose has holes in the bottom for excess water to escape.
Fallen in love with a beautiful pot that has no drainage? No problem. You can either carefully drill a few holes yourself or use it as a "cachepot." Just keep the herb in its simple plastic nursery pot (with holes!) and place it inside the decorative one. After watering, just be sure to tip out any water that collects at the bottom.
A common rookie mistake is adding a layer of gravel to the bottom of a pot without holes, thinking it helps with drainage. It actually does the opposite, creating a stagnant swamp right under your plant's roots—a recipe for disaster.
2. Select the Perfect Soil
It can be tempting to just scoop up some dirt from the backyard, but please don't! Garden soil is far too dense for containers. It compacts easily, suffocates roots, and can bring unwanted pests or diseases into your home.
Always start with a fresh, high-quality potting mix from a garden center. Look for bags specifically formulated for container or indoor plants. These mixes are light and airy, designed to hold just the right amount of moisture while letting the excess drain away. This balance is crucial for healthy root development.
For herbs that prefer it a bit drier, like rosemary or thyme, you can even improve the drainage by mixing in a handful of perlite or coarse sand.
3. Find the Ideal Location
Where you place your herbs makes all the difference in their growth and even their flavor. Most of the herbs we love to cook with are complete sun-worshippers, needing at least six hours of bright, direct sunlight every day.
- South-Facing Windows: This is prime real estate. It's the perfect spot for sun-loving Mediterranean herbs like rosemary, basil, thyme, and oregano. They’ll be happy there all day.
- East-Facing Windows: These windows get that lovely, gentle morning sun. This is ideal for less demanding herbs that can get scorched by intense heat, such as mint, parsley, and chives.
- West-Facing Windows: These can work well, but keep an eye on your plants. The afternoon sun can be surprisingly intense, especially in the summer, so you may need to check for wilting on hot days.
Don't worry if you're working with a smaller space; you can absolutely create a thriving indoor garden. For more specific ideas, check out our guide on setting up an herb garden for an apartment. A little thoughtful planning now will give your herbs the best possible head start.
2 Keys to Mastering the Essentials of Light and Water
Getting the hang of light and water is where most new indoor gardeners stumble. It can feel like a tricky balancing act, but I promise, it's far more intuitive than it seems. Once you learn to "read" what your plants are telling you, giving them the right amount of sun and hydration becomes second nature.
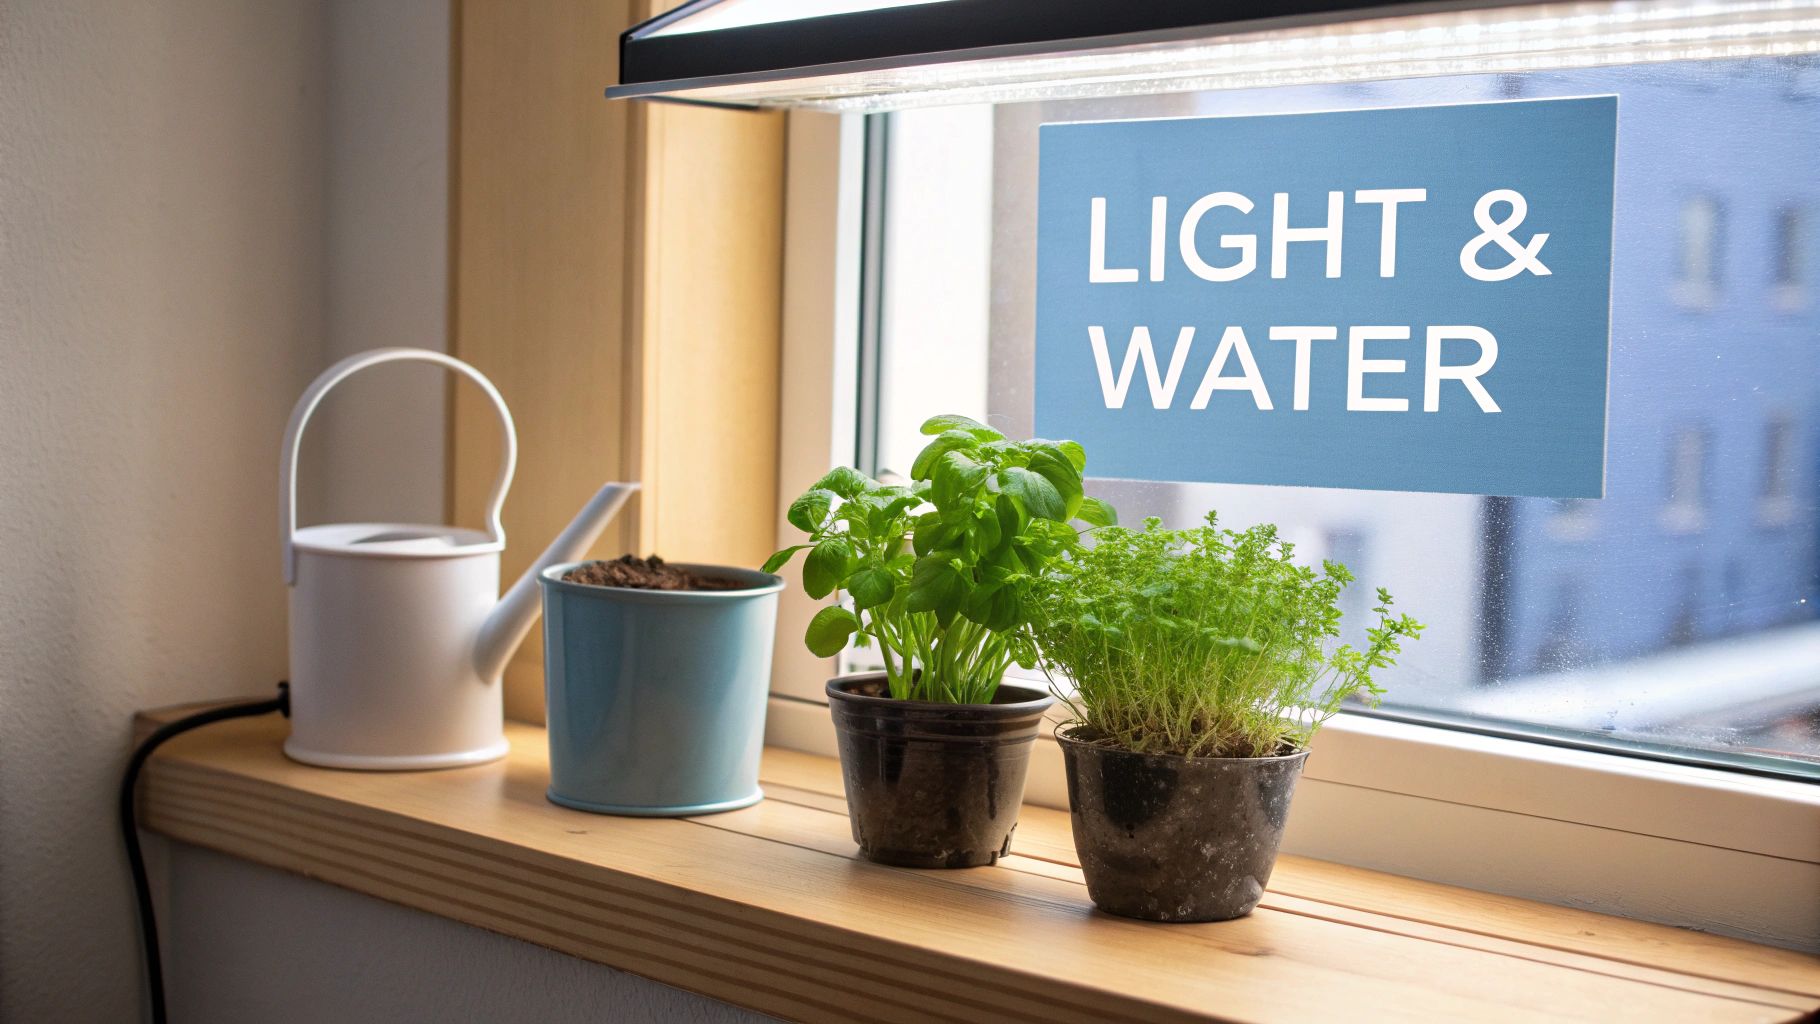
1. Provide Proper Light
Most of the herbs you'll use in the kitchen are sun-worshippers. To develop those fragrant, flavorful oils we love, they need at least six hours of good, strong light every day. So, what exactly qualifies as "good light"?
-
Direct Light: This is the real deal—intense, unfiltered sunlight. If you have a south-facing window, that’s your prime real estate for Mediterranean herbs like rosemary, thyme, and basil. They'll soak it up.
-
Indirect Light: Think of this as bright light, but without the harsh rays. It's the kind of light you’d find a few feet away from a sunny window or in an east-facing spot that gets gentler morning sun. Herbs like mint and parsley often thrive here, as direct sun can scorch their leaves.
When Sunlight Isn't Enough
Don't have a sunny windowsill? Don't sweat it. This is a super common problem, and the solution is surprisingly easy and affordable: an LED grow light. Honestly, these are a game-changer for anyone wanting to grow easy to grow herbs indoors, no matter your home's layout. A simple clip-on lamp or a small strip light can instantly turn a dim corner into a productive herb garden.
2. Get Watering Right
Now, let's talk about the number one killer of houseplant herbs: overwatering. It’s usually a case of too much love. I’ve seen it time and time again—more herbs die from drowning than from thirst.
Your best tool for checking soil moisture is, and always will be, your own finger. Ditch the rigid watering schedule and embrace the "finger test." Just stick your index finger about an inch down into the soil. If it feels damp, hold off for another day or two. If it feels dry to the touch, it's time to water.
This one simple habit is the key to preventing root rot. It guarantees your herbs get a drink only when they actually need one. For more tips on setting up a healthy routine, check out our complete guide on the 11 easy steps for growing herbs indoors.
One last thing—indoor air can get incredibly dry, especially when the heat is on in the winter. Your herbs will appreciate a little extra humidity. An easy trick is to create a simple pebble tray. Just grab a shallow tray, fill it with a layer of pebbles, and add water until it’s just below the top of the stones. Set your pots on top, and as the water evaporates, it creates a perfect little humid microclimate right around your plants.
How to Harvest Herbs to Encourage More Growth
Getting to snip fresh herbs for your meal is easily the best part of having an indoor garden. But it's not just about grabbing what you need for dinner. When you harvest correctly, you’re actually pruning the plant in a way that signals it to grow back fuller, bushier, and even more productive.
Think of it as giving your herb a strategic haircut that encourages a healthy growth spurt.
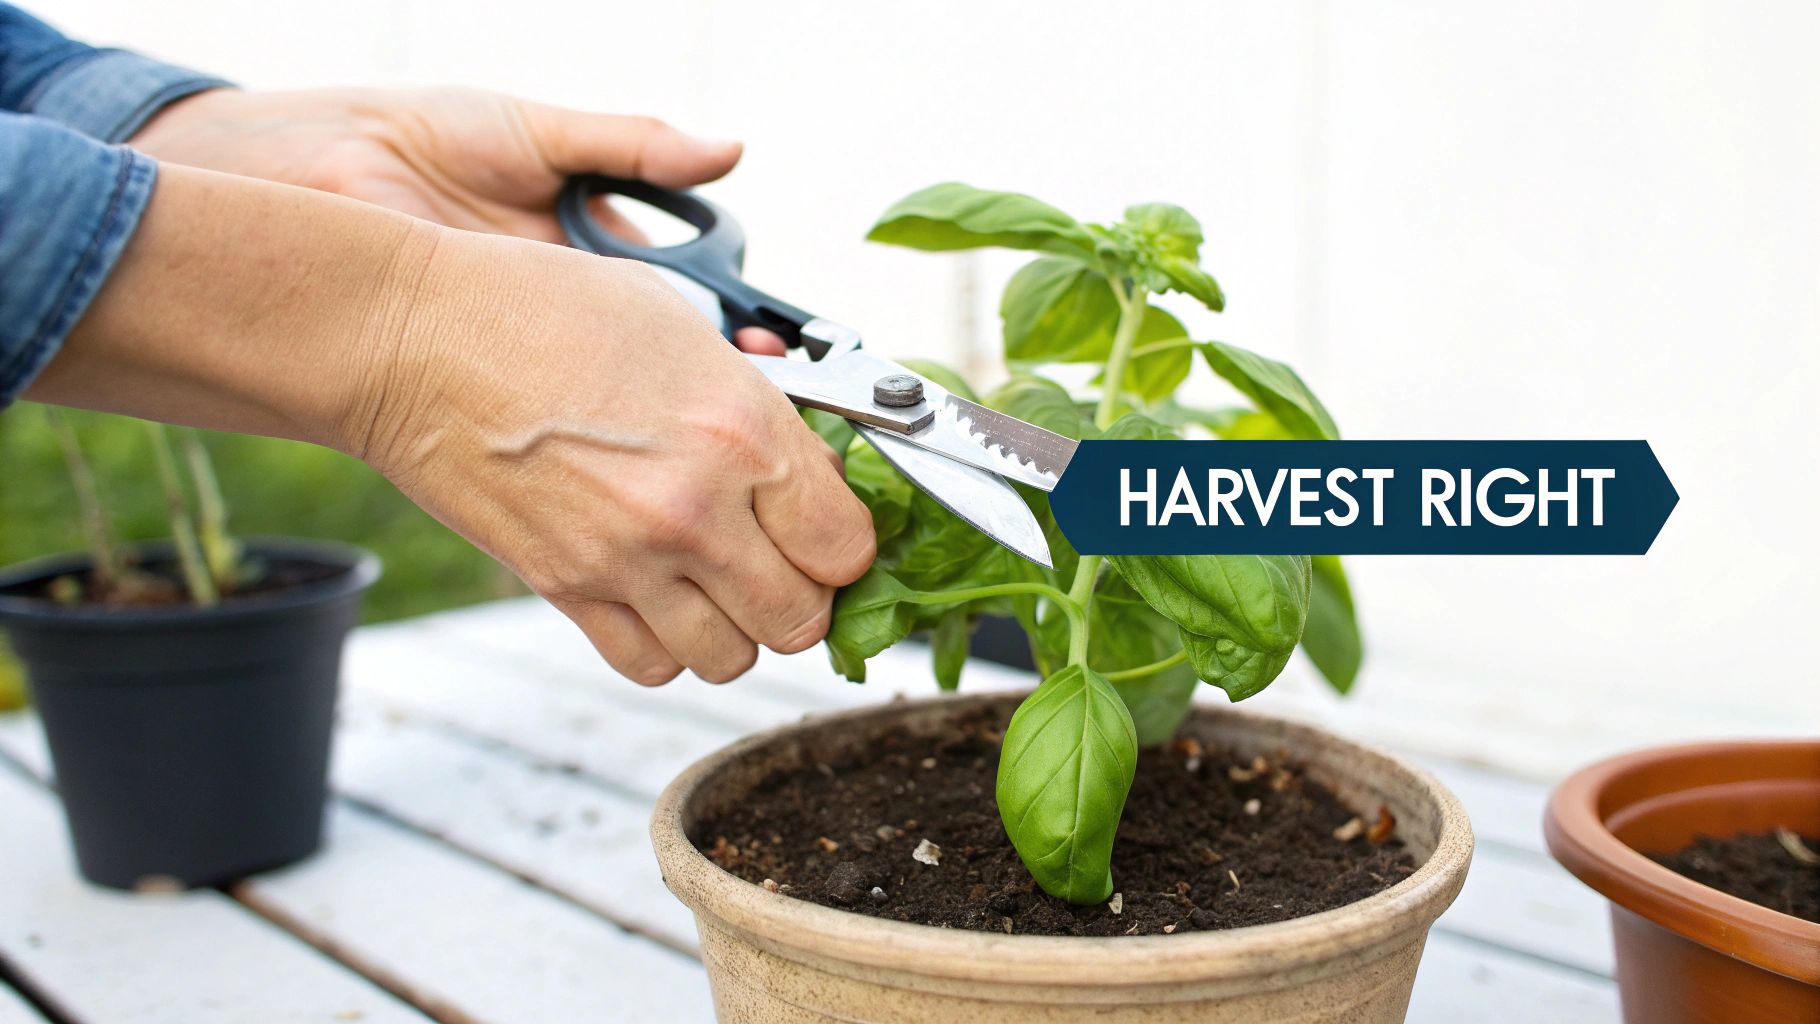
I see it all the time—new gardeners are almost afraid to cut their plants, worried they might do some damage. For most herbs, the opposite is true. Regular trimming is what keeps them from getting "leggy" (all stem, few leaves) or woody.
As a general rule of thumb, never take more than one-third of the entire plant at once. This leaves plenty of foliage for the plant to continue photosynthesis, bounce back quickly, and keep on growing. This simple trick is the secret to a compact, endlessly productive basil or mint plant.
Smart Snipping for 3 Different Herb Types
You can't harvest every herb the same way. Their individual growth habits dictate the best technique for a continuous supply of fresh leaves.
-
1. Branching Herbs (Basil, Mint, Oregano): Look for a main stem and snip it just above a set of leaves. This is the magic spot. Cutting here encourages the plant to fork, sending out two new stems from that single point and making the whole plant much fuller over time.
-
2. Grassy Herbs (Chives, Lemongrass): With these, you want to work from the outside in. Grab a pair of scissors and snip the outer leaves about an inch or two from the soil. This keeps the center of the plant free to keep pushing out fresh new blades.
-
3. Woody Herbs (Rosemary, Thyme): Focus on the new, tender growth at the tips. Trim the top two to three inches of each sprig—that's where the flavor and aroma are most intense. This also prevents the plant from putting all its energy into developing tough, woody stems.
Harvesting isn't just taking from your plant; it's an essential part of its care. You're sending a clear signal to your herbs to keep producing, which leads to a healthier, more generous garden in the long run.
Once you’ve got your cuttings, the fun really begins. Brew a soothing tea with a handful of fresh mint, whip up a batch of incredible pesto with your basil, or let a few sprigs of rosemary infuse some olive oil.
To keep them fresh, you can stand the stems in a glass of water on your counter (like a little bouquet!) or wrap the bunch in a damp paper towel before popping it in the fridge. They'll stay perfect for days.
2 Best Ways to Grow if You Don't Have a Green Thumb
Let's be honest, not everyone has a sun-drenched south-facing window, and remembering to water plants can be a challenge. If that sounds like you, don't worry. Technology has come a long way, and there are some brilliant tools that make growing easy to grow herbs indoors practically foolproof. These aren't just for tech geeks; they're for anyone who wants fresh herbs without the guesswork.
1. Use a Smart Indoor Garden
The most popular gadget by far is the smart indoor garden. Picture a sleek little greenhouse that sits on your countertop, doing all the hard work for you. These all-in-one systems usually feature built-in, full-spectrum LED grow lights that mimic natural sunlight and run on an automatic timer. They also have a self-watering reservoir, so you just fill it up, and the machine handles the rest. It's a true 'set it and forget it' way to grow.
This isn't just a niche hobby anymore. The smart indoor garden market was recently valued at USD 151 million and is on track to more than double, hitting around USD 302 million by 2034. It's clear people love the convenience. These systems are practically built for growing favorites like basil and cilantro. You can read more about this boom and its impact on home gardening trends if you're curious.
2. Try Soil-Free Success With Hydroponics
Another fantastic route is a home hydroponics kit. This method might sound complicated, but it's really just about growing plants in nutrient-rich water instead of soil. No dirt, no mess.
Hydroponics is genius in its simplicity. Plants get their nutrients delivered straight to their roots, which means they can pour all their energy into growing leaves. The result is often faster, bigger harvests compared to traditional pots and soil.
This makes it a perfect fit for city dwellers or anyone with limited space. Most home hydroponic kits are compact, clean, and ridiculously efficient. They take all the mystery out of feeding your herbs, ensuring your little garden thrives with very little effort on your part. It's an incredibly rewarding way to watch things grow, right from the very first sprout.
3 Common Questions About Growing Herbs Indoors
Even the most seasoned gardeners run into a few hiccups. Don't think of these common issues as failures; they're just your plants' way of telling you what they need. Let's tackle some of the most frequent questions that come up when you start growing herbs inside.
1. Why Are My Herb Leaves Turning Yellow?
Nine times out of ten, yellow leaves are a cry for help from overwatering. When soil stays waterlogged, the roots can't get any oxygen and start to rot. It's a classic rookie mistake.
Before you even reach for the watering can, do the "finger test." Stick your finger into the soil up to the first knuckle. If it feels even slightly damp, hold off for another day or two.
If you’re positive you're not overwatering, the culprit could be a lack of nutrients or insufficient light. Try moving your plant to a sunnier spot first. If that doesn't help, a dose of balanced liquid fertilizer—diluted to half-strength—once a month during the spring and summer should do the trick.
2. What Are These Tiny Flies Buzzing Around My Herbs?
Ugh, fungus gnats. These pesky little flies absolutely love overly moist soil, and they can appear out of nowhere. The good news is they're more of an annoyance than a real threat to mature plants.
The key is to break their life cycle. Let the top 1-2 inches of soil dry out completely between waterings. This creates a dry, desert-like environment where their larvae just can't survive. To catch the adults and prevent them from laying more eggs, place a few yellow sticky traps near the base of your plants.
Pro Tip: A simple and surprisingly effective barrier is a thin layer of decorative sand or fine gravel on top of your soil. This physically blocks the adult gnats from getting to the moist soil to lay their eggs. Problem solved.
3. Can I Really Grow Herbs Indoors Without a Sunny Window?
Absolutely! This is one of the biggest myths that stops people from even trying. If your home lacks a window that gets at least six hours of bright, direct sun, a simple LED grow light is your new best friend.
You don't need a complicated or expensive setup. Look for a full-spectrum light and hang it about 6-12 inches above your herbs. Plug it into a cheap outlet timer and set it to run for 12-16 hours a day. This easily mimics a long summer day and allows you to have a thriving herb garden in a dim apartment or even right through the darkest days of winter.
Ready to start your own indoor herb oasis? At Homegrown Garden, we have everything you need, from heirloom seeds to beginner-friendly kits. Explore our collection and get growing today.

