


So, you've got your tomato seeds and you're ready to go. How long until you see those first little green shoots?
On average, you can expect to see sprouts in 5 to 10 days. But that’s not the whole story. Think of it less as a hard-and-fast rule and more as a starting point that you, the gardener, have a surprising amount of control over.
2 Key Expectations for Your Tomato Seeds
The transformation from a tiny, dormant seed into a thriving sprout is a delicate dance, and it's all about the environment you create. While every tomato variety has its own personality, a few key conditions will either kickstart the process or stop it dead in its tracks.
The single most important factor? Soil temperature. Warmth is the wake-up call for a tomato seed. Without it, the seed just sits there, waiting for a signal that spring has truly arrived. This is exactly why putting a seed tray on a chilly windowsill often leads to disappointment and slow, spotty germination.
1. How Temperature Dictates Germination Speed
If you want to shave days off that waiting period, consistent warmth is your secret weapon. It's not just an old gardener's tale; the science backs it up. Research has consistently shown that the sweet spot for getting tomato seeds to pop is between 75°F and 82°F (24°C to 28°C). At these temperatures, you'll see the fastest germination and the strongest little seedlings.
Once the soil gets much warmer than about 83°F (28.5°C), you'll start to see success rates drop off. If you're curious about the details, you can read more about these temperature findings and their impact on germination.
My Go-To Tip: Focus on the soil temperature, not just the air temperature in the room. A simple seedling heat mat is one of the best investments you can make. Just slip it under your seed tray to maintain that perfect warmth. It’s a game-changer and can easily cut your tomato seed germination time by half.
2. A Quick Look at the Timeline
While warmth is the main driver, things like consistent moisture and the specific seed variety also have a say. A seed that's kept evenly moist in warm soil will swell and split open far sooner than one left to dry out in a cold room.
This table really puts it into perspective, showing just how directly temperature affects the timeline.
Tomato Germination Time by Soil Temperature
The relationship between soil temperature and how quickly tomato seeds sprout is incredibly direct. As you can see below, finding that "sweet spot" makes a massive difference in your results.
| Soil Temperature (°F) | Soil Temperature (°C) | Average Germination Time (Days) |
|---|---|---|
| 50°F | 10°C | 40-45 Days |
| 60°F | 16°C | 12-15 Days |
| 70°F | 21°C | 8-10 Days |
| 80°F | 27°C | 5-7 Days (Optimal) |
| 90°F | 32°C | 8-12 Days (Stressful) |
The numbers don't lie! By providing the right conditions from day one, you move from just hoping for sprouts to actively managing the germination process for the best possible outcome.
2 Factors That Determine Seed Success
Long before you worry about heat mats and grow lights, the first step to getting your tomato seeds to sprout quickly is choosing the right seeds. It's a simple fact: the quality, age, and type of seed you start with can make a huge difference in how fast you see those first little green shoots.
Fresh seeds almost always pop up the fastest. Think of a seed as a tiny, sleeping plant with a packed lunch. As the years go by, that lunch loses its nutritional value, and the plant's energy fades. That’s why a fresh packet of seeds from this year will nearly always outperform that mystery packet you found in the back of your shed.
1. Freshness is Key
While tomato seeds can technically stay viable for 5 years or more if stored perfectly, both their speed and success rate drop off year after year. An older seed might still grow, but it's going to take its sweet time and might not be as strong. If you're gambling on older seeds, just plant a few extras in each pot to improve your odds.
It's also interesting to see the difference between seeds you save yourself and commercially prepared ones. Seeds scooped right out of a tomato have a surprising advantage.
A study from the Georgia Academy of Science discovered something pretty amazing: 82.5% of seeds taken from fresh tomatoes sprouted within a week. Compare that to just 49% of commercially dried seeds in the same period. The fresh seeds were also nearly a full day faster. You can dig into the full study on tomato seed viability for more details.
Why the difference? That gel sack around a fresh seed actually contains compounds that stop it from sprouting inside the tomato. When you save your own seeds, you gently ferment and wash this layer away. The commercial drying process, while effective for storage, can put the seed under a bit of stress, making it slower to wake up.
2. The Case for Heirlooms
When you're browsing for seeds, don't overlook heirlooms and open-pollinated varieties. These are brilliant because they let you become a seed-saver yourself. You can collect seeds from your best plants each season, and over time, you're essentially breeding tomatoes that are perfectly suited to your backyard.
Imagine saving seeds from your strongest ‘Brandywine’ or your most productive ‘Amish Paste’ plant. You're selecting for genes that have already proven they can handle your specific soil and weather. It's a simple way to build up a collection of robust, reliable seeds.
Starting with the best seeds you can find gives you a serious head start. It cuts down on the waiting and wondering, and it means the seedlings that do emerge are ready to hit the ground running.
7 Tips for Creating Perfect Germination Conditions
Getting your tomato seeds to sprout quickly and reliably is all about creating the perfect environment. Think of it like a cozy incubator for your future plants. By dialing in a few key variables, you can shave days off the tomato seed germination time and end up with much healthier, stronger seedlings from the get-go.
1. Give Your Seeds a Head Start
Before your seeds even touch the soil, you can give them a little nudge to wake them from their slumber. Soaking tomato seeds in lukewarm water for about 4-8 hours is a simple trick I swear by. This softens the tough outer seed coat and signals to the seed that it's time to get growing.
Just be careful not to overdo it. Leaving them in water for too long can actually drown the seed. After their short bath, I just pat them dry on a paper towel before planting.
2. Choose the Right Growing Medium
Your tiny seeds need a light, fluffy, and sterile place to put down roots. Using heavy garden soil or even standard potting mix is a common mistake; it’s often too dense, holds too much water, and can make it tough for delicate new roots to emerge. Worse, it can harbor fungi that cause "damping off," a fatal disease for young seedlings.
Your best bet is a sterile, soil-less seed-starting mix. These are specifically designed with a fine texture that provides excellent drainage and aeration. You can grab a pre-made bag or easily mix your own. A great recipe involves:
- Coco Coir: A fantastic, sustainable base that holds moisture well but stays light and airy.
- Perlite: Those little white specks of volcanic glass that provide crucial aeration.
- Vermiculite: A mineral that helps with moisture retention, giving you a buffer against overwatering.
A simple mix of equal parts of these three ingredients creates the perfect sterile home for your seeds to get started.
3. Plant at the Perfect Depth
I've seen more beginners struggle with this than anything else. Planting seeds too deep is a classic error. A tiny tomato seed only has a small reserve of energy to push its first leaves up to the surface. Bury it too deep, and it'll run out of fuel before it ever sees the light of day.
A good rule of thumb is to plant seeds at a depth of roughly twice their diameter. For tomato seeds, that’s incredibly shallow—only about 1/8 to 1/4 inch deep. I just press the seed lightly onto the surface of the moist mix and then sprinkle a fine layer of the mix right over the top.
4. Master the Moisture Balance
Consistent moisture is non-negotiable, but soggy soil is a death sentence. The goal is to keep the growing medium damp, like a well-wrung-out sponge, but never waterlogged. Too much water will lead to root rot and fungal problems before the seed even has a chance.
Pro Tip: Try watering your seed trays from the bottom. Just place your tray in a larger pan of water for about 30 minutes and let it soak up moisture from the drainage holes. This encourages roots to grow downward and avoids compacting the soil or washing away your precious seeds.
5. Create a Mini Greenhouse
To lock in that essential warmth and humidity, a simple humidity dome is a game-changer. Most seed-starting trays come with a clear plastic lid that traps moisture and heat, creating a perfect microclimate that really speeds up germination. If you don't have one, don't worry—clear plastic wrap stretched over the container works just as well.
This simple step prevents the soil from drying out and maintains the consistent warmth that tomato seeds absolutely love. To see how different temperatures affect various seeds, check out our comprehensive seed germination temperature chart.
6. Introduce Light at the Right Time
While tomato seeds are perfectly happy to germinate in the dark (they are underground, after all), they need strong light the instant they sprout. The moment you see that first little green hook breaking the surface, get that humidity dome off and move the seedlings under a good light source.
A sunny south-facing window might work in a pinch, but grow lights are far more reliable for preventing weak, "leggy" seedlings that stretch desperately for light.
7. Make the Right Seed Choice
The germination journey really begins with the seeds you choose. How fresh they are and how they were prepared can make a big difference in how quickly they sprout. This infographic highlights the difference between using fresh seeds right from a tomato versus commercially dried ones.
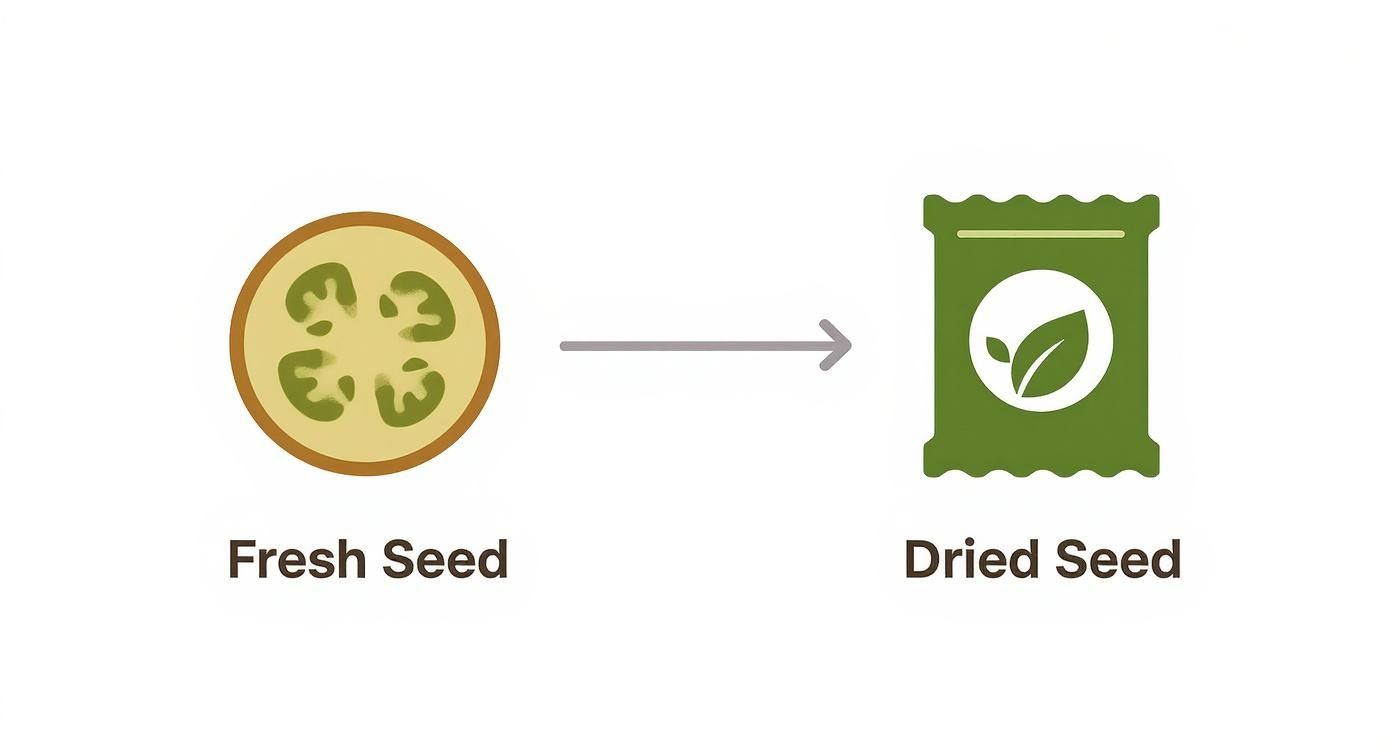
As you can see, seeds taken directly from a fresh tomato often sprout faster and more consistently than their commercially dried counterparts.
5 Reasons Tomato Seeds Don't Sprout
Even the most seasoned gardeners run into trouble sometimes. Staring at a tray of empty soil cells after a week of anticipation is frustrating, but don't toss it out just yet. Most of the time, germination failures boil down to a few common, fixable issues.
Think of it this way: each problem is a lesson. By learning to spot what went wrong, you can adjust your setup and get those seeds to pop. Let's walk through the five most common roadblocks that can mess with your tomato seed germination time.
1. My Seeds Never Sprouted at All
This is easily the most disheartening problem. If a week or two has gone by with zero action, it's time to play detective. The usual culprits? Temperature and moisture.
Take a moment to think back. Was the soil consistently warm enough? Seeds sitting in soil below 65°F (18°C) might not sprout at all, or they could take weeks longer than you'd expect. On the flip side, if the soil dried out completely—even for just a few hours—it can stop the germination process in its tracks for good.
2. I'm Seeing Fuzzy White Mold on the Soil
If you spot a fuzzy white or grayish film on your soil, you're looking at damping off. This is a fungal disease that absolutely loves cool, damp, stagnant conditions. While it’s famous for causing new seedlings to keel over, it can also rot the seeds before they even have a chance to sprout.
Your best defense is a good offense. Always start with a fresh, sterile seed-starting mix and make sure there’s some airflow. Once you see the first hint of green, take the humidity dome off. Letting the air circulate is crucial for keeping this common seedling disease at bay.
The real secret here is that prevention is a hundred times easier than a cure. If you start with a clean environment, you give your seeds a fighting chance to outgrow fungal threats before they ever become a problem.
3. Only a Few of My Seeds Sprouted
Did you plant a dozen seeds but only get three or four sprouts? This almost always points to the age or quality of the seeds. Tomato seeds can last for years, but their viability naturally drops over time. If you're working with a packet that's been in a drawer for a while, a lower germination rate is pretty normal.
While fresh seeds often pop up in 5 to 8 days, I've seen older seeds take 10 to 20 days and still have a decent success rate. If you know your seeds are old, just sow a few extra to make up for the duds. You can dig deeper into tomato seed viability over time to get a better idea of what to expect from your stash.
4. My Seedlings Are Super Tall and Skinny
If your seedlings shot up fast but look pale, thin, and stretched out, you've got "leggy" seedlings. This is a dead giveaway that they aren't getting enough light. The second a seedling breaks through the soil, it's in a desperate hunt for a strong light source.
A sunny windowsill, unfortunately, just doesn't cut it most of the time. The seedling stretches and stretches toward the weak light, resulting in a fragile stem that can barely hold itself up. The fix is simple: get them under a grow light as soon as you see them emerge.
5. My Seeds Sprouted, but Now They're Stuck
It’s a classic scenario: a seedling emerges, looks promising, and then... nothing. It just sits there, tiny and unchanged, for days on end. This kind of stall is often caused by cold soil, which can shock the delicate new roots and put the brakes on all development.
It can also happen if your seed-starting mix is completely inert. The seedling uses up the energy packed in the seed and then has nothing left to fuel its growth. Make sure your seedlings are warm and, once their first true leaves appear, consider giving them a very weak, half-strength liquid fertilizer to get them going again.
If you want to be certain about your seed quality before planting, you can always do a quick germination test for seeds to see how viable they are.
3 Next Steps for Your Seedlings
https://www.youtube.com/embed/SWq_W51k7k0
Seeing those first green shoots poke through the soil is a fantastic moment, but the journey from a fragile sprout to a fruit-bearing plant has just begun. The next few weeks are critical for developing strong, healthy seedlings ready for the garden.
Your main goal now is to grow stout, sturdy plants, not tall, spindly ones. The moment those first leaves appear, they need intense light. A seedling that stretches and looks pale is desperately "reaching" for more light. A sunny window often isn't enough to prevent this. For the best results, get them under a grow light for 14-16 hours a day to encourage thick, healthy stem development.
1. Preparing for the Great Outdoors
Once your seedlings have a few sets of "true leaves"—that's the second and subsequent sets of leaves that look like actual tomato leaves—they're on their way to being ready for the garden. But you can't just move them from their cozy indoor home straight into the ground. This abrupt change causes transplant shock, which can easily kill your young plants.
The key is a process called hardening off. Think of it as bootcamp for your plants. You're gradually toughening them up by exposing them to outdoor conditions over a week or two.
- Day 1: Start by placing them in a sheltered, shady spot outside for just an hour.
- Following Days: Each day, increase their outdoor time by an hour or two. Slowly introduce them to a bit more direct morning sun and gentle breezes.
For a complete day-by-day schedule, our guide on how to harden off seedlings will walk you through the process, ensuring a smooth and stress-free transition for your plants.
Hardening off is the single most important step to prevent transplant shock. Rushing this process is a common mistake that can undo weeks of careful germination work. Patience here pays off with robust, resilient plants.
2. Watering and First Feedings
Young seedlings are delicate. Their new root systems are incredibly sensitive to too much or too little water. Keep watering them gently from the bottom whenever the soil feels light or dry to the touch. This encourages roots to grow downward and prevents issues like damping off. The soil should be consistently moist, but never a soggy swamp.
Hold off on the fertilizer for a bit. The seedling gets all the energy it needs to start from the seed itself. Once you see the first set of true leaves unfurl, it’s time for their first meal. Start with a balanced, liquid fertilizer diluted to half-strength. A weekly feeding at this gentle dose is plenty to fuel their growth without burning their sensitive new roots.
3. Watching for Pests
As your tomato plants grow, they'll attract attention from more than just you. Pests like aphids can quickly become a problem, so learning about mastering organic aphid control for your garden is a great next step to keep your young plants safe and thriving.
4 Common Tomato Seed Questions
Even with the best-laid plans, things can go sideways when you're starting seeds. It’s all part of the process! Let's walk through some of the questions I hear most often from fellow gardeners about getting those stubborn tomato seeds to pop.
1. Can I Just Plant Seeds From a Store-Bought Tomato?
Technically, yes, you can. But should you? That's the real question. It's a total gamble.
Most tomatoes you find at the grocery store are F1 hybrids. Think of them as the specific, high-performing offspring of two very different parent plants. The fruit is fantastic, but the seeds inside carry a jumbled mix of genes from those parents. You might get something great, something weird, or something that barely produces. It's a genetic lottery, and the odds aren't usually in your favor.
If you want your plants to produce fruit just like the parent, you need to stick with heirloom or open-pollinated seeds. They grow "true to type," meaning you get exactly what you expect, season after season.
2. Do Tomato Seeds Actually Need Light to Sprout?
This is a big point of confusion, but the answer is a firm no. Tomato seeds don't need a single ray of light to germinate. In their natural world, they'd be tucked safely under a layer of soil, and that darkness is exactly what they prefer.
But—and this is a big but—the moment you see that first little green stem break the surface, light becomes the single most important thing. Your new sprouts need intense light immediately to start photosynthesizing. Without it, they'll become weak and "leggy" in a hurry.
3. What's This "Paper Towel Method" I Keep Hearing About?
Ah, the paper towel trick! It's a fantastic, almost foolproof way to check if an old packet of seeds is still viable before you waste a bunch of soil and time. It's also great for getting a head start on germination.
Here’s how you do it:
- Get a paper towel damp, but not sopping wet. Squeeze out any excess water.
- Spread your tomato seeds out on one half of the towel.
- Fold the other half over the top, creating a little seed sandwich.
- Slip the whole thing into a plastic zip-top bag, but don't seal it all the way. You want a little air to get in.
- Find a consistently warm spot to stash it—on top of your refrigerator or near a router often works perfectly.
Start checking on them after a few days. Once you see those little white tails (the roots!) emerging, it's time to gently move them into a pot with seed-starting mix.
4. Why Is It Taking Forever for My Seeds to Sprout?
Patience is a virtue, but if it's been over two weeks, something's likely off. Nine times out of ten, the culprit is one of three things.
First and foremost: cold soil. This is the number one germination killer. If your soil is below 65°F (18°C), your seeds will just sit there dormant. Second, it could be old seeds. Viability drops over time, and older seeds can take much longer to wake up, if they do at all.
Finally, check your watering habits. Letting the soil dry out completely, even once, can stop the germination process dead in its tracks. A consistently moist (but not waterlogged!) environment is non-negotiable.
At Homegrown Garden, we believe in the joy of growing your own food. We offer the heirloom seeds, starter kits, and expert know-how to help you succeed. Ready to dig in? Check out our collections and get your garden started at https://www.homegrown-garden.com.
Starting tomatoes this season? Try our heirloom Beefsteak tomato seeds for a reliable, classic slicer.

