


Planting flower bulbs is one of the most satisfying things you can do in a garden. It’s a simple act of faith, really—tucking these quiet, unassuming little packages into the ground, knowing they'll burst into a riot of color months later. The whole process comes down to a few key things: picking good bulbs, getting your soil just right, planting them at the correct depth and time, and giving them a bit of care. Get these basics down, and you’re set for a fantastic show.
Your 7-Step Guide To A Spectacular Bulb Display
There's something magical about planting bulbs. You're essentially burying treasure in one season, and with a bit of patience, you're rewarded with a stunning floral display in another. Whether you’re a brand-new gardener putting in your first daffodils or a seasoned pro designing a layered masterpiece of tulips and hyacinths, this guide will walk you through everything. We’ll break down each stage, taking the mystery out of it and giving you the confidence to create a beautiful garden that comes back year after year.
This simple gardening pleasure has grown into a massive global passion. The flower bulb and tuber market is now valued at around $2.5 billion, and it's only getting bigger as more people discover the joy of home gardening. For us, this boom is great news—it means more variety and better quality bulbs are available everywhere.
The Foundation Of A Flourishing Bulb Garden
Before you even grab a trowel, let's cover the essentials. Most of the spring flowers we love—tulips, daffodils, crocuses—need to be planted in the fall. This gives them the cold winter chill they absolutely require to kickstart their blooming process in the spring.
On the other hand, summer-blooming bulbs like dahlias and gladioli are planted in the spring, once you're sure the last frost has passed. Understanding these optimal planting times is probably the most critical part of the whole equation.
A truly successful bulb garden really boils down to three things:
- Sunlight: Most bulbs are sun-worshippers. They need at least six hours of direct sun each day to not only bloom well but also to store up enough energy for the next year's show.
- Soil Drainage: This one is a deal-breaker. Bulbs will absolutely rot if they're left sitting in soggy, waterlogged soil. If your garden has heavy clay, you'll need to amend it with compost or other organic matter to improve drainage.
- Proper Depth: A good rule of thumb is to plant a bulb about three times as deep as it is tall. Planting deep enough protects it from wacky temperature swings and hungry critters.
Remember, a flower bulb is a complete, self-contained plant. It already has all the nutrients and energy it needs for its first year's bloom. Your job is to simply provide the perfect environment for it to wake up and do its thing. Think of yourself as a supportive caretaker, not a miracle worker.
We'll get into the nitty-gritty of each of these points in a bit. For now, let's start with a quick overview of what to expect.
Here’s a table that breaks down the most important considerations at a glance.
Quick Guide To Planting Flower Bulbs
| Factor | Key Consideration |
|---|---|
| Timing | Plant spring-blooming bulbs in fall; plant summer-blooming bulbs in spring. |
| Location | Choose a spot with at least 6 hours of direct sunlight daily. |
| Soil | Must be well-draining; amend heavy clay soil with compost. |
| Depth | Plant bulbs 2-3 times as deep as the bulb is tall. |
| Spacing | Space large bulbs 6-8 inches apart; smaller bulbs 3-4 inches apart. |
| Watering | Water well once after planting, then only if the soil is very dry. |
| Aftercare | Let foliage die back naturally after blooming to recharge the bulb. |
This quick guide gives you the core principles, but next, we'll dive into the specific, step-by-step actions you'll take to bring your garden to life.
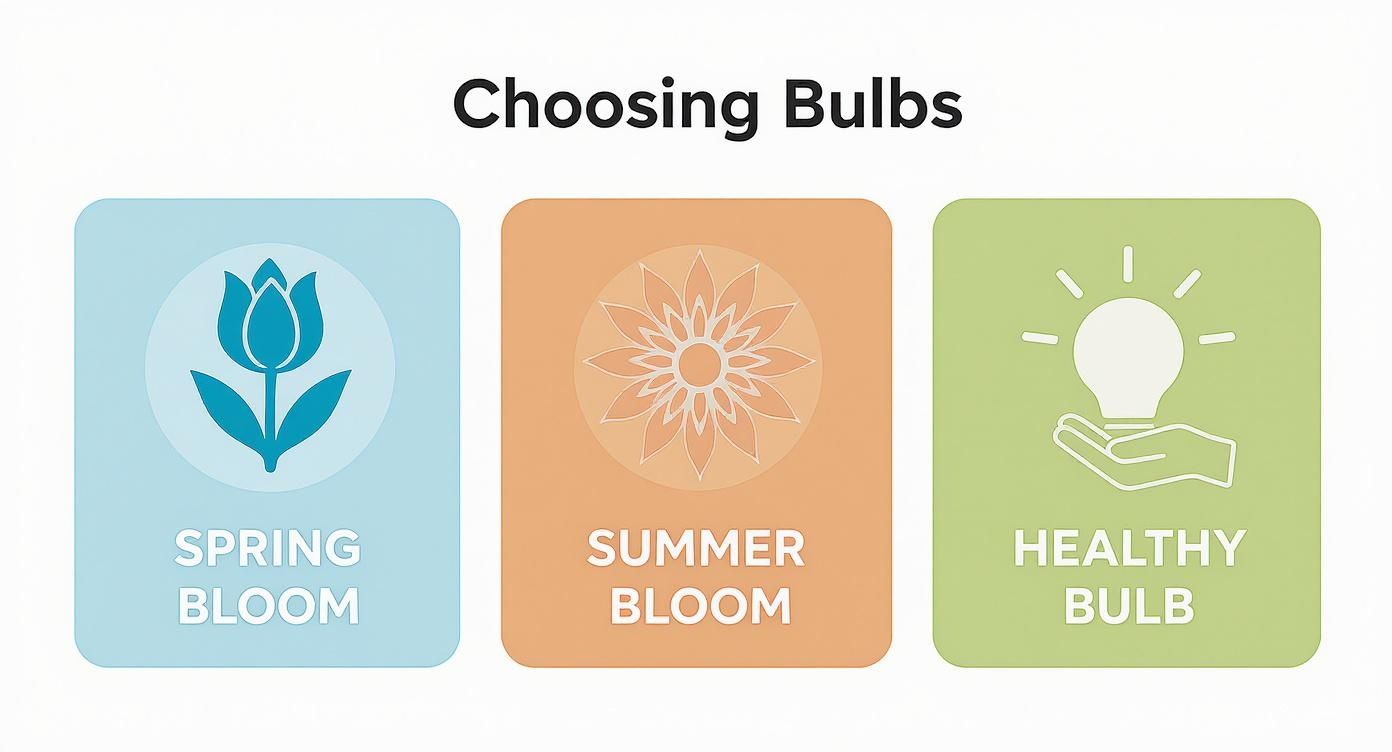
Step 1: Choose the Perfect Bulbs for Your Garden
Your journey to a stunning garden starts long before you ever grab a trowel. It begins at the nursery or your favorite online bulb shop, and learning how to pick a high-quality bulb is probably the most important first step you can take. A healthy bulb is a self-contained promise—it holds all the energy needed for that first glorious season of blooms.
The very first thing you need to figure out is whether you're planning for a spring spectacle or a summer showstopper. This single decision shapes your entire planting calendar and garden design for the year.
Spring Bloomers vs. Summer Stunners
Think tulips, daffodils, and hyacinths. These are your classic spring-blooming bulbs, and they have one non-negotiable requirement: a long, cold winter nap. They absolutely must be planted in the fall to give them the chill time they need underground. Without that cold dormancy period, they simply won't flower. It’s what tells them spring has arrived.
On the flip side, you have your summer-blooming beauties like dahlias, gladioli, and begonias. These are tender souls that can't handle a frost. You’ll plant them in the spring, well after the last frost has passed, and they'll power through the warm months to give you an incredible summer display.
Getting this timing right is crucial, especially if you're new to gardening. I’ve seen many beginners plant tulips in May, hoping for flowers, and it's a mistake that's so easy to avoid.
Here's a simple rule of thumb that has saved me countless headaches: If it blooms in spring, plant it in the fall. If it blooms in summer, plant it in the spring. Nail this one concept, and you're already on the path to success.
It’s no surprise that bulb gardening is more popular than ever. We saw a reported 36% increase in U.S. bulb sales from 2021 to 2022. This boom means there’s an incredible variety out there, especially for classics like tulips and daffodils. You can learn more about these fascinating consumer trends in flower bulb sales.
Your Personal Bulb Inspection Checklist
So, you’ve decided on a type of bulb. Now it's time to put on your detective hat. Not all bulbs are created equal, and a few seconds of inspection at the store can make the difference between a garden full of life and a disappointing patch of dirt.
I always try to avoid those pre-packaged mesh bags where you can't really see what you're getting. If you have the option, picking them out yourself from open bins is the way to go.
Here's what I look for:
- Give it a Squeeze: A healthy bulb should feel firm and solid, with no soft or squishy spots. It’s a lot like picking out a good onion at the grocery store—you want it to feel dense and heavy.
- Check the Weight: A good bulb should feel substantial for its size. That weight tells you it’s packed with moisture and energy, not dried out and hollow.
- Inspect its "Tunic": The papery outer layer is called the tunic. A few nicks or a bit of peeling is totally normal and nothing to worry about. What you want to avoid are deep gashes or any signs of mold, which usually looks like a blue or gray powder.
- Sprouts (or a Lack Thereof): When buying fall-planted bulbs, you don't want to see much green growth. A tiny little nub is fine, but a long green shoot means the bulb woke up too early and might struggle to establish itself once planted.
Matching Bulbs to Your Unique Garden
Finally, even the healthiest bulb will fail if it's in the wrong spot. Before you buy, take a moment to think about your specific garden conditions.
Ask yourself a few key questions:
- What’s Your Climate Zone? Some bulbs, especially certain tulips, need a longer, colder winter than others to perform well year after year. Always check the bulb's requirements against your USDA Hardiness Zone to make sure it’ll get the chilling hours it needs.
- How Much Sun Do You Get? Most bulbs are sun-worshippers and need at least six hours of direct sun to really thrive. If your garden is on the shadier side, don't despair! Just look for varieties known to handle partial shade, like snowdrops or some types of daffodils.
- What's Your Soil Like? Bulbs have one major enemy: "wet feet." They absolutely hate sitting in soggy soil, which can lead to rot. If you have heavy clay, you'll need to amend it or build raised beds.
Picking the right bulb is a true investment in your garden’s future. When you take the time to choose healthy bulbs that are a good fit for your yard, you're not just planting a root—you're planting a promise of spectacular color to come.
Step 2: Master Soil Prep and Planting Depth
Think of it this way: just as a house needs a solid foundation, a stunning garden of bulbs starts with healthy soil. Honestly, this is the single most important thing you can control. Getting the soil right from the beginning sets your bulbs up for success. I’ve seen it time and again—poor soil leads to weak plants and disappointment, while rich, well-prepared soil is the secret to a garden bursting with life.
The number one enemy of any flower bulb is rot, which is almost always a result of soggy, waterlogged soil. Bulbs are little powerhouses of stored energy, but they'll turn to mush in a heartbeat if they're left sitting in a puddle. That’s why excellent drainage isn't just a suggestion; it's a must.
Creating the Perfect Soil Environment
The good news is that improving your soil isn’t rocket science. Whether you’re wrestling with heavy clay that holds water like a sponge or sandy soil that drains before a plant can get a drink, the answer is usually the same: add plenty of organic matter.
Amending your soil accomplishes two crucial things. First, it completely changes the soil's structure—breaking up dense clay to create tiny air pockets for roots and helping sandy soil hold onto moisture. Second, it infuses the soil with vital nutrients that will feed your bulbs for the long haul.
Here are my go-to amendments for creating incredible garden soil:
- Compost: This is the gardener's black gold for a reason. It’s packed with nutrients and introduces beneficial microbes that build a thriving underground ecosystem.
- Aged Manure: Well-rotted manure is a fantastic source of slow-release nitrogen and does wonders for improving soil texture.
- Peat Moss or Coconut Coir: These are brilliant for helping sandy soils retain water and for loosening up compacted clay.
A quick way to check your drainage is to dig a hole about a foot deep, fill it with water, and see what happens. If there's still water standing in the hole an hour later, you know you've got some work to do. For a deeper dive, check out our guide on preparing your garden soil for planting.
Getting Planting Depth and Spacing Just Right
Once your soil is in great shape, the next big questions are how deep to plant and how far apart to space your bulbs. Nailing these two details is what protects bulbs from a surprise frost, prevents them from getting overcrowded, and gives them the room they need to really put on a show.
A trusty rule of thumb I always follow is to plant a bulb two to three times as deep as the bulb is tall. So, if you have a two-inch-tall tulip bulb, you'll want to plant it about six inches deep. This depth does a great job of insulating the bulb from wild temperature swings and helps keep it safe from hungry squirrels.
Proper planting depth isn't just about protection—it's about performance. Plant a bulb too shallow, and it might pop up too early only to get zapped by a late frost. Plant it too deep, and it might burn through all its stored energy just trying to reach the surface, leaving you with weak stems and underwhelming flowers.
Here's a handy chart to take the guesswork out of planting some of the most popular bulbs.
Planting Depth and Spacing for Popular Flower Bulbs
| Bulb Type | Ideal Planting Depth | Recommended Spacing |
|---|---|---|
| Tulips | 6-8 inches | 4-6 inches apart |
| Daffodils | 6-8 inches | 6-8 inches apart |
| Hyacinths | 5-6 inches | 5-6 inches apart |
| Crocus | 3-4 inches | 2-3 inches apart |
| Alliums (Large) | 6-8 inches | 8-12 inches apart |
| Dahlias (Tubers) | 4-6 inches | 18-24 inches apart |
| Lilies | 6-8 inches | 8-12 inches apart |
| Gladiolus | 4-6 inches | 5-6 inches apart |
Remember, these are guidelines. A little variation won't hurt, but sticking close to these recommendations gives your bulbs the best possible start.
Arranging Your Bulbs for a Natural, Beautiful Display
When it comes to spacing, the idea is to give each bulb enough personal space to grow without leaving awkward, empty patches in your garden bed. If you love a neat, formal look, go ahead and measure precisely. But for that effortless, cottage-garden vibe, I highly recommend planting in clusters or "drifts."
Here’s a little trick I use: instead of arranging bulbs in rigid lines, I’ll take a handful and gently toss them onto the prepared soil. Then, I plant them more or less where they land, just making a few small adjustments to make sure none are touching. This technique creates gorgeous, natural-looking clumps that look like they've always been there.
- For large bulbs like tulips and daffodils, give them about 5-6 inches of breathing room.
- For smaller bulbs like crocuses and grape hyacinths, a tighter spacing of 2-3 inches is perfect.
By focusing on great soil, correct planting depth, and thoughtful spacing, you’re creating the perfect home for your bulbs to settle in and thrive. Your reward will be a breathtaking display of color come springtime.
Step 3: Decide Between Garden Beds and Containers
Deciding where to plant your bulbs is one of the most exciting parts of the process. It's a choice that really defines the character of your spring garden. Are you dreaming of big, sweeping drifts of color, or do you prefer focused, vibrant displays you can move around? The classic garden bed and the versatile container each have their own magic, and the right choice for you depends on your space, your style, and how much hands-on time you want to spend.
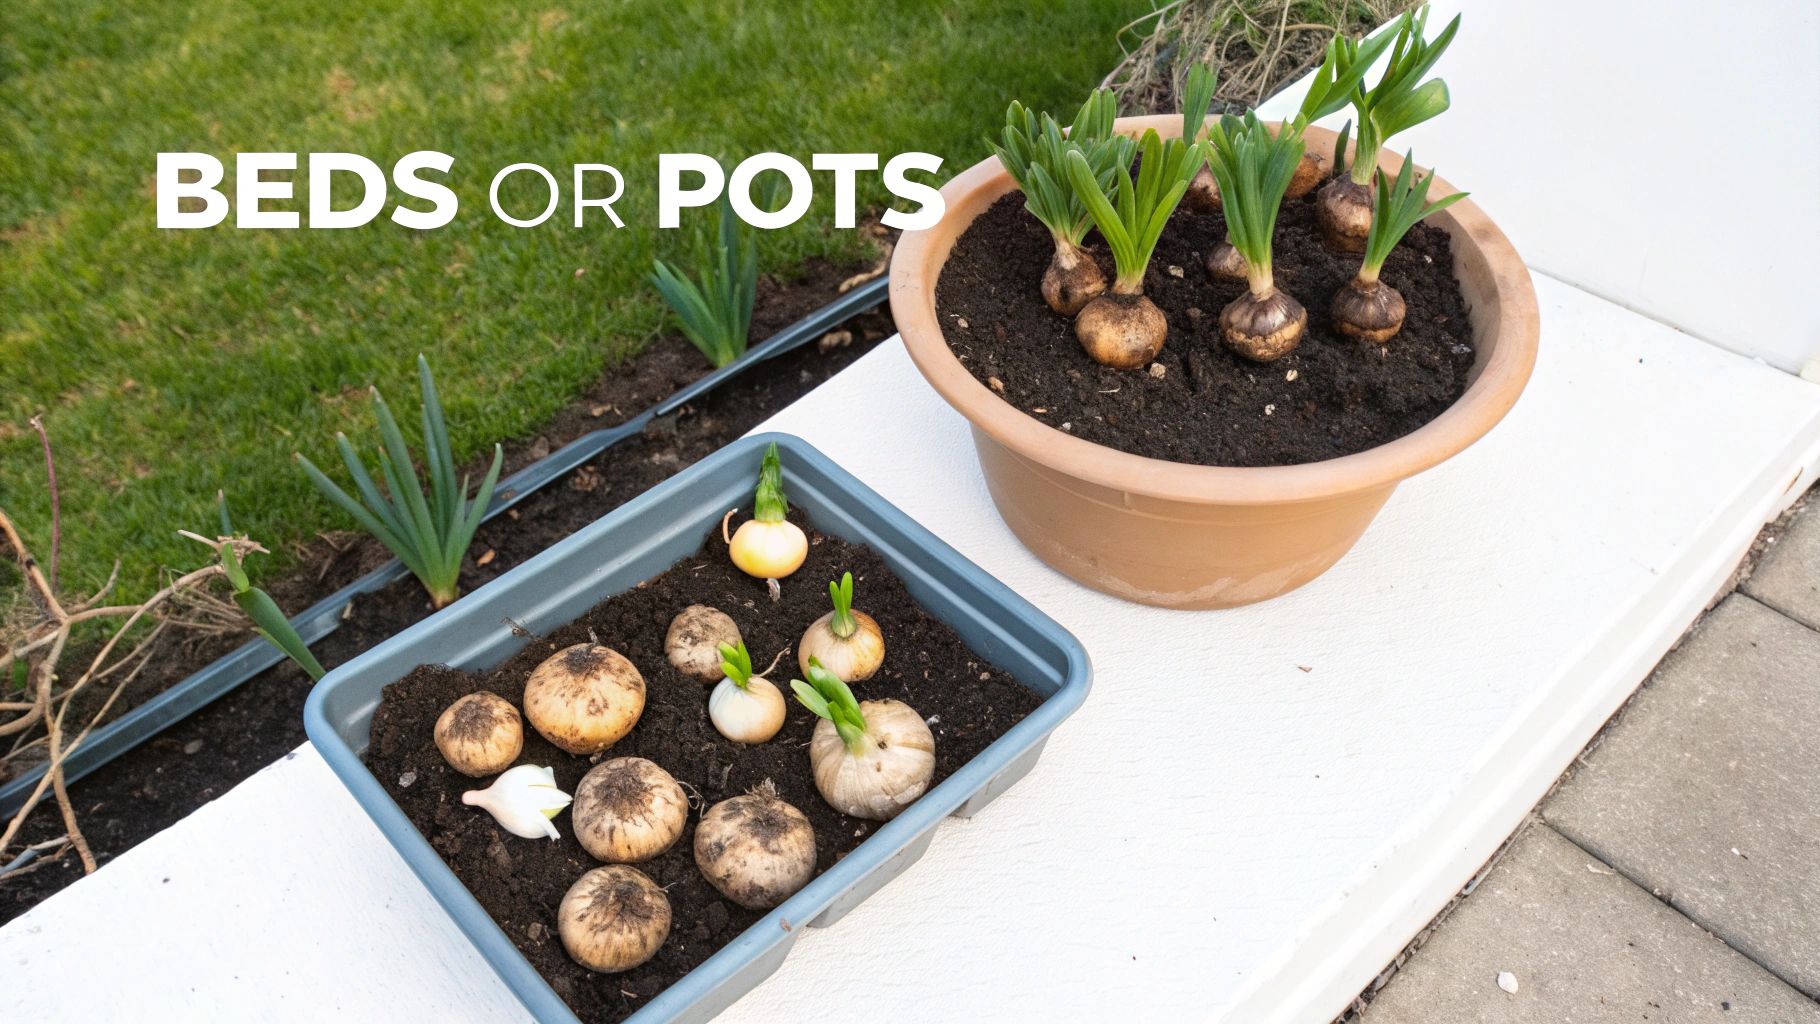
Both methods can give you incredible results. Garden beds let you create those jaw-dropping, natural-looking landscapes, while pots give you total control and bring that pop of color right to your patio or front door. Let's dig into the practical side of each so you can figure out what works best for you.
The Classic Garden Bed Approach
There’s something truly special about planting bulbs directly in the ground. It allows them to set down deep roots and tap into the natural rhythm of the soil. This connection to the earth often helps them perennialize better, meaning they'll come back stronger year after year. The ground also acts as a fantastic natural insulator, protecting them from those wild temperature swings that can happen in early spring or late fall.
If you have the space, this is where you can get really creative with layered designs that unfold over weeks.
One of my favorite techniques for in-ground planting is called “lasagna planting.” It’s a brilliant way to get a continuous succession of blooms from one small patch of soil. You’re essentially stacking bulbs in layers, just like a lasagna, based on their bloom time.
It’s surprisingly simple:
- The Bottom Layer: Dig your hole and place the biggest, latest-blooming bulbs at the very bottom. Think tulips or those big, beautiful alliums.
- The Middle Layer: Cover them with a few inches of soil, then arrange your mid-season bloomers, like hyacinths or smaller daffodils.
- The Top Layer: Add another thin layer of soil and finish with the earliest, smallest bulbs like crocuses, grape hyacinths, or snowdrops.
This method is a game-changer. It maximizes every square inch and ensures that just as one set of flowers starts to fade, another is ready to take its place.
Mastering Bulb Planting in Containers
Don't have a big yard? No problem. Container gardening is your ticket to a stunning bulb display. You can line your walkway with pots of cheerful tulips, create a dramatic focal point on your balcony, or simply enjoy having flowers close enough to appreciate from your kitchen window.
For a deeper dive into this, our complete guide is packed with more container gardening tips to help you get it right.
First things first: the pot itself matters. You need a container that’s deep enough to handle the bulbs' recommended planting depth plus a few extra inches at the bottom for roots to stretch out. If the pot is too shallow, the roots will get cramped and you'll end up with stunted, unhappy plants.
If there’s one golden rule for container gardening, it's drainage. Your pot must have drainage holes. Bulbs sitting in soggy soil will rot, plain and simple. I always add a layer of gravel or broken terracotta shards at the bottom just to be extra sure that water has a clear escape route.
Also, be sure to use a high-quality potting mix, not soil scooped from your garden. Bagged potting mixes are engineered to be lightweight and fast-draining—the perfect environment for bulbs in a confined space. Garden soil, on the other hand, gets heavy and compacted in a pot, holding way too much water.
Special Care for Potted Bulbs
While pots are wonderfully flexible, they do come with a few challenges. A container is exposed to the air on all sides, making it much more sensitive to temperature changes than the insulated ground.
This is a big deal in winter. In colder regions (generally Zone 7 and below), you can't just leave your potted bulbs out in the open. A hard, prolonged freeze will kill them. The solution is to provide some protection. You can tuck the pots into an unheated garage or shed for the coldest months. Another trick is to huddle them together against a sheltered wall and wrap the cluster of pots in burlap or even bubble wrap to create an insulating barrier.
Finally, remember that containers dry out way faster than garden beds. After the initial planting, give them a good soak. But once they start growing, you’ll need to be vigilant. Check the soil every couple of days by sticking your finger in an inch or so. If it feels dry, it's time to water thoroughly. This little bit of extra attention is all it takes to get a spectacular show from your potted bulbs.
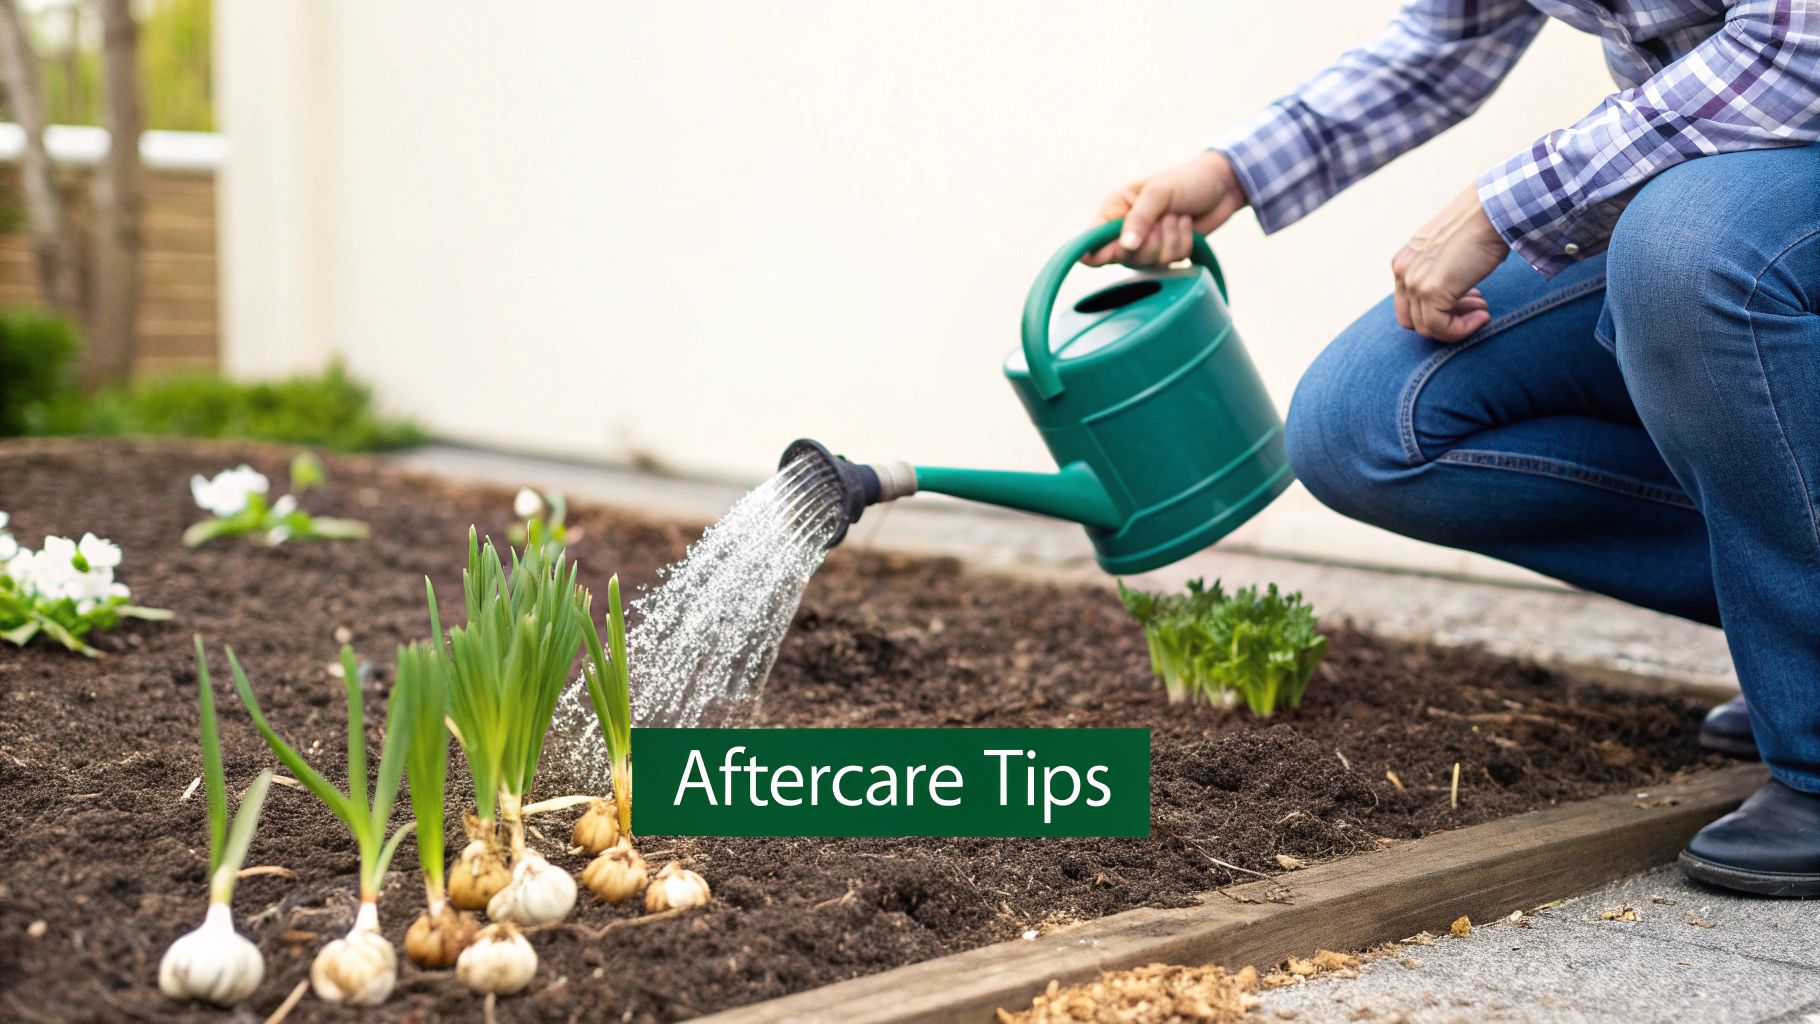
Step 4: Follow Essential Aftercare for Thriving Bulbs
Getting your bulbs tucked into the ground feels like the finish line, but what you do next is what truly sets the stage for a spectacular spring or summer show. Think of it as sending your bulbs off to bed with everything they need for a long, productive winter's nap. This aftercare really comes down to three simple but critical pillars: watering, fertilizing, and mulching.
Each of these steps plays a vital role in protecting your investment and ensuring your bulbs wake up ready to perform. Skipping them can lead to weak growth, fewer blooms, or even bulbs that fail to emerge at all. Let's break down exactly what to do.
The Critical Role of Water After Planting
The very first thing to do after covering your bulbs with soil is to give them a deep, thorough watering. This isn't just about quenching their thirst; it’s about settling the soil and eliminating any air pockets around the bulb. Those pockets can leave the new roots dry and exposed.
This single act kickstarts root development, encouraging the bulb to establish a strong anchor system before the ground freezes solid. Once this initial watering is done, you can generally let nature take over, especially if you live in a climate with regular fall and winter precipitation.
If you hit a prolonged dry spell after planting, though, check the soil every week or so. If it’s dry a few inches down, give it another good drink. The goal is to keep the soil lightly moist, not a soggy mess.
Fueling Future Flowers with the Right Fertilizer
Here’s a common mistake I see gardeners make: they douse newly planted bulbs with a heavy, all-purpose fertilizer. The truth is, a flower bulb is a self-contained package of energy, with everything it needs for its first year of blooms already stored inside. Your job is to help it recharge for the following year.
The best time to fertilize is right when you plant, but the key is using the right kind of food. Steer clear of high-nitrogen fertilizers, which will only encourage lush, weak foliage at the expense of the flowers.
Instead, look for a bulb-specific food or a granular fertilizer with a low first number and a higher middle number, like a 5-10-5 or 3-5-3 ratio.
- Phosphorus (the middle number): This is the superstar nutrient for bulbs. It promotes vigorous root growth and strong flower development.
- Potassium (the third number): This helps with overall plant health and disease resistance.
Just sprinkle the granular fertilizer into the planting hole or mix it into the soil at the bottom before placing your bulb. This "root-zone feeding" puts the nutrients exactly where they're needed most. A slow-release bulb food is an excellent choice, as it will gently feed the developing roots all winter long.
Think of it this way: The initial watering settles the bulb into its new home, while the right fertilizer provides the pantry of food it will need to wake up strong. These two steps work together to create the perfect underground environment.
The Protective Power of Mulch
The final step in your aftercare routine is spreading a layer of mulch over the garden bed. If watering and fertilizing are about getting the bulb started, mulching is about protecting it through the winter. A 2-3 inch layer of organic mulch is like a cozy blanket for your garden.
Mulch provides several key benefits for your bulbs:
- Insulation: It helps regulate soil temperature, shielding bulbs from the damaging freeze-thaw cycles that can heave them right out of the ground.
- Moisture Conservation: It slows down evaporation, keeping the soil from drying out too quickly.
- Weed Suppression: A good layer of mulch blocks sunlight, preventing pesky winter and early spring weeds from sprouting and competing for nutrients.
You have plenty of great options for mulch. Shredded leaves, pine straw, or shredded hardwood bark are all excellent choices. They not only do the job well but also break down over time, slowly adding valuable organic matter back into your soil. Applying this final layer is a simple task that pays huge dividends, ensuring your bulbs rest undisturbed until it's their time to shine.
Step 5: Troubleshoot When Your Bulbs Don't Behave
Even the most seasoned gardeners face a little drama now and then. You do everything right, but a patch of tulips is a no-show, or your daffodils look a bit pathetic. It happens! The good news is that most common bulb problems are easy to figure out and fix, turning a frustrating moment into a learning experience for next year's garden.
https://www.youtube.com/embed/-qYonWEwPko
One of the biggest letdowns is when bulbs come up "blind," meaning they produce leaves but no flowers. This isn't just bad luck; there's usually a reason. The most frequent culprits are not enough sun, planting them too shallow, or—and this is a big one—cutting back the foliage too soon the previous year. You have to let those green leaves die back naturally; they’re the power plant that recharges the bulb for the next season's show.
Another common headache is bulb rot. If you dig up a dud and find a soft, mushy mess, you can bet the problem is poor drainage. Bulbs absolutely despise having "wet feet" and will quickly rot if left in soggy soil.
Playing Detective in the Garden
When things go wrong, it's time to put on your detective hat and look for clues. Are the flowers that did show up small or weak? That often points to a lack of nutrients in the soil or simple overcrowding. Bulbs, just like people, need their personal space and good food to thrive.
Here are a few classic mysteries you might encounter:
- The Case of the Missing Bulbs: If your bulbs vanish without a trace or you find tell-tale tunnels, you've got critters. Squirrels are notorious for digging up a freshly planted snack, while voles prefer to tunnel underground for their feast.
- The Eager Beavers: A freak warm spell in winter can fool bulbs into sprouting way too early. It can be a little jarring to see green shoots poking through the snow, but it’s usually not a catastrophe. Those shoots are tougher than they look and can often handle a subsequent freeze just fine.
- Fuzzy Fungal Foes: Noticing a gray or fuzzy mold on your bulbs? That’s a clear sign of fungal disease, almost always brought on by too much moisture and not enough air circulation.
To stop squirrels and other digging pests in their tracks, I swear by this trick: lay chicken wire flat over the bed right after you plant, and then cover it with your mulch. For voles, planting bulbs inside wire cages or mixing sharp gravel into the planting hole makes your garden a much less attractive buffet.
Preventing Pests and Diseases Before They Start
An ounce of prevention is truly worth a pound of cure in the garden. Being proactive is your best defense. Getting familiar with some general pest control tips can help protect not just your bulbs, but your entire garden ecosystem.
When it comes to diseases like botrytis (often called tulip fire) or basal rot, it all starts with prevention. Always plant healthy, firm bulbs and double-check that your soil drains well.
If you spot signs of fungus on bulbs before planting or notice weirdly discolored leaves later on, you need to act fast. Knowing how to treat plant fungus can save your flowers before the problem gets out of hand. And don't forget that proper spacing isn't just about looks—it promotes good airflow that keeps fungal issues from taking hold in the first place.
Step 6: Get Answers to Top Bulb-Planting Questions
Even after years of gardening, questions always pop up. Let's dig into a few of the ones I hear most often from fellow gardeners—getting these details right can really set your garden up for success.
Do I Need to Soak Bulbs Before Planting?
For the most part, no. Your trusty tulips and daffodils can go right from the bag into the ground without any extra steps.
However, some of the more delicate summer bloomers, like ranunculus and anemones, really appreciate a good soak. Think of it as waking them up after a long nap. Just let them sit in room-temperature water for a few hours before planting to rehydrate them and get those roots ready to grow.
What If My Bulbs Have Already Sprouted?
Don't panic! It happens, especially if you snag a bag of bulbs late in the season. You can absolutely still plant them.
Just be gentle. Those little green shoots are fragile, so handle them with care to avoid snapping them off. Plant them at their normal depth, and they should catch up just fine. They're telling you they're raring to go!
So many people think a little green sprout means the bulb is a goner. It’s actually the opposite—it’s a sign of life! The trick is to get it into the soil quickly so it can focus on growing roots before it puts too much energy into its leaves.
Can I Grow Tulips in Pots?
You bet! Growing tulips in containers can create a stunning, concentrated burst of color on a patio or balcony.
The secret is using a deep pot with plenty of drainage holes. Keep in mind that pots get much colder than the ground, so if you're in a chilly climate (Zone 7 or below), you’ll need to protect them. Tucking them into an unheated garage or shed for the winter works perfectly. Just know that container-grown bulbs are often best treated as annuals for one big, beautiful show.
Step 7: Find the Best Bulbs for Your Garden
Ready to get your hands dirty and plan a spectacular display? At Homegrown Garden, we've got a fantastic collection of high-quality heirloom bulbs, seeds, and the right tools for the job. Come find your inspiration and start building your spring masterpiece today at https://www.homegrown-garden.com.

