


Growing your own microgreens indoors is one of the most rewarding and straightforward ways to get fresh, nutrient-packed greens on your plate. All you really need are four basic things: a shallow tray, something for them to grow in, good seeds, and a bit of light. The best part? You can go from seed to harvest in just 7 to 14 days. That means fresh greens in about two weeks.
Your Guide to Growing Microgreens Indoors
It's surprisingly easy to grow your own little nutrient powerhouses right at home. This guide will walk you through everything, from the simple gear you'll need to picking the best seeds to guarantee a successful first harvest. You can forget about those complicated, expensive setups you might have seen online. We're focusing on a foolproof method that works for any space, whether you have a bright, sunny windowsill or just a small patch of countertop.
Think of this as your jumpstart into the world of fresh, vibrant greens without the fuss. My goal here is to take the mystery out of it and show you that anyone—and I mean anyone—can grow these amazing little plants, no green thumb required.
The 11 Easiest Microgreens for Beginners
To get you started on the right foot, it helps to pick seeds that are practically guaranteed to grow. These varieties are my go-to recommendations for anyone just starting out because they're quick, forgiving, and packed with distinct flavors.
Here's a quick-reference chart to help you choose your first crop. It breaks down some of the easiest and most popular options, comparing their taste and how long you'll have to wait before you can start snipping.
The 11 Easiest Microgreens for Beginners
| Microgreen Variety | Flavor Profile | Average Grow Time (Days) | Requires Soaking |
|---|---|---|---|
| Broccoli | Mild, slightly peppery | 7-10 | No |
| Radish | Spicy, like a radish root | 5-12 | No |
| Kale | Mild, earthy cabbage flavor | 10-14 | No |
| Pea Shoots | Sweet, fresh pea taste | 10-16 | Yes |
| Sunflower | Nutty and crunchy | 8-12 | Yes |
| Mustard | Zesty and spicy | 8-12 | No |
| Arugula | Peppery and slightly bitter | 8-12 | No |
| Cress | Peppery and pungent | 5-7 | No |
| Kohlrabi | Mild, sweet cabbage flavor | 8-12 | No |
| Beet | Sweet and earthy | 12-18 | Yes |
| Cabbage | Mild, slightly sweet | 8-12 | No |
Looking at this list, you can see plenty of "no-soak" options like radish and broccoli that are perfect for a super-fast turnaround. Once you get a harvest or two under your belt, you can try varieties that need a pre-soak, like sunflower or pea shoots, which are absolutely delicious.
Why Grow Microgreens at Home
For me, the biggest draw is the incredible speed. Having a fresh harvest ready in just 7 to 14 days is a game-changer, especially for those of us who want a consistent supply of fresh greens without waiting months. It's no wonder their popularity has exploded; the global microgreens market was recently valued at USD 1,774.7 million, driven by people looking for healthy, accessible food. You can see more data on the growing demand for microgreens on IMARC Group.
Growing your own is also a fantastic way to control your food budget without sacrificing quality. Having fresh, organic-quality produce on hand makes healthy eating much more affordable. If you're looking for more ways to make healthy eating work for your wallet, there's a great guide on how to eat organic on a budget that offers some really practical tips.
Choosing Your Microgreen Growing Supplies
Before you can get your hands dirty, you'll need to gather a few supplies. Don't worry, you don't need a bunch of expensive or specialized gear to learn how to grow microgreens indoors. The goal here is to start simple and keep it affordable.
Your most important item will be shallow growing trays. You can grab the standard 10x20 inch trays from any garden center, but you can also get creative with what's already in your house. Take-out containers, aluminum pie pans, and even the plastic clamshells from store-bought salad mixes work beautifully. Just remember to poke a few drainage holes in the bottom.
Selecting Your Growing Medium
Next up, your microgreens need something to grow in. This growing medium is what supports the roots, and you've got a few great options to choose from.
- Coconut Coir or Peat Moss: These are fantastic soil-free choices. They hold onto moisture without getting waterlogged, give the roots plenty of air, and are far less messy than traditional soil.
- Hydroponic Mats: If you want an even cleaner setup, look into hemp or jute mats. You just lay the mat in the tray, get it wet, and spread your seeds on top. It's probably the tidiest way to grow indoors.
- Potting Soil: A fine-grained, organic seed-starting mix will also do the trick, though it can be a bit messy. Steer clear of heavy garden soil from your backyard; it compacts easily and can carry pathogens that will wipe out your delicate seedlings.
My go-to recommendation for anyone just starting out is coconut coir. It’s forgiving, sterile, and you can easily see when it's time to water. It really helps you avoid the classic beginner mistake of overwatering.
Essential Tools And Seeds
With your trays and medium sorted, you only need two other must-haves: a spray bottle and quality seeds. A simple spray bottle is perfect for gently misting your seeds and soil without washing them all into a corner. This gentle touch is key during the first few days of germination.
Finally, the seeds themselves. Always look for seeds specifically packaged for growing microgreens or sprouts. These seeds are usually untreated and have been tested for common pathogens. To get the best results, find a reputable supplier and choose non-GMO seeds. Quality seeds are the foundation of a successful indoor harvest. For more on this, check out our tips for starting seeds indoors to give your garden a great start.
Planting Your Seeds for a Lush Harvest
This is where the real fun begins. Your trays are prepped, your growing medium is ready, and it's time to sow the seeds that will become your beautiful indoor garden. Nailing these first few steps is the secret to learning how to grow microgreens indoors and getting that satisfyingly thick harvest.
First things first, let's talk moisture. Whether you're using coconut coir, a soil mix, or another medium, you want it to be perfectly moist—but definitely not waterlogged. I always aim for the consistency of a well-wrung-out sponge. If you grab a handful and squeeze, it should feel damp, but you shouldn’t see more than a drop or two of water. Too much water is a classic beginner mistake that can suffocate your seeds or invite dreaded mold.
Sowing for a Full Canopy
With your soil perfectly moistened, it's time to scatter your seeds. The goal here is seed density. You want to create a thick, even blanket of seeds across the entire surface of your growing medium. This is what leads to a lush, full canopy later on.
Don't be timid! The seeds should be close enough to touch, but not piled up in clumps. Think of it like adding sprinkles to a cake—you want generous, even coverage. A sparse sowing will just lead to a thin, patchy harvest, while severe overcrowding can choke out your plants and restrict airflow. It takes a little practice to get the feel for it, but a great starting point for a standard 10x20 inch tray is about 1-2 ounces of seed, depending on the variety.
The Power of a Pre-Soak
For certain types of seeds, a quick pre-soak is a game-changer. It can dramatically speed up seed germination, especially for larger seeds with tough outer shells like peas, sunflowers, and beets. Soaking softens that hard coat, basically giving the seed a clear signal that it's time to sprout.
Here are a few of my go-to soaking times:
- Pea Shoots: Give these about 8-12 hours in water.
- Sunflower: A shorter 4-8 hour soak is usually perfect.
- Beets: These also benefit from a longer 8-12 hour soak.
On the other hand, smaller seeds like broccoli, kale, or radish don't need this step. In fact, soaking them often creates a clumpy, slimy mess that's difficult to spread. For those, a thorough misting with a spray bottle right after you sow them is all they need. If you really want to get into the nitty-gritty of germination, our guide on mastering the art of seed germination at home is packed with more pro tips.
This graphic really breaks down the thought process for picking the right seeds for your indoor setup.
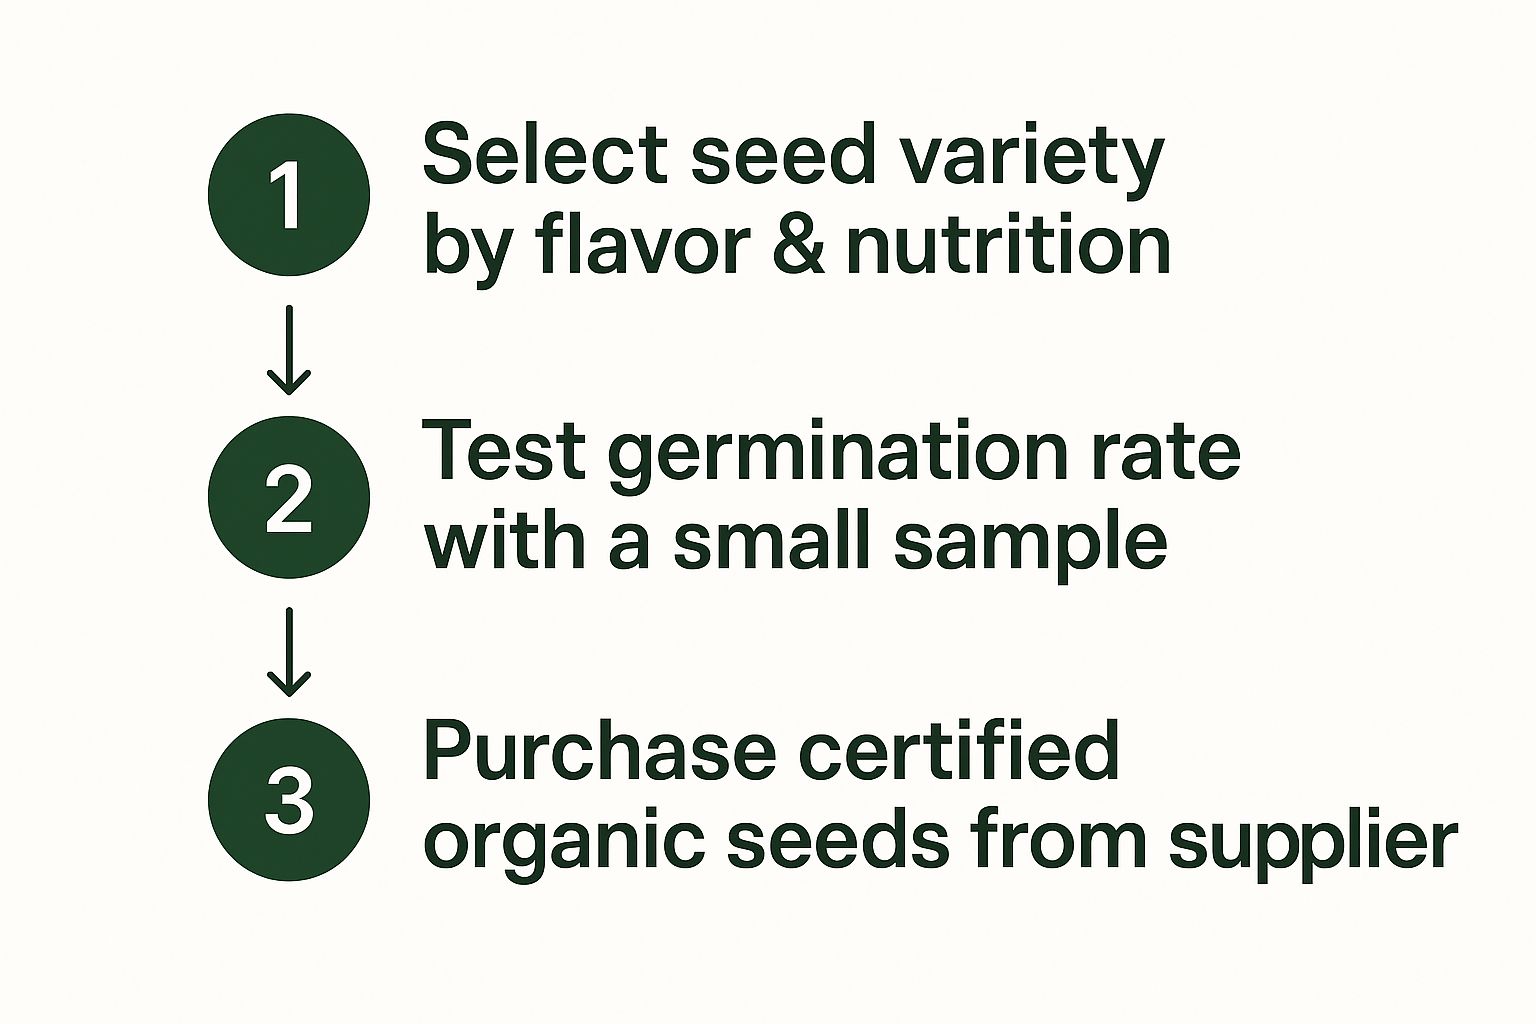
As you can see, everything flows from that initial choice. Starting with a high-quality, viable seed variety suited for microgreen growing is the foundation for everything that follows.
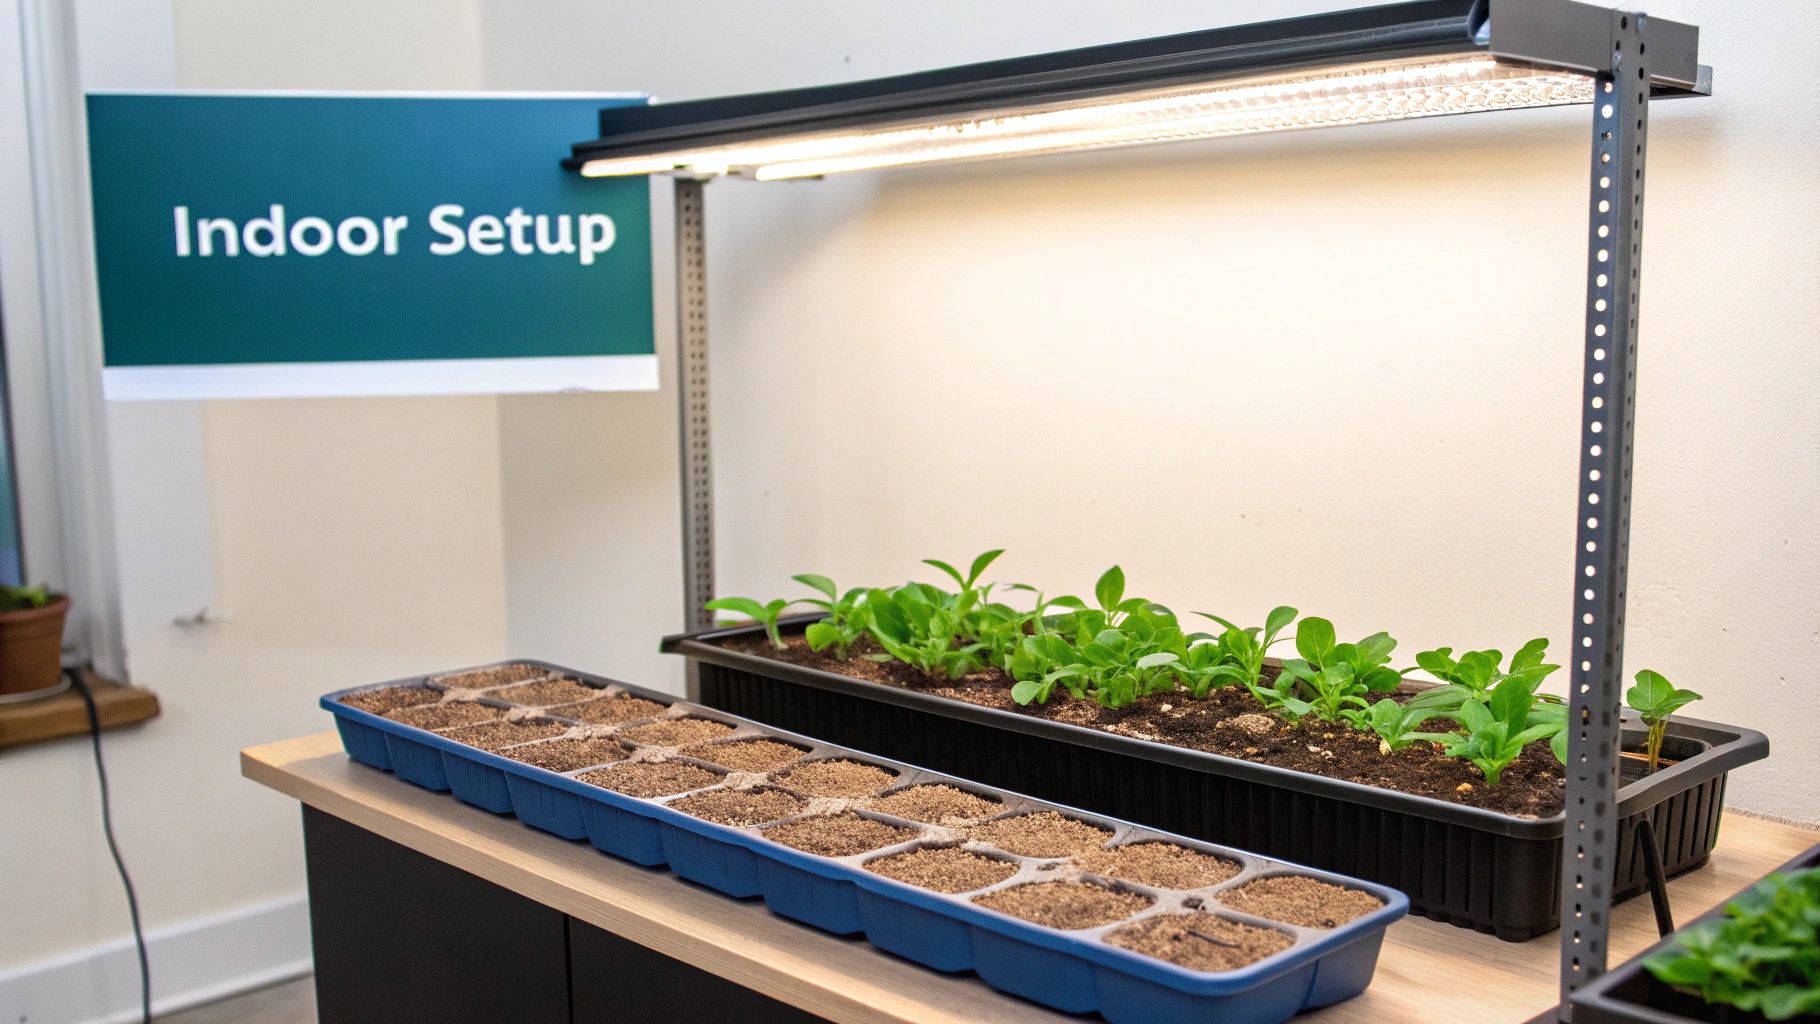
Getting the Light and Water Just Right
Now that your seeds are planted, we get to the fun part—managing their environment. This is where you really start to see your efforts pay off. The two things you’ll be focusing on are light and water. Get these right, and you're well on your way to a perfect harvest.
It might sound strange, but the first step to healthy microgreens is actually keeping them in the dark. This "blackout period" is a non-negotiable step for getting strong, uniform sprouts.
By covering your trays for the first 3-5 days, you're tricking the seeds into thinking they're buried deep in the soil. This encourages them to push up with some serious force, developing thick, sturdy stems as their roots anchor into the medium. The easiest way to do this? Just flip an empty tray on top of your seeded one.
From Darkness to Light
After a few days, you’ll see the magic happen. The tiny seedlings will actually start to lift the cover tray—that's your cue to introduce them to the light. This is when they really start to photosynthesize and turn that beautiful, vibrant green. Consistent light from this point on is what keeps your greens from getting all pale and "leggy."
Aim to give them 12-16 hours of light every day. You have a couple of solid options here:
- A Sunny Spot: A south-facing windowsill can work. Just remember to give the trays a quarter-turn each day so they don’t start leaning toward the sun.
- LED Grow Lights: Honestly, this is the best way to go if you're serious about how to grow microgreens indoors. A good LED provides consistent, full-spectrum light. You can hang it just a few inches above the greens, which encourages them to grow stout and leafy instead of tall and stringy.
My Two Cents: Don't underestimate the blackout period. It builds the foundation for your crop. But once they're out, give them all the light they need. Skimping on either will lead to disappointing results.
The Art of Watering
Watering is a balancing act. The goal is a medium that feels like a well-wrung-out sponge—moist, but never soggy. This is crucial because overwatering is the fastest way to invite mold or root rot, which will wipe out a tray in no time.
This is exactly why most growers, myself included, swear by bottom-watering. Forget the spray bottle. Instead of watering from the top and getting the delicate leaves wet, you simply pour water into the bottom tray (the solid one without holes). The soil will wick up exactly what it needs, delivering moisture straight to the roots while keeping the greens dry and healthy.
How do you know when it's time? Just pick up the tray. When it feels noticeably lighter than it did yesterday, it’s thirsty. While the principles differ slightly for outdoor plots, understanding the fundamentals of timing can be helpful. You can learn more about the general best time to water a vegetable garden in our detailed guide.
Alright, you've babied your seeds, managed the light, and kept them perfectly watered. Now for the best part: harvesting your very own indoor microgreens. Getting the timing right is everything—it's the key to unlocking the best flavor, texture, and all those nutrients you’ve been growing.
The ideal harvest window is a bit of a sweet spot. It’s short, but once you know the visual cues, you’ll never miss it. You're looking for the appearance of the plant's first true leaves.
When your seeds first sprout, they’ll push out a pair of leaves called cotyledons. These are the initial, often rounded, "seed leaves." A few days later, you’ll see a second set of leaves emerge that look distinctly different—more like the adult version of the plant. Those are your true leaves, and that’s your green light. For most varieties, you'll be ready to harvest somewhere between 7 and 14 days after you first sowed the seeds.
Why the rush? If you wait too long, the flavor can get bitter and the stems turn stringy. Harvesting right at that true-leaf stage catches them at their peak tenderness and taste.
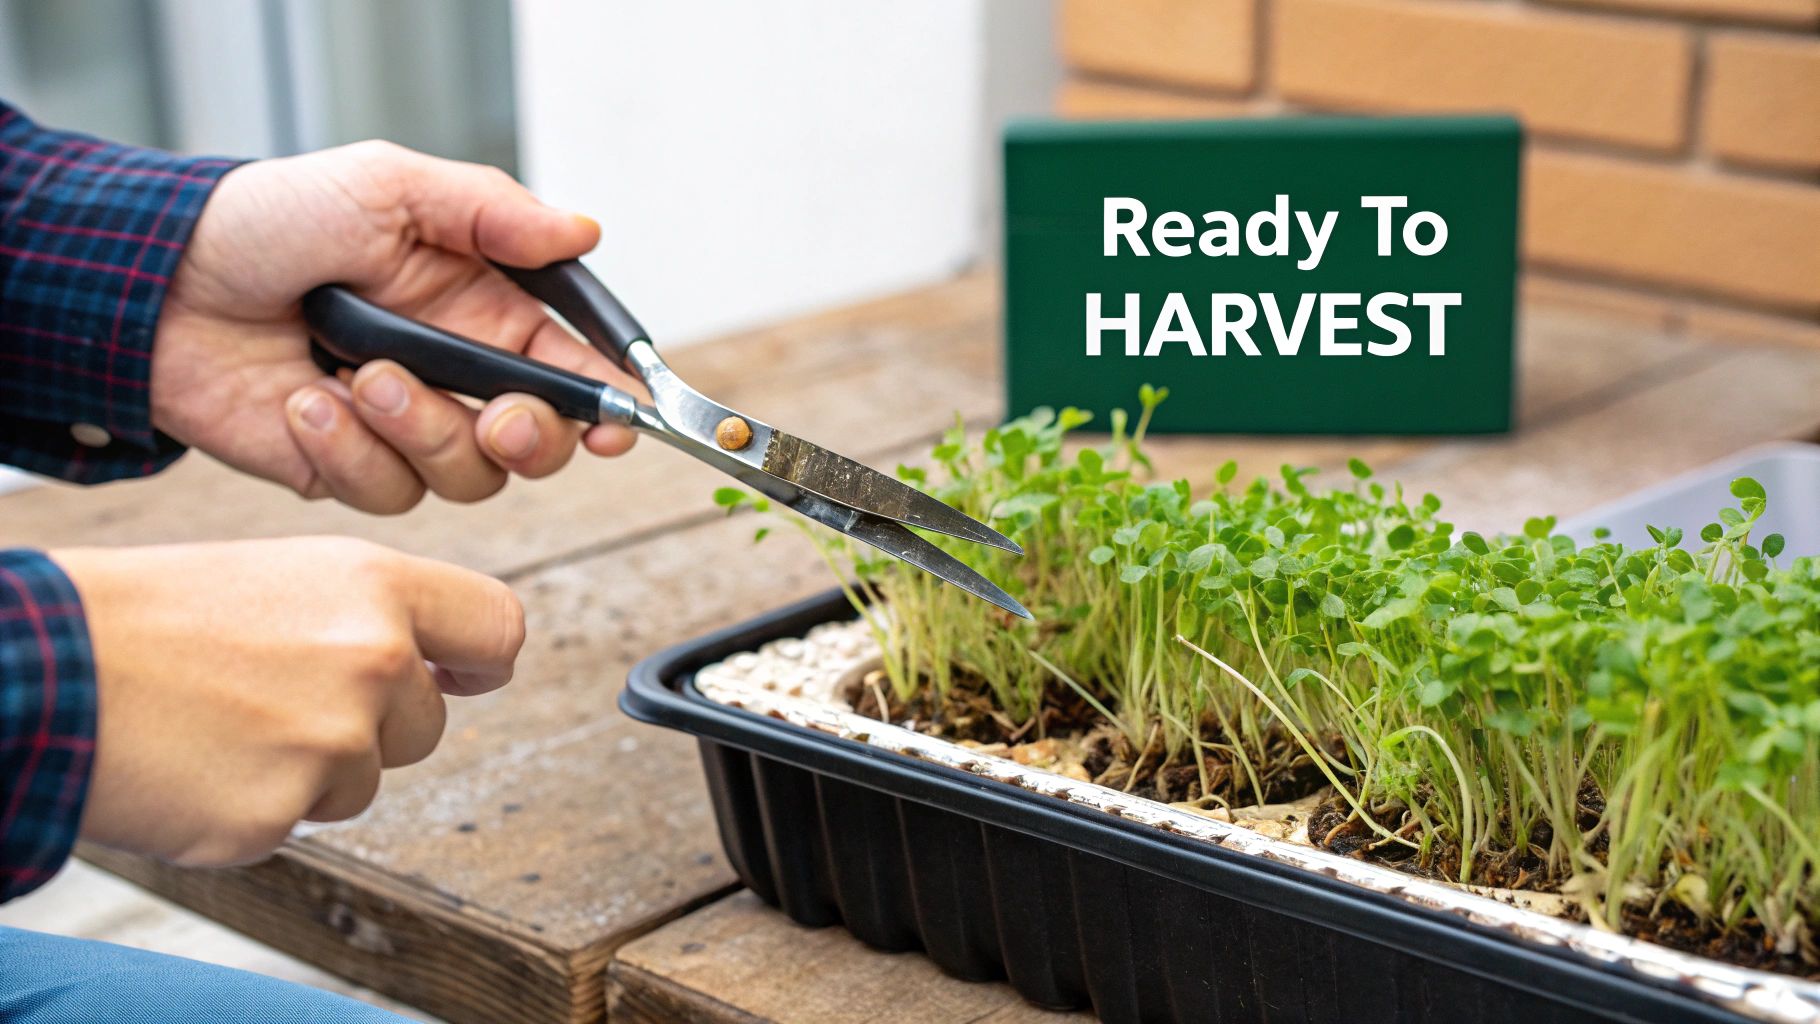
The Right Way to Harvest
When you see those true leaves, grab a pair of sharp kitchen scissors or a clean, sharp knife. I’ve found a long, thin blade works wonders for getting a clean slice across a whole row at once, but scissors are perfectly fine, too.
- Hold the Tops: Gently grasp a small bunch of microgreens near the top.
- Cut Above the Soil: Slide your blade or scissors in about a half-inch above the growing medium and snip them off.
- Keep it Clean: Cutting this way avoids pulling up any soil or coir, which saves you a lot of rinsing and cleanup later.
My best advice? Only cut what you need for your next meal. Microgreens are at their most vibrant and crisp the moment they're harvested. Treating your tray like a tiny, living salad bar means you can enjoy that just-picked freshness for several days.
Storing for Maximum Freshness
If you do harvest a whole batch at once, proper storage is your friend. Moisture is the enemy here, as it will turn your delicate greens into a slimy mess in no time.
To keep them fresh, gently sandwich the unwashed microgreens between a couple of dry paper towels. Slide the whole bundle into an airtight container or a resealable bag and pop it in the fridge. This little trick will keep them perfectly crisp for up to a week.
It's no surprise that these little powerhouses are becoming so popular. The global microgreens market is expected to hit a staggering USD 6.12 billion by 2030. They're not just showing up in salads; their antioxidant-rich profile is even making waves in the cosmetics industry. You can learn more about the exploding microgreens market on Grand View Research.
Answering Your Top Microgreen Questions
As you start your journey to grow microgreens indoors, you're bound to run into a few head-scratchers. Don't worry, we've all been there! It's just part of the learning curve. Let's walk through some of the most common questions and challenges that new growers face, so you can get back to growing with confidence.
Why Are My Microgreens So Tall and Floppy?
Ah, the classic "leggy" microgreen problem. If you're seeing long, weak, and pale stems, it's almost always a sign that your greens are desperate for more light. The technical term is etiolation—it’s the plant's way of stretching itself thin trying to find a better light source.
While the initial blackout period is crucial for germination, once those sprouts appear, they need intense light to thrive. For those short, stocky, and vibrant greens we're all aiming for, you need to provide 12-16 hours of strong, direct light every single day. A sunny south-facing window can sometimes work, but for consistent results, nothing beats a simple LED grow light.
Position the light just a few inches above the canopy. This ensures the light is intense enough to prevent stretching and encourages that beautiful, dense growth.
My favorite trick: Stand between your grow light and your greens. If your shadow on the tray is sharp and well-defined, your light is probably strong enough. If it's fuzzy and faint, your plants are starving for more light.
Is That White Fuzz on My Soil Actually Mold?
That moment of panic when you see white fuzz on your soil is a rite of passage for new growers. But take a deep breath—most of the time, what you’re seeing are root hairs, not mold. These are just tiny, fibrous extensions of the root system, and they are a sign of a very healthy, happy plant.
So, how can you tell the difference between good root hairs and bad mold? It's easier than you think.
- The Water Test: Give the fuzzy area a gentle misting with a spray bottle. Root hairs will instantly absorb the water and seem to disappear. Mold, on the other hand, will stay put, looking slimy or like a tiny spiderweb.
- The Smell Test: Get close and take a whiff. Healthy root hairs have no scent at all. If you smell something musty or like a damp basement, you've got mold.
True mold usually pops up from overwatering, poor air circulation, or planting your seeds too densely. To avoid it, always bottom-water your trays, use a small fan to keep the air moving, and give your seeds enough room to breathe.
Can I Reuse My Soil After a Harvest?
I know it’s tempting to try and save a few bucks by reusing your soil, but trust me on this one: it's a recipe for disaster. I strongly advise against it if you want consistent, healthy harvests.
The old growing medium is tangled with the root mat from your last crop. As those old roots start to decay, they become a perfect breeding ground for mold and other nasty pathogens that can wipe out your next batch of greens.
Beyond the disease risk, your first crop has already sucked up most of the available nutrients from the soil. The best practice is to start every tray fresh. Using a sterile medium like coconut coir gives each new crop a clean slate and the best possible start. It's a simple step that makes a huge difference when you're learning how to grow microgreens indoors.
Do My Microgreens Need Any Fertilizer?
This is one of the easiest questions to answer: no, they don't. The beauty of microgreens lies in their simplicity.
Everything a plant needs to get from seed to the microgreen stage is already stored inside the seed itself. Your growing medium is really just there to hold moisture and give the roots something to anchor into. Because the growing cycle is so short—typically just 7 to 14 days—you'll harvest them long before they would ever need outside nutrients.
In fact, adding fertilizer can do more harm than good by burning the plant's delicate young roots. All your microgreens need from you is clean water and plenty of light. It's that simple.
Ready to start your own indoor garden with seeds you can trust? At Homegrown Garden, we provide high-quality heirloom seeds, beginner-friendly kits, and all the guidance you need to grow with confidence. Explore our collection and start your journey today at https://www.homegrown-garden.com.

