

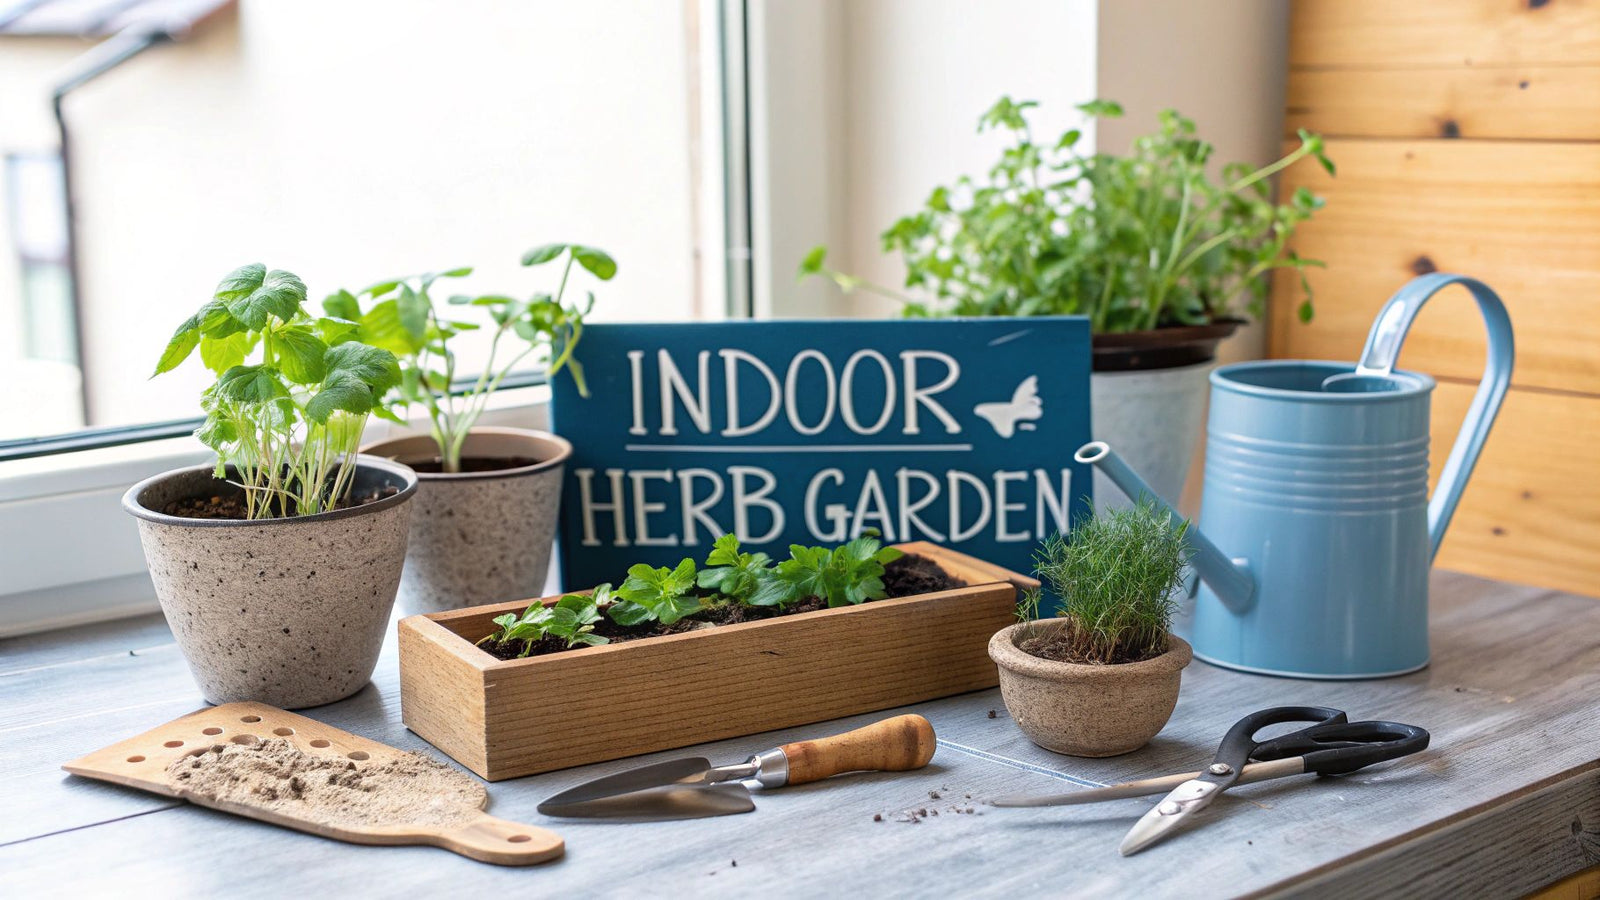

If you've ever thought about starting an indoor herb garden, let me tell you—it boils down to three simple things: give them enough light, pick the right plants, and please, don't drown them. It’s a project that brings fresh, organic flavor right to your kitchen, no matter how small your living space is.
3 Big Reasons You Should Start an Indoor Herb Garden
Picture this: you're making a pasta sauce and realize you need some basil. Instead of running to the store, you just snip a few fresh leaves from a plant on your windowsill. That's the simple joy of growing your own herbs. It's more than just having plants around; it's a practical way to seriously upgrade your cooking and bring a bit of green into your home.
This isn't just a niche hobby anymore. For anyone in an apartment or a house without a yard, it’s a game-changer. It's a great way to live a little more sustainably, cutting down on plastic packaging from store-bought herbs and ensuring what you're eating is completely free of chemicals. You're in total control.
It's Good for More Than Just Your Food
The obvious perk is having fresh ingredients on hand, but the benefits don't stop in the kitchen. An indoor herb garden can genuinely make your home a better place to be.
- 1. A Little Slice of Calm: Taking care of plants is a fantastic way to de-stress. I find that the simple ritual of watering and trimming my herbs is a perfect, mindful break from the chaos of the day.
- 2. Instant Decor Upgrade: A sunny spot filled with vibrant green herbs instantly adds life, color, and a wonderful, natural scent to any room. It just makes a space feel more alive.
- 3. Fresher Air: We all know plants are natural air purifiers. While a few pots of mint won't replace an air filter, they absolutely contribute to a healthier home. If you want to dive deeper into this, there's a great guide to improving indoor air quality that's worth a read.
This isn't just a feeling; it's a massive trend. The global market for indoor plants hit USD 21.40 billion back in 2025 and is only getting bigger. It's clear that more and more of us want to bring nature indoors. You can check out the full report from Custom Market Insights if you're curious about the data. Starting your own little garden is an easy way to get in on this wonderful movement.
Choosing Your First 7 Herbs To Grow Indoors
Alright, this is the fun part—picking out the herbs you'll actually grow. It’s easy to get carried away and want to plant everything, but trust me, starting with a few forgiving varieties is the secret to success. Some herbs are just naturally better suited for indoor life.
Think of it this way: some plants are high-maintenance sun-worshippers (looking at you, basil), while others are perfectly happy with a little less fuss (hello, chives). The goal is to match the plant's personality with the environment you can offer.
This visual guide is a great starting point for figuring out what you’ll need.
As you can see, classics like basil, mint, and parsley are popular for a reason—they're great team players in an indoor garden.
Top 7 Herbs for Indoor Beginners
I've grown a lot of herbs over the years, and these seven are the ones I always recommend to friends just starting out. They're resilient, don't get too big, and you'll actually use them in your kitchen.
- 1. Basil: This is the quintessential kitchen herb. Basil absolutely craves sunlight and warmth, so a south-facing window is its ideal home. Keep the soil moist but never soggy, and be sure to pinch off the top sets of leaves regularly. This little trick encourages it to grow out, not just up, giving you a much bushier plant.
- 2. Mint: A word of caution: mint is an enthusiastic grower. It's so vigorous that it's best to give it its own pot, otherwise it will quickly bully its neighbors. The good news is that it’s less picky about light than basil and can handle a bit of shade. Perfect for mojitos or a fresh cup of tea.
- 3. Chives: Looking for a nearly foolproof option? Chives are your answer. They do just fine with moderate light and won't hold a grudge if you forget to water them now and then. Their light, oniony flavor is incredible snipped over eggs or baked potatoes.
- 4. Parsley: Whether you prefer curly or flat-leaf, parsley grows well inside. It likes bright, indirect light and soil that stays consistently moist. It can be a little slow to get going from seed, but once it takes off, it's incredibly generous. Always snip the outer stems first to keep the new growth coming from the center.
- 5. Oregano: This Mediterranean herb loves two things: sun and dry soil. Let the pot dry out almost completely between waterings. Its punchy, earthy flavor is a must-have for any Italian or Greek cooking. A regular trim keeps it from getting long and "leggy."
- 6. Thyme: Here's another sun-lover that prefers its soil on the dry side. Thyme is a fantastic low-maintenance choice because it's quite drought-tolerant. Those tiny leaves are bursting with aroma, making it a star in roasts, stews, and soups.
- 7. Rosemary: If you have a very sunny, dry spot, rosemary is an amazing herb to grow. It can be a little finicky because it demands excellent drainage and hates having "wet feet" (soggy roots). But the pine-like scent and flavor it adds to savory dishes are absolutely worth it.
One of the most common mistakes I see is putting herbs with totally different needs in the same pot. For example, sun-loving, dry-soil rosemary will suffer next to moisture-loving basil. Grouping plants with similar light and water preferences is one of the biggest keys to a happy herb garden.
A 5-Herb Comparison Guide for Beginners
To make it even easier to choose, here’s a quick-glance table comparing my top five picks for absolute beginners. It’s a simple way to see which herbs will best fit the spots you have available and the food you love to cook.
| Herb | Light Needs (Hours/Day) | Watering Frequency | Best For (Cuisine) | Growth Habit |
|---|---|---|---|---|
| Mint | 4-6 (Indirect/Partial) | High (keep soil moist) | Teas, Cocktails, Middle Eastern | Spreading |
| Chives | 4-6 (Indirect/Partial) | Moderate | French, Soups, Eggs | Clumping |
| Parsley | 6+ (Bright, Indirect) | High (keep soil moist) | Italian, French, Garnishes | Bushy |
| Basil | 6-8 (Direct Sun) | High (keep soil moist) | Italian, Thai, Vietnamese | Upright/Bushy |
| Thyme | 6-8 (Direct Sun) | Low (let soil dry out) | Mediterranean, French, Roasts | Low/Spreading |
This table should help you narrow down your choices to the herbs that will not only survive but truly thrive in your home.
2 Quick Steps for Making Your Final Selections
So, how do you decide? First, think about what you actually cook. If you're always making pasta sauce, basil and oregano are no-brainers. Love a good roast chicken? Thyme and rosemary are your friends. There's no point in growing something you'll never use.
Next, be realistic about the light in your home. Take a day to notice which windows get strong, direct sun and for how long. If you’re still not sure where to begin, you can explore a more detailed list of the easiest herbs to grow indoors for more ideas. This will help you build a garden that you'll be proud of.
Gathering Your 7 Essential Gardening Supplies
Alright, you've got a list of herbs you're excited to grow. Now for the fun part: getting your hands on the right gear. Setting up your indoor garden is a crucial first step, but don't worry—it doesn't have to be complicated or break the bank. Making a few smart choices now will give your herbs the best possible start.
We'll break it down into three key things: the pots your herbs will call home, the soil that'll feed them, and whether to start from scratch with seeds or get a head start with young plants.
2 Keys to Choosing the Right Containers
Think of the pot as your herb's house. The single most important feature? Drainage. I can't stress this enough. If water can't escape, it'll sit at the bottom and rot the roots, which is a surefire way to kill your new plant.
- 1. What It's Made Of: You can't go wrong with classic terra cotta pots. They're porous, so they let the soil breathe and dry out evenly. Glazed ceramic or plastic pots are great too, just make sure they have holes in the bottom.
- 2. Picking the Right Size: Look for pots that are at least 6 inches deep. This gives the roots plenty of room to stretch out and get established. If you're growing something with a long taproot, like parsley or dill, go even deeper.
If there's one piece of advice I can give, it's this: never put a plant in a pot without drainage holes. It's the fastest way to doom an herb to root rot. If you find the perfect pot and it doesn't have holes, be prepared to drill a few yourself. Healthy roots depend on it.
Selecting the Perfect Potting Mix in 1 Step
It’s tempting to just scoop up some dirt from your backyard, but that's a classic rookie mistake. Garden soil is far too heavy for containers. It compacts over time, suffocating the roots, and can bring unwanted pests indoors.
What you need is a bag of potting mix. It’s specifically blended to be light and airy, providing the perfect balance of moisture retention and drainage that container plants crave.
For most herbs, a standard indoor potting mix works just fine. If you’re growing Mediterranean herbs like rosemary or thyme, they prefer soil that’s a bit grittier. An easy trick is to mix a handful of perlite or coarse sand into your potting mix to improve the drainage even more. If you're looking for inspiration on other useful tools, a guide to the best gardening gifts can give you some great ideas.
The 2 Choices: Seeds vs. Starter Plants
This decision really boils down to patience versus convenience. There's no wrong answer here; it just depends on the experience you're looking for. Starting with seeds is incredibly rewarding but takes time. Grabbing starter plants from a nursery gives you an instant green boost.
Your 7-Item Indoor Gardening Shopping List
- Pots with Drainage: Aim for at least 6 inches deep and wide.
- Saucers or Trays: A must-have for catching water and protecting your windowsills or counters.
- Well-Draining Potting Mix: Look for a blend made for container or indoor plants.
- Your Herbs: Either seed packets or small starter plants.
- Watering Can: A small one with a long, thin spout is perfect for getting water right to the soil without splashing the leaves.
- Small Trowel: Not essential, but it makes filling pots so much less messy.
- Grow Lights (Optional): If you don't have a sunny spot that gets 6+ hours of direct light, grow lights are a game-changer. Our guide on the best grow lights for indoor plants can help you choose the right one.
Finding The Perfect Spot For Your Herbs in 2 Steps
Okay, you’ve picked out your herbs and have all your supplies ready to go. This is the fun part, but the next decision is probably the most important one you'll make: where are you going to put them? For an indoor garden, light isn't just a "nice to have"—it's everything. It's the fuel your plants need to live and grow.
Think about the herbs you're growing. Most of the popular kitchen varieties are total sun-worshippers. They need a solid 6 to 8 hours of bright, direct sunlight every single day to be happy. If they don't get it, you’ll see them get "leggy." That’s when they stretch out, looking thin and weak, desperately reaching for any light they can find. The result is sad-looking plants with leaves that lack that fresh, punchy flavor.
So, before you commit to a spot, spend a day playing detective. Watch how the sun moves across your home. Take note of which windows get that gentle morning light and which ones get blasted by the intense afternoon sun. This little bit of observation will pay off big time.
Step 1: Identify Your Home's 4 Best Light Sources
It’s a common misconception that any window will do. The truth is, the direction your window faces makes a huge difference in the quality and amount of light your herbs will get.
Here’s a quick guide to what you can expect from your windows:
- 1. South-Facing Windows: This is the prime real estate for an indoor herb garden. These spots get the most direct, bright sunlight for the longest part of the day. It’s the ideal home for sun-loving Mediterranean herbs like rosemary, thyme, oregano, and basil.
- 2. West-Facing Windows: A great runner-up! These windows get a lot of strong, direct sun in the afternoon and evening. It can get a little hot for some of the more delicate herbs, but it’s still an excellent choice for most.
- 3. East-Facing Windows: These windows are perfect for herbs that prefer a gentler start to the day. The morning light is bright but not scorching, making it a good fit for plants like mint, chives, and parsley.
- 4. North-Facing Windows: Honestly, this is the toughest spot. North-facing windows offer the least light, and most herbs will struggle here. You might keep a mint plant alive, but it probably won’t thrive without a little help.
If you have a clear, unobstructed south-facing window, use it. That's your gold standard. It gives you the best shot at a lush, productive garden and the most options for what you can grow.
Step 2: What To Do When You Don't Have Enough Natural Light
Don't have a sunny windowsill to spare? Don’t give up. This is where a little bit of technology can completely change the game. A simple grow light can turn a dim kitchen counter or a dark corner into a perfect little herb-growing oasis.
This idea of using artificial light comes from a practice called controlled environment agriculture (CEA), where growers create ideal conditions indoors. For a deep dive, you can find more insights on how these systems support sustainability goals on imarcgroup.com.
But you don't need a high-tech, expensive setup to get started. A simple full-spectrum LED panel or even a clip-on grow light will work wonders. Just position the light a few inches above your plants and put it on a timer for about 12-14 hours a day. This gives your herbs a consistent "sunny" day, every day, helping them grow strong and flavorful no matter what the weather’s doing outside.
Your 3-Step Guide To Planting And Watering Like A Pro
Alright, you've got your supplies and found the perfect sunny spot. Now for the fun part—getting your hands dirty and bringing that herb garden to life. We’ll go through the planting process step-by-step and then tackle the biggest hurdle for new gardeners: watering.
Step 1: Prepping Your Pots
Before you even think about soil, let's get your pots ready. If you're using classic terra cotta pots, give them a good soak in water for about an hour. Why? Because bone-dry terra cotta acts like a sponge and will steal moisture straight from the soil, leaving your new herbs thirsty.
Once soaked, cover the drainage hole. A small piece of mesh screen or even a coffee filter works perfectly. This simple trick keeps your soil in the pot instead of letting it wash out all over your windowsill.
Now, fill your pots with potting mix, but stop about an inch from the rim. This little bit of headspace is a game-changer—it prevents a muddy mess from overflowing every time you water.
Step 2: Settling Your Herbs Into Their New Home
Whether you're starting with tiny seedlings or more established starter plants, the key is a gentle touch. Dig a small hole in the soil, just big enough for the root ball.
Carefully slide the herb out of its original container. If the roots are a tangled, compacted mess (what we call 'root-bound'), gently tease them apart with your fingers to encourage them to grow outward into their new home.
Set the plant in the hole, making sure the top of its root ball sits level with the surrounding soil. Fill in the gaps with more soil, pressing down lightly to get rid of any air pockets and make the plant feel secure.
Finish it off with a good, thorough watering to help it settle in. For a deeper dive, especially if you're starting from scratch with seeds, take a look at our guide on building an indoor seed starting setup.
Step 3: The Art of Watering Your Indoor Herbs
This is where most people go wrong. Overwatering is the number one killer of indoor herbs. It’s so easy to love your plants to death! The secret is to ditch the rigid schedule—forget "Watering Wednesdays"—and learn to read your plants instead.
The best advice I ever received was to "test, don't guess." Before you even pick up your watering can, stick your finger about an inch into the soil. If it feels dry at your fingertip, it's time to water. If it feels damp, wait another day or two and check again.
When it is time to water, be thorough. Pour water slowly and evenly over the soil until you see it start to drip out of the drainage hole. This ensures the water reaches the deepest roots, encouraging them to grow strong.
Just don't forget the final step: after about 15 minutes, dump out any excess water that has collected in the saucer. Letting your pots sit in a puddle is a surefire way to cause root rot.
For those who love a bit of tech, smart gardening is becoming more common. New systems use sensors to monitor soil moisture and automatically water your plants, taking the guesswork out of it entirely. You can learn more about these innovations by exploring the latest indoor plants market research.
3 Common Questions for Your Indoor Herb Garden
Even with the perfect setup, you're going to have questions as your little herb garden starts to grow. It happens to everyone! Think of this as your go-to guide for those "is this normal?" moments that every new indoor gardener experiences. Tackling these common issues early will keep small hiccups from turning into big headaches.
1. How Often Can I Actually Snip Off My Herbs?
This is the fun part—actually using what you've grown! You can usually start harvesting once your plants look sturdy and have plenty of leaves, which is typically about 4-6 weeks after you first planted them.
The trick is to think "a little bit, often." A great rule of thumb I've learned over the years is to never take more than one-third of the plant at once. This leaves it with enough energy to keep photosynthesizing and pushing out new, tasty leaves for you.
For herbs like basil and mint, pinching off the top leaves regularly actually signals the plant to grow bushier and fuller. For chives and parsley, it’s best to snip the outer stalks first, letting the new growth continue to sprout from the center.
2. What Are These Tiny Bugs on My Plants?
Bringing the outdoors in sometimes means you get a few uninvited guests. Don't worry, it's usually not a big deal. The most common culprits you'll see are spider mites, aphids, and fungus gnats. Catching them early is key.
- Spider Mites & Aphids: These guys love to hang out on the undersides of leaves. A quick spray of water with a few drops of mild dish soap is often all it takes to handle them.
- Fungus Gnats: Those annoying little flies buzzing around the soil? They absolutely love damp conditions. Your best bet is to let the top inch or two of soil dry out completely before you water again.
"A healthy plant is the best defense against pests. Stressed plants—those that are overwatered, underwatered, or not getting enough light—are much more susceptible to infestations. Focusing on providing the right basic care is your best preventative measure."
3. Do My Indoor Herbs Need Fertilizer?
Yes, but easy does it. The nutrients in a pot of soil aren't endless, and your herbs will eventually use them up. A little fertilizer gives them a gentle boost.
I usually wait a month or two after potting before I start feeding them. A balanced, all-purpose liquid fertilizer works great, but here's the crucial part: dilute it to half-strength. Full-strength can be way too intense and burn the roots. Feed them about once a month during their main growing seasons, spring and summer.
When fall and winter roll around, your plants naturally slow down. You can cut back on feeding to every other month, or even stop entirely until things pick up again in the spring. More isn't better here—over-fertilizing can actually make your herbs taste less potent.
At Homegrown Garden, we believe everyone can enjoy the satisfaction of growing their own food. Explore our curated selection of heirloom herb seeds and beginner-friendly kits to find everything you need to start your own thriving indoor garden today.

