

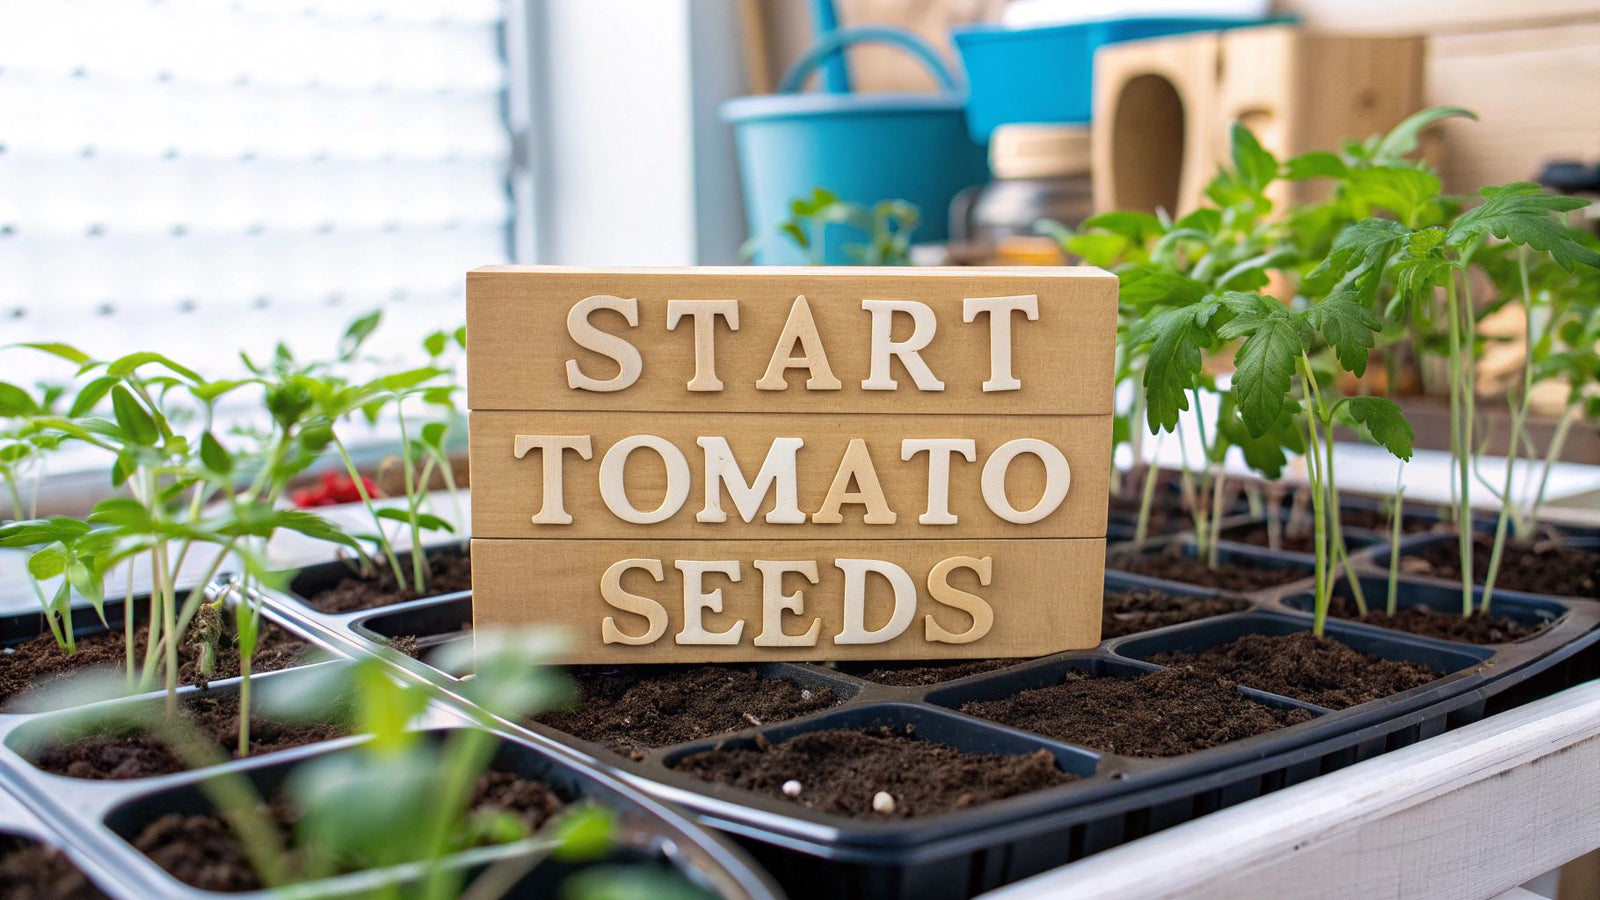

The secret to a bountiful tomato harvest starts long before you ever dig in the soil. For most of us, that magic number is starting seeds indoors about 6 to 8 weeks before the last expected frost date in your area. This timing is the sweet spot that gives your plants the perfect head start.
The 4 Keys to Nailing Your Tomato Seed Timing
Figuring out exactly when to start your tomato seeds is probably the most critical first step you'll take. Jump the gun, and you end up with "leggy," weak seedlings that struggle later on. Wait too long, and you're looking at a delayed, and often smaller, harvest.
Let's walk through the four key things you need to know to get this timing just right.
Find Your Last Frost Date
Your entire seed-starting calendar hinges on one crucial date: your average last frost date. This is the day on the calendar after which you can reasonably expect no more killing frosts in your specific garden.
The easiest way to find this is with a quick online search for your zip code plus "last frost date." For example, if your last frost is typically around May 15th, you'll count backward 6-8 weeks from there. That means you should be planting your seeds sometime between late March and mid-April.
The 6 to 8 Week Sweet Spot
So, why 6 to 8 weeks? This window isn't arbitrary. It's the ideal amount of time for a tiny tomato seed to sprout and grow into a sturdy little seedling with a strong root system and a few sets of true leaves. This makes them tough enough to handle the move outdoors without going into shock. We dive deeper into this timing in our guide on when to start seeds indoors.
A seedling grown for 6-8 weeks has the perfect balance of maturity and vigor. It’s old enough to be resilient but not so old that it becomes root-bound or stressed out in its small starter pot.
Avoid Common Timing Pitfalls
Every year, I see well-meaning gardeners start their seeds way too early out of pure excitement. It's an easy mistake to make, but it often leads to problems.
- Leggy Plants: Seedlings started too soon often stretch desperately towards their light source, becoming thin, pale, and weak.
- Outgrowing Their Home: A healthy tomato plant can quickly outgrow a small pot. Sticking to the timeline ensures they don’t get root-bound before it's safe to move them outside.
- Transplant Shock: A properly timed seedling is far better equipped to handle the move to the garden, which means it will start growing—and producing fruit—much faster.
This visual timeline is a great way to map out the process from seed to garden.
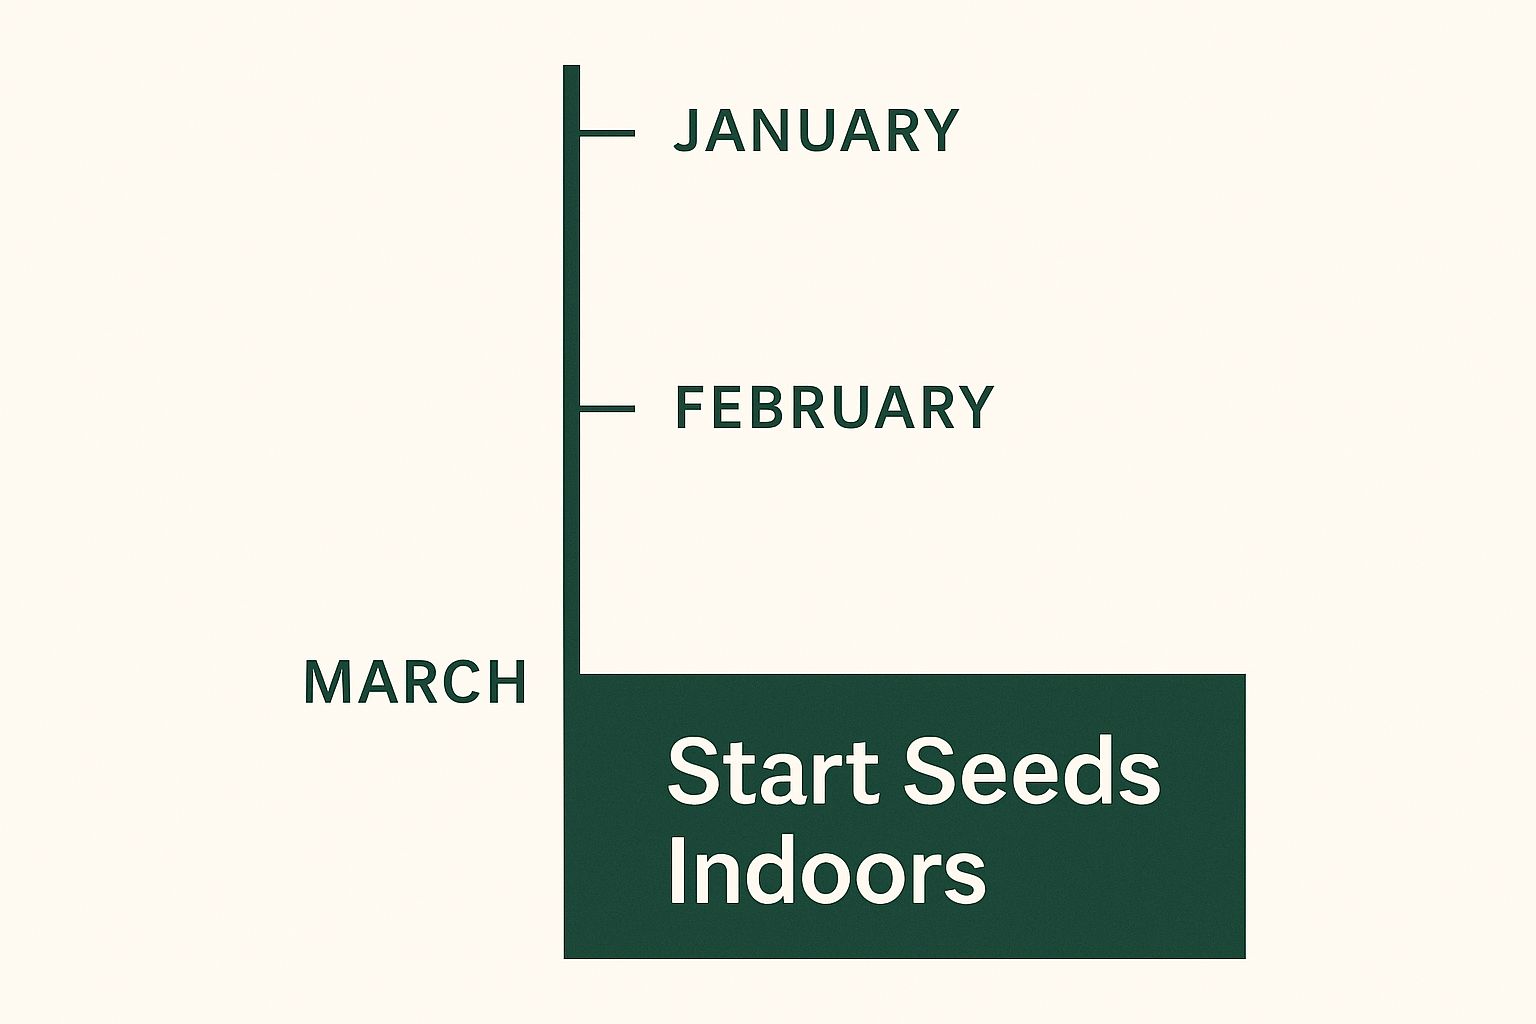
As you can see, that indoor growing period is where you set the foundation for a successful season.
Your Tomato Seed Starting Timeline
To make it even simpler, here's a quick-reference table. Just plug in your last frost date and work backward to build your own custom schedule.
| Stage | Timing Relative to Last Frost Date | Key Action |
|---|---|---|
| Start Seeds Indoors | 6 to 8 weeks before last frost | Sow seeds in trays under grow lights. Keep them warm and moist. |
| First True Leaves Appear | 4 to 6 weeks before last frost | Thin seedlings to one per cell and begin gentle weekly fertilization. |
| Potting Up | 3 to 4 weeks before last frost | Move seedlings to larger pots once they have 3-4 sets of true leaves. |
| Hardening Off | 7 to 14 days before last frost | Gradually acclimate plants to outdoor conditions (sun, wind, temps). |
| Transplant Outdoors | On or after last frost | Plant your hardened-off seedlings into their final garden spot. |
Following this timeline takes the guesswork out of the process and puts you on the direct path to a fantastic harvest.
Prepping Your Indoor Seed Starting Station: 7 Key Steps
Before you even think about tearing open a seed packet, it's worth taking some time to set up your indoor growing station. Honestly, a bit of prep work now is the single best thing you can do for your future tomato plants. It saves a ton of headaches down the road.
Let's walk through the seven essential pieces of the puzzle to create the perfect little nursery for your seedlings.
Find the Right Containers
You've got plenty of options here, from the classic plastic seed-starting trays to recycled yogurt cups or peat pots. The most important thing isn't what they're made of, but that they have good drainage. Whatever you choose, it absolutely must have holes in the bottom. Waterlogged soil is the fastest way to get root rot, which will kill your seedlings before they even get a chance.
Use a Sterile Seed Starting Mix
I know it's tempting to just go scoop some dirt from the garden, but trust me, that's a mistake. Garden soil is way too heavy, compacts easily, and is often full of weed seeds and pathogens that can wipe out your tiny plants. A high-quality, sterile seed-starting mix is light, fluffy, and designed to hold just the right amount of moisture without becoming a swamp.
Sanitize All Your Gear
This might seem like overkill, but it's a good habit to get into. Even if your pots are brand new, give everything a quick wash. I use hot, soapy water and then follow up with a quick soak in a solution of one part bleach to nine parts water. This kills any lingering fungal spores or bacteria that could cause "damping-off" disease.
Get Your Lighting Right
Here’s a hard truth most new gardeners learn: a sunny windowsill is almost never enough light for strong tomato seedlings. Without intense, direct light from above, your plants will stretch for the sun and become “leggy”—tall, thin, and super weak.
A simple fluorescent shop light or a dedicated LED grow light is pretty much non-negotiable for a good setup. For a complete walkthrough on this, check out our guide to building the ideal indoor seed starting setup.
A pro tip: Keep your lights just 2-3 inches above the tops of your seedlings and run them for 14-16 hours per day. This close proximity is the secret to getting those stocky, robust plants you're after.
Create Some Airflow
Stagnant, humid air is a breeding ground for fungal diseases. A small, oscillating fan set on low and aimed near your seedling trays is all you need. The gentle breeze does two things: it disperses humidity and it gently jostles the seedlings, which actually helps them build stronger, sturdier stems.
Gather Your Watering Tools
Watering delicate seedlings requires a light touch. A heavy stream of water from a big can will wash away seeds and flatten your tiny plants. A simple spray bottle for misting the soil surface is perfect for the early days.
Another great method is bottom-watering. Just place your trays in a shallow basin of water for 20-30 minutes and let the soil wick up moisture from the bottom. This encourages deep root growth and keeps the leaves dry.
Pre-Moisten Your Soil
Last but not least, never plant seeds into dry, dusty soil. Before you fill your containers, dump your seed-starting mix into a bucket or a small tub. Gradually add some warm water and mix it all together with your hands until it has the consistency of a wrung-out sponge. This ensures the entire mix is evenly moist from the start, giving your seeds the perfect environment to sprout.
The 5 Key Steps for Planting Tomato Seeds
Alright, your seed-starting station is all set up, and now comes the fun part: getting those seeds into the soil. Let's walk through the process together. Getting these initial steps right is the secret to a strong start and avoiding those common pitfalls that can stop your seeds before they even sprout.
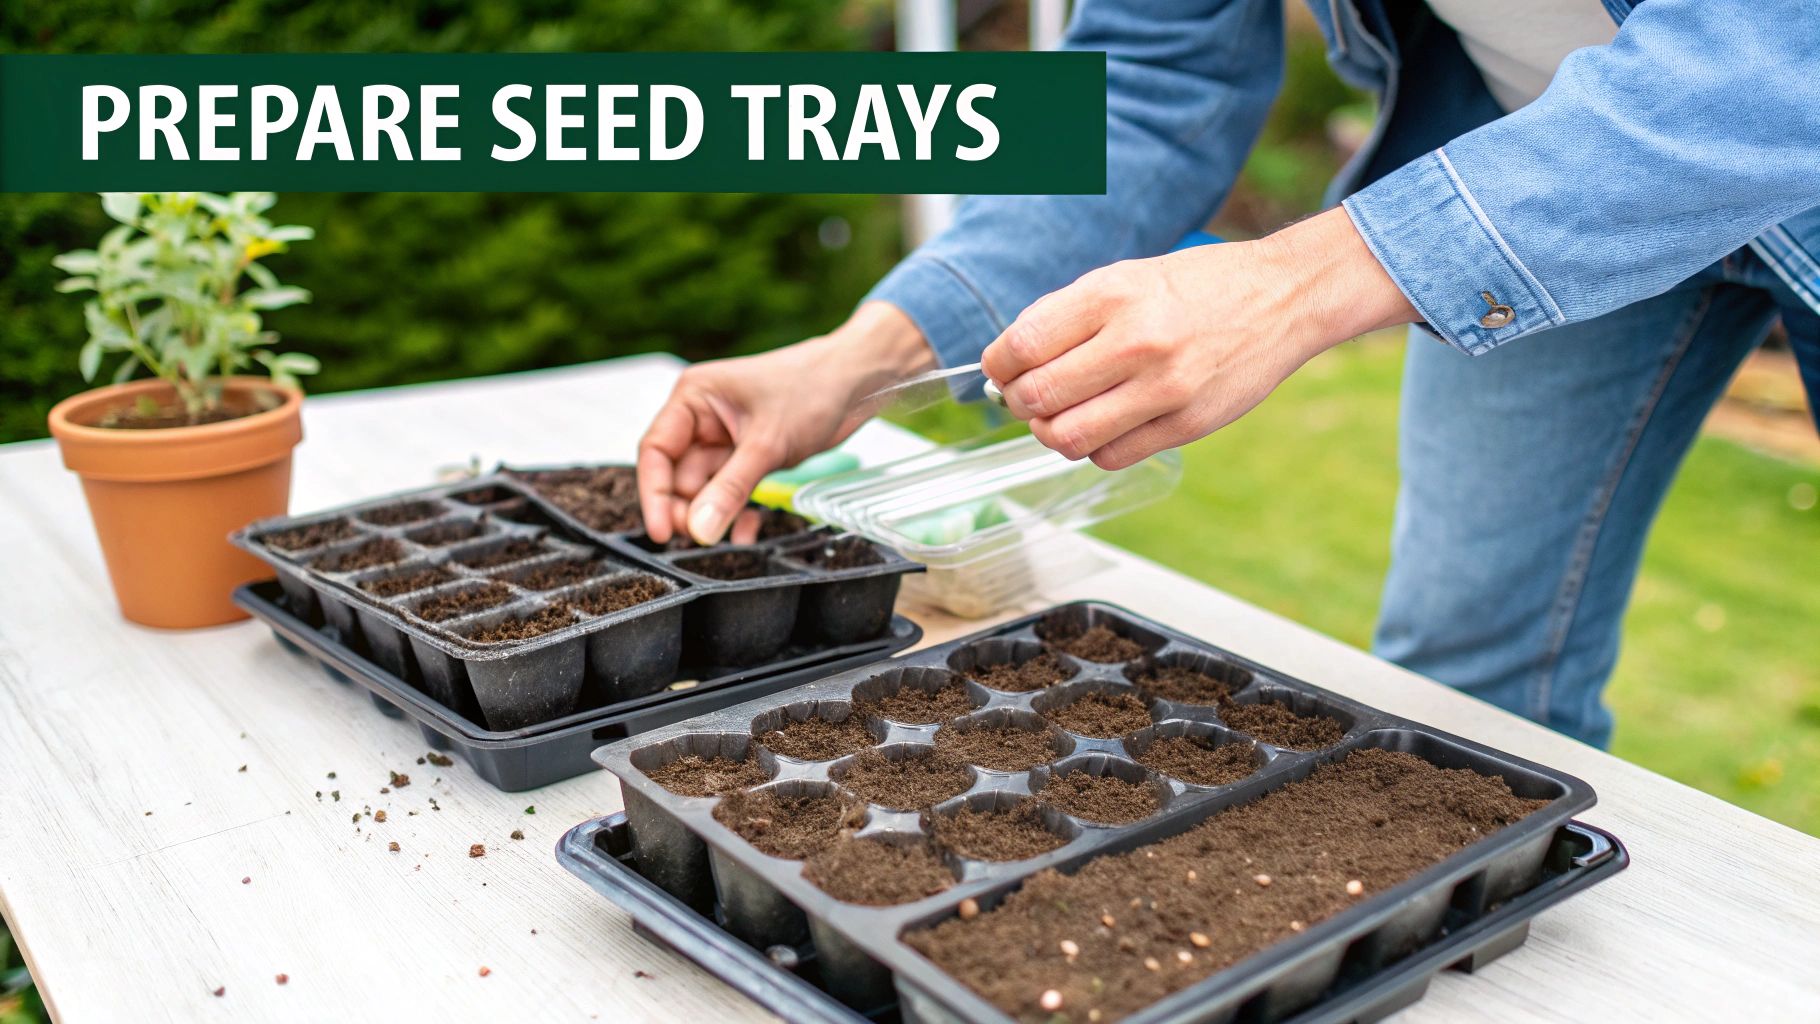
Nail the Planting Depth
One of the easiest mistakes to make is planting seeds too deep. It's a classic rookie error. For tomatoes, the sweet spot is only about 1/4 inch deep. If you go any deeper, the little seedling can run out of steam trying to push its way to the surface and the light.
I find the easiest way is to just make a small indentation in the moist soil with the tip of a pencil or even your pinky finger. Drop one or two seeds into each cell—planting a backup is always a good insurance policy—and then lightly brush the soil back over to cover them up.
Create a Humid Haven
To get tomato seeds to pop, you need two things: consistent warmth and high humidity. After you've planted everything, cover your seed trays with a clear plastic dome. This simple trick traps heat and moisture, creating a perfect little greenhouse environment that really kicks germination into high gear.
No dome? No problem. A piece of clear plastic wrap stretched over the tray does the exact same job. Just be ready to take the cover off the moment you spot the first green shoots peeking through. This restores airflow and prevents problems down the road.
Bring on the Warmth
While tomato seeds don't need light to actually germinate, they absolutely crave warmth. I always place my covered trays on a seedling heat mat. It keeps the soil at a steady temperature, which makes a huge difference in how quickly and evenly your seeds will sprout.
Most tomato varieties germinate best when the soil temperature stays between 75-85°F (24-29°C). In that range, you can expect to see tiny sprouts in as little as 5-7 days. For more details on what different seeds prefer, check out this super helpful guide: https://homegrown-garden.com/blogs/blog/seed-germination-temperature-chart.
Label Everything
This might sound like a no-brainer, but trust me, it's incredibly easy to forget which variety is which once they're all planted. Before you even open a seed packet, make your labels. A waterproof marker and a plastic plant tag are your best friends here. A piece of masking tape on the side of the tray works in a pinch, too.
Thin Them Out for Stronger Plants
Remember that "insurance seed" we planted? If both seeds in a cell sprout, you’ll have to make a tough choice and pick a winner. The best time to do this is after the seedlings have developed their first set of "true leaves" (the second set of leaves they grow).
Using a small pair of scissors, simply snip the weaker-looking seedling right at the soil line. It's important not to pull it out, as that can damage the delicate roots of the one you're keeping. This little sacrifice ensures the remaining seedling gets all the light, water, and nutrients it needs to grow big and strong. Before you know it, you'll be focused on preparing the soil for planting them into their final home in the garden.
11 Tips for Raising Strong Tomato Seedlings
Seeing those first green sprouts is always a thrill, but now the real work begins. Your role has officially shifted from seed-starter to plant-parent, and how you care for these little guys in their first few weeks will make all the difference come harvest time.
Here are my 11 go-to strategies for raising happy, healthy tomato seedlings that are destined for greatness.
Get the Light Right, Right Away
The second you see that first little green hook breaking through the soil, get that humidity dome off and blast it with light. I mean it. Your grow light should be just 2-3 inches above the tops of the plants, and it needs to stay on for a long day—think 14-16 hours every single day. This is probably the single most important thing you can do to prevent weak, spindly, "leggy" seedlings and grow stocky, robust little plants instead.
Water from the Bottom Up
Dribbling water from above is a recipe for disaster. It can easily knock over fragile seedlings and creates damp conditions around the stem that invite fungal diseases like damping-off. The better way is to bottom-water. Just set your entire seed tray inside a larger, solid tray (a baking sheet works in a pinch) and pour an inch or so of water into the outer tray. Let it sit for 20-30 minutes so the soil can wick up moisture from the drainage holes. This encourages roots to grow down deep, searching for that water.
Create a Little Breeze
Out in the real world, a plant has to deal with the wind. This constant movement signals the stem to get thicker and stronger to stay upright. You can mimic this indoors by aiming a small oscillating fan near your trays for a few hours each day. The gentle breeze not only builds resilience but also helps with air circulation, keeping fungal issues at bay.
Time for Their First Meal
Your seedlings won't need any fertilizer until they grow their first set of "true leaves." These are the second pair of leaves that pop out, and they'll look like tiny, classic tomato leaves, not the simple, oval-shaped "seed leaves" (cotyledons) they started with.
Once you see those true leaves, it's time to start a weak feeding routine. I use a liquid fertilizer diluted to quarter-strength, once a week. It’s just enough to give them a boost without burning their delicate new roots.
Thin the Herd
If you planted two seeds in each cell and both came up, you have to play favorites. It feels cruel, I know, but you have to pick one and sacrifice the other. The best way to do this is to take a pair of small scissors and snip the weaker-looking seedling right at the soil line. Don't pull it out! That could disturb the roots of the seedling you want to keep.
By choosing the strongest seedling, you're giving it all the resources—water, nutrients, and light—to thrive without competition. Two seedlings in one cell will only lead to two weaker plants.
Keep Things Moving
Even with a good grow light setup, some areas will inevitably get more intense light than others. To make sure all your plants grow evenly, just give the tray a quarter-turn every day. It's a simple habit that prevents some seedlings from leaning or stretching to reach for the light.
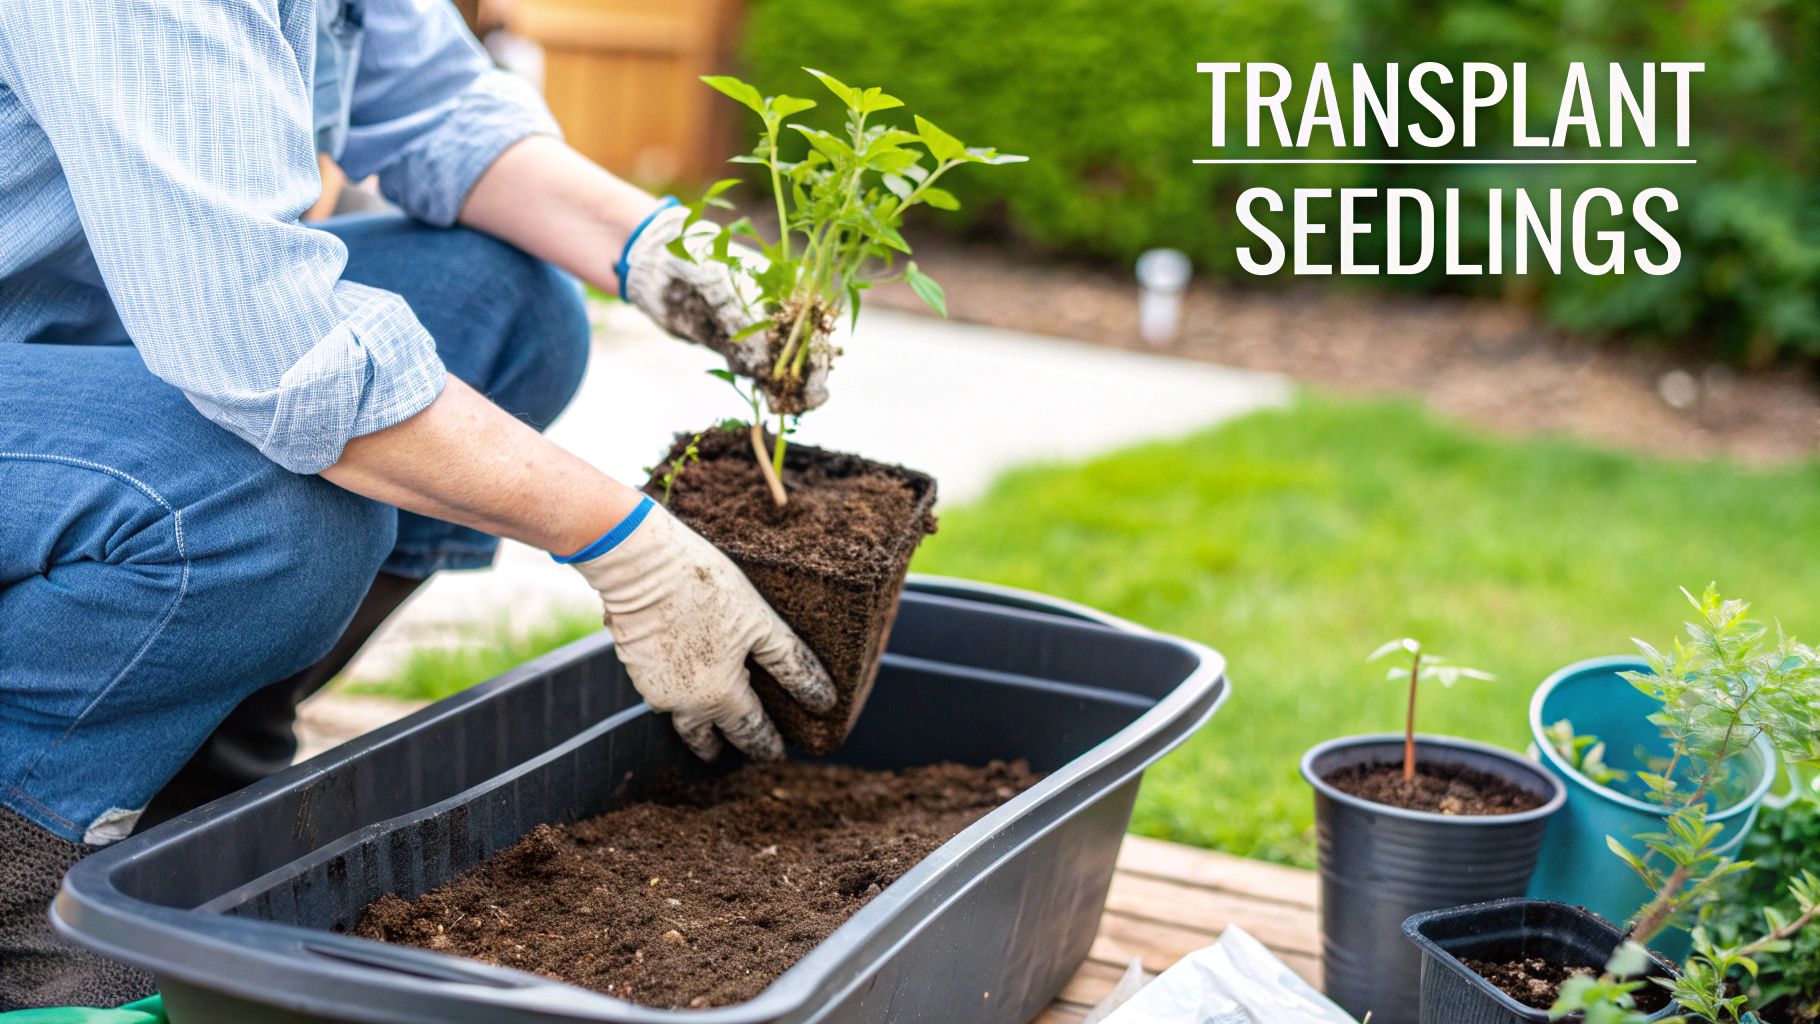
Know When It's Time for a Bigger Home
Eventually, your seedlings will outgrow their tiny starter cells. You'll know it's time to "pot up" when they're about 3-4 inches tall and have developed 3-4 sets of true leaves. Moving them to a larger container, like a 4-inch pot, gives their root system the space it needs to expand and get strong.
Bury That Stem
Here’s a fantastic trick unique to tomatoes: they can grow roots all along their stems. When you move your seedling into its new, bigger pot, don’t be afraid to bury a good portion of that main stem. All those little fuzzy hairs on the stem will turn into roots (they're called adventitious roots), creating a much more extensive and robust root system for the plant.
Stay on Top of Watering
The goal is consistent moisture, not soggy soil. Let the very top surface of the soil get a little dry between waterings, but never let the whole cell dry out completely. A stressed seedling is a vulnerable seedling. A great tip is to just pick up the tray every day. You'll quickly get a feel for how heavy it is when it's perfectly watered versus when it's getting light and thirsty.
Watch Out for Pests
Indoor pests aren't as common, but you might run into fungus gnats—those tiny, annoying flies buzzing around your plants. Their presence is almost always a sign that you're overwatering. Let the soil surface dry out more thoroughly between waterings to break their life cycle; their larvae can't survive in dry soil.
Don't Sweat the Germination Rate
Finally, don't panic if every single seed doesn't sprout. It's totally normal. Even under perfect conditions, not every seed is viable. For example, one large-scale experiment found an average 83.4% germination rate across almost 1,600 seeds, which is actually considered very good. You can see all the data from these tomato seed tests on joegardener.com. This is exactly why it's always a good idea to plant a few more seeds than you think you'll need.
The 7-Step Countdown to Planting Out
After weeks of babying your tomato seedlings inside, I know how tempting it is to just plop them straight into the garden. But trust me, that's a recipe for disaster. You have to go through a process called hardening off, which is just a fancy way of saying you need to get your plants used to the great outdoors.
This isn't a step you can skip. Think of it like this: your seedlings have been living in a climate-controlled spa. Suddenly throwing them into the harsh world of direct sun, wind, and chilly nights can shock them so badly they'll either stop growing or die.
Here’s the simple, seven-step schedule I use every year. It works like a charm.
Your Day-by-Day Hardening Off Guide
Remember, this is a guideline, not a rigid rule. The most important thing is to watch your plants and the weather. If a surprise cold snap or a crazy windy day rolls in, just keep them inside and pick up where you left off tomorrow.
-
Step 1: The Gentle Introduction (Day 1) Start slow. Find a protected spot that gets dappled shade—think under the cover of your porch, a big leafy tree, or even on the north side of your house. Give them just one hour out there and then bring them back in.
-
Step 2: Build Tolerance (Day 2) Back to the same shady spot, but this time, let them hang out for two hours. We're building up their tolerance little by little.
-
Step 3: A Taste of Sunshine (Day 3) Now it’s time for a taste of sunshine. Let them stay outside for three hours total. For at least one of those hours, let them get some gentle, direct morning sun. The afternoon sun is way too strong at this point.
-
Step 4: Increase Sun Exposure (Day 4) We're upping the ante. Today, they get four hours outside, with about half of that time in the morning sun. You’ll notice the soil in their little pots dries out much faster now, so keep an eye on their water.
-
Step 5: Get Tougher (Day 5) Your plants are getting tougher! They can now handle five to six hours outside, with a good three or four hours of that in direct sun. Their leaves are building up a "sunscreen" to handle the UV rays.
-
Step 6: The Long Haul (Day 6) Today they spend most of the day outside—a full eight hours or so, mostly in the sun. Just be sure to bring them in before the temperature drops in the evening. They should be looking strong and sturdy.
-
Step 7: The Final Exam (Day 7) This is the final exam. If the forecast looks good and temps will stay above 50°F (10°C), leave your plants out for the full 24 hours, overnight and all. If they cruise through this without any issues, congratulations! They are officially ready to be planted in their permanent garden home.
Listen to Your Plants: Always watch for signs of stress. If you see their leaves wilting, or worse, getting white, sun-scalded patches, you're pushing them too hard. Dial back the sun exposure for a day or two before you continue. This gentle approach is the absolute key to avoiding transplant shock and getting your tomato season off to a fantastic start.
3 Common Questions About Starting Tomato Seeds
Even the most carefully planned seed-starting projects can run into hiccups. Below, I’ve gathered a handful of real-world questions that tend to pop up. Think of this as troubleshooting your indoor garden with a friend who’s been there.
1. Can I Start Tomato Seeds Later Than Recommended?
You can – but it comes with compromises. Kicking off seedlings just 4-5 Weeks before your last frost often means they’re still on the small side when it’s time to plant outside.
That usually leads to:
- A delayed first harvest
- Shortened productive season in cooler climates
- Potentially lower overall yield
When I’ve fallen behind, I pick one of the faster-maturing varieties to claw back lost time. Cherry tomatoes or early-season hybrids can save you a few precious weeks.
Quick Tip: Pair slower starters with heat-loving varieties in scorching regions, or vice versa in cooler spots, to even out harvest timing.
2. What Are Leggy Seedlings And How Do I Fix Them?
You’ll know them by sight: tall, spindly stems and pale leaves. Those seedlings are reaching, desperately chasing light.
Here’s what really works:
- Move Lights Closer: Keep your grow light just 2-3 Inches Above the foliage.
- Add Airflow: A gentle fan for a couple of hours a day strengthens stems.
- Bury Deeply: When transplanting, deepen the stem—tomatoes root along buried sections, giving you a sturdier plant.
In my first season, I ignored fans and ended up with flop-sy seedlings. A simple desk fan made all the difference the next year.
Remember: Leggy isn’t lethal. Tomatoes bounce back when treated right.
3. Is A Sunny Window Good Enough For Seedlings?
A bright windowsill looks dreamy, but sunlight through glass rarely delivers the 14-16 Hours of direct, even light seedlings crave. One-sided exposure almost guarantees lopsided growth.
Instead, consider:
- A basic LED grow light
- An affordable fluorescent shop light
These options ensure your tomato starts stay compact, leaf-filled, and ready for the garden.
Investing in proper lighting up front means fewer re-digs and healthier plants down the line.
At Homegrown Garden, we believe everyone can grow their own food. Find the perfect heirloom seeds and beginner-friendly kits to start your journey at Homegrown Garden.

