

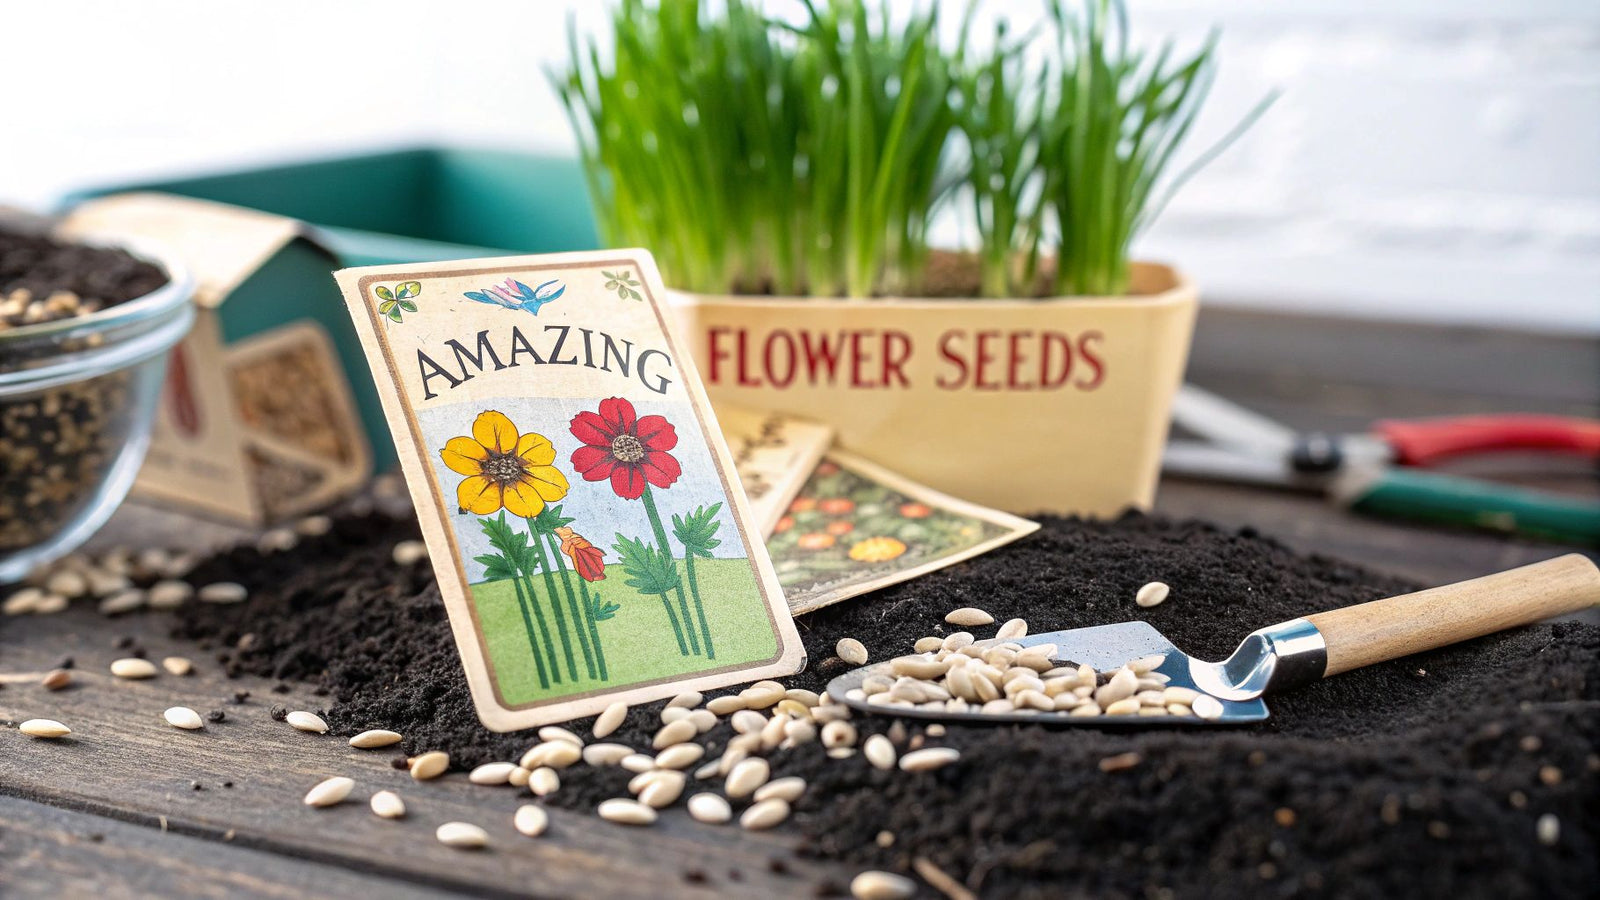

Starting a garden from seed is one of life's simple joys, but success begins long before you get your hands dirty. Think of it less as a science and more as a matchmaking process—you're trying to find the perfect flower seeds for your specific patch of earth. The trick is to align your choices with your climate, soil, and sunlight. Once you know what your garden offers, you can confidently choose between annuals, perennials, and biennials that are set up to thrive.
7 Key Factors for Choosing the Right Flower Seeds
Standing in front of a rack of flower seeds can feel a bit overwhelming. With thousands of options, where do you even begin? Don't worry. A beautiful, thriving garden comes down to just a handful of smart decisions made right at the start. Let's walk through the seven most important things to consider to make sure you pick the perfect seeds for your garden dreams.
1. Know Your Climate Zone
First things first: you need to know your USDA Plant Hardiness Zone. This isn't just jargon; it’s the single most important piece of information for a gardener. The zone map tells you which plants can survive the winter in your specific area. Choosing seeds suited to your zone is the difference between a garden that flourishes and one that's a constant struggle.
2. Assess Your Sun Exposure
Take a day to be a sun detective in your own yard. Watch where the light falls and for how long. This simple observation will tell you if you have a spot for "full sun" plants (6+ hours of direct light), "part sun" plants (4-6 hours), or "full shade" plants (less than 4 hours). Trying to grow a sun-worshipping Zinnia in a shady corner will only give you a sad, leggy plant with hardly any flowers.
3. Understand Your Soil Type
Your soil is the foundation for everything. Is it sandy and drains in a flash? Or is it heavy clay that holds water like a sponge? Maybe you're lucky and have that perfect, loamy middle ground. Many seed packets will give you clues about what the plant prefers. For example, Lavender absolutely loves dry, sandy soil, while a plant like Astilbe needs rich, moist conditions to be happy. If you're not sure, a simple soil test can give you a world of insight.
4. Decide on Annuals, Perennials, or Biennials
Getting a handle on a flower's lifecycle is your secret weapon for garden planning. Each type has a unique role to play, whether you're looking for a quick burst of color or a long-term garden backbone.
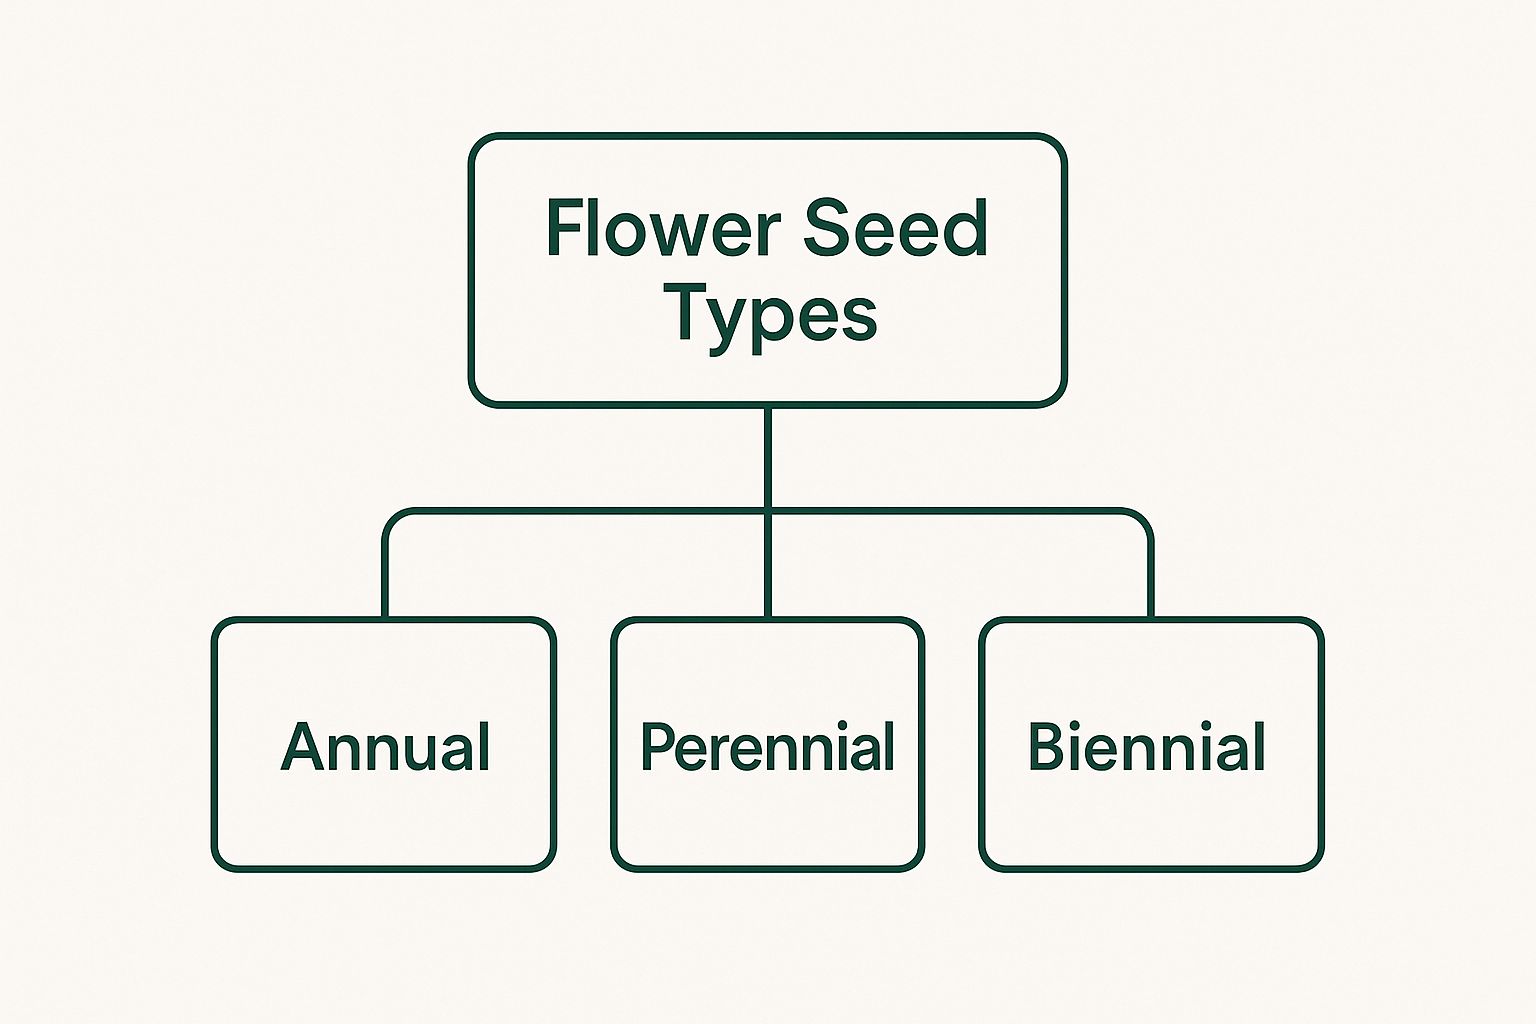
This quick breakdown helps you visualize whether you're planting for a single spectacular season, a two-year surprise, or a garden that comes back year after year.
Comparing Annual, Perennial, and Biennial Flower Seeds
Deciding between these three types can feel tricky, but it really comes down to what you want your garden to do. Are you renting and just want a splash of color for the summer? Or are you putting down roots and want your garden to grow with you? This table breaks it down.
| Seed Type | Lifecycle | Bloom Time | Best For |
|---|---|---|---|
| Annual | Completes its lifecycle in one year (seed to flower to seed). | Blooms profusely for one season, usually summer until first frost. | Quick, vibrant color, filling gaps, and container gardening. |
| Perennial | Lives for three or more years, returning each spring. | Typically has a shorter, specific bloom window (e.g., a few weeks). | Creating a long-term garden foundation and low-maintenance structure. |
| Biennial | Completes its lifecycle in two years. | Grows foliage the first year, then flowers, sets seed, and dies the second year. | Cottage gardens and adding unique, often old-fashioned, charm. |
Ultimately, most of us end up with a mix. Annuals provide that season-long "wow" factor, while perennials form the reliable backbone of the garden that greets you again every spring.
5. Learn to Read Seed Packets
Think of a seed packet as your plant's personal instruction manual. All the critical information you need is right there. Make sure to look for:
- Days to Germination: How long you’ll have to wait for that first exciting sprout.
- Sowing Depth: Exactly how deep to plant the seed. Too deep and it won't have the energy to reach the surface!
- Spacing: How much room to leave between plants to prevent them from fighting for resources.
- Mature Height: The plant's final size, which is crucial for deciding where it goes in the garden (tall plants in the back!).
6. Consider Native and Heirloom Varieties
Native plants are the unsung heroes of a low-maintenance garden. They're already perfectly adapted to your local climate and soil, and they're fantastic for supporting local bees, butterflies, and birds. Heirloom seeds, on the other hand, are like little pieces of history. They are open-pollinated varieties that have been saved and passed down for generations, often treasured for their incredible fragrances, flavors, or unique looks.
By selecting plants that express desirable traits, whether that’s height, color, or long-lasting blooms, you’ll move your seed stock closer to your ideal.
7. Factor in Your Gardening Goals
Finally, ask yourself: why are you planting this garden? Do you dream of cutting fresh bouquets for your kitchen table? Then you'll want to look at flowers like Snapdragons or Cosmos. Is your goal to create a buzzing haven for pollinators? Coneflowers and Milkweed are your best friends. Or maybe you just want a beautiful, low-fuss space that offers waves of color all season long. Your personal vision is the final, most important filter for choosing the right flower seeds.
It’s clear that more and more people are discovering the joy of gardening. The global flower seeds market is expected to grow from USD 2.71 billion in 2025 to USD 3.96 billion by 2032, with Europe currently leading the way. You can learn more about the flower seed market's impressive growth on Fortune Business Insights. This trend shows just how many of us are connecting with the simple, rewarding act of planting a seed and watching it grow.
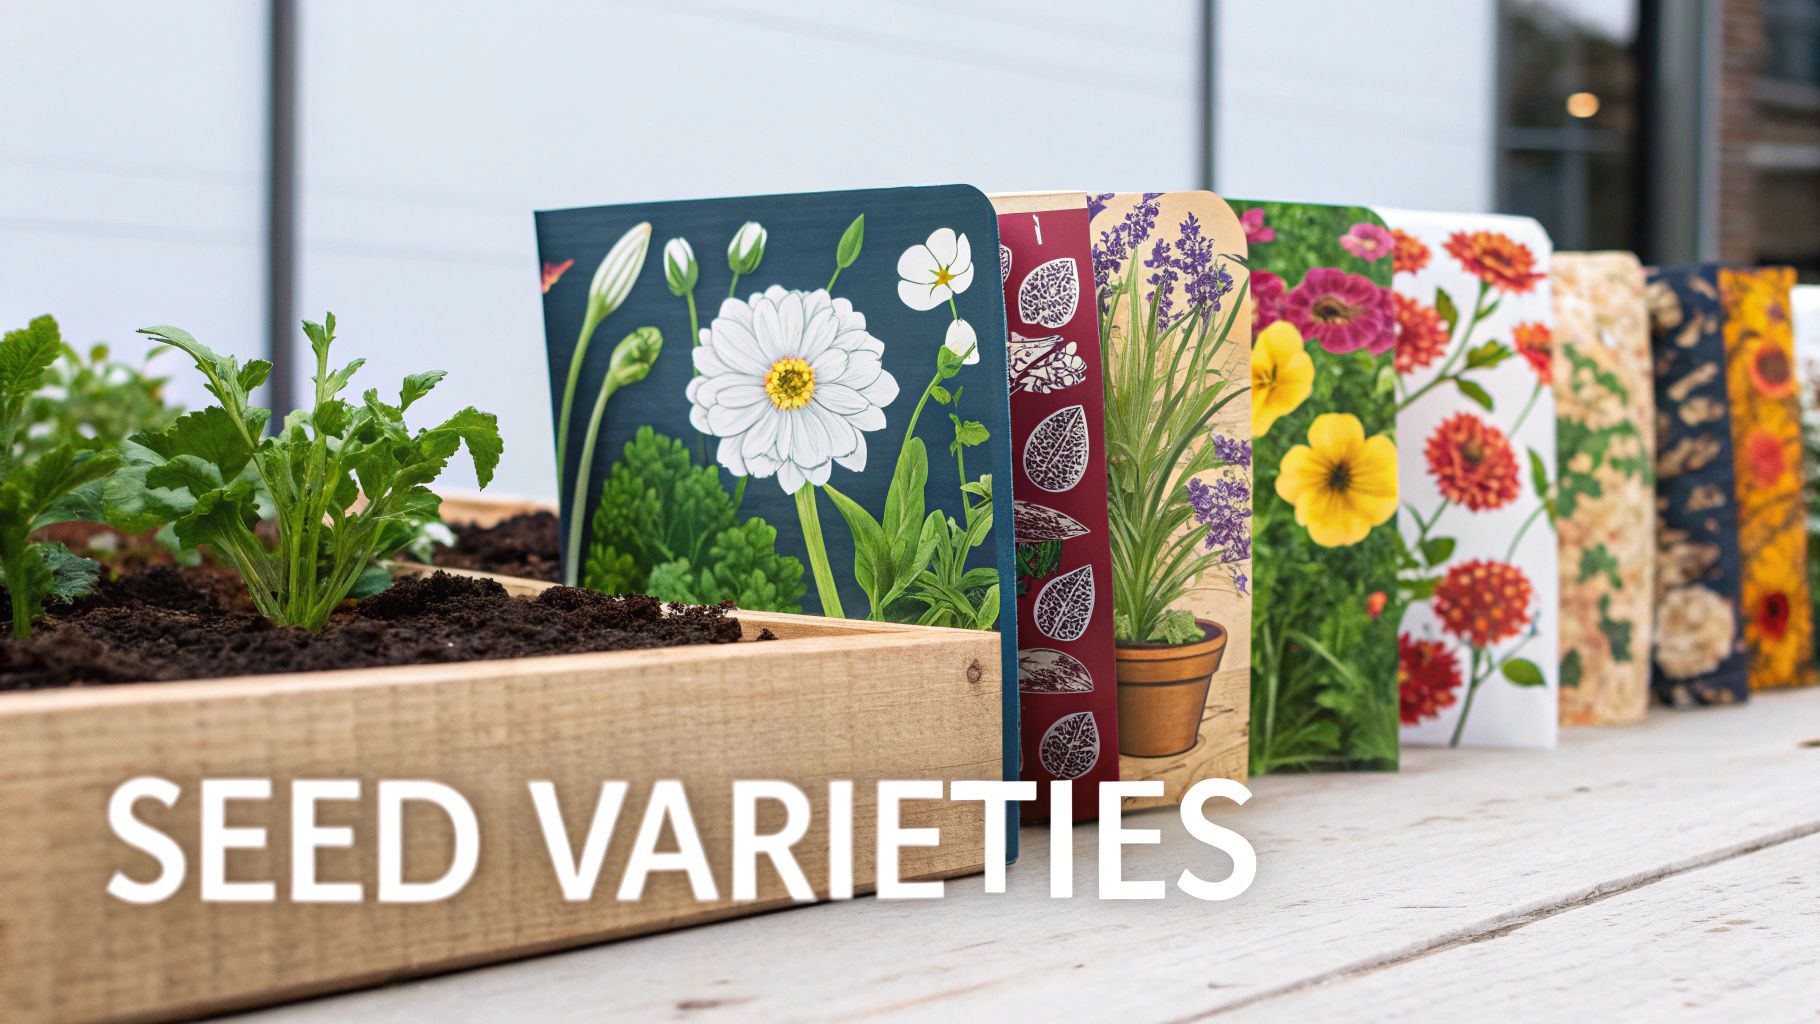
11 Easy-to-Grow Flower Seeds for Beginners
Jumping into gardening with a packet of seeds can feel a little daunting, but choosing the right flowers can make all the difference. The secret isn't some special skill—it's picking plants that are forgiving, tough, and practically leap out of the ground. This list is my go-to for anyone starting their first garden. These 11 foolproof flowers are known for their reliable sprouting and robust growth, helping you get a gorgeous splash of color that builds your confidence for many seasons to come.
1. Marigolds (Tagetes)
Marigolds are what I call the workhorses of the garden. They are ridiculously easy to grow from seed, often sprouting in less than a week, and they aren’t fussy about soil. They’ll even put on a good show in poor clay.
But their bright orange and yellow blooms are more than just pretty faces. Marigolds are famous for warding off soil pests like nematodes and even discouraging rabbits. This makes them a fantastic companion for your vegetable patch. Just poke the seeds about 1/4 inch deep after the last frost, and they’ll take it from there.
2. Sunflowers (Helianthus annuus)
Is there anything that screams "summer" more than a giant sunflower? Growing them is a pure joy, especially with kids. The seeds are big and easy for small hands to manage, and their growth is so fast it feels like magic.
All sunflowers really ask for is a spot with full sun and soil that drains well. Plant the seeds about 1 inch deep and 6 inches apart, then stand back and watch them shoot for the sky. The flowers are a magnet for bees and butterflies, and after they fade, you can either harvest the seeds for a snack or leave them out as a winter feast for the birds.
3. Zinnias (Zinnia elegans)
If you're after a non-stop explosion of color, Zinnias are your answer. These annuals absolutely love the heat and will pump out blooms from early summer right up until the first frost. They're also one of the best flowers out there for attracting butterflies.
Just be sure to give them some breathing room to prevent powdery mildew, a common issue in humid weather. Sow the seeds 1/4 inch deep right in the garden once the soil is warm, and you’ll see your first flowers in about 60 days.
Zinnias are a "cut-and-come-again" flower. This means the more you snip blooms for bouquets, the more you encourage the plant to produce new ones. It’s a beautiful cycle that gives you a continuous supply all season.
4. Cosmos (Cosmos bipinnatus)
With their delicate, daisy-like flowers and feathery leaves, Cosmos bring a soft, airy vibe to the garden. They are incredibly low-maintenance and will happily grow in poor, dry soil. In fact, if you give them soil that’s too rich, you’ll get more leaves than flowers!
To plant them, just lightly press the seeds into the soil’s surface; they actually need a little light to germinate. They’ll bloom like crazy with very little water, attracting bees and other helpful insects.
5. Nasturtiums (Tropaeolum majus)
Nasturtiums are the ultimate multitaskers. Not only are they a breeze to grow, but their leaves, flowers, and even their seed pods are edible, adding a fun, peppery kick to salads.
They also work as a "trap crop," luring pesky aphids away from your more prized plants like tomatoes or roses. Just plant the big, wrinkly seeds about 1/2 inch deep in a sunny spot with average soil.
6. Sweet Peas (Lathyrus odoratus)
For a touch of romantic charm and an absolutely enchanting fragrance, you can’t beat Sweet Peas. These climbing vines produce gorgeous, ruffled blossoms that are perfect for cutting. They prefer cooler weather, so get them in the ground as soon as the soil is workable in early spring.
- Soaking Tip: To give them a head start, soak the seeds in water overnight before planting. This helps soften their tough outer coat.
- Support: Be sure to give them a trellis, net, or fence for their little tendrils to grab onto.
- Sunlight Needs: They love sun on their leaves but prefer their roots to stay cool. A simple layer of mulch around the base does the trick.
7. Morning Glories (Ipomoea purpurea)
These vigorous climbers are your best friend for quickly covering an ugly fence, a bare wall, or an arbor. Their trumpet-shaped flowers put on a daily show, famously opening with the morning sun and closing in the afternoon. Plant the seeds 1/2 inch deep once all danger of frost is gone.
8. Calendula (Calendula officinalis)
Also known as pot marigold, Calendula is a cheerful, cool-season flower that’s incredibly resilient. It often self-seeds, meaning you’ll likely see it pop up again next year all on its own. The petals are edible and have been used for centuries in herbal salves and teas.
9. Poppies (Papaver rhoeas)
For a touch of wildflower whimsy, poppies are a fantastic choice. The seeds are tiny, almost like dust, so a good trick is to mix them with a bit of sand before scattering them over the soil. They need a cold period to wake up, a process called cold stratification, so sow them in late fall or very early spring.
10. Bachelors Buttons (Centaurea cyanus)
Sometimes called cornflowers, these tough, drought-tolerant plants produce charmingly fringed flowers in beautiful shades of blue, pink, and white. They are another cool-weather lover that can be planted directly in the garden in early spring. Plus, they make wonderful, long-lasting cut flowers for bouquets.
11. Four O'Clocks (Mirabilis jalapa)
Just as their name suggests, these unique flowers wait all day to open in the late afternoon. They stay open all night, releasing a lovely, sweet fragrance into the evening air. They are incredibly easy to grow from seed and don't mind poor soil or even a bit of shade. Their vibrant, trumpet-shaped blooms are a favorite of hummingbirds and moths.
Your 9-Step Guide to Sowing Flower Seeds Indoors
Giving your flowers a head start indoors is one of the great joys of gardening. It’s your chance to nurture tiny seedlings in a controlled, safe environment before they’re strong enough to face the great outdoors. Let's walk through the process, step-by-step, to turn a handful of seeds into a garden bursting with color.
1. Gather Your Supplies
Before you tear open a single seed packet, get everything you need in one place. You’ll want containers (seed trays, peat pots, or even recycled yogurt cups with holes punched in the bottom), a quality seed-starting mix, plant labels, and a spray bottle. Trust me, having it all ready makes the whole process so much smoother.
2. Choose the Right Containers
A seedling's first home is a big deal. While plenty of containers work, the non-negotiable feature is drainage holes. Without a way for excess water to escape, you’re inviting root rot—a death sentence for tiny, developing plants.
3. Prepare Your Seed Starting Mix
Don’t be tempted to scoop up soil from your garden. It’s far too heavy and can carry diseases that will wipe out your seedlings. Instead, use a sterile, fluffy seed-starting mix designed to give delicate roots room to grow. Moisten the mix until it feels like a wrung-out sponge before you fill your containers.
4. Sow Your Flower Seeds Correctly
Now for the fun part. A good rule of thumb is to plant a seed about twice as deep as it is wide. Some seeds, however, are so fine they barely need covering. For tiny ones like poppies or petunias, just press them gently onto the soil's surface—they actually need light to germinate.
Always plant two or three seeds per cell or pot. Not every seed is guaranteed to sprout, so this simple trick really boosts your chances of success. You can thin out the weaker seedlings later, leaving the strongest one to thrive.
5. Label Everything Clearly
You might think you'll remember what you planted where, but in a few weeks, you'll be looking at a sea of identical green sprouts. Grab some plant labels and mark each container with the flower variety and the date you sowed them. This helps you track their progress and know what's what when transplanting day arrives.
6. Provide Warmth for Germination
Most seeds need warmth to wake up from their slumber; it’s nature’s signal that spring has arrived. You can achieve this by placing your trays somewhere warm, like on top of the refrigerator. For an even bigger advantage, a seedling heat mat provides consistent soil temperature and can dramatically speed up germination.
7. Give Them Plenty of Light
The moment your seeds sprout, light becomes their number one priority. Without enough of it, seedlings get "leggy"—stretching into long, pale, and weak versions of themselves. A sunny, south-facing window can do the job, but for robust, stocky plants, nothing beats a grow light. Position it just a few inches above the seedlings for 14-16 hours a day.
Looking for more great ideas? Check out our guide on tips for starting seeds indoors.
8. Water Gently and Consistently
Those new seedlings are incredibly delicate, so a heavy stream of water can knock them right over. Use a spray bottle to gently mist the soil, or try bottom-watering by setting the trays in a shallow pan of water for about 30 minutes. The goal is to keep the soil consistently moist, but never waterlogged.
Starting annuals this way has become a huge trend. In fact, annual flower seeds are the biggest part of the market, making up about 46% of total revenue thanks to their quick growth. This passion for gardening is spreading worldwide, especially in the Asia-Pacific region, which is expected to grow at a rate of 7.9% through 2030.
9. Harden Off Your Seedlings
Before your little plants can move out into the garden for good, they need a proper introduction to the elements. This crucial step is called "hardening off." About a week or two before your area's last frost date, start taking the seedlings outside to a protected spot for just a few hours a day. Gradually increase their time outdoors to get them used to the sun and wind. This toughens them up and prevents transplant shock, setting them up for a successful season in your garden.
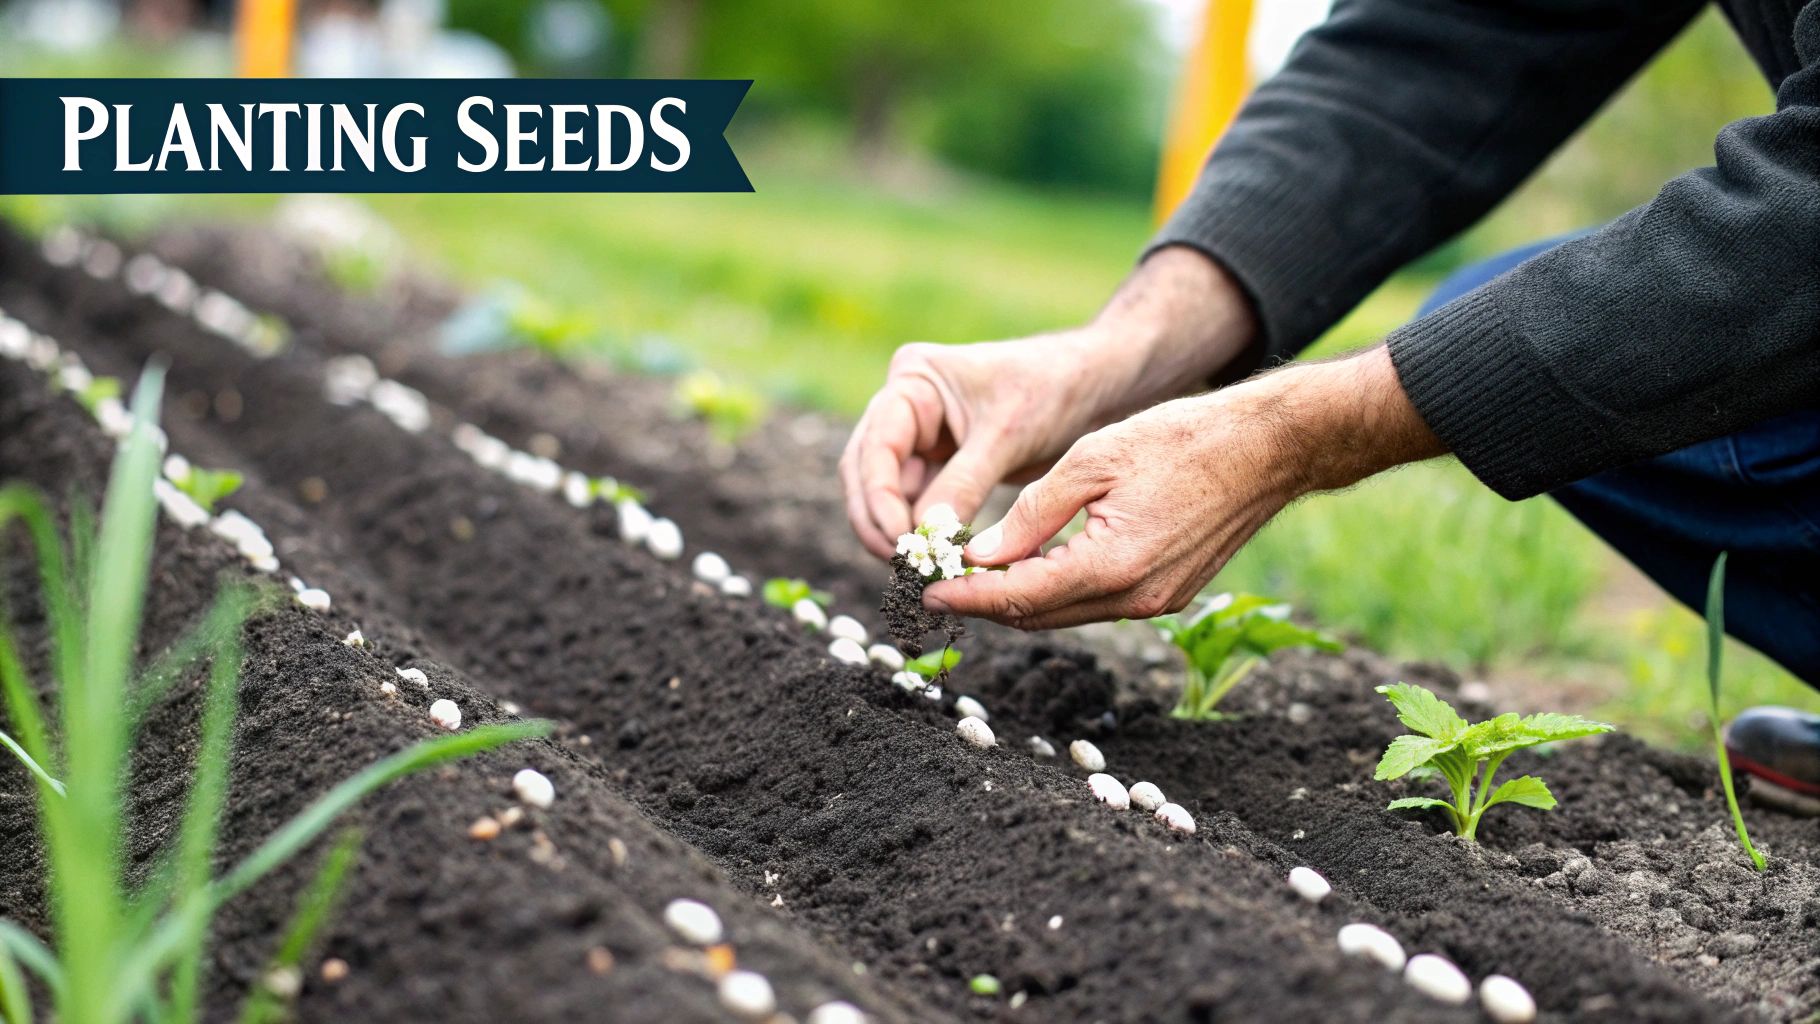
The 5 Best Practices for Direct Sowing Seeds Outdoors
There's a real joy in skipping the indoor shuffle of grow lights and seedling trays. Sowing flower seeds directly into the garden is a simple, straightforward way to get beautiful results, and for many hardy annuals and wildflowers, it’s exactly how nature intended it. Following a few key practices will give your seeds the best possible start, helping you transform a patch of bare earth into a riot of color.
1. Prepare the Perfect Seedbed
Think of your garden soil as the cradle for your future flowers. Getting it prepped properly is the single most important thing you can do for your seeds. You want to create a soft, welcoming place where tiny roots can stretch out and take hold without a struggle.
First, clear the stage. Pull out every last weed, tuft of grass, and any large rocks that might get in the way. Next, it's time to enrich the soil by working in a 1-2 inch layer of good compost or other organic matter. This not only feeds the soil but also improves its texture, helping it hold onto moisture.
Finally, take a rake and break up any remaining clumps. Your goal is a fine, crumbly, and level surface—what gardeners call a "fine tilth."
2. Time Your Sowing Just Right
Gardening is all about timing, and planting seeds is a delicate dance with the seasons. Sow too early, and a late frost could spell disaster. Wait too long, and your seedlings might struggle to get established in the intense summer heat.
The secret is to know your local climate, specifically your last average frost date. Your seed packet is your best friend here, as it will give you specific advice.
- Hardy Annuals: Tough guys like Poppies and Bachelor's Buttons don't mind a little cold. You can sow these in early spring as soon as the soil isn't a frozen block.
- Tender Annuals: Zinnias, Cosmos, and other heat-lovers are a different story. Wait until all danger of frost has completely passed and the soil has had a chance to warm up.
3. Master Your Sowing Technique
How you put the seeds in the ground will shape the final look of your garden. The method you choose really comes down to the style you’re going for.
If you’re planning a structured cutting garden or a neat-and-tidy border, planting in rows is the way to go. It makes weeding, thinning, and harvesting much easier down the line. Just use a stick or the edge of a hoe to create shallow furrows, drop your seeds in at the recommended spacing, and gently cover them up.
For a more natural, meadow-like vibe, the broadcast method is perfect. To get an even spread, try mixing your seeds with a little bit of sand before scattering them across the prepared bed. A light rake over the top afterwards ensures the seeds make good contact with the soil.
A common mistake is planting seeds too deep. A good rule of thumb is to sow a seed no deeper than twice its width. The tiniest seeds often need light to germinate and should just be pressed onto the soil surface.
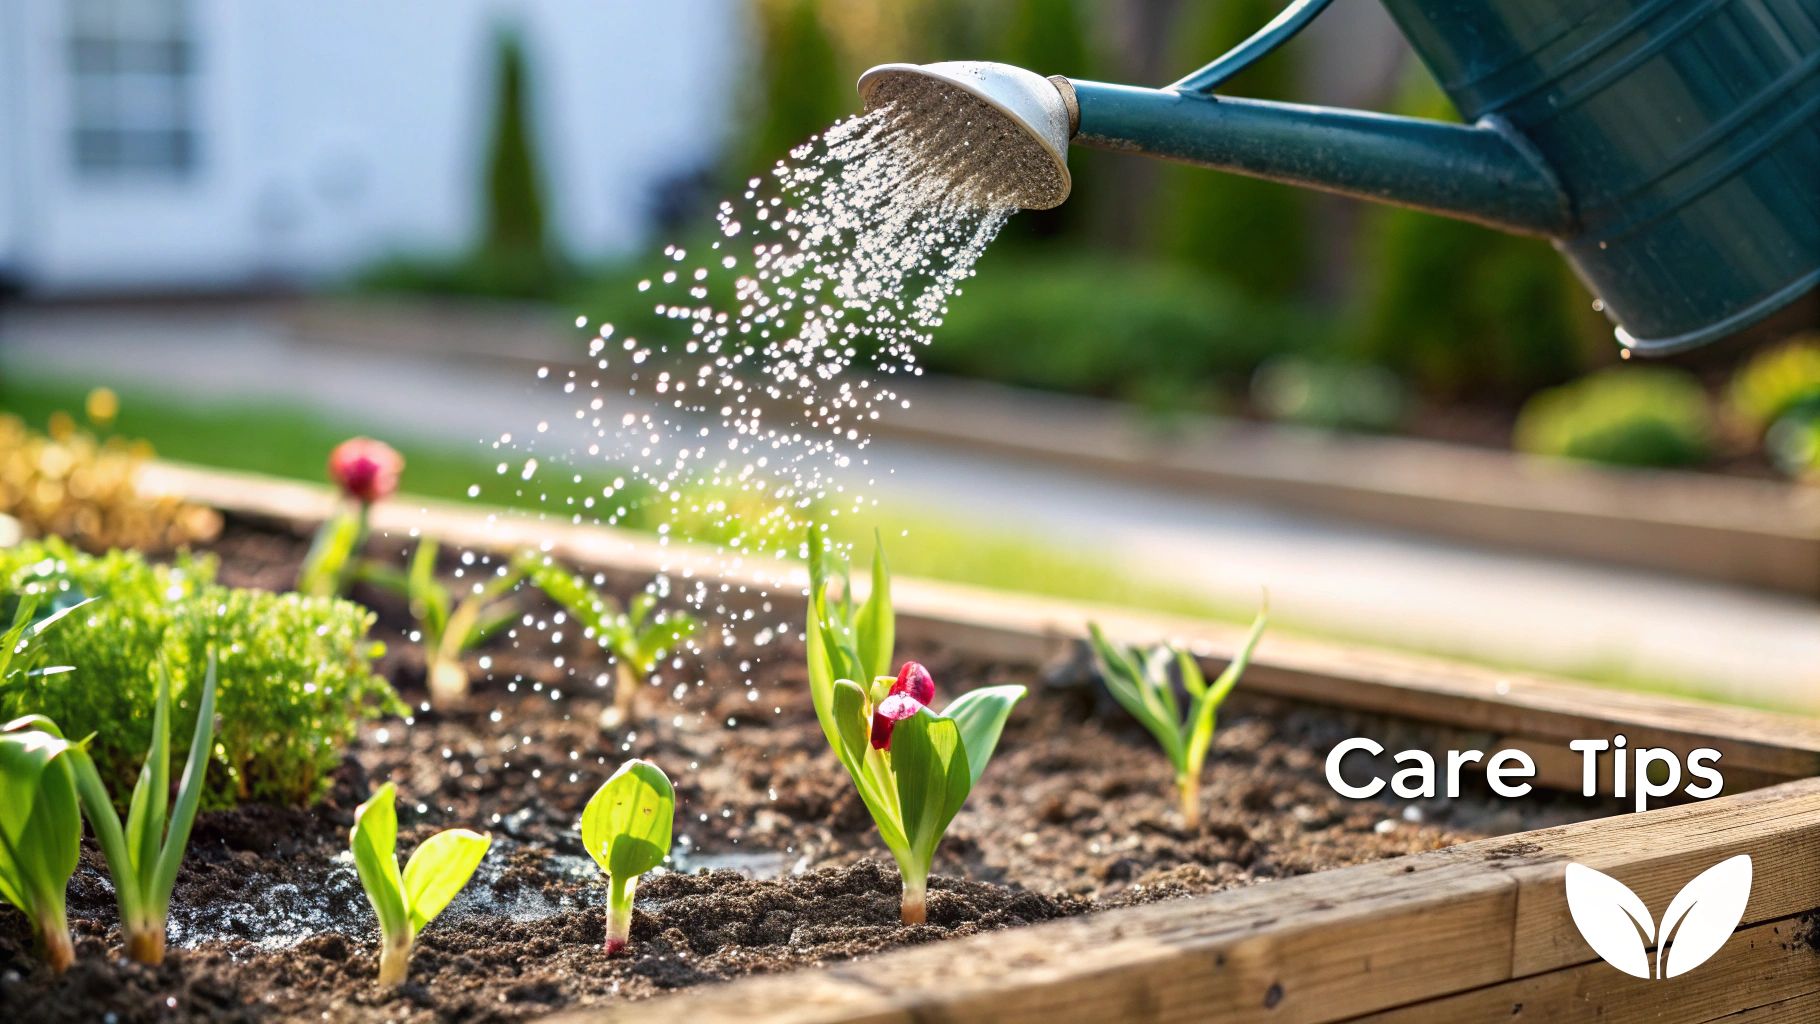
4. Water Wisely for Germination
Once your seeds are in the ground, they need consistent moisture to wake them up and kickstart the growing process. The key here is to be gentle. A powerful blast from a hose can wash all your seeds away in an instant.
Use a watering can with a fine rose attachment or a hose nozzle on a "mist" or "shower" setting. You want to keep the top inch of soil consistently moist—think of a well-wrung-out sponge—but never soggy or waterlogged. This is the most critical phase for getting good germination.
For a deeper dive into getting this right, check out our 10 tips for sowing and germination.
5. Protect Your Newly Sown Seeds
You're not the only one excited about those little seeds. Birds, squirrels, and even a heavy downpour can undo all your hard work in a flash. Protecting the seedbed for the first couple of weeks is a simple final step that makes a huge difference.
You can lay a lightweight floating row cover over the area; it lets light and water through but keeps pests out. Another trick is to place a few thin branches or some chicken wire flat across the bed. It’s just enough of a barrier to deter birds from scratching and digging, giving your future flowers the peaceful start they need.
8 Common Seed Starting Mistakes to Avoid
Even the most experienced gardeners hit a few bumps in the road when starting flowers from seed. A few small missteps can lead to a tray of disappointment, but here's the good news: they're almost always easy to fix.
By getting ahead of these common pitfalls, you can give your seedlings a huge advantage right from the start. Let's walk through eight frequent mistakes and, more importantly, how to sidestep them.
1. Sowing Seeds Too Deep
This is probably the single most common mistake I see. Think of a seed as having its own little packed lunch—a finite amount of energy to get its job done. Its mission is to push a shoot up to the surface and unfurl its first leaves. If you bury it too deep, it will run out of fuel before it ever sees the sun.
A great rule of thumb is to plant a seed no deeper than twice its width. For those dust-like seeds, like poppies or petunias, that means barely covering them at all. I often just press them right onto the surface of the soil, as many of these tiny varieties actually need light to kickstart germination.
2. Overwatering Your Seedlings
We've all been there. You're so excited, you just want to shower your new plant babies with love—and water. But too much of a good thing can be deadly. Constantly saturated soil literally drowns the delicate new roots, cutting off their oxygen supply.
This soggy environment is also a five-star resort for fungal diseases like "damping off," which causes seedlings to mysteriously rot and collapse at the soil line.
Your goal should be soil that’s consistently moist, not soggy. A good mental picture is a well-wrung-out sponge. Let the top layer of soil dry out just a bit between waterings. A fantastic trick is bottom-watering: just set your seed tray in a shallow pan of water for 30 minutes and let it soak up what it needs from below.
3. Providing Insufficient Light
The moment a seed sprouts, it's on a desperate search for light. Without enough of it, you'll get "leggy" seedlings—sad, pale, stretched-out stems that are incredibly weak. A sunny windowsill might seem like the perfect spot, but on most days, it just doesn't provide the direct, overhead light that seedlings need to grow stout and strong.
For truly robust plants, you can't beat a grow light. I recommend keeping your seedlings under one for 14-16 hours per day. Position the light just a few inches above the tops of the plants. This prevents stretching and gives them the energy they need to become healthy little powerhouses.
4. Starting Seeds Too Early
The temptation to get a jump on spring is real, but starting seeds too soon can do more harm than good. When seedlings outgrow their tiny pots weeks before they can safely go outside, they become root-bound.
Their roots hit the walls of the container and start circling, creating a dense, tangled knot. Once you finally transplant them, these roots struggle to spread out, which can stunt the plant's growth for the rest of the season.
Always trust your seed packet! It will tell you the best time to start, which is typically 6-8 weeks before your area's last average frost date. This timing ensures your seedlings are the perfect, healthy size for a smooth move into the garden.
5. Using Poor Quality Soil
Never, ever just scoop up dirt from your garden to start seeds indoors. It’s a recipe for disaster. Garden soil is far too heavy, it compacts easily in small containers, and it's often full of weed seeds, pests, and pathogens that will decimate your delicate seedlings.
Always invest in a sterile, lightweight seed-starting mix. This stuff is specifically designed to be light and fluffy, giving tiny new roots the perfect, resistance-free environment to get established.
6. Forgetting to Label Your Trays
You'd be surprised how quickly you can forget what you planted where. In the heat of the moment, you think, "Oh, I'll remember the zinnias are on the left." A few weeks later, you’re staring at a sea of identical green sprouts with no clue which is which.
This becomes a real problem at planting time, especially when different flowers have different spacing or sun requirements. Do your future self a favor and use waterproof plant markers to label every single variety with its name and the date you sowed it.
7. Improper Seed Storage
Seeds are alive, just dormant. If you don't store them correctly, they lose their ability to wake up. Heat, moisture, and light are the enemies of seed viability, and exposure will dramatically lower your germination rates next year.
Protecting your investment is all about proper storage. If you want to learn the best techniques, check out our complete guide on how to store seeds long term to keep them fresh and ready to grow.
8. Skipping the Hardening Off Process
You wouldn't send a baby into the wild without preparing it, and the same goes for your seedlings. After a cozy, sheltered life indoors, the shock of direct sun, wind, and temperature swings can be fatal. This gentle transition period is called "hardening off," and it's absolutely critical.
About a week or two before your planting date, start taking your seedlings outside to a protected spot for just an hour. Each day, gradually increase their outdoor time. This slow and steady approach allows them to acclimate and build up the resilience they need to thrive in the garden.
Gardening is a passion that's clearly growing. The global market for flower seeds was valued at around USD 1.6 billion in 2023 and is expected to climb to USD 2.3 billion by 2032. This boom is driven by better seed technology and more people discovering the joy of growing. You can discover more insights about the flower seeds market on mordorintelligence.com.
Even with the best care, seedlings can sometimes look a little off. Don't panic! Most common issues are easy to diagnose and fix once you know what to look for.
Troubleshooting Common Seedling Problems
This quick diagnostic table can help you figure out what's going on with your young plants and how to get them back on track.
| Symptom | Potential Cause | Solution |
|---|---|---|
| Tall, thin, pale stems | Insufficient light | Move seedlings closer to the grow light (2-3 inches away) or increase the duration to 14-16 hours per day. |
| Seedlings fall over, rot at base | Damping off (fungal disease) | Caused by overwatering and poor air circulation. Reduce watering, ensure good airflow with a small fan, and discard infected seedlings to prevent spread. |
| Yellowing lower leaves | Nutrient deficiency | The seed's energy stores are used up. Begin feeding with a diluted, balanced liquid fertilizer at quarter-strength once true leaves appear. |
| White, powdery spots on leaves | Powdery mildew | Usually from poor air circulation or high humidity. Improve airflow with a fan and avoid getting water on the leaves. |
| Stunted growth, wilting | Root-bound | The seedling has outgrown its container. Gently transplant it into a slightly larger pot with fresh seed-starting mix. |
Seeing your seedlings struggle can be frustrating, but think of it as part of the learning process. Each challenge teaches you something new and makes you a better, more intuitive gardener for the next season.
4 Common Questions About Flower Seeds Answered
Every gardener, whether you're just starting out or have been at it for years, runs into questions. Is this old seed packet still any good? Why didn’t anything sprout? It happens to all of us. Let's tackle some of the most common questions I hear, so you can get back to growing with confidence.
1. How Long Do Flower Seeds Actually Last?
Think of a seed as a tiny plant embryo packed with a lunchbox full of energy. How long it stays fresh really depends on the type of seed and how you store it. As a general rule, most flower seeds will give you good results for 1 to 3 years.
Of course, there are always exceptions. Some seeds are tough little survivors. Poppies and zinnias, for instance, can often sprout reliably even after 5 years or more. Then you have the more delicate types, like delphinium or larkspur, which are best used within a year. They just don't have the same staying power.
Here's a pro tip: Fresher is almost always better. When you save your own seeds, you have a massive advantage because you know exactly how old they are and that they've been stored properly—unlike a packet that might have been sitting on a hot store shelf for who knows how long.
2. What’s the Best Way to Store Seeds?
To keep your seeds viable for as long as possible, you need to protect them from their three biggest enemies: heat, light, and moisture. The mantra to live by is simple: cool, dark, and dry.
An airtight container is your best friend here—think glass jars, small plastic containers, or even a sturdy zip-top bag. For a little extra insurance against humidity, toss in one of those silica gel packets you find in new shoe boxes.
Store your container somewhere it won't get disturbed, like the back of a closet, a cool basement, or even the door of your refrigerator. If you're serious about long-term storage, some gardeners even freeze their seeds. This puts them into a deep sleep, preserving their energy until you’re ready to bring them back to life.
3. What's the Difference Between Heirloom, Hybrid, and Open-Pollinated Seeds?
Getting a handle on these terms is a game-changer. It helps you pick seeds that match what you actually want to do in your garden, whether that's growing unique, old-fashioned varieties or aiming for a super-uniform flower bed.
- Open-Pollinated (OP): This is nature's way. These seeds come from plants pollinated naturally by bees, birds, or the wind. The best part? If you save seeds from an OP plant, the next generation will grow "true to type," meaning they'll look just like their parent (as long as they didn't cross-pollinate with a different variety nearby).
- Heirloom: Think of these as a special kind of open-pollinated seed with a story to tell. To earn the "heirloom" title, a variety is usually at least 50 years old and has been passed down through generations. These are the plants your grandmother might have grown, often chosen for their incredible fragrance, unique colors, or historical significance.
- Hybrid (F1): These are the result of very intentional matchmaking. Plant breeders cross-pollinate two different parent plants to create an F1 hybrid that combines the best traits of both, like disease resistance or bigger blooms. While hybrids can be fantastic performers, their seeds are a genetic gamble. If you plant them, you'll get a mixed bag of plants that look more like the "grandparents" than the hybrid parent.
4. Why Didn't My Flower Seeds Sprout?
This is easily one of the most frustrating moments for any gardener. You do everything right (or so you think), and... nothing. Just bare soil staring back at you. When seeds fail to germinate, it's almost always one of these common culprits:
- Planting Depth: A seed buried too deep will run out of energy before it can reach the sunlight. On the flip side, a seed that needs darkness to sprout won't do a thing if it's sitting on the surface. A good rule of thumb is to plant a seed no deeper than twice its own width.
- Watering Issues: Too little water and the seed never gets the signal to wake up. Too much water and it will suffocate or rot. Your goal is to keep the soil consistently moist but not soggy—think of a well-wrung-out sponge.
- The Wrong Temperature: Every seed has its own "Goldilocks zone" for temperature. If you plant heat-loving zinnias in chilly spring soil, they'll just sit there. The same goes for planting cool-weather sweet peas in the dead of summer. Check the packet for the ideal soil temperature.
- Old Seeds: Time is the enemy of viability. If your seeds have been kicking around for several years or were stored in a hot, humid garage, their internal lunchbox might just be empty. They simply don't have the energy left to grow.
At Homegrown Garden, we believe everyone has a green thumb. We're here to provide you with high-quality heirloom seeds, simple kits, and all the friendly advice you need to get growing. Start your own garden adventure with us today at https://www.homegrown-garden.com.

