


If you've ever wanted to grow your own food but felt overwhelmed by where to start, a beginner's gardening kit is your answer. Think of it as a complete garden-in-a-box, bundling pre-selected seeds, soil, and containers into one simple package. These kits are designed to take the guesswork out of gardening, giving you a straightforward path to your first harvest.
7 Reasons a Gardening Kit Is Your Best First Step
Let’s be honest, starting a garden from zero can feel like a huge project. You’re suddenly faced with questions like: Which plants won't kill each other? What kind of soil do they need? Is this pot big enough? A good gardening kit solves all of that for you.
And you're not alone in wanting to get your hands dirty. More and more people are discovering the practical benefits and pure joy of home gardening. The market for gardening tools, which includes these kits, was valued at a whopping USD 8.98 billion in 2024 and is expected to climb to over USD 15.39 billion by 2032. It's a clear sign that people everywhere are catching on. If you're curious, you can find more data on the garden tools market growth to see just how popular this has become.
The 7 Core Components of a Great Kit
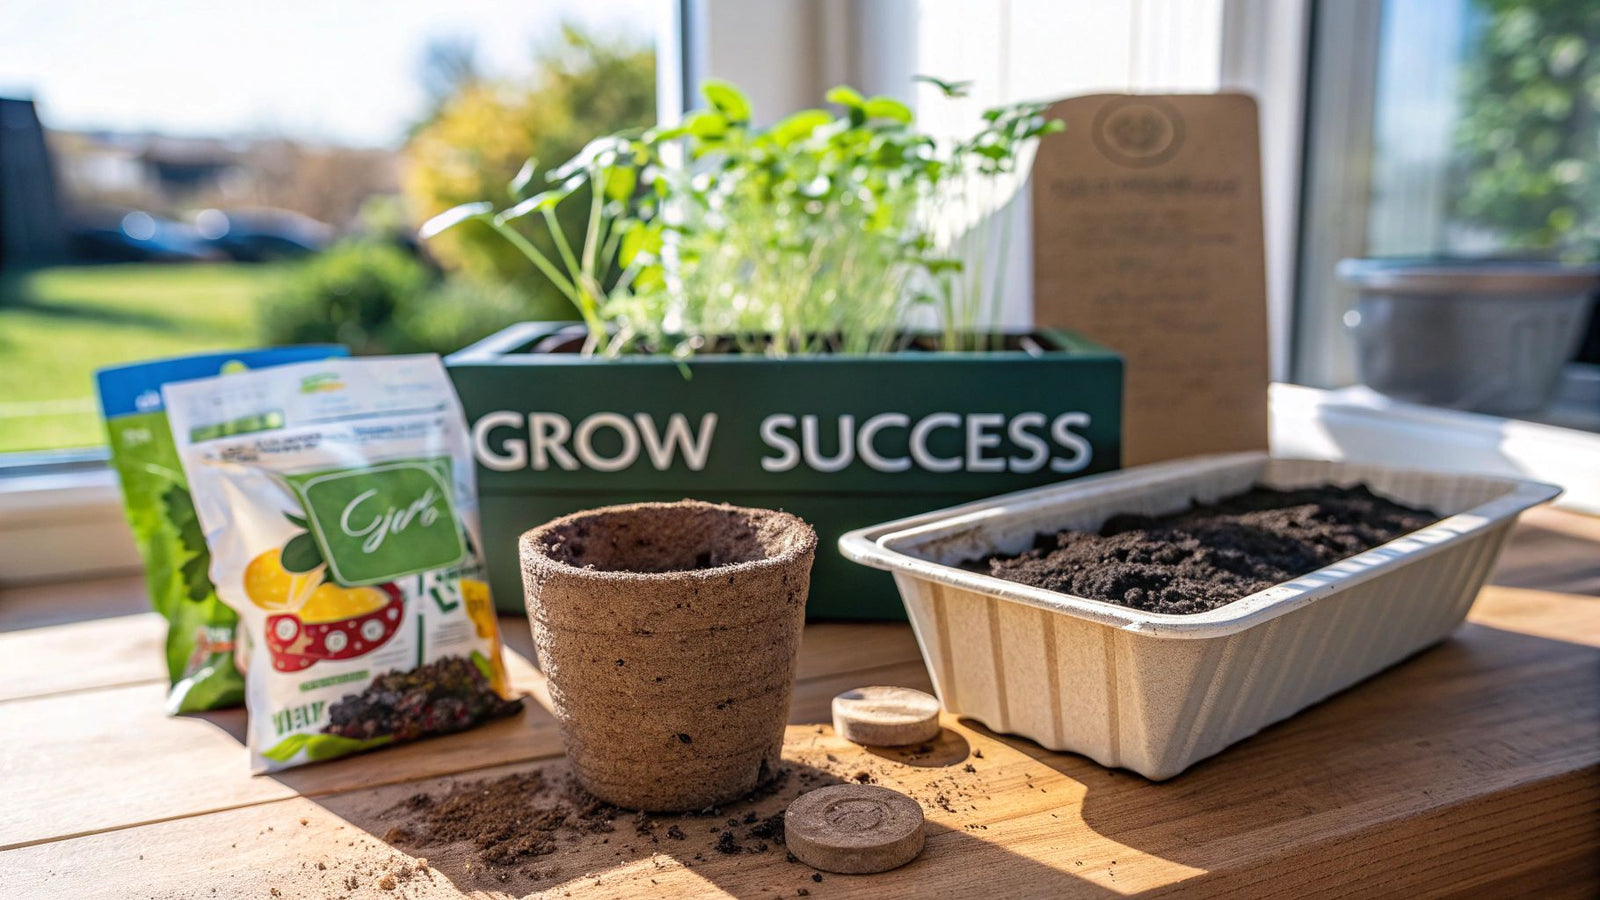
A really great gardening kit is so much more than just a few seeds in a fancy bag. It’s a complete system, thoughtfully put together to help you succeed. The best ones give you a solid foundation with a few key elements that are designed to work in harmony.
When you know what to look for, you'll see why a kit isn't just a purchase—it's an investment in a wonderful new hobby. Here are the 7 essentials that signal you've found a winner.
- 1. Quality, Easy-to-Grow Seeds: The kit should come with seeds known for being resilient and giving quick results. Think basil, mint, or cherry tomatoes—plants that boost your confidence early on.
- 2. Nutrient-Rich Potting Mix: This often comes as compressed coco coir pucks. Just add water, and they expand into a light, fluffy soil that's perfect for new roots.
- 3. Appropriate Containers: Look for biodegradable peat pots, small decorative planters, or trays that are the right size for seedlings to get their start.
- 4. Clear, Step-by-Step Instructions: A good guide should feel like a friend walking you through planting and care, using simple language instead of confusing jargon.
- 5. Plant Markers or Labels: These little tags are surprisingly helpful. You’ll be glad you have them when you’re trying to remember which pot has the parsley and which has the cilantro.
- 6. Proper Drainage Solutions: This is critical. The containers absolutely must have drainage holes or a layer of pebbles to let excess water escape and prevent root rot.
- 7. A Compact and Manageable Size: The whole setup should be designed for a beginner-friendly space, like a sunny windowsill, a small balcony, or a little corner on the patio.
A well-designed kit thoughtfully includes all these pieces to make sure your first gardening experience is a great one. Below is a quick breakdown of what makes each component so important.
6 Gardening Kit Essentials for Beginners
| Component | What It Does | Why It's Key for Your Success |
|---|---|---|
| Easy-to-Grow Seeds | Provides seeds for plants known to be low-maintenance and forgiving. | Builds your confidence with early wins and a successful first harvest. |
| Nutrient-Rich Soil | Offers a pre-mixed, sterile medium with the right balance of nutrients. | Eliminates the need to buy and mix your own soil, which can be tricky. |
| Right-Sized Containers | Gives your seedlings the perfect amount of space to establish roots. | Prevents issues like root-binding (too small) or waterlogging (too big). |
| Simple Instructions | Guides you through each step from planting to ongoing care. | Removes the confusion and makes the entire process feel approachable. |
| Plant Markers | Helps you identify your different plants as they grow. | Avoids mix-ups, especially when you're growing similar-looking herbs. |
| Good Drainage | Ensures excess water can escape from the bottom of the pots. | This is the #1 way to prevent root rot, a common beginner mistake. |
Ultimately, having all these components in one place removes the initial barriers and lets you focus on the fun part: watching your plants grow.
5 Ways to Find the Perfect Gardening Kit for Your Space
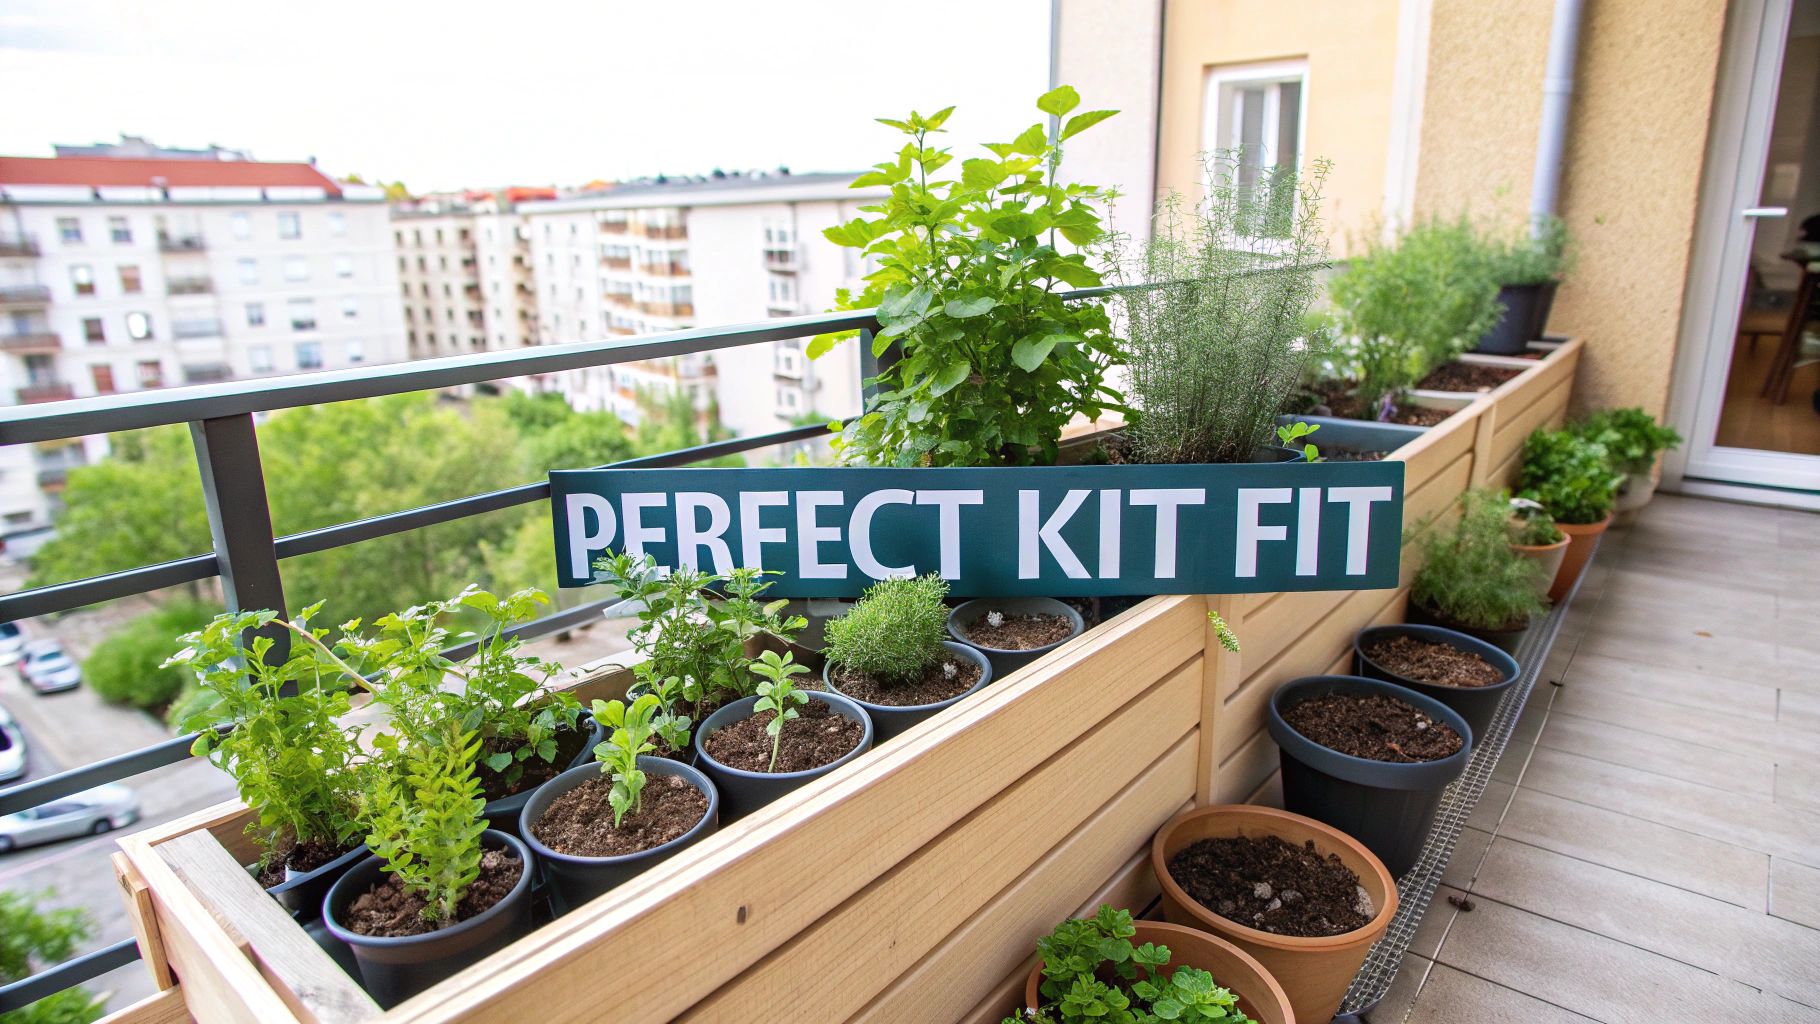
Let's be honest: the best beginner gardening kit isn't always the one with the prettiest box. The perfect kit is the one that actually fits into your life and your home, whether you've got a big backyard or just a sliver of a windowsill in a city apartment.
Your success story starts with a realistic look at your environment. The most common mistake I see new gardeners make is falling in love with a kit for sun-hungry tomatoes when all they have is a shady patch of patio. Taking a few minutes to match a kit to your home is the single most important thing you can do to get started on the right foot.
Matching Your Kit to Your Light
Sunlight is the fuel that makes a garden grow, plain and simple. How much sun you get will determine what you can realistically plant. Before you even click "add to cart," spend a day playing detective and tracking the light in your chosen spot.
Does that spot get blasted with bright, direct sun for six or more hours? That’s what we call "full sun," and it's gold for growing things that produce fruit, like cherry tomatoes or peppers. If you're looking at about four to six hours of direct sun, especially in the morning, you've got partial shade—perfect for a ton of leafy greens and herbs. Less than four hours? That's a shady spot, but don't despair. You can still grow things like mint and certain types of lettuce.
If you’re in an apartment with less-than-ideal light, an indoor herb kit is a fantastic way to go. They're designed specifically for these conditions and often come with everything you need to grow fresh flavors right on your counter. This indoor herb garden starter kit is a great example of what to look for.
A south-facing window in the Northern Hemisphere is prime real estate for an indoor garden, getting the most sun. A north-facing window gets the least and is best for plants that don't mind a little shade.
Choosing a Kit for Your Footprint
Okay, now let's talk about physical space. What you can grow on a kitchen counter is worlds away from what you can do on a small patio. It's all about picking the right tool for the job.
Here’s how to think about it based on your space:
- The Apartment Windowsill: Space is tight, so think small and self-contained. Herb kits with cute pots are the classic choice for a reason. You could also easily grow microgreens for salads or even a single dwarf tomato plant.
- The Tiny Balcony: When you can't build out, build up! A vertical planter kit is your best friend here, letting you stack plants to make the most of a small footprint. Tiered planters are another great way to grow a mix of herbs, lettuces, and even strawberries.
- The Sunny Patio: With a little more square footage, you can level up to a small raised bed kit. These give plants more room to spread their roots, opening the door to bigger vegetables like bush beans, carrots, and kale. A 4'x4' raised bed is a super manageable size that still gives you a ton of growing space.
By thinking through your light and your space before you buy, you’re not just buying a kit; you’re setting yourself up for an amazing first harvest.
4 Easy Steps to Setting Up Your Kit for Planting
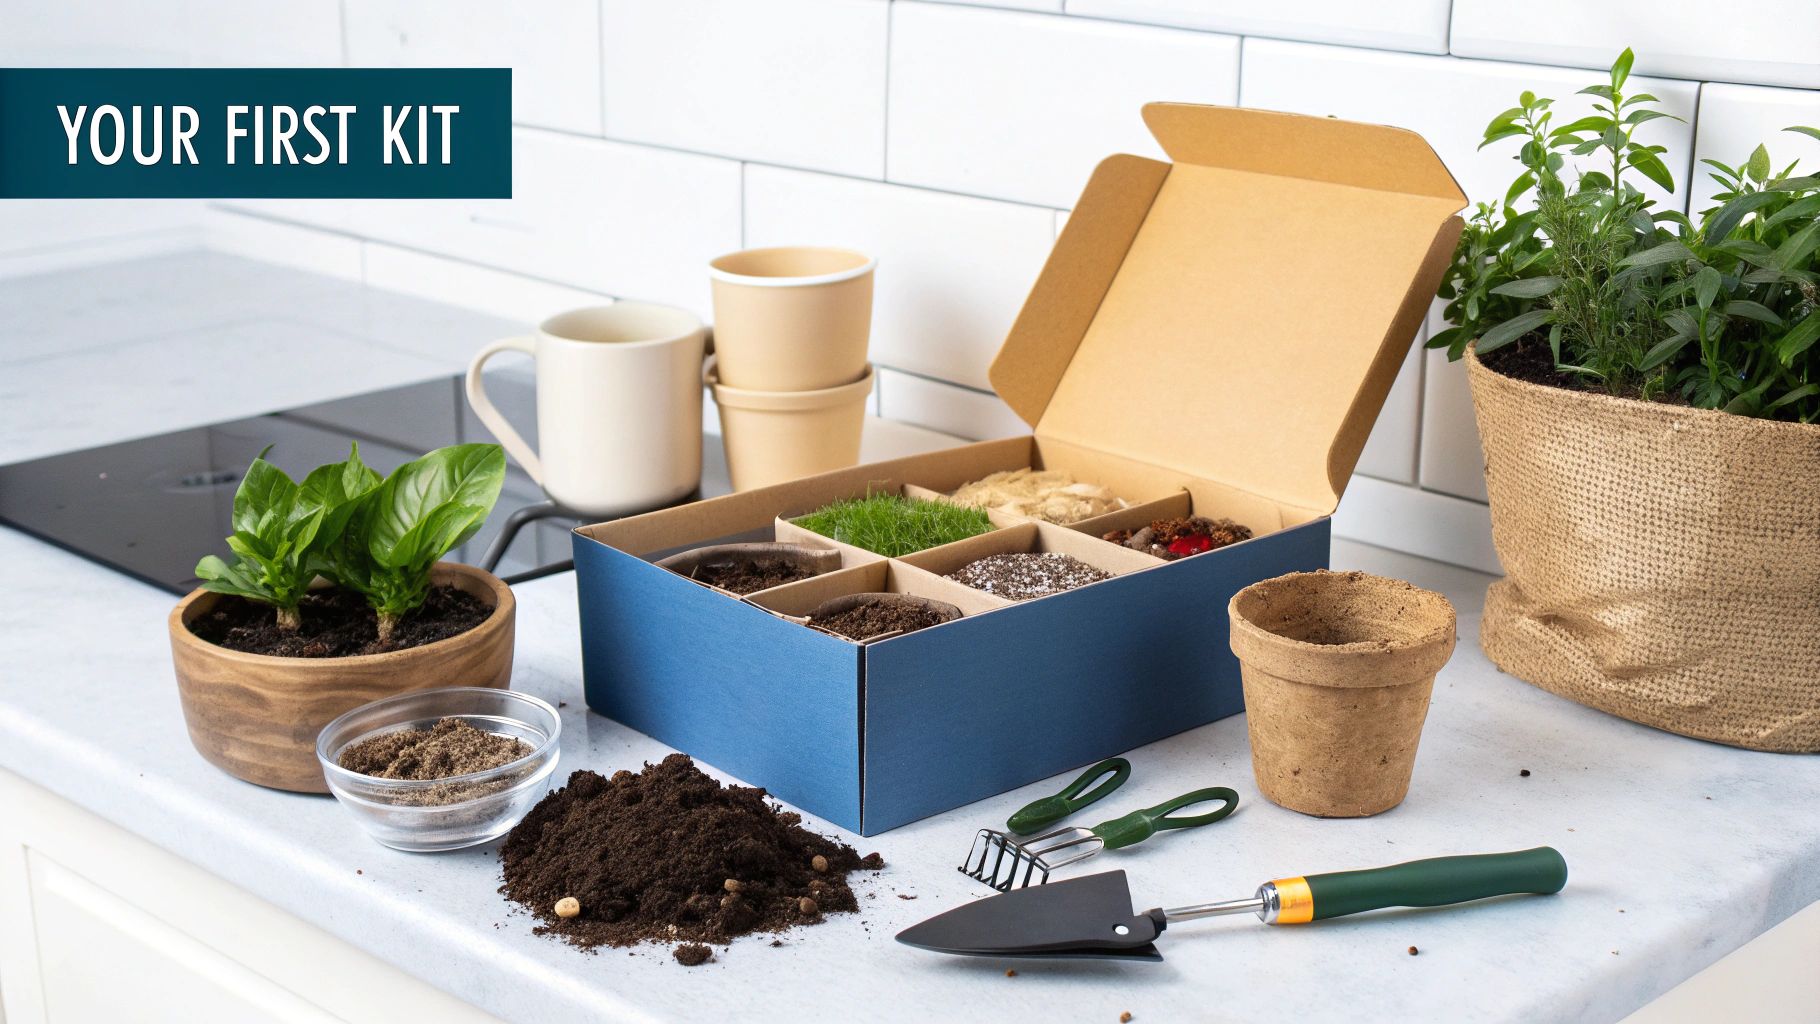
There's a special kind of excitement when you first open up one of these gardening kits for beginners. It’s a box full of potential. Before you dive in, though, taking a few moments to get everything set up properly is probably the single most important thing you can do for your future plants. The biggest mistake I see new gardeners make? Rushing this part.
First things first, grab those instructions and actually read them. I know, I know, but trust me on this. They'll have specific tips for the exact seeds and soil in your kit, like how deep to plant your basil seeds versus your parsley. A quick read-through can save you from a simple mistake that keeps your seeds from ever waking up.
Getting Your Soil and Pots Ready
Most starter kits these days come with these neat little compressed soil pucks, usually made from coco coir. To bring them to life, just pop one in a separate bowl and slowly add the amount of warm water the instructions suggest. It’s pretty satisfying to watch it expand into a fluffy pile of planting medium. Using a bowl keeps your countertop from turning into a muddy mess.
Once your soil is ready, take a look at the pots. This is critical: they must have drainage holes. If yours don't, you’ll need to carefully poke a few in the bottom. Without them, water will just sit there and rot the roots—the fastest way to kill a plant.
Fill each pot with your freshly expanded soil, but leave about an inch of room at the top. Don't pack it down too hard.
I can't stress this enough: proper drainage is non-negotiable. Healthy roots need oxygen just as much as they need water. If they're sitting in a waterlogged swamp, they'll suffocate. Good drainage lets the excess water escape and keeps everything in balance.
This little graphic breaks down the whole process, from unboxing to planting.
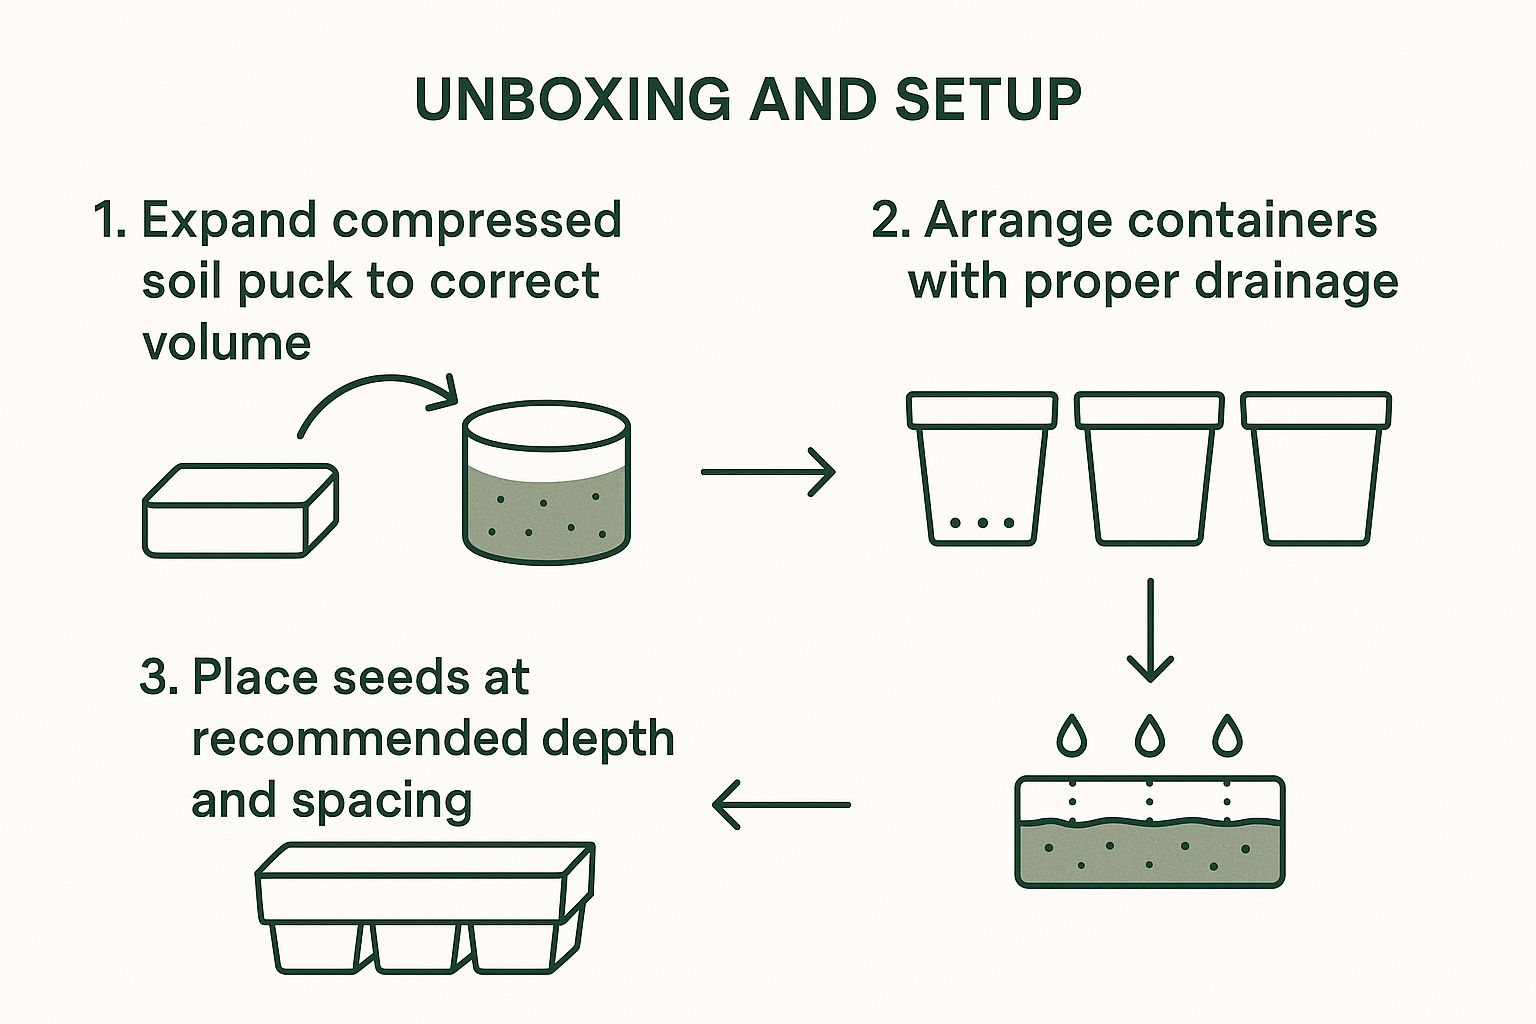
As you can see, it's really just a sequence of small, important actions. Get the soil right, make sure the pots can drain, and then plant your seeds with a little care.
Sowing the Seeds
Alright, this is the moment you've been waiting for. Check your instructions for the planting depth. It really does matter. A solid rule of thumb is to plant a seed about twice as deep as it is wide. If you go too deep, the poor little sprout might exhaust all its energy trying to reach the sunlight.
Gently press two or three seeds into the soil of each pot, giving them a little space from each other. Why more than one? It’s just good insurance in case one is a dud. This way, you have a much better shot at getting at least one healthy seedling per pot.
Lightly cover them with a bit more soil and give them their first gentle drink of water. And that’s it! You're officially on your way.
For a more detailed guide on this part of the process, you can explore our post on the perfect indoor seed starting setup.
5 Smart Watering Tips for Your Gardening Kit
Sunlight and water are the twin pillars of a healthy garden, but getting them right can feel like a guessing game at first. The biggest mistake I see new gardeners make is getting locked into a rigid schedule, like watering every day at 5 PM no matter what. The real secret is learning to read your plants and soil.
Forget the calendar. The best tool you have is your own finger. This little trick, which gardeners call the "finger dip test," is the most reliable way to know if your plants are thirsty, especially when you're starting with a kit.
Simply stick your index finger about an inch deep into the soil. If it comes out dry and clean, it’s time to water. But if soil sticks to your finger and it feels damp, your plants are perfectly content. Hold off for another day or two. This one simple habit will save you from the number one rookie mistake: overwatering and drowning your plants' roots.
Understanding What "Full Sun" Really Means
Next up is sunlight—the fuel your garden runs on. Every seed packet and plant tag will have instructions like "full sun" or "partial shade," but what does that actually look like in your home or on your balcony?
Let's decode this gardener-speak.
- Full Sun: This is the big one. It means your plant needs 6 or more hours of direct, unfiltered sunlight hitting its leaves every day. Think of sun-worshipping plants like tomatoes, peppers, and most flowers. A south-facing window or an unobstructed spot on a patio is usually your best bet.
- Partial Sun / Partial Shade: These two are pretty much interchangeable. They describe a spot that gets a solid 4 to 6 hours of direct sun. A lot of these plants appreciate the gentler morning sun and like a little protection from the scorching afternoon heat. Many herbs and leafy greens, like cilantro and lettuce, are happiest here.
- Shade: This doesn't mean total darkness! It just means the plant gets less than 4 hours of direct sun. Often, this is dappled light filtering through a tree or coming through a window that doesn't get a direct blast of sun. You'd be surprised what can grow here—mint and certain lettuces often do just fine.
Knowing this before you even open your kit helps you pick the perfect spot from day one.
I always tell people to think of it this way: a tomato is a sunbather who wants to be on the beach all day, while a delicate fern prefers to sit under an umbrella with a cool drink. You just have to match the plant to its ideal vacation spot.
5 Smart Watering Tips for Your Kit
Getting water to the roots without turning your soil into a swamp is an art. Remember, too much love can be just as bad as neglect. Here are five practical tips I've learned over the years to help you water like a pro.
- Water the Soil, Not the Leaves. Splashing water all over the leaves is a welcome mat for mildew and other fungal diseases. Aim your watering can directly at the base of the plant. The goal is to get moisture to the roots, not to give the plant a shower.
- Water Deeply, but Less Often. When it's time to water, give it a really good soak. Keep going until you see water draining from the bottom holes. This encourages the roots to grow deep and strong in search of moisture, making the plant much more resilient.
- Use Room-Temperature Water. This is a small thing that makes a big difference. Icy cold water straight from the tap can shock a plant's root system. Just fill your watering can and let it sit for a while before you use it.
- Morning is Best. If you can, water in the morning. This gives the plant all day to drink up the moisture before the sun gets too hot. Plus, any stray splashes on the leaves will have plenty of time to dry, which helps keep diseases away.
- Adjust to the Season. Your garden kit isn't a machine; its needs will change. Plants get much thirstier during a hot summer week than they do on a cool, overcast day in spring. That's why the finger dip test is your best friend—it never lies
5 Common Plant Problems and How to Fix Them
Watching those first little green sprouts push through the soil is an amazing feeling. That initial win is a huge confidence booster, but this is where the real fun begins. The ongoing care you provide is what will turn those tiny, fragile seedlings into strong, healthy plants, and it's simpler than you might think.
One of the first things you'll need to do is thin out your seedlings. Remember how we planted a couple of extra seeds in each pot, just in case? Well, now that they've sprouted, it's time to pick the strongest-looking one and snip the others at the soil line with a pair of scissors. It can feel a little brutal, I know, but this step is essential. It gives the "winner" all the space, nutrients, and light it needs to flourish without any competition.
5 Common Plant Problems and What They Mean
As your plants get bigger, they'll start to communicate with you. Learning to read these visual cues is a core skill that gardening kits for beginners are perfect for teaching. Here are five common signs to keep an eye out for:
- 1. Long, "Leggy" Stems: Are your seedlings looking tall and spindly with just a few leaves on top? They're desperately stretching for more sunlight. Your best bet is to move them to a brighter spot right away.
- 2. Yellowing Leaves: This is the classic cry for help from an overwatered plant. The roots are essentially drowning and can't breathe. Hold off on watering and let the soil dry out a bit.
- 3. Crispy, Brown Leaf Tips: This usually means the air is too dry or the plant is thirsty. I always check the soil moisture first. If it's damp, a light misting can help increase the humidity.
- 4. Droopy or Wilting Leaves: Your plant is thirsty! Give it a thorough drink, making sure the water soaks deep into the soil. It should perk right back up in a few hours.
- 5. Tiny Holes or Webs: These are telltale signs of pests. Take a close look, especially under the leaves, for any tiny insects and deal with them quickly using a gentle, organic solution.
Think of your plant's leaves as a daily report card. By taking a moment to observe them each day, you can catch minor issues before they become major problems, building your confidence as a gardener.
The joy of home gardening is catching on, with more and more people discovering how rewarding it is to grow their own food and flowers. The global home gardening market, which includes these fantastic starter kits, was valued at USD 15.78 billion in 2025 and is expected to climb to nearly USD 26.47 billion by 2034.
This huge trend is all about a growing desire for sustainable living and knowing exactly where our food comes from. You can read more about the growth of the home gardening industry. By nurturing your first plants from a simple kit, you're becoming part of a massive, positive movement.
7 Ways to Grow Your Skills After Your First Kit
Getting that first harvest from a gardening kit is a huge win. Seriously, pat yourself on the back. It’s proof that you’ve got a green thumb in the making. But the real takeaway isn't just the fresh herbs or veggies; it's the skills you quietly picked up along the way—things like patience, daily observation, and the rhythm of consistent care.
Those are the building blocks for everything that comes next. Think of your first kit as the "training wheels" phase of your gardening adventure. Now that you've found your balance, it's time to explore what else is out there, whether you're working with a tiny balcony or a full-blown backyard.
7 Ways to Grow Your Gardening Skills
Ready to move beyond the all-in-one box? Once you feel confident with the basics, you can start branching out. Here are seven fantastic ways to build on your success and keep the momentum going.
1. Try More Ambitious Plants
If you started with something forgiving like basil or mint, why not challenge yourself with a plant that asks for a little more attention? Fruiting plants are a perfect next step.
Think about growing cherry tomatoes or bush beans in a container. They’ll introduce you to new concepts, like pollination and the need for more regular watering, but nothing beats the feeling of picking your own homegrown produce.
2. Start From Seed Packets
Kits are great, but they come with pre-selected seeds. The real fun begins when you dive into the world of seed packets. This opens the door to thousands of unique and heirloom varieties you’ll never see at the grocery store.
For some great advice on choosing the right gear, check out our guide to the best seed starter kits.
3. Go Bigger with Your Containers
Those little starter pots served their purpose, but your plants will thank you for an upgrade. Moving them into larger containers, like fabric grow bags or bigger decorative pots, gives their roots the space they need to stretch out. More root space almost always means a bigger, healthier plant and a more impressive harvest.
4. Build a Small Raised Garden Bed
If you have a bit of outdoor space—even a small patio—a raised garden bed can completely change your gardening game. You don't need anything massive. A simple 4' x 4' bed is surprisingly productive and gives you total control over the soil, which is a huge advantage for growing healthy vegetables.
5. Discover Companion Planting
This is where gardening starts to feel like both an art and a science. Companion planting is all about pairing plants that benefit each other. It’s a classic gardening technique that really works.
- Pest Control: Planting marigolds near tomatoes can help keep pests away.
- Flavor Boost: Many gardeners swear that planting basil next to tomatoes actually improves their flavor.
6. Make Your Own Compost
Ready to create some "black gold" for your garden? Starting a small compost bin is an incredible way to turn your kitchen scraps into the richest, most nutrient-dense food for your plants. It’s a win-win: you reduce household waste and stop having to buy fertilizer.
7. Think Vertically
Don't have a lot of ground space? Look up! Vertical gardening is the perfect solution for small balconies, patios, and yards. Using wall-mounted planters, trellises, or hanging baskets lets you maximize your growing area and create a stunning wall of green.
Your first gardening kit wasn't just a box of soil and seeds—it was your ticket into a massive, welcoming community of people who are getting back in touch with their food and the natural world.
You're not alone in this. The passion for growing things is booming, especially with younger generations. In the U.S., a staggering 69.2% of Gen Z and 51% of Gen Y are planning to spend even more time gardening in 2025. This wave of enthusiasm is why gardening kits for beginners are becoming so popular.
As you can see from these exciting gardening statistics, you're part of a growing movement. Your journey is just getting started, and there's a whole world of plants out there waiting for you.
3 Frequently Asked Questions About Gardening Kits
Diving into gardening, even with a starter kit, is exciting! But it's totally normal for a few questions to pop up along the way. Getting those sorted out early on is the best way to build your confidence and make sure you have a great time from day one.
Here are a few of the things we hear most often from new gardeners.
1. How Long Before I Actually See Something Growing?
Ah, the big question! This is where the real anticipation kicks in. How long you'll wait to see those first little green shoots depends entirely on what you've planted.
Some seeds are just raring to go. You could see sprouts from quick-growers like radishes and certain types of lettuce in as little as 3 to 7 days. Others, like many popular herbs—think basil or parsley—take their time and might need 10 to 14 days to make an appearance.
A little piece of advice every gardener learns: patience is key. As long as you're keeping the soil moist and warm, trust that your seeds are doing their thing under the surface, even when you can't see the progress.
2. What if Nothing Sprouts?
First off, don't worry. It happens to the best of us! Before you toss the pot and start over, let's play detective and check a few common reasons seeds might refuse to sprout:
- Water Woes: The goal is soil that feels like a damp, wrung-out sponge. Too much water can drown the seeds, while too little will stop them from starting at all.
- Planting Depth: Were the seeds buried too deep? A seed only has so much energy stored up to push its way to the surface. If it's too far down, it might run out of steam before it sees the light.
- Temperature Troubles: Most seeds need a bit of warmth to get the message that it's time to grow. A cold, drafty spot can put the brakes on germination.
If you’ve checked all these boxes and a couple of weeks have passed with no signs of life, it's perfectly fine to try again. That's often why many kits come with a few extra seeds!
3. Should I Be Using Fertilizer?
Great question. The good news is that most potting soil that comes with gardening kits for beginners is already packed with nutrients. This initial food source is usually enough to give your seedlings a fantastic head start for their first 4 to 6 weeks.
Once you're past that initial month or so, you can start thinking about giving your growing plants a little boost. A gentle, diluted liquid fertilizer every few weeks is a great way to keep them happy and thriving.
Ready to get your hands dirty and start your own garden? At Homegrown Garden, we have high-quality kits and all the friendly advice you need to make it a success. Take a look at our collection and start your growing adventure at https://www.homegrown-garden.com.

