


Getting your ancho peppers started indoors 6 to 8 weeks before your last frost date is the secret to a fantastic harvest. This head start is crucial because it gives the plants a long, leisurely season to mature. Remember, anchos are just fully ripened and dried poblano peppers, and that ripening process takes time!
By creating a cozy, well-lit environment inside, you're setting the stage for healthy plants that will eventually be loaded with peppers.
7 Steps For Starting Ancho Pepper Seeds Indoors
Giving your ancho peppers a strong start indoors is probably the most critical part of the whole process. These peppers need a long growing season, and starting them inside guarantees they have enough time to develop before heading out to the garden.
You get to control the environment, which helps you dodge common problems like stubborn germination or weak, spindly seedlings. A little effort now pays off big time later.
1. Gather Your Supplies
Before you even think about planting, get all your gear ready. It makes everything go so much smoother. You don't need a high-tech lab, but a few items are absolutely essential.
Here’s your shopping list:
- Poblano Pepper Seeds: This is key! You need to buy poblano seeds to grow ancho peppers. Stick with a reputable seed company to make sure they actually sprout.
- Seed Starting Trays: I find that trays with individual cells and a clear humidity dome work best. They lock in the moisture and warmth that pepper seeds absolutely love.
- Seed Starting Mix: Don't just scoop up dirt from your garden. Use a sterile, light seed starting mix. It’s fine-textured and free from nasty pathogens that can kill off your baby seedlings.
- Heat Mat: Pepper seeds are picky—they need warm soil to germinate, ideally between 77–86°F (25–30°C). A simple seedling heat mat under your tray is the easiest way to provide that consistent warmth from below.
- Grow Lights: Let's be honest, a windowsill rarely cuts it. Even basic fluorescent or LED grow lights will prevent your seedlings from stretching and getting all weak and floppy.
2. Nail the Timing
When it comes to starting seeds, timing is everything. Start too early, and you'll be wrestling with huge, root-bound plants while it's still freezing outside. Start too late, and you've just shortened your growing season and your potential harvest.
The sweet spot is 6 to 8 weeks before your area's last expected frost date. This gives your seedlings plenty of time to grow a solid root system and a few sets of true leaves without getting too big for their starter homes.
3. Sow Your Seeds The Right Way
With your supplies ready, it’s go-time. Fill your seed trays with a pre-moistened seed starting mix and gently tamp it down.
Plant one or two seeds in each cell, burying them about ¼-inch deep. I always plant two per cell as a little insurance policy—if one doesn't pop up, the other probably will. You can easily snip the weaker one later. Give the surface a light mist of water to help everything settle in.
4. Create a Warm, Humid Haven
Warmth and humidity are the magic ingredients for pepper seed germination. Pop that plastic humidity dome over your seed tray and place the whole setup on your heat mat.
This creates a perfect mini-greenhouse, trapping moisture and keeping the soil at that ideal temperature. You probably won't even need to water again until you see sprouts, but it's wise to peek every few days just to make sure the soil hasn't gone bone dry.
5. Let There Be Light
The moment you see the first hint of green, it's time to bring in the light. Take the humidity dome off for good—this improves air circulation and helps prevent "damping off," a fungal disease that's deadly to seedlings.
Hang your grow lights just a few inches above the seedlings and leave them on for 14-16 hours a day. This direct, intense light encourages them to grow stout and strong, not thin and "leggy" like they would if they were straining for a faraway window.
6. Water From The Bottom
One of the quickest ways to kill seedlings is by overwatering them. The solution? Water from the bottom up.
Just set your seed tray inside a larger, shallow pan of water. Let it sit for about 20-30 minutes, allowing the soil to wick up moisture through the drainage holes. This brilliant trick encourages roots to grow downward and keeps the top layer of soil drier, which helps keep fungus gnats and disease at bay. Always let the soil dry out a bit between waterings.
For a deeper dive, check out these essential tips for starting seeds indoors to really master the technique.
7. Harden Off Before The Big Move
After 6-8 weeks of pampering, your seedlings will look like they're ready for the garden. But hold on! You can't just toss them out into the wild. They need to be slowly introduced to the great outdoors through a process called "hardening off," which we’ll get into next.
Ancho Pepper Seed Starting Quick Reference
To make things even easier, here’s a quick-glance table summarizing the key details for getting your ancho pepper seeds started on the right foot.
| Factor | Ideal Condition | Expert Tip |
|---|---|---|
| Planting Time | 6–8 weeks before last frost | Mark your calendar! This window gives seedlings the perfect amount of time to mature indoors. |
| Seed Depth | ¼-inch deep | A pencil eraser is a great tool for making uniform holes at the perfect depth. |
| Soil Temperature | 77–86°F (25–30°C) | A seedling heat mat is non-negotiable for fast, consistent germination. |
| Germination Time | 7–14 days | Be patient. Some peppers pop up quickly, while others take their sweet time. |
| Light Requirement | 14–16 hours per day | A simple timer for your grow lights makes this a set-it-and-forget-it task. |
| Watering Method | Bottom-watering | Wait until the top of the soil feels dry to the touch before watering again. |
Following these guidelines will give your seedlings the robust start they need to become healthy, productive plants in your garden.
5 Steps to Get the Soil Just Right for Your Peppers
Think of your garden soil as the foundation for your entire pepper harvest. If you get this part right, you'll sidestep a ton of problems later on. Ancho peppers are what we call "heavy feeders," which just means they pull a lot of nutrients from the soil to grow those big, beautiful poblanos that you'll eventually dry into anchos.
Creating that perfect environment isn't as complicated as it sounds. It really comes down to getting three things dialed in: drainage, pH balance, and plenty of good nutrients. It doesn't matter if you're using raised beds, big pots, or a traditional garden plot—these principles are key to growing amazing peppers.
1. Check Your Soil pH and Drainage
Peppers can be a little picky about their soil's pH. They do best when it's slightly acidic to neutral, ideally somewhere in the 6.0 to 6.8 range. When the pH is in this sweet spot, the plant's roots can easily grab all the nutrients available. If your soil is too acidic or too alkaline, those nutrients get locked up, and your plants can't access them, no matter how much you feed them.
A simple soil test kit from any garden center will tell you where you stand. Is your soil too acidic (below 6.0)? A little garden lime will bring it up. Too alkaline (above 6.8)? Adding some elemental sulfur or working in organic matter like pine needles can help bring it down.
Drainage is just as crucial. Pepper roots absolutely hate sitting in soggy, waterlogged soil. That's a fast track to root rot and other frustrating diseases. You're aiming for loamy soil—that perfect mix of sand, silt, and clay that holds moisture but doesn't turn into a swamp.
A Quick Drainage Test: Dig a hole about a foot deep and fill it with water. If it drains away within an hour or so, you're in good shape. If water is still sitting there hours later, you’ll definitely need to improve the drainage.
2. Add Plenty of Organic Matter
Honestly, the single best thing you can do for your garden soil is load it up with organic matter. This is the secret sauce that works wonders—it improves drainage in heavy clay soil while also helping sandy soil hold on to more water. It's a win-win.
Aged compost is the absolute gold standard here. It's packed with beneficial microbes and provides a slow, steady stream of nutrients that your pepper plants will thrive on. Well-rotted manure is another fantastic option.
3. Top-Dress Your Garden Beds
Before you plant, spread a generous 2- to 3-inch layer of compost or aged manure right on top of your garden bed. This is one of the easiest ways to build up that rich soil.
4. Work It Into the Soil
Use a garden fork to gently mix that organic matter into the top 6-8 inches of soil. This puts it right where the new roots will be exploring. It's a simple step that makes a huge difference.
5. Feed Your Peppers at Planting Time
While compost gives your plants a fantastic nutritional base, it helps to know what your peppers are looking for. They need a balanced diet, but be careful—too much of one thing can backfire. Specifically, if you go heavy on the nitrogen, you’ll get stunning, bushy green plants with hardly any flowers or peppers.
At planting time, I recommend using a balanced, all-purpose organic fertilizer. Look for one with fairly even N-P-K numbers (Nitrogen-Phosphorus-Potassium). This initial feeding gets your young plants off to a great start without triggering that out-of-control foliage growth. We’ll get into feeding them throughout the season later, but getting the soil right first is the most important move you can make.
If you want to dive deeper, our complete guide on preparing garden soil walks through these techniques and more.
And it’s a rewarding one! Ancho peppers are becoming a staple in kitchens everywhere. With the U.S. market for ancho chile powder expected to grow at a CAGR of 7.4%, thanks to its huge role in the food industry, a successful home harvest is something to be proud of. You can see more about the market trends for this versatile spice on grandviewresearch.com.
5 Steps for Moving Your Seedlings into the Garden
After all those weeks of tending to your seedlings indoors, it’s finally time for the big move. This is one of the most exciting—and nerve-wracking—parts of the process. You're taking your carefully nurtured baby plants from a cozy, controlled environment and introducing them to the wild world of your garden.
Getting this transition right is everything. It's not just about digging a hole and plopping the plant in. A successful transplant sets the stage for a strong, productive season, preventing the dreaded transplant shock that can stunt growth for weeks. Think of it as giving your plants the best possible start in their new home.
1. Toughen Them Up First: The Art of Hardening Off
You can’t just take your seedlings from the windowsill straight into the garden. That sudden blast of sun, wind, and temperature swings would be a huge shock to their system. The result? Sunburned leaves, wilting, and a plant that just sits there, stunned.
To avoid this, you need to gradually acclimate them through a process called hardening off. This is non-negotiable. Plan on this taking about 7 to 10 days. It’s all about easing them into their new reality.
- Days 1-3: Find a protected spot outside, maybe on a covered porch or under a shady tree. Leave the seedlings there for just an hour or two, then bring them back in.
- Days 4-6: Start increasing their outdoor time. Let them get a taste of some gentle morning sun, but bring them in before the intense afternoon rays hit.
- Days 7-10: By now, they should be tough enough to handle a full day outside. If the nighttime temperatures are staying reliably above 55°F (13°C), you can even leave them out overnight.
This slow, steady exposure strengthens the plant's cell structures, getting them ready to thrive in the garden.
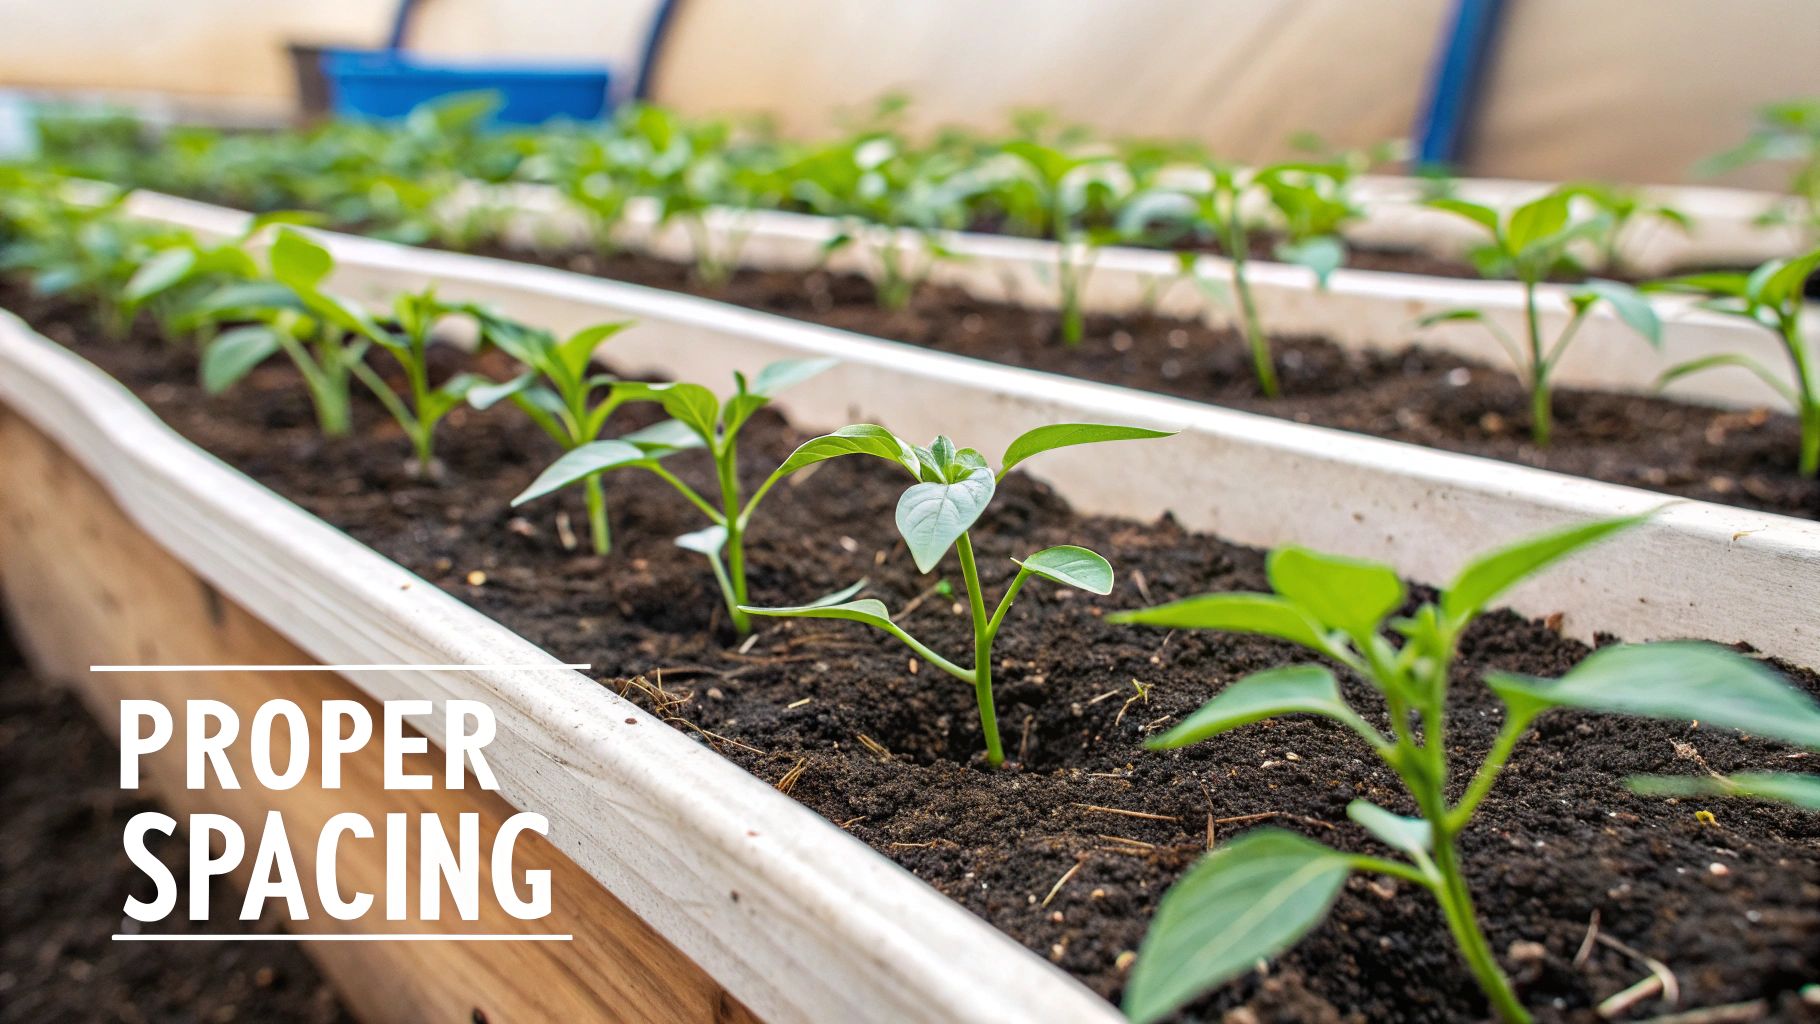
2. Get the Timing and Spacing Just Right
With your hardened-off seedlings ready to go, the next piece of the puzzle is timing. Don't rush it. Wait until you're absolutely certain the last frost has passed. More importantly, check your soil temperature—a simple soil thermometer is a great tool for this. You’re looking for a consistent 60°F (16°C). Planting in cold, damp soil is a surefire way to stall their growth right from the start.
Space is just as critical. It’s tempting to squeeze plants together, but they need room to breathe and grow. When you crowd them, they end up fighting for sun, water, and nutrients. Poor air circulation also creates a perfect environment for fungal diseases to take hold.
Give each ancho pepper plant about 18 to 24 inches of space on all sides. This might look like a lot of empty dirt at first, but trust me, they'll fill it in. Proper spacing means healthier plants and a bigger harvest.
3. Plant Them at the Perfect Depth
Alright, it's planting time. Dig a hole that’s about the same depth as the seedling’s container and a little bit wider. The goal here is to make the transition as seamless as possible for the roots.
Carefully slide the plant out of its pot. If the roots are a bit tangled or circling the bottom (what gardeners call "root-bound"), gently tease them apart with your fingers. This encourages them to grow outward into the new soil.
Place the plant in the hole so that the top of its root ball is sitting level with the ground around it. This is important: unlike tomatoes, you don't want to bury the stem of a pepper plant. Backfill the hole, pressing the soil down gently but firmly to get rid of any air pockets.
4. Water In and Mulch Well
The very first thing to do after planting is to give your seedling a good, deep drink of water. Don't just sprinkle the surface; you want to soak the entire root zone to help the soil settle in and minimize shock.
Next up is one of my favorite garden hacks: mulching. Apply a 2- to 3-inch layer of organic mulch—straw, shredded leaves, or aged wood chips all work great. Spread it around the base of the plant, but leave a little collar of bare soil right around the stem to prevent rot.
A good layer of mulch does three amazing things:
- It holds moisture in the soil, meaning you water less often.
- It keeps weeds from sprouting and competing with your peppers.
- It helps keep the soil temperature stable, protecting roots from scorching summer heat.
5. Stake Them Before They Need It
Ancho pepper plants can get surprisingly tall and bushy. Once they're loaded up with heavy, thick-walled poblano peppers, the branches can easily bend or even snap. The trick is to give them support before they start to lean.
Putting in a stake or a cage right when you transplant means you won't risk damaging the root system later on. A simple wooden stake, a sturdy tomato cage, or a trellis will do the job perfectly. As the plant grows, you can loosely tie the main stem to the support to keep it growing strong and upright, ensuring all those beautiful peppers make it to harvest day.
7 Golden Rules for Watering and Feeding Ancho Peppers
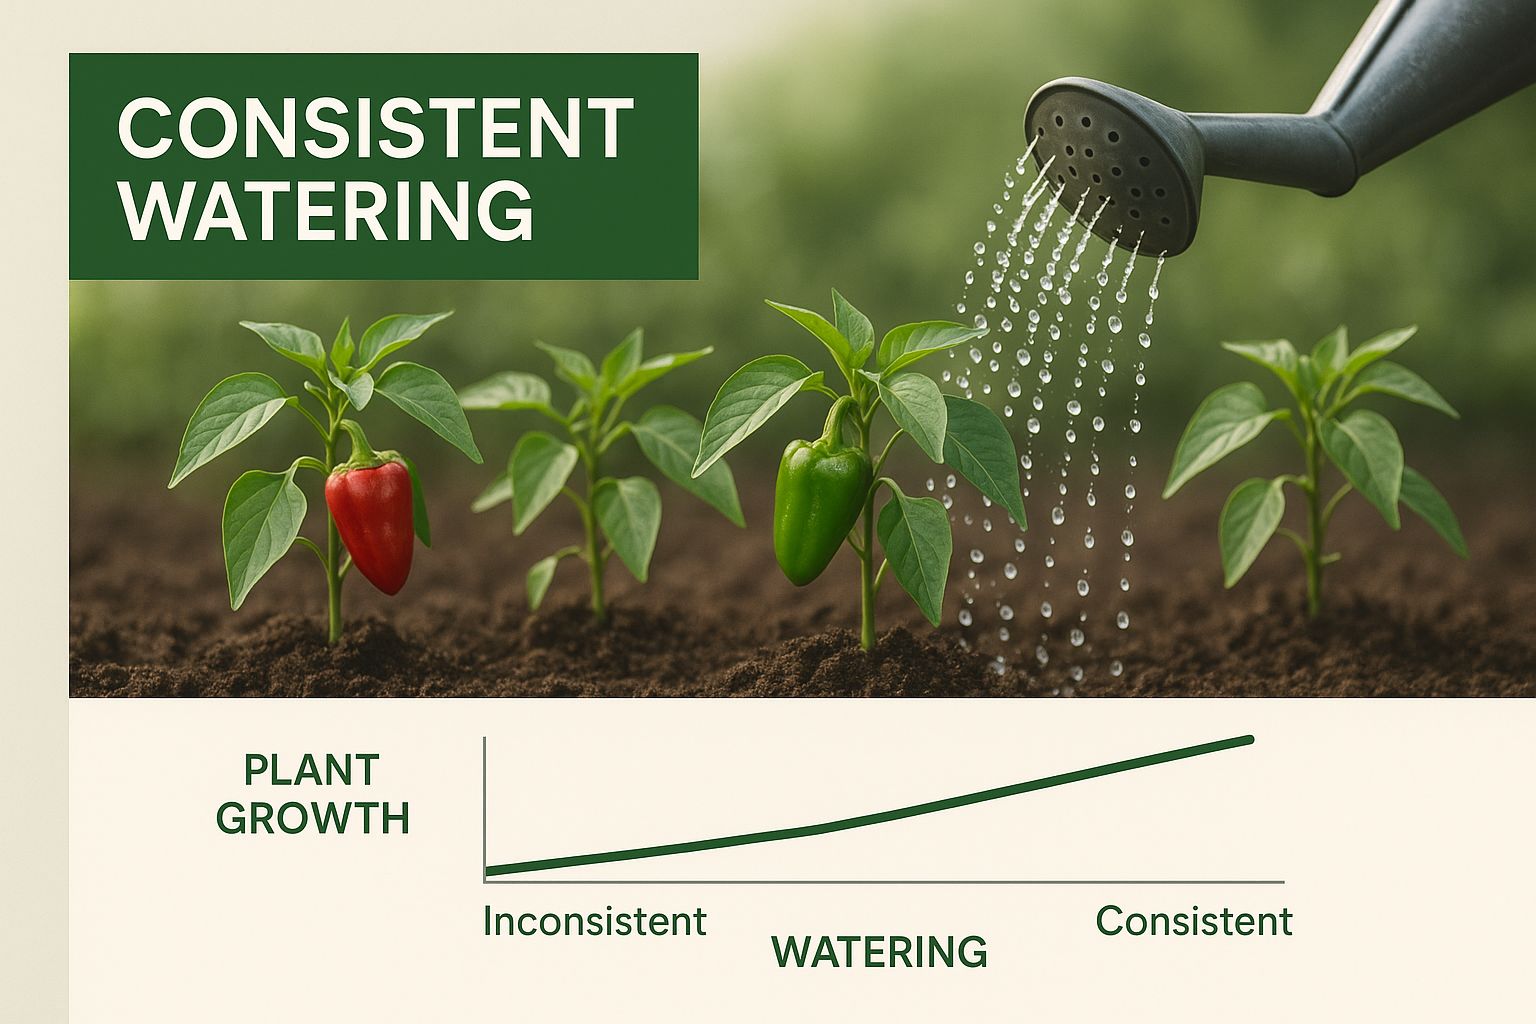
Once your ancho pepper plants are settled into their new home in the garden, your job shifts. Now, it's all about the consistent care that will make the difference between a few peppers and a truly impressive haul. The two biggest things you'll be doing from here on out are watering and feeding. If you can get these right, you're setting yourself up for success.
Think of it this way: watering is the daily lifeblood that keeps the plant running, while feeding is the targeted nutrition that fuels serious growth and pepper production. Nailing this balance helps you dodge common headaches like blossom end rot or stunted plants, giving them everything they need to grow those thick-walled, delicious poblanos you're dreaming of.
1. Water Deeply, Not Daily
Giving your plants a little sprinkle every day just encourages a weak, shallow root system. A much better approach is to water deeply once or twice a week, aiming for a total of about 1 to 2 inches of water. This forces the roots to grow deep into the soil, where they'll be better protected from the summer heat and have access to more nutrients.
2. Let the Soil Be Your Guide
Don't just water because it's Tuesday. The only real way to know if your plants are thirsty is to get your hands dirty. Stick a finger about two inches into the soil near the base of the plant. If it feels dry down there, it’s time to give them a good soak.
3. Water the Soil, Not the Leaves
Wet leaves are an open invitation for fungal diseases. I highly recommend using soaker hoses or a drip irrigation system. These methods deliver water right where it's needed—at the base of the plant—keeping the leaves dry and cutting down on water lost to evaporation.
4. Make Morning Your Prime Time
An early morning watering session gives your plants the hydration they need to face the heat of the day. Plus, if you do splash some water on the leaves, the sun has all day to dry it off, which really helps keep diseases at bay.
5. Know the Difference in Wilting
It's totally normal to see a little wilting on the hottest part of a summer afternoon; plants often bounce back as soon as the sun starts to go down. But if you walk out in the morning and your plants still look droopy, that's a clear signal they're desperately thirsty and need a drink, stat.
6. Adjust Water as Fruit Develops
As your plants begin to set and grow peppers, they're going to need more water. It makes sense—those peppers are mostly water! During this fruiting stage, you'll need to check the soil moisture more often to keep up with the demand.
7. Use Mulch to Conserve Water
Applying a 2-3 inch layer of organic mulch, like straw or shredded leaves, is one of the best things you can do for your pepper plants. It works wonders by slowing evaporation, regulating soil temperature, and smothering weeds that compete for water and nutrients.
A Smart Feeding Schedule for More Peppers
Ancho peppers can be pretty hungry plants, and what they need to eat changes as they grow. A smart feeding plan gives them the right nutrients at the right time, without overdoing it.
About three to four weeks after you’ve transplanted them, your peppers have probably gobbled up most of the initial nutrients in the soil. Now's the time to start a regular feeding routine. Start them off with a balanced, all-purpose organic fertilizer to encourage good, strong leaf and stem growth.
But once you spot those first little flower buds appearing, it's time to change your strategy.
This is a critical moment. You need to back off the nitrogen and ramp up the phosphorus (P) and potassium (K). Too much nitrogen now will just give you a giant, leafy green bush with hardly any peppers. Phosphorus and potassium are the nutrients that directly fuel flower formation and fruit development.
Here’s a simple schedule that works for me:
- Early Growth (Post-Transplant): Every 2-3 weeks, give your plants a dose of a balanced liquid fertilizer. Something like a fish emulsion or a homemade compost tea is perfect for this stage.
- Flowering & Fruiting Stage: Switch over to a fertilizer that's higher in phosphorus and potassium. You'll often find these marketed for tomatoes and peppers. Apply this every 2-3 weeks, following the directions on the package. For a deep dive, check out our guide on the best fertilizer for tomatoes and peppers.
- Keep an Eye Out: Your plants will tell you what they need. If you see lower leaves turning yellow, that could be a sign they need a bit more nitrogen. A purplish hue on the leaves often points to a phosphorus deficiency. Don't be afraid to adjust your feeding based on what you see.
By giving your ancho peppers deep, consistent watering and a feeding plan that adapts to their needs, you're creating the perfect environment for them to thrive and reward you with an incredible harvest.
10 Steps for Harvesting and Drying Your Ancho Peppers
After weeks of patiently tending your plants, you’ve finally reached the most rewarding part of the journey. This is where your garden-fresh poblanos transform into the rich, smoky, and slightly sweet anchos that are a cornerstone of so many incredible Mexican dishes. It’s a process that takes a bit of timing and patience, but believe me, the flavor is worth every second of the wait.
The real secret lies in knowing exactly when to pick your peppers. Harvesting at the perfect moment is what unlocks that complex, raisin-like flavor profile that makes ancho chiles so special.
7 Tips for a Perfect Ancho Harvest
-
Harvest Green for Poblanos If your heart is set on making chiles rellenos or other dishes calling for fresh poblanos, go ahead and pick them when they are a deep, glossy green. They should feel firm and satisfyingly heavy for their size, usually around 4-6 inches long.
-
Wait for Deep Red for Anchos Here’s the most important part. For that authentic ancho magic, you have to leave the peppers on the plant long after they turn green. They will slowly, almost grudgingly, ripen to a beautiful, rich, dark red. This can take an extra 2-4 weeks, but this is where the plant pumps sugars into the fruit, developing the signature taste you're after.
-
Check for a Little Wrinkling The ideal time to pick a poblano for drying is when it’s fully red and maybe even showing the first subtle signs of wrinkling on the skin. This is a tell-tale sign that the pepper is done growing and is ready to begin the drying process.
-
Use a Clean Cut When you’re ready, don't just pull the pepper off. You risk tearing the branch and damaging the plant. I always recommend using a pair of clean, sharp garden shears or a small knife to snip the stem, leaving about an inch still attached to the pepper itself.
-
Harvest in the Morning For the best results, try to get out there and harvest in the cool of the morning. The plants are fully hydrated after the night, and the peppers will be at their absolute peak freshness and crispness.
-
Handle with Care When you're picking fully ripened red poblanos, it’s a good idea to wear gloves, especially if you have sensitive skin. While they're considered mild, the capsaicin (the stuff that makes peppers hot) becomes more concentrated as they ripen, and it can irritate some people.
-
Know That Ripening Can Continue Off the Vine If an unexpected early frost is in the forecast, don't panic! You can pick any peppers that are starting to show a blush of red. Just place them on a sunny windowsill, and many will continue to ripen indoors over the next week or so.
3 Ways to Dry Your Peppers
Once you have a haul of beautiful red poblanos, it’s time for the final transformation. Drying them is what officially turns them into anchos. There are a few different ways to get this done, and each has its own benefits.
As you can see, keeping your plants well-watered is fundamental. It supports them through that long ripening process, ensuring you get healthy, flavourful peppers ready for drying.
-
Sun-Drying (The Traditional Method) If you live in a warm, dry, and sunny climate, this is the classic, time-honored approach. You can string the peppers up by their stems to create a ristra or simply lay them on screens in a single layer. The key is good air circulation and plenty of direct sun. It's a slow-and-steady method that can take 1-3 weeks, but many people swear it produces the most complex flavor.
-
Using a Food Dehydrator (The Most Reliable Method) For a foolproof option, nothing beats a food dehydrator. It provides consistent, low heat and excellent airflow, taking all the guesswork out of the process. I set mine to about 135°F (57°C), and the peppers are usually perfectly dried in 8 to 12 hours.
-
Drying in the Oven (The Quickest Indoor Method) No dehydrator? No problem. Your oven can work in a pinch. Just place the peppers on a baking sheet and set your oven to its absolute lowest temperature—ideally around 140-150°F (60-65°C). It's crucial to prop the oven door open just a crack to let the moisture escape. Check on them regularly; this usually takes 6-10 hours.
No matter which method you choose, the goal is the same. Your ancho peppers are perfectly dry when they feel leathery and pliable, much like a raisin, but will snap if you try to bend them sharply. Make sure there are no soft spots left.
Ancho Pepper Drying Method Comparison
Deciding how to dry your peppers often comes down to your climate and the equipment you have on hand. Here's a quick rundown of the three most common methods to help you choose the best one for your situation.
| Drying Method | Time Required | Pros | Cons |
|---|---|---|---|
| Sun-Drying | 1–3 weeks | Traditional, develops deep flavor, no electricity needed. | Requires a very specific (hot, dry, sunny) climate; can attract pests. |
| Dehydrator | 8–12 hours | Highly reliable, consistent results, works in any climate. | Requires a special appliance. |
| Oven | 6–10 hours | Uses a common kitchen appliance, relatively fast. | Can easily scorch peppers if the temperature is too high; ties up your oven. |
Each method will get you to that delicious, smoky-sweet ancho flavor. The best one is simply the one that works for you.
Once they're completely dry, store your homemade anchos in an airtight container in a cool, dark place like a pantry. They'll keep their incredible flavor for at least a year, ready for all your culinary adventures. It’s no wonder these peppers are so popular; the global ancho chile market is projected to hit USD 1.23 billion by 2030, a testament to the growing love for authentic Mexican flavors. You can learn more about the rise of the ancho chile on accio.com.
4 Common Questions About Growing Ancho Peppers
Even with the best guide, questions always seem to pop up right when you're in the middle of the growing season. Let's dig into some of the most common things gardeners ask about growing ancho peppers, from basic "what's the difference" questions to troubleshooting problems in the garden. Getting these answers sorted can make a huge difference in your final harvest.
We'll cover the essentials that every pepper grower wonders about at some point, so you can feel confident from seed to harvest.
1. Poblano vs Ancho: What Is the Difference?
This is easily the question I hear the most, and thankfully, the answer is simple. They're the exact same pepper, just at different points in their lifecycle.
- A Poblano is the fresh, green pepper you find at the grocery store. It's picked at this stage for making classic dishes like chiles rellenos, where that mild heat and thick, sturdy wall are perfect for stuffing.
- An Ancho is what you get when you let that Poblano ripen fully on the plant until it turns a deep, rich red, and then you dry it out.
That whole ripening and drying process completely changes the pepper. It concentrates all the natural sugars and develops an incredible smoky, slightly fruity flavor that's worlds away from its green version. So, when you set out to grow ancho peppers, what you're really doing is growing poblanos and letting them mature completely.
2. Can I Grow Ancho Peppers in a Container?
You absolutely can! Ancho peppers do surprisingly well in containers, which is fantastic news if you're working with a small space, a patio, or a balcony. The trick is just giving them enough room for their roots to spread out.
I always recommend a pot that's at least 5 gallons. One of those standard buckets from a home improvement store works great. Just make sure you drill plenty of drainage holes in the bottom—pepper roots really can't stand to be waterlogged.
A quick heads-up for container gardeners: pots dry out way faster than a garden bed, especially on hot or windy days. You'll need to check the soil moisture every day and plan on watering more often. Nutrients also leach out quicker with each watering, so sticking to a regular feeding schedule is key to getting a good harvest.
3. How Long Does It Take From Seed to Harvest?
Growing anchos definitely teaches you patience, as the full journey takes a little while. From the day you plant your seed to the day you have a dried ancho pepper ready for the kitchen, you're looking at a timeline of about 100 to 120 days.
Here’s a general idea of how that breaks down:
- Germination to Transplanting: 6-8 weeks
- Transplant to Green Poblano: 60-80 days
- Ripening from Green to Red: Another 2-4 weeks on the vine
- Drying: A few days to two weeks, all depending on your method
This is exactly why starting seeds indoors is so critical in most climates. It gives the plants the big head start they need to finish their entire cycle before the first frost arrives.
4. What Pests and Diseases Should I Watch For?
Ancho pepper plants are pretty tough, but a few common problems can still show up. Knowing what to look for helps you tackle them before they get out of hand.
Aphids are probably the most common pest you'll see; these tiny insects love to hang out on new, tender growth. You can often get rid of them with a sharp spray of water from the hose or by using an insecticidal soap. Protecting your plants is a big part of gardening, so it's worth learning about different Integrated Pest Management strategies you can use.
Blossom end rot is another classic frustration. It shows up as a dark, leathery spot on the bottom of the pepper. This isn't a disease but a calcium uptake problem, usually caused by inconsistent watering. Your best defense is to keep the soil evenly moist.
At Homegrown Garden, we're here to help you succeed with every seed you plant. Our curated selection of heirloom seeds, detailed grow guides, and expert support ensures you have everything you need for a garden you can be proud of. Start your gardening adventure with us today! https://www.homegrown-garden.com
Growing your own peppers from seed? You can browse our heirloom vegetable seeds to plan next season's garden.

