


The real secret to a massive tomato harvest isn't some complicated trick—it all comes down to a bit of simple calendar math. Your goal is to start your tomato seeds indoors 6 to 8 weeks before your area's last average frost date. Nailing this timing is crucial; it’s the sweet spot that gives your seedlings plenty of time to grow strong roots and sturdy stems without getting lanky and outgrowing their pots before it's safe to plant them outside.
1. Figuring Out Your Ideal Seed-Starting Window
When it comes to starting tomatoes from seed, timing truly is everything. If you jump the gun and start them too early, you'll likely end up with "leggy," weak plants that are stressed and root-bound in their little pots. Wait too long, and you're cutting into your precious growing season, which can mean a smaller harvest later on. That 6-to-8-week window has become the gold standard for a reason.
This timeframe gives your tiny seedlings the chance to hit the perfect size for transplanting. By then, they’ll have developed their first few sets of "true leaves" (the ones that show up after the initial two baby leaves) and a healthy root system. This makes them tough enough to handle the move into the garden without throwing a fit and suffering from transplant shock.
Find Your Last Frost Date
First things first, you need to figure out your last average frost date. This isn't a hard-and-fast guarantee, but it’s a historical average that gives you a solid target to aim for. The easiest way to find it is to pop your zip code into an online frost date calculator.
Once you have that date, just count backward on a calendar. For instance, if your last frost date is around May 15th, you'll want to get those seeds sown sometime between March 20th and April 3rd.
To make it even easier, here's a quick reference table. Just find your last frost date to see your ideal planting window.
Your Tomato Seed Starting Calendar
Use your last average frost date to find your ideal indoor seed starting window.
| If Your Last Average Frost Date Is... | Start Seeds Indoors Between... |
|---|---|
| March 15th | January 18th - February 1st |
| April 1st | February 4th - February 18th |
| April 15th | February 18th - March 4th |
| May 1st | March 6th - March 20th |
| May 15th | March 20th - April 3rd |
| June 1st | April 6th - April 20th |
Remember, this is a guide. If you live somewhere with a cool, short season, I'd lean closer to the 8-week mark to give your plants a bit of a head start.
This visual breaks down the key steps perfectly.
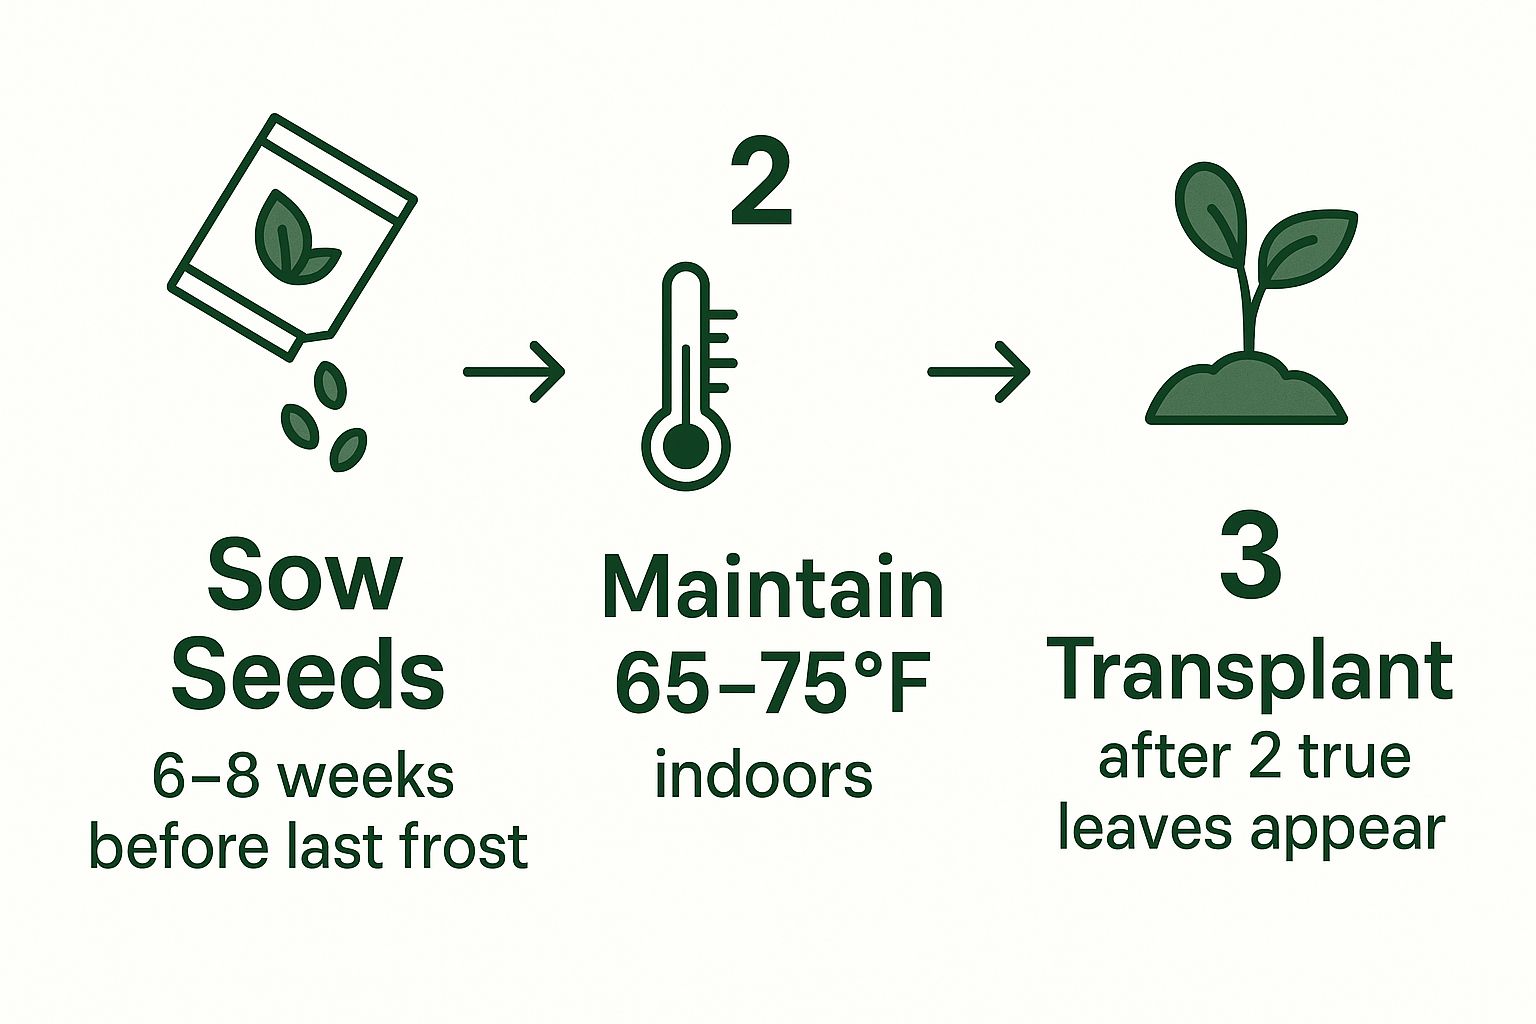
As you can see, success really boils down to getting the timing right, keeping the indoor temperature consistent, and transplanting when the seedlings are ready. Of course, the quality of your seeds plays a big role, too. I've found that tomato seeds under five years old typically have germination rates around 80-90%, so using fresher seeds gives you the best shot.
These timing principles don't just apply to tomatoes! You can learn more in our comprehensive guide on when to start seeds indoors.
2. Getting Your Seed Starting Kit Together
Before a single seed gets planted, you've got to gather your gear. Having everything on hand from the get-go makes the whole process smoother and sets your tiny tomato plants up for success. Trust me, you don't want to be running to the store mid-sow. It's like cooking—you get your ingredients ready before you turn on the stove.
You don't need a fancy, high-tech setup, but a few key items will make a world of difference between spindly, weak seedlings and strong, garden-ready plants.
Picking Your Pots and Soil
First up, you need a home for your seeds. You’ve got a few solid choices here, and what you pick often comes down to personal preference and budget.
- Reusable Plastic Trays: These are the workhorses of the seed-starting world. They're cheap, they last for years if you treat them well, and you can find them in all sorts of cell sizes.
- Peat or Coir Pots: If you dread transplanting, these are for you. The whole pot goes right into the ground, which means way less stress on the plant's roots. They just grow right through the sides as the pot breaks down.
- Soil Blocks: For the eco-conscious gardener who wants to skip plastic altogether, a soil blocker is a brilliant little tool. It presses your damp soil mix into small cubes, creating a pot-less system that gives the roots fantastic air exposure.
No matter which container you choose, the soil is non-negotiable. Do not use soil from your garden. It’s too heavy, it compacts easily, and it’s often full of pathogens that can cause "damping-off"—a fungal disease that will wipe out your seedlings overnight. Always start with a fresh, sterile seed-starting mix. It's light, fluffy, and gives those brand-new roots the easy path they need.
I see a lot of new growers use big pots thinking they'll save a step later. It's a classic mistake. Smaller cells are much better for germination because they warm up faster and you have far more control over moisture levels—both are critical for getting seeds to sprout.
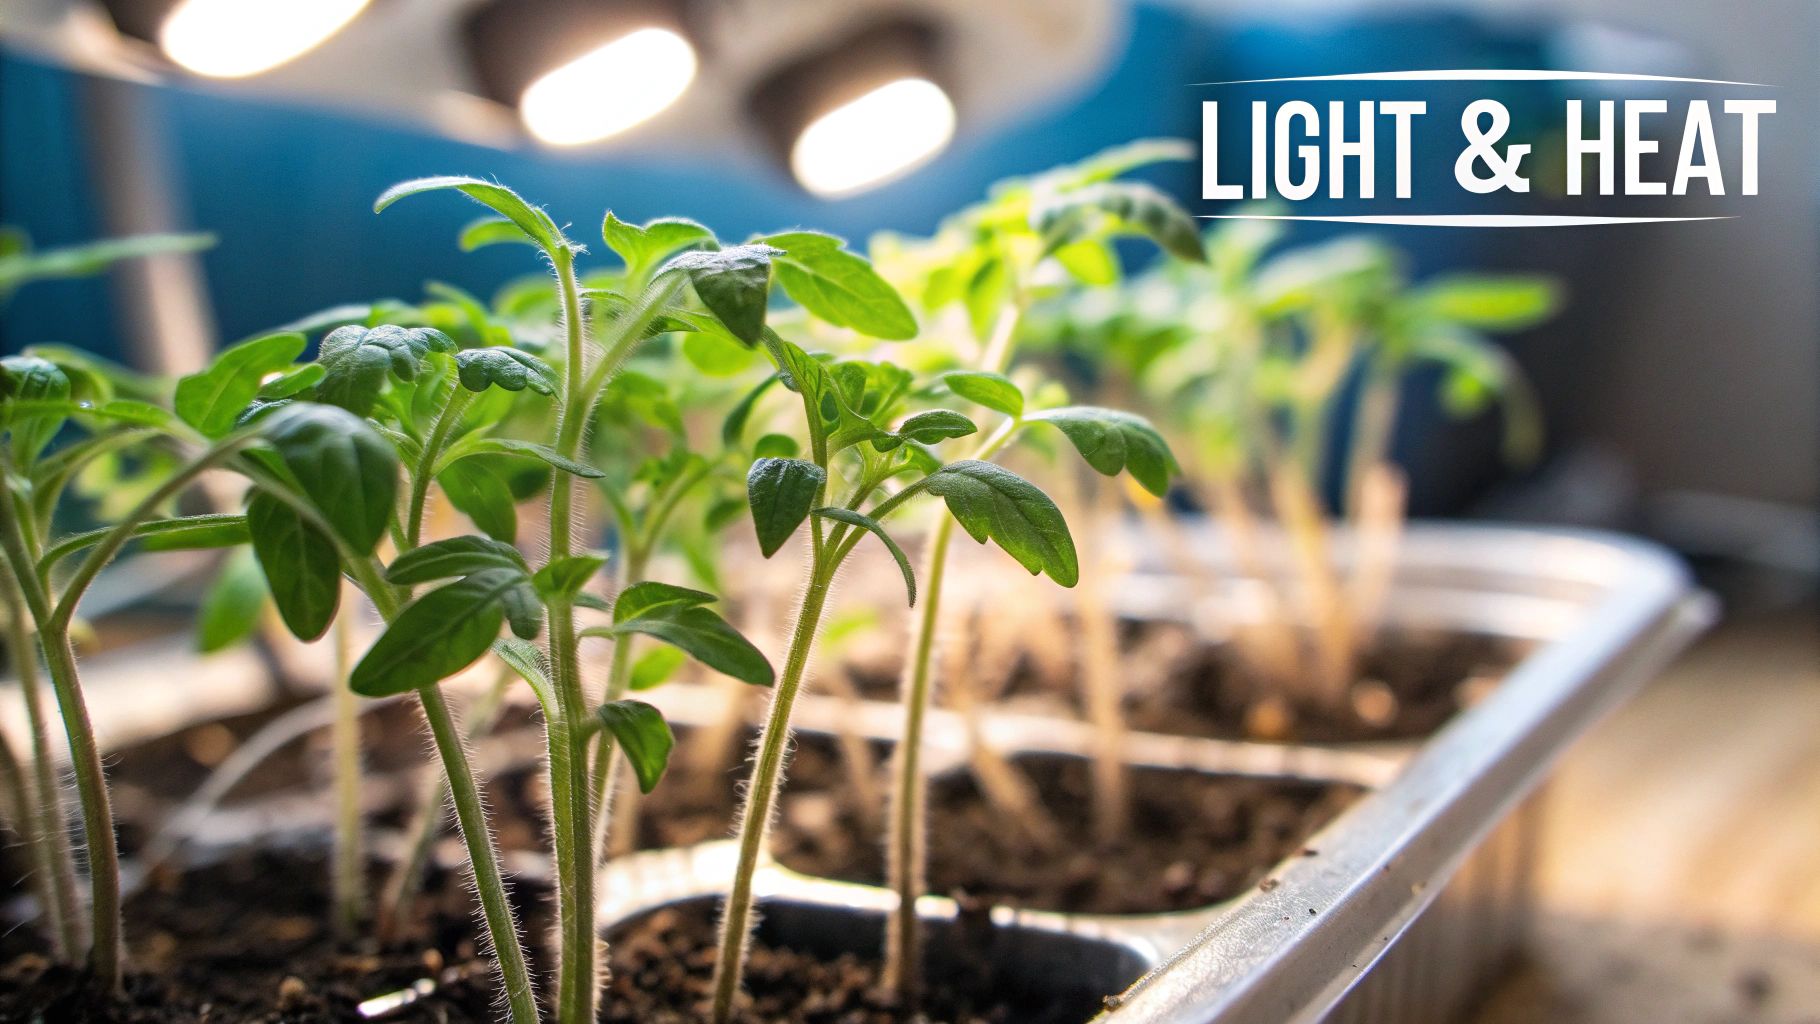
Let There Be (the Right) Light
Now, let's talk about light. This is where a lot of well-intentioned efforts go wrong. A sunny windowsill might seem like the perfect spot, but for most of us, it’s a recipe for disappointment.
Your tomato seedlings need a whopping 14-16 hours of bright, direct light every single day. A window just can't provide that, especially in late winter or early spring. Without enough light, you get "leggy" seedlings—long, pale, and weak little things stretching for a sunbeam.
The solution is simple and doesn't have to be expensive. An ordinary shop light with fluorescent or LED bulbs works wonders. For even better results, a dedicated LED grow light is a fantastic investment. The key is to hang the light just a few inches above the tops of your seedlings. This gives them the intense, consistent light they need to grow short, stocky, and strong.
3. Choosing Seeds That Will Thrive in Your Garden
Every seed packet holds the promise of a future harvest, but getting there starts with choosing the right tomato. It’s easy to get lost in a sea of options, from amazing heirlooms to hardy, disease-resistant hybrids. The key is to match the variety to your climate, your garden, and, of course, what you love to eat.
Your success is directly tied to the quality of your seeds. Always go for fresh seeds from a supplier you trust. I’ve learned the hard way that old, poorly stored seeds just don't perform. Freshness makes a massive difference in how quickly and reliably your seeds will sprout.
In fact, some interesting research shows just how much. Seeds harvested fresh from a tomato had an impressive germination rate of 82.5%, completely outclassing the 49% rate from pre-packaged dried seeds. The study also noted that the fresh seeds produced stronger, faster-growing seedlings. You can dig into the specifics of these findings on tomato seed germination if you're curious.
Testing Your Old Seeds
Have a stash of seeds from last year? Don't just toss them in some soil and hope for the best. There's nothing more frustrating than waiting weeks for seedlings that never appear. A quick viability test can save you a ton of time and disappointment.
Here’s a simple trick I use every year:
- Get a paper towel damp, but not dripping wet.
- Place about 10 seeds on one half of the towel.
- Fold the other half over the top and slip the whole thing into a plastic bag.
- Leave the bag somewhere warm, like on top of the fridge, for about a week. 70°F is a good target.
After seven days or so, peek inside. If seven of the ten seeds have sprouted, you’ve got a 70% germination rate, which is workable—just plant a few extra seeds in each cell to be safe. If you see fewer than five sprouts, it’s probably time to treat yourself to a new packet of seeds.
My Favorite Pro-Tip: Give your seeds a head start with a pre-soak. Just letting them sit in a small bowl of lukewarm water for a few hours before planting can work wonders. It softens up the hard seed coat and can shave a day or two off your germination time. It’s a tiny step that makes a real difference.
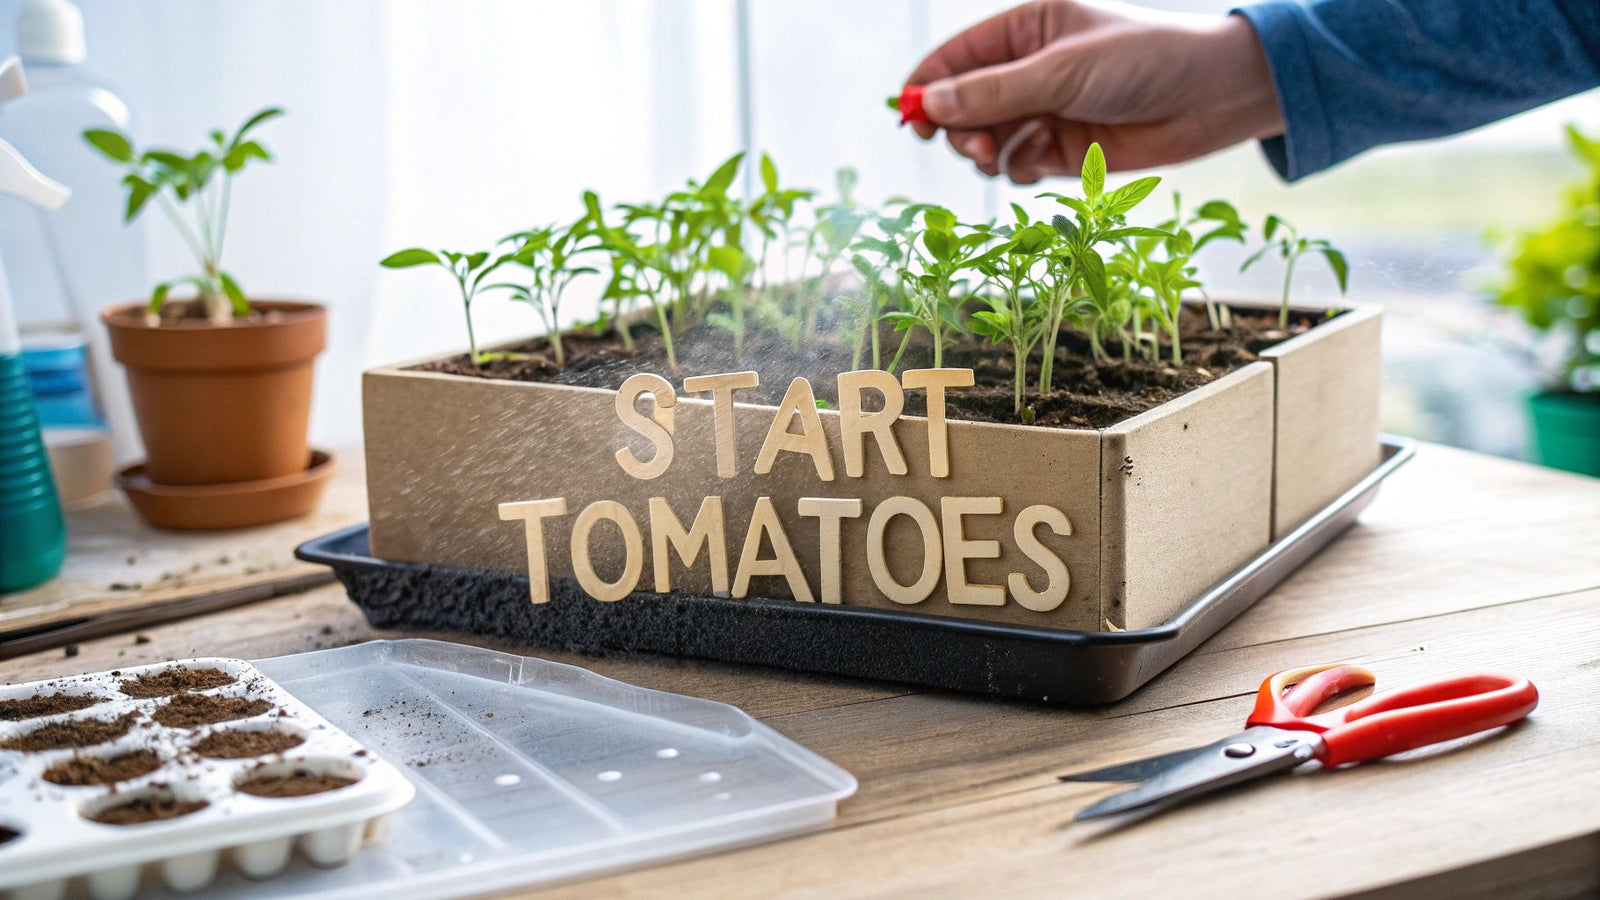
4. Planting Your Tomato Seeds
Alright, this is where the magic really starts—getting those seeds into their first home. The little things you do now will make a huge difference between a tray of thriving seedlings and a tray of duds.
First things first, let's talk about the soil. Before a single seed gets planted, your starting mix needs to be properly moistened. The goal is a texture like a damp sponge you've just wrung out. It should be moist to the touch but not sopping wet.
Why is this so important? Pre-moistening your mix gives the seeds the consistent moisture they need to kickstart germination. If you try to water dry soil after planting, you risk creating dry pockets or washing the tiny seeds around.
Nailing the Planting Process
With your soil prepped, you're ready to sow. The most common mistake I see new gardeners make is burying their seeds way too deep. It's an easy fix, though.
A good rule of thumb is to plant a seed about twice as deep as its width. For something as small as a tomato seed, we're talking about just a quarter-inch or so.
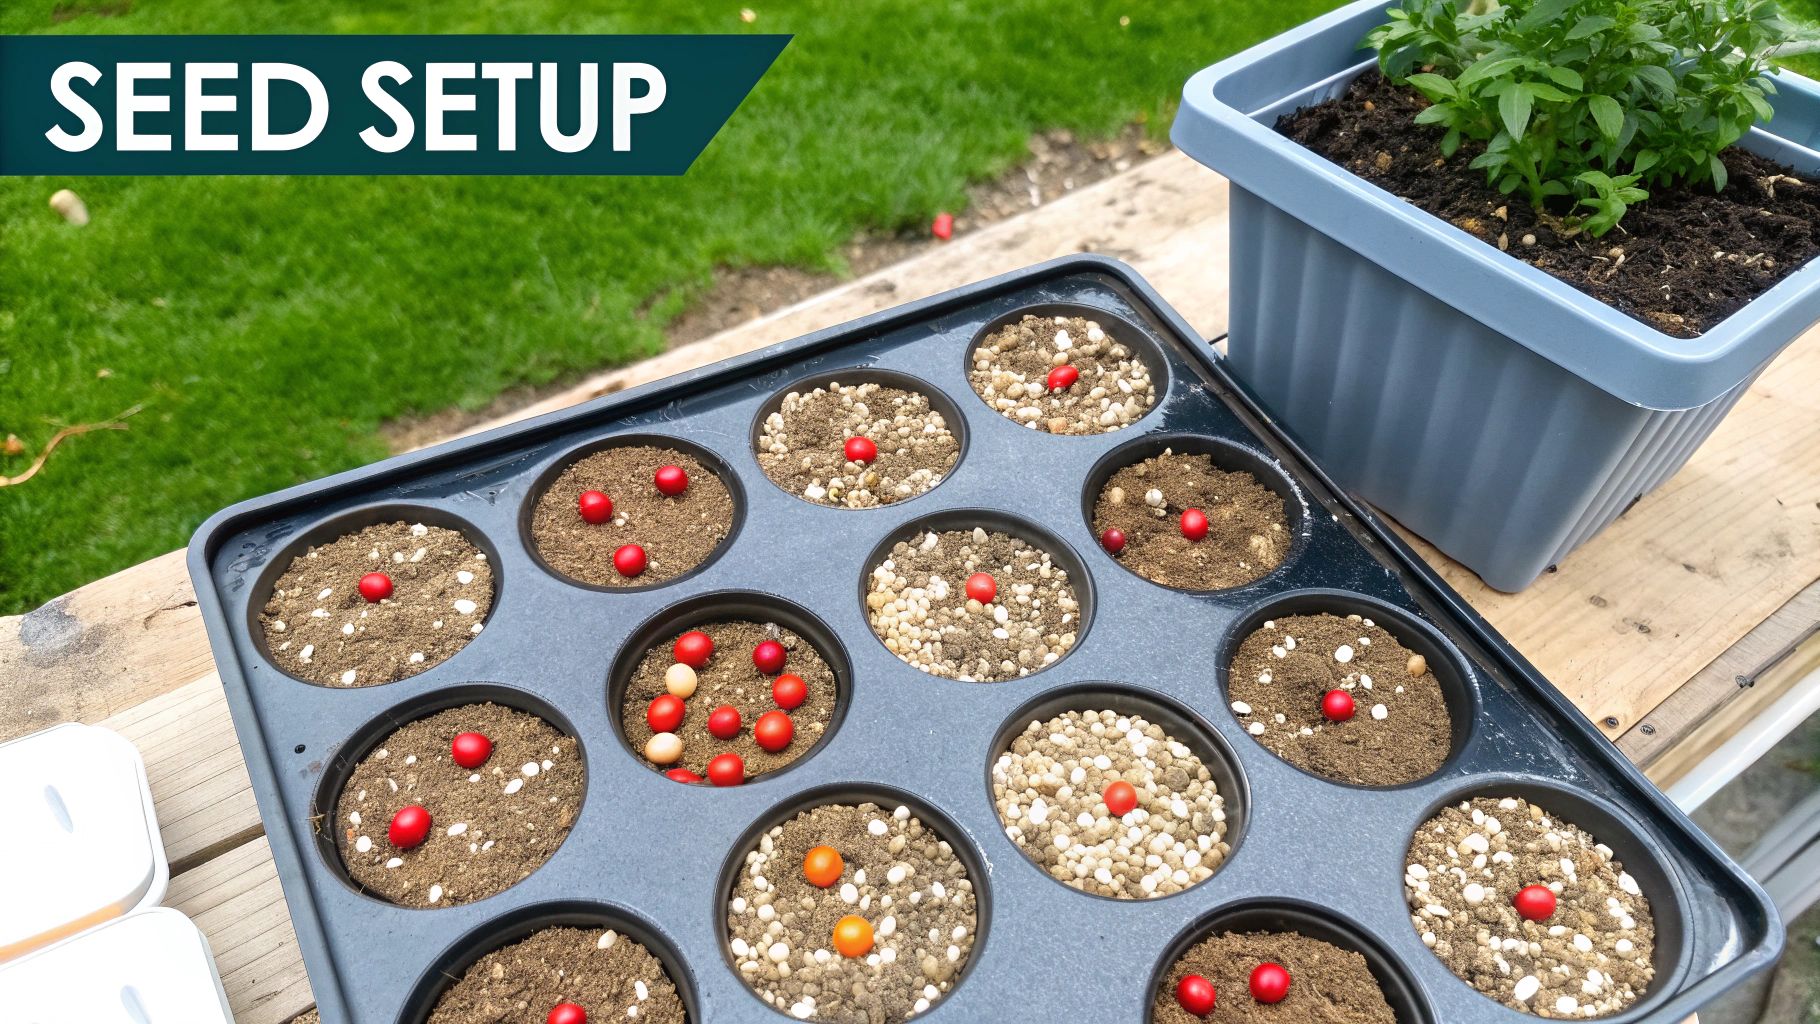
- I use the tip of a pencil or a small dowel to make a shallow hole in the center of each cell.
- Drop 2-3 seeds into each one. This is a bit of gardening insurance—it drastically increases your odds of getting at least one strong seedling per cell.
- Gently brush some soil over the seeds to cover them up.
Don't worry about overcrowding. We'll thin them out later, selecting the most vigorous plant to continue growing.
Here's a pro tip: Once you're done planting, pop a clear humidity dome over the tray. This creates a mini-greenhouse environment, trapping heat and moisture right where you need it. It’s a simple step that can seriously speed up how fast your seeds sprout.
The final piece of the puzzle is warmth. Tomato seeds love a bit of heat to get going. A seed-starting heat mat set to a cozy 75°F is ideal for providing that consistent bottom heat. No heat mat? No problem. The top of a refrigerator often gives off just enough gentle warmth to do the trick.
For a deeper dive into getting your indoor seed setup just right, check out our guide with more tips for starting seeds indoors.
5. Caring for Your Young Tomato Seedlings
So, those first little green shoots have finally pushed through the soil. Congratulations! Now the real fun begins. The daily attention you give these tiny sprouts over the next few weeks is what turns them into strong, healthy plants ready for the garden. Getting this part right is every bit as crucial as knowing when to start tomato plants from seeds.
When it comes down to it, great seedling care really boils down to three things: light, water, and airflow. If you can get these right, you’ll grow stocky, vigorous plants instead of the tall, weak, and spindly ones that never seem to do well.
Creating the Perfect Environment
Your new seedlings are hungry for light—and I mean a lot of it. A sunny windowsill just isn't going to provide the intensity they need. For strong, compact growth, they require a solid 14-16 hours of direct light every single day.
You'll want to hang your grow light just a couple of inches above the tops of the seedlings. As they get taller, you'll need to keep raising the light to maintain that small gap. Keeping the light source close is the secret to preventing them from stretching out and becoming fragile.
Next up is watering, and there's a definite right and wrong way to do it. Many beginners make the mistake of watering from the top, which can lead to problems. A much better approach is to let them drink from the bottom.
- Start by placing your seedling cells or pots inside a solid tray that doesn't have drainage holes.
- Pour about an inch of water into this bottom tray.
- Give the seedlings about 20-30 minutes to soak up the water through the holes in their containers.
- Once you see the soil surface is damp, pour out any water that's left in the bottom tray.
Watering this way encourages the roots to grow down deep in search of moisture, which builds a much more robust root system. It also keeps the stems and leaves dry, a simple trick that goes a long way in preventing common fungal diseases like damping-off.
Here's a pro tip from my own experience: an oscillating fan is your best friend. Just a simple one, set on low for a few hours a day, creates a gentle breeze that mimics outdoor conditions. This constant air movement strengthens the seedling stems, getting them ready for the real wind they'll face once they're planted outside.
Getting the timing and care right is what separates a good home harvest from a great one. This same principle applies on a massive scale in commercial farming. Take the Asia-Pacific region, which accounts for nearly 46% of the entire global tomato seed market. Professional growers there start their seeds indoors 6 to 8 weeks before transplanting, a strategy vital for meeting market demands and ensuring a profitable harvest. You can find more fascinating data about the global tomato seed market and its economic impact.
6. Preparing Your Plants for the Outdoors
Those seedlings you've babied indoors for weeks are in for a rude awakening if you just toss them out into the garden. Moving them directly from a controlled, cozy environment into the wild world of sun, wind, and temperature swings is a recipe for shock, sunburn, and often, death.
This critical transition period has a name: hardening off. It’s all about slowly getting your plants accustomed to the great outdoors. It's tempting to skip this step when you're excited to get planting, but trust me, it’s one of the biggest mistakes new gardeners make. A little patience now pays off with strong, healthy plants later.
The whole process usually takes about 7 to 14 days. Don't rush it.
A Simple 7-Day Hardening Off Schedule
The idea is to gradually increase their time outside each day. Think of it like letting your eyes adjust to a bright room—you don't just stare into the sun.
Here’s a schedule that has always worked well for me:
- Day 1 & 2: Find a protected spot for your seedlings—maybe on a porch or under a large tree. Leave them out for just 1-2 hours in the morning or late afternoon. The key is dappled sunlight, not direct, harsh rays.
- Day 3 & 4: Up their outdoor time to about 3-4 hours. They can handle a little direct morning sun now, but make sure you bring them in before the intense midday sun hits.
- Day 5 & 6: Now they can stay out for 5-6 hours. They should be looking much sturdier and can handle a few hours of direct sunlight without wilting.
- Day 7: If the weather is cooperating and nighttime temps are staying above 50°F, it's time for their first sleepover. Leave them out overnight in their sheltered spot. If they look happy and healthy the next morning, they're ready to be planted in the garden.
A quick glance at the weather forecast is your best friend here. An unexpected cold snap, heavy rain, or strong winds can set you back to square one. Patience is everything during this final stage.
Keep a close eye on your plants throughout the week. If you notice their leaves turning white or looking bleached, that's sunscald. If they're wilting dramatically, they're stressed. If you see either of these, just dial back their sun exposure for a day or two before picking up where you left off.
Remember, plants dry out much faster outside, especially on breezy days. You'll likely need to water them more often, so check the soil moisture every day. While this process is crucial for tomatoes, you can learn more about timing for other vegetables in our guide on when to plant vegetable seeds.
7. Your Top Tomato Seed Starting Questions, Answered
Every gardener has questions, especially when it comes to getting those tiny tomato seeds to sprout. Let's tackle some of the most common puzzles you might run into.
Common Seed Starting Questions
What happens if I start my tomato seeds too early?
It's a classic case of too much of a good thing. Kicking things off more than 8 weeks before your last frost date almost always leads to leggy, overgrown seedlings. They quickly outgrow their little pots, their roots get all tangled and "root-bound," and the whole plant becomes stressed.
You'll see yellowing leaves and a general lack of vigor. Then, when it's time to move them outside, these coddled plants often suffer from serious transplant shock, which can set back your harvest by weeks.
Can I just use soil from my garden to start seeds?
Please don't! This is one of the most common mistakes I see new gardeners make. Your garden soil is way too heavy for delicate new roots, and it compacts into a brick-like mass when you water it in a small container.
Worse yet, it’s usually full of weed seeds, insect eggs, and fungal spores that can cause diseases like damping-off, which kills seedlings overnight. Always, always grab a bag of sterile, lightweight seed-starting mix. It’s specifically designed to be fluffy and disease-free, giving your seedlings the best possible start.
Is a grow light really necessary for tomato seedlings?
Honestly, yes. While you might get lucky with a super-sunny, south-facing windowsill, it rarely provides the intense 14-16 hours of direct light that tomato seedlings need to thrive.
Without that powerful, consistent light, they’ll do what all plants do: stretch and strain toward the window. This gives you weak, pale, and spindly plants that are likely to struggle later on. A simple grow light is the single best investment you can make to guarantee you’ll have strong, stocky, and healthy tomato plants come spring.
At Homegrown Garden, we're here to help you succeed with every seed you plant. Explore our curated selection of heirloom tomato seeds and all the supplies you need to get growing.

