


Of course you can grow sweet peas in containers! In fact, with the right setup, you can have fragrant, gorgeous blooms climbing up a trellis on even a small patio or balcony.
The secret is giving their long roots a deep pot to stretch out in, feeding them with a rich, well-draining soil mix, and providing a sturdy structure to climb. When you grow in containers, you're the one in charge—you can create the perfect little world for these classic flowers to thrive.
3 Reasons Why You Should Grow Sweet Peas in Pots
Don't let a lack of garden space stop you. Growing sweet peas in containers is one of the most satisfying ways to fill a small area with stunning color and that classic, intoxicating scent. Pots give you a flexible and manageable way to get healthy, productive plants, often with less fuss than planting in the ground.
This method is a game-changer for anyone with a balcony, patio, or even just a sunny doorstep. Let's dig into why it works so well.
1. You Have Total Control Over the Soil
This is probably the single biggest perk of container gardening. Sweet peas are hungry plants and absolutely need rich, well-draining soil to put on a good show—a luxury not all of us have in our backyards.
By using a pot, you get to play soil scientist and create the perfect blend from the get-go. This means no competing with tree roots, no fighting with heavy clay or sandy soil. A custom mix helps your sweet peas develop a robust root system, which is the engine for producing masses of flowers.
2. They Are Perfect for Small Spaces and City Dwellers
You don’t need a sprawling English garden to enjoy sweet peas. Their natural desire to climb makes them a perfect fit for containers in tight spots.
- Patios & Balconies: Pop a trellis in a large pot and you can transform a boring wall into a living curtain of blooms.
- Front Doorways: A container on either side of an entrance creates a beautiful and fragrant welcome for you and your guests.
- Rooftop Gardens: Even urban rooftops can come alive with color by using lightweight pots. They're also a great option to pair with other trendy houseplants to complement your decor.
3. Pests and Diseases Are Easier to Handle
When your plants are in containers, it's so much easier to keep an eye on them. Spotting pests like aphids or the first signs of powdery mildew is simpler when the plant is right at eye level.
You can isolate an affected pot and treat it quickly before the problem hops over to your other plants. In a crowded garden bed, pests can spread like wildfire. If one plant gets really sick, you can just remove that one container without disrupting everything else.
Sweet pea breeding has a long history of focusing on specific growing conditions. We're lucky that today, many varieties have been adapted specifically for containers. You can find cascading types with 8-10 inch flowers or compact dwarf varieties that only reach about 3 feet tall, making them ideal for a controlled patio environment.
7 Best Containers and Soil Mixes for Sweet Peas
Getting the container and soil right is probably the single most important thing you'll do when growing sweet peas in pots. These fragrant climbers have surprisingly deep roots, and giving them the perfect foundation from the very beginning is the secret to a long season of beautiful, aromatic blooms. Think of the pot as their home and the soil as their lifelong pantry.
Let's walk through the seven best options for containers that will keep your sweet peas happy and thriving. We’ll cover everything from classic materials to modern innovations that can make your life a little easier.
This handy decision tree can help you figure out if container gardening is the right path for your sweet pea adventure.
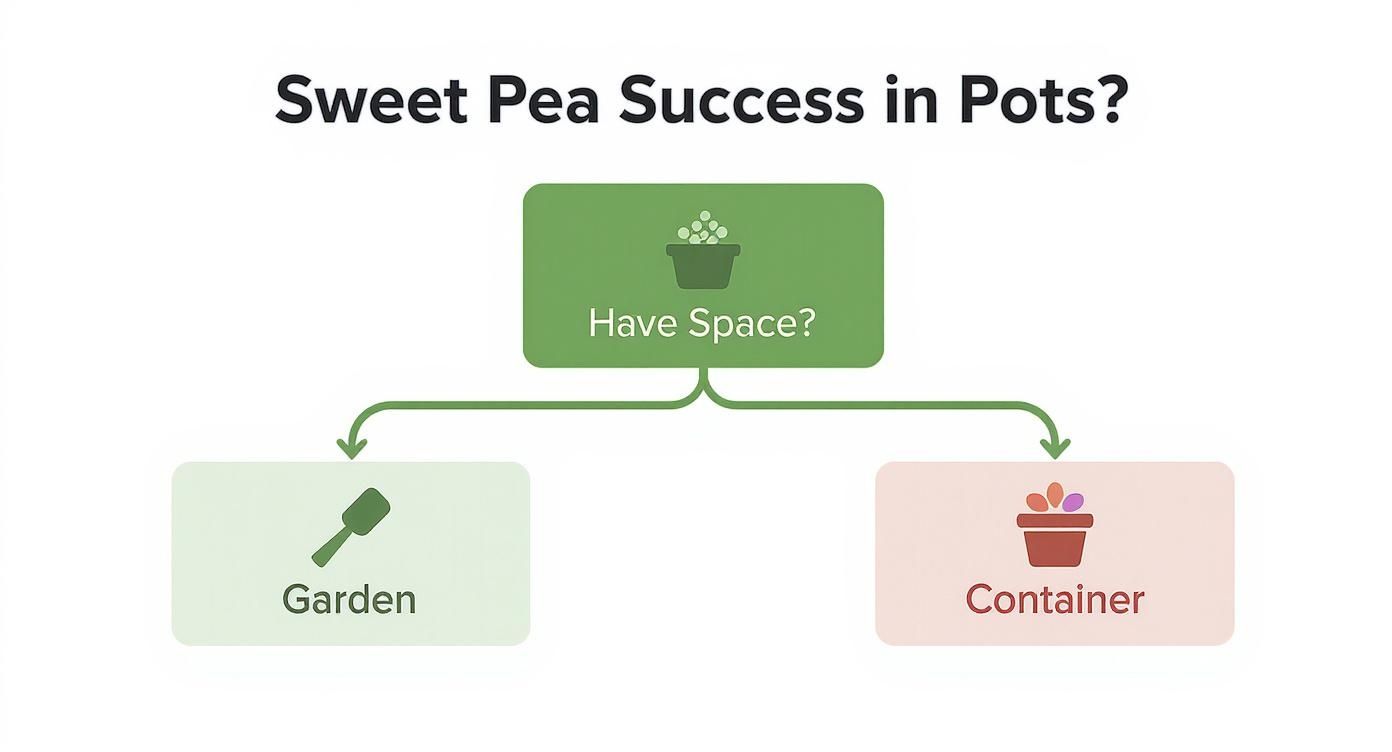
As you can see, container growing is a fantastic solution for gardeners working with limited space, like a patio or balcony.
7 Top Container Choices for Sweet Peas
1. Deep Terracotta Pots
Classic terracotta is a wonderful choice because it's porous. This allows air to circulate around the roots and helps prevent the soil from becoming a waterlogged mess. Their weight also makes them stable, which is a huge plus for supporting tall, top-heavy trellises. Just remember, they do dry out faster, so you'll need to be on top of watering during hot spells.
2. Large Wooden Planters or Half Barrels
Wooden containers offer incredible insulation, protecting delicate roots from wild temperature swings—both hot and cold. A half whiskey barrel or a deep wooden trough gives you plenty of room for multiple plants, which is perfect for creating a really dense, lush display. Make sure any wood you use is either untreated or sealed with a plant-safe product.
3. Fabric Grow Bags
These are lightweight, surprisingly affordable, and amazing for root health. The breathable fabric stops roots from circling and becoming pot-bound. Instead, it promotes a dense, fibrous root system through a process called "air-pruning." For sweet peas, a 10- or 15-gallon grow bag is an ideal size.
4. Tall Plastic or Resin Pots
Modern plastic and resin pots are a practical option. They are lightweight, durable, and excellent at retaining moisture, which cuts down on your watering duties. You can find many that mimic the look of stone or terracotta but are much easier to move around. The key here is to choose a pot that is deep rather than wide.
5. Self-Watering Planters
If you're busy or just a bit forgetful with watering, these planters are a total game-changer. They have a built-in reservoir that wicks water up into the soil as needed. This ensures your sweet peas get consistent moisture without the risk of overwatering—a common culprit behind bud drop.
6. Galvanized Metal Tubs
For a rustic, farmhouse aesthetic, galvanized metal tubs are hard to beat. They are incredibly durable, but you absolutely must drill plenty of drainage holes in the bottom before planting. Be mindful that metal can get scorching hot in direct sun, so it's a better choice for climates that aren't excessively hot or for spots that get a bit of afternoon shade.
7. Vertical Wall Planters with Deep Pockets
Is floor space your biggest challenge? A sturdy wall planter with deep individual pockets can work wonders. This lets you create a stunning living wall of sweet peas. You’ll just need to pay close attention to watering, as the smaller soil volume in the pockets dries out much more quickly.
For a deeper dive into materials and what might work best in your specific garden, check out this excellent A Kiwi Gardener's Guide to Plant Containers.
To help you weigh the options, here’s a quick comparison of the most common materials.
Comparing 5 Container Materials for Sweet Peas
| Material Type | Pros | Cons | Best For |
|---|---|---|---|
| Terracotta | Porous (good aeration), heavy and stable | Dries out quickly, can crack in freezes | Gardeners who don't mind frequent watering. |
| Wood | Excellent insulation, attractive natural look | Can rot over time, may be heavy | Climates with big temperature swings. |
| Fabric | Promotes healthy roots, lightweight, affordable | Dries out very fast, less decorative | Gardeners focused purely on plant health. |
| Plastic/Resin | Retains moisture well, lightweight, durable | Can get brittle with age, less breathable | Low-maintenance gardening and hot climates. |
| Metal | Very durable, unique aesthetic | Heats up significantly in direct sun | Cooler climates or partially shaded spots. |
Ultimately, the best container is one that fits your space, your climate, and how much time you have for watering.
Crafting the Perfect Soil Mix in 3 Steps
Sweet peas are hungry plants that need a soil blend that is both rich in nutrients and exceptionally well-draining. I can't stress this enough: poor drainage is the fastest way to invite root rot. You're aiming for a light, fluffy medium that holds moisture without ever becoming a dense, soggy mess.
Don't underestimate the need for space. Sweet peas produce long taproots that need room to stretch deep. Squeezing them into a small container will restrict root growth and ultimately limit the plant's flowering potential.
Giving them enough room is crucial. As a rule of thumb, experts at the National Sweet Pea Society recommend containers with a capacity of at least 20 liters (~5 gallons). They suggest allocating about 7 liters of soil for each plant, ensuring their extensive root systems have enough space to develop fully.
A great starting point is a high-quality, peat-free potting compost. From there, you can add a few things to create the perfect structure and fertility. I've had great success with this simple recipe:
- 1. Start with 60% Premium Potting Compost: This is the foundation of your mix.
- 2. Add 20% Perlite or Coarse Grit: Absolutely essential for creating air pockets and ensuring sharp drainage.
- 3. Mix in 20% Well-Rotted Manure or Garden Compost: This adds vital slow-release nutrients to feed your hungry plants all season long.
Mix these components together thoroughly before you fill your pots. Creating a custom blend like this gives your sweet peas the best possible start. Many of the same principles apply to other heavy feeders, so you might find our guide on the https://homegrown-garden.com/blogs/blog/best-soil-mix-for-vegetable-garden useful, too.
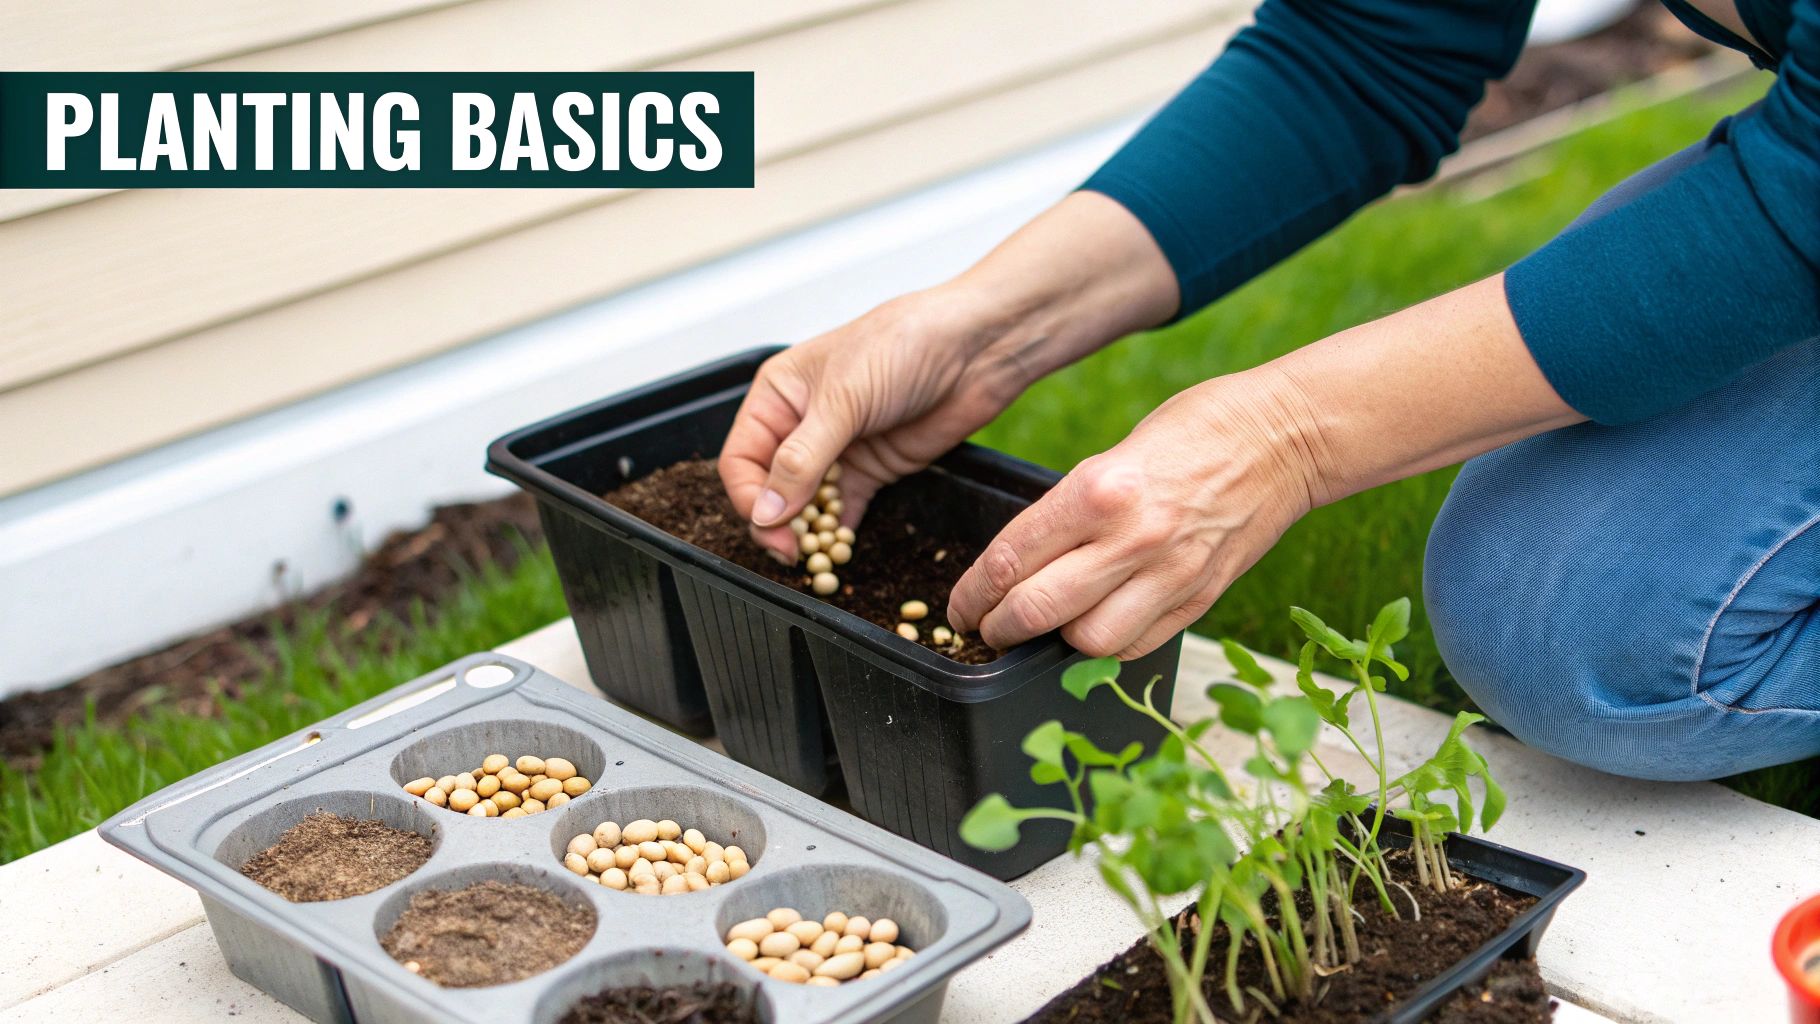
5 Essential Steps for Planting Seeds and Seedlings
With your containers and soil mix ready, it's time for the best part—the planting. Getting your sweet peas into their new home correctly is what sets the stage for a summer packed with incredible blooms. Don't worry, it's not complicated, but a few key details can make a world of difference when you're growing sweet peas in containers.
Let's walk through the process, from waking up the seeds to gently settling young plants into their pots. Following these tips will help you sidestep common mistakes and give your sweet peas the strong, healthy start they need to thrive.
1. Get the Seeds Ready
Gardeners have debated for years whether to soak or nick sweet pea seeds. The logic is sound—sweet peas have a tough outer shell, and helping moisture get in can speed up germination.
Honestly, though, I've found that with modern, high-quality seeds, it's often an unnecessary step. Just planting them in cool, consistently moist soil usually gives me excellent results without the extra fuss. If you're working with older seeds or have struggled before, nicking the seed coat (opposite the little 'eye') with a nail file is a safer bet. Soaking can sometimes backfire and cause the seeds to rot before they even sprout.
2. Choose Between Direct Sowing vs. Starting Indoors
You've got two great options for getting your seeds started. The right choice really comes down to your local climate and whether you want a head start on the season.
-
Direct Sowing: This is the easiest route. You simply plant the seeds directly into their final, large container. It completely avoids any root disturbance later on, but you'll have to time it just right with the spring weather.
-
Starting Indoors: If you live in a colder region, starting seeds inside is a game-changer. It gives your plants a crucial head start, letting them build a robust root system before they ever face the great outdoors. This is my go-to technique for a longer blooming season.
Starting seeds inside gives you total control. Sweet peas germinate best in cool temperatures, around 50-55°F (10-13°C), which is much easier to manage indoors than during an unpredictable spring.
For a detailed schedule on getting this right, our guide on when to start seeds indoors is a fantastic resource for planning.
3. Perfect Your Planting Depth and Spacing
Whether you’re sowing in starter cells or directly into a big pot, depth and spacing are everything. Getting this right ensures every plant has access to the light, water, and nutrients it needs to flourish without getting crowded out by its neighbors.
A good rule of thumb is to plant each seed about 1 inch (2.5 cm) deep. I just use my fingertip—pressing the soil down to the first knuckle creates the perfect little pocket.
After you've dropped the seed in, cover it up, gently firm the soil, and give it a good watering. Spacing is just as important for promoting airflow, which is your best defense against diseases like powdery mildew.
- For Climbing Varieties: Space your seeds or seedlings about 4-6 inches (10-15 cm) apart. It might look a little tight at first, but this will create that lush, dense wall of flowers and foliage you're aiming for.
- For Dwarf or Bush Varieties: These compact plants need a bit more elbow room. Give them around 6-8 inches (15-20 cm) of space to spread out.
4. Transplant Your Seedlings Carefully
If you started your seeds indoors or bought seedlings from a nursery, moving them to their permanent container needs a gentle touch. Sweet peas have sensitive roots and really hate being disturbed. The goal here is to minimize transplant shock so they don't miss a beat.
Before you even think about planting them out, you need to harden them off. This just means getting them used to the outdoors gradually. Over a week or two, take them outside for a bit longer each day, starting with just an hour in a sheltered, shady spot.
When it's time to plant, be careful! Gently slide the seedling out of its starter pot, doing your best to keep the entire root ball intact. If you were clever and used biodegradable peat or wool pots, you can plant the whole thing directly in the soil. It's the best way to avoid disturbing the roots. Place the seedling in its new home at the same depth it was growing before, fill in the gaps with soil, and water it in well to help it settle.
5. Get the Timing Just Right
The final piece of the puzzle is timing. Sweet peas are cool-season flowers through and through. They establish the best root systems in cool soil and can even shrug off a light frost. One of the most common mistakes is planting them too late when the weather is already heating up, which can lead to weak, stunted plants.
Your local climate dictates your planting calendar.
- Mild Climates (Zones 8-10): You're the lucky ones! You can often sow seeds in the fall to overwinter for an extra-early spring flower show.
- Colder Climates (Zones 7 and below): Your best bet is to start seeds indoors in late winter, about 8-10 weeks before your last expected frost. You can move them outside as soon as the ground is workable, often a few weeks before that last frost date. Nature gives a great cue—when you see the first daffodils popping up, it's usually safe to plant your sweet peas.
9 Crucial Care Tips for Watering, Feeding, and Support
Once your sweet peas are settled into their new container homes, the real work—and the real fun—begins. Consistent, thoughtful care is what turns those tiny seedlings into a magnificent wall of fragrant, fluttering blooms. If you want a long and abundant flowering season, you’ve got to get your routine for watering, feeding, and support just right.
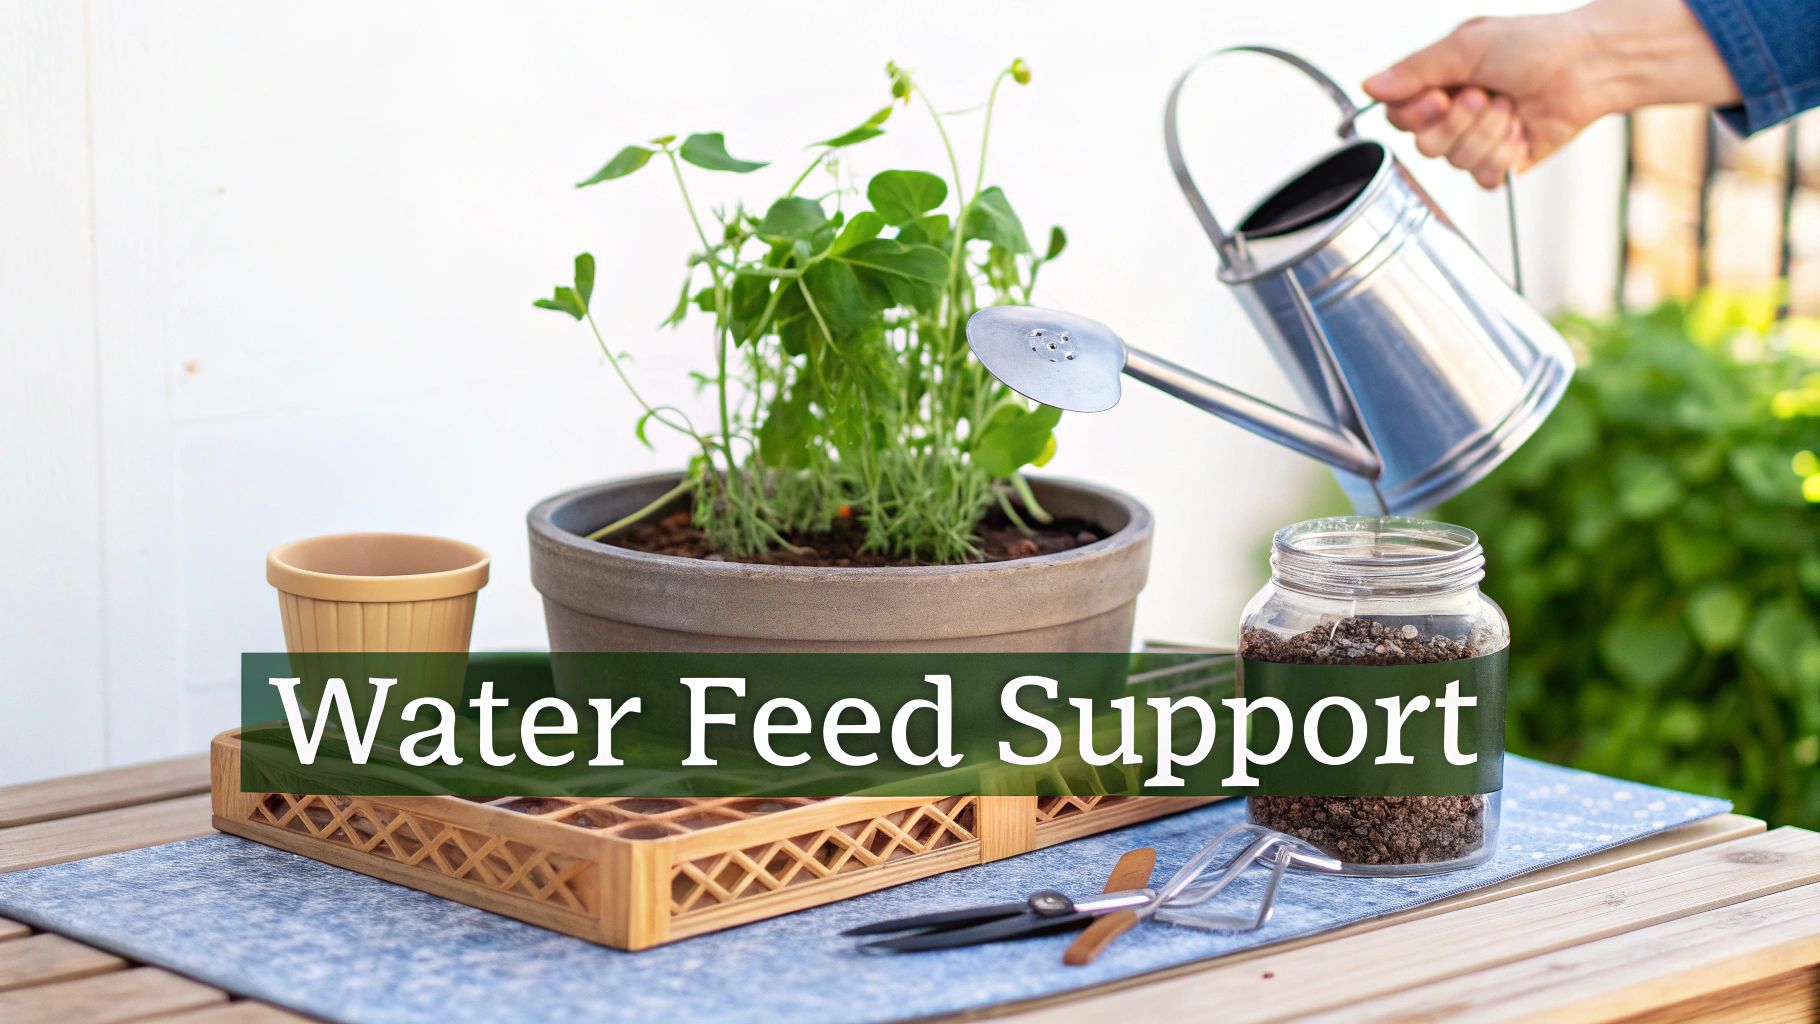
This isn’t about following some complicated schedule. It’s more about paying attention and understanding what these classic flowers need to truly thrive in a pot. Let’s walk through the nine essential practices that will keep your plants healthy, strong, and blooming their hearts out all summer.
1. Master Consistent Watering
For any container-grown plant, consistent moisture is the golden rule, and sweet peas are certainly no exception. Pots simply dry out much faster than garden beds, a fact that’s especially true on warm, windy days. Your goal is to keep the soil evenly moist—think of a well-wrung-out sponge. You never want it bone dry, but you don't want it waterlogged either.
The best tool for checking moisture is your own finger. Just poke it about an inch into the soil. If it feels dry, it's time to water. When you do, give the pot a good, deep soak until you see water flowing from the drainage holes. This ensures the entire root ball gets a drink.
2. Feed for Flowers, Not Foliage
Sweet peas are hungry plants, but what you feed them makes all the difference. The aim here is to encourage a profusion of flowers, not a jungle of leafy green growth. That’s why you want to steer clear of high-nitrogen fertilizers.
Once you see the first flower buds forming, it's time to start a feeding routine. Every two or three weeks, give them a liquid fertilizer that’s high in potash (potassium). A standard tomato feed or a special flower-boosting formula is perfect for this. Potash is the key nutrient that fuels flower production, and using it will give you a much more impressive and long-lasting display.
3. Provide Sturdy Support Early
Sweet peas are climbers, born and bred. They use their delicate little tendrils to pull themselves skyward, but they need something to grab onto from the very beginning. Don't wait until they start flopping over to give them support. It’s best to install your trellis, bamboo canes, or netting right when you plant to avoid damaging their sensitive roots later on.
As the vines get going, they might need a little nudge in the right direction. I usually check on them every few days, gently guiding any stray stems back toward the support. If a few are being stubborn, a loose tie with some soft garden twine does the trick. Giving them a clear path to climb keeps things tidy and dramatically improves air circulation.
4. Pinch for a Bushier Plant
This is one of those simple little tricks that can make a huge difference in your final flower count. When your young sweet pea plants have developed 3-4 pairs of leaves and stand about 4-6 inches tall, it's time to "pinch out" the growing tip.
It’s easy—just use your thumbnail or a clean pair of snips to remove the very top of the main stem, right above a set of leaves. This tiny action sends a signal to the plant to stop growing up for a moment and instead push out multiple side shoots from its base. More shoots mean more stems, which ultimately means way more flowers.
Don't be timid about pinching; it feels wrong to snip the top off a healthy plant, but trust me, it’s one of the best things you can do for a fuller, more robust sweet pea. You're effectively trading one main stem for several flowering ones.
5. The Golden Rule: Deadhead Relentlessly
If you only remember one thing from this guide, make it this. A sweet pea plant has one biological mission: to produce seeds. As soon as a flower fades and starts to form a seed pod, the plant thinks its job is done and will either slow down or stop making new blooms altogether.
Your job is to interrupt that cycle. The solution is wonderfully simple: cut the flowers!
- Harvest Often: The best way to deadhead is to cut beautiful bouquets for your house every few days. The more you cut, the more flowers the plant will produce to replace them.
- Remove Faded Blooms: At the same time, snip off any individual flowers that are past their prime before they even think about making a seed pod.
- Cut Stems Long: When you're cutting, take the stem as far down as you can, right back to the main vine. This encourages the plant to send up another long, strong flowering stem from that same spot.
6. Add a Cooling Mulch Layer
Sweet peas have a saying: "cool feet, warm head." Their roots perform best in soil that doesn't get too hot, which can be a real challenge in containers sitting in the direct sun. A protective top layer is a great way to help regulate that soil temperature.
Just spread a 1-2 inch layer of organic mulch, like well-rotted compost or fine bark chips, over the soil surface. This layer not only keeps the roots cool but also helps the soil hold onto moisture, meaning you won't have to water quite as often. For a deeper dive into managing container environments, you might find some other useful container gardening tips in our related guides.
7. Ensure Excellent Air Circulation
Good airflow is your best defense against fungal diseases like powdery mildew, which sweet peas can be prone to. It all starts with proper spacing at planting time, but how you manage the vines as they grow is just as important.
Try to avoid letting your plants become a dense, tangled mess. As you guide them up their support, gently spread the stems out. This allows air to move freely through the foliage, which helps leaves dry off quickly after rain or morning dew, making it much harder for fungal spores to get established.
8. Protect From Extreme Heat
While sweet peas need plenty of sun to flower well, they are at heart cool-season plants. They can really start to struggle, and may even stop flowering, if temperatures consistently push above 80°F (27°C).
If a major heatwave is in the forecast, do what you can to give them some afternoon shade. This could be as simple as moving the pots to a spot that gets protection from the intense late-day sun or rigging up a piece of shade cloth to give them a break.
9. Watch for Early Pest Problems
Vigilance is the key to stopping pests like aphids before they turn into a real infestation. One of the great things about container gardening is how easy it is to inspect your plants up close. Make a habit of checking the tender new growth tips and the undersides of leaves every few days.
If you spot a few aphids, you can often just knock them off with a sharp spray of water from a hose. If the problem seems a bit more stubborn, a simple insecticidal soap solution is an effective and garden-friendly way to get things under control.
5 Common Sweet Pea Problems in Containers and How to Fix Them
Even the most attentive gardener runs into a few hiccups. When you're growing sweet peas in pots, a yellowing leaf or a dropped bud can feel like a major setback. But don't despair! Think of these as little distress signals from your plants, telling you exactly what they need. Learning to read these signs is the key to getting them back on track for a spectacular season of blooms.
Let's walk through five of the most common challenges you might face and get your plants back to their vibrant, fragrant best.
1. The Mystery of the Yellowing Leaves
It’s always a bit alarming to see those lush green leaves turn a sickly yellow. More often than not, this points directly to a watering issue. The contained environment of a pot makes it incredibly easy to either over-water or under-water.
Overwatering is usually the main culprit. When soil is constantly waterlogged, the roots can't breathe, which quickly leads to root rot and those tell-tale yellow leaves. On the flip side, letting the pot dry out completely stresses the plant, causing it to shed its lower leaves to conserve energy.
- The Fix: Before reaching for the watering can, do the finger test. Poke your finger about an inch into the soil. If it feels damp, hold off for another day. When you do water, give it a good, thorough soak until water drains freely from the bottom, and never let the pot sit in a saucer full of water.
If the yellowing is more uniform across the whole plant and not just on the lower leaves, you might be looking at a nitrogen deficiency. This is a less common cause, but a quick dose of a balanced liquid fertilizer can often set things right.
2. Why Are My Flower Buds Dropping Off?
There is almost nothing more frustrating than watching perfectly formed little flower buds fall off right before they have a chance to open. This phenomenon, known as bud drop, is nearly always a sign of stress. The plant basically decides it doesn't have enough resources to support flowers and cuts its losses.
The two biggest triggers are inconsistent watering and sudden heatwaves. A plant that goes from bone dry to sopping wet can get shocked into dropping its buds. Sweet peas are also cool-season flowers, so an unexpected spike in temperature can stress them out in a big way.
A consistent environment is the secret to preventing bud drop. Sweet peas thrive on routine, especially when it comes to moisture levels in their containers. Drastic changes are their biggest enemy.
To solve this, focus on maintaining that ideal "evenly moist" soil. If a heatwave is in the forecast, try moving your pots to a spot where they’ll get some afternoon shade to shield them from the most intense sun.
3. Dealing With Aphids and Other Pests
Aphids absolutely adore the tender new growth on sweet peas. These tiny sap-sucking insects can weaken a plant quickly and even spread disease. In a container, an infestation can take hold fast, so it pays to be vigilant.
Keep an eye out for clusters of tiny green or black bugs, usually on the growing tips and the undersides of leaves. Another dead giveaway is a sticky residue called "honeydew," which can unfortunately attract sooty mold.
Here’s how to handle them without reaching for harsh chemicals:
- A Strong Spray: For a small problem, a sharp blast of water from a spray bottle or hose is often all it takes to dislodge them.
- Insecticidal Soap: If they're persistent, an insecticidal soap solution is a great next step. It’s effective on contact and safe for your plants.
- Encourage Predators: If you have other pots nearby, planting marigolds or alyssum can attract beneficial insects like ladybugs, which are voracious aphid-eaters.
4. Keeping Powdery Mildew at Bay
That white, dusty coating on the leaves is a classic sign of powdery mildew. This fungal issue thrives in humid conditions and where airflow is poor—especially when days are warm but nights are cool and damp.
The best defense here is prevention. Give your plants plenty of space from the start and be diligent about training them up their supports to avoid a tangled mess. This promotes the good air circulation they need. Also, make it a habit to water the soil directly, keeping the foliage as dry as possible, particularly in the evening.
If you do spot it, act quickly. Snip off any heavily affected leaves and treat the rest of the plant. For an organic approach that works surprisingly well, try a solution of one part milk to nine parts water, sprayed on the leaves in full sun.
5. Plenty of Vines, But Not Enough Flowers
Are your sweet pea vines looking incredibly lush and green but producing hardly any flowers? The problem is almost certainly your fertilizer. An abundance of leafy growth at the expense of blooms is a classic sign of too much nitrogen.
Nitrogen tells the plant to focus on growing leaves, not flowers. This is exactly why switching to a high-potash fertilizer, like one formulated for tomatoes, is so critical once the plants start to form buds. Change up your feeding routine, and you should see a big difference.
The love for sweet peas extends to the cut flower market, where container cultivation techniques are vital. For florists, sweet peas have a vase life of about 4 to 5 days, which can be stretched a bit with floral preservatives. You can learn more about making the most of your sweet pea blooms from SarahRaven.com.
Your Top 4 Questions About Growing Sweet Peas Answered
After covering the basics, there are always a few questions that pop up when you're trying to grow sweet peas in containers. Getting these little details right is often the secret to turning a decent display into a truly spectacular one. I've gathered the most common queries here to give you quick, clear answers so you can garden with more confidence.
Let's troubleshoot some of the common sticking points and clear up any confusion.
1. How Deep Does My Pot Really Need to Be?
This is probably the most critical question, and the answer is simple: deeper is always better. Sweet peas have surprisingly long, vigorous taproots that need room to run. If you cramp them in a shallow pot, you'll end up with stunted plants and a disappointing lack of flowers.
For the climbing varieties that most of us love to grow, you should be looking for a container that’s at least 16-20 inches (40-50 cm) deep. That depth gives those essential roots the space they need to develop, which in turn fuels the lush top growth and the fragrant blooms you're after.
Think of a deep pot as an investment in your plant's future. A strong root system is the engine that drives a long, prolific blooming season. Skimping on depth will always hold your plants back.
2. How Many Plants Can I Fit in One Container?
I know it's tempting to cram a bunch of seedlings into a pot for a quick, bushy look, but trust me, overcrowding is a huge mistake. The plants will just end up fighting for water, nutrients, and light, which ultimately leads to weaker growth and fewer flowers for everyone. Giving each plant its own personal space is key.
Here’s a practical guide I use for spacing:
- 12-inch (30 cm) Diameter Pot: This size works well for 3 to 4 climbing sweet pea plants. I like to arrange them around the edge, leaving the middle open for the support structure.
- 18-inch (45 cm) Diameter Pot: Here, you can comfortably fit 5 to 6 plants. This is a great size for creating a really full, dense look on a wigwam or small trellis.
- 24-inch (60 cm) Pot or Half Barrel: With this much space, you can plant 7 to 8 seedlings and create a truly impressive pillar of flowers.
Don't forget that good air circulation is your best defense against fungal diseases like powdery mildew. Proper spacing is the first and most important step.
3. Why Are My Sweet Peas Not Flowering?
It’s incredibly frustrating when your vines look green and healthy but refuse to bloom. When this happens, it's time to play detective. It usually boils down to one of three common culprits.
- Too Much Nitrogen: This is the number one reason. If you're using a fertilizer that’s high in nitrogen, the plant will put all its energy into producing gorgeous green leaves—at the expense of flowers. The fix? Immediately switch to a high-potash feed, like a liquid tomato fertilizer, which encourages the plant to form buds.
- Not Enough Sun: Sweet peas are total sun-worshippers. To get a great show of flowers, they need at least 6 to 8 hours of direct sunlight every day. If your container is tucked away in a shady corner, the plant simply won't have enough energy to bloom properly.
- Heat Stress: These are fundamentally cool-season flowers. Once the weather gets consistently hot, with temperatures above 80°F (27°C), the plants can get stressed and stop producing flowers. Moving your pots to a spot with some afternoon shade during a heatwave can help keep them blooming longer.
4. Can I Bring Sweet Pea Containers Indoors?
It's a lovely thought, having those fragrant sweet peas blooming on a sunny windowsill, but it's not a realistic long-term plan. Sweet peas are desperate for the intense light and cool air that are almost impossible to provide inside a house. They also count on excellent air circulation to stay healthy.
Of course, bringing a pot inside for a day or two to enjoy a beautiful flush of blooms won't do any harm. Just know that they'll quickly start to fade from the lower light and still air. They are truly happiest living their lives outdoors, soaking up all the sun and cool breezes they crave.
At Homegrown Garden, we believe everyone deserves the joy of a flourishing garden, no matter the size of their space. Our curated selection of heirloom seeds, starter kits, and expert guides provides everything you need to grow with confidence. Start your container garden journey with us today at https://www.homegrown-garden.com.
Filling a sunny patio with blooms? Browse our flower seeds for containers to pair with (or stand in for) sweet peas.

