

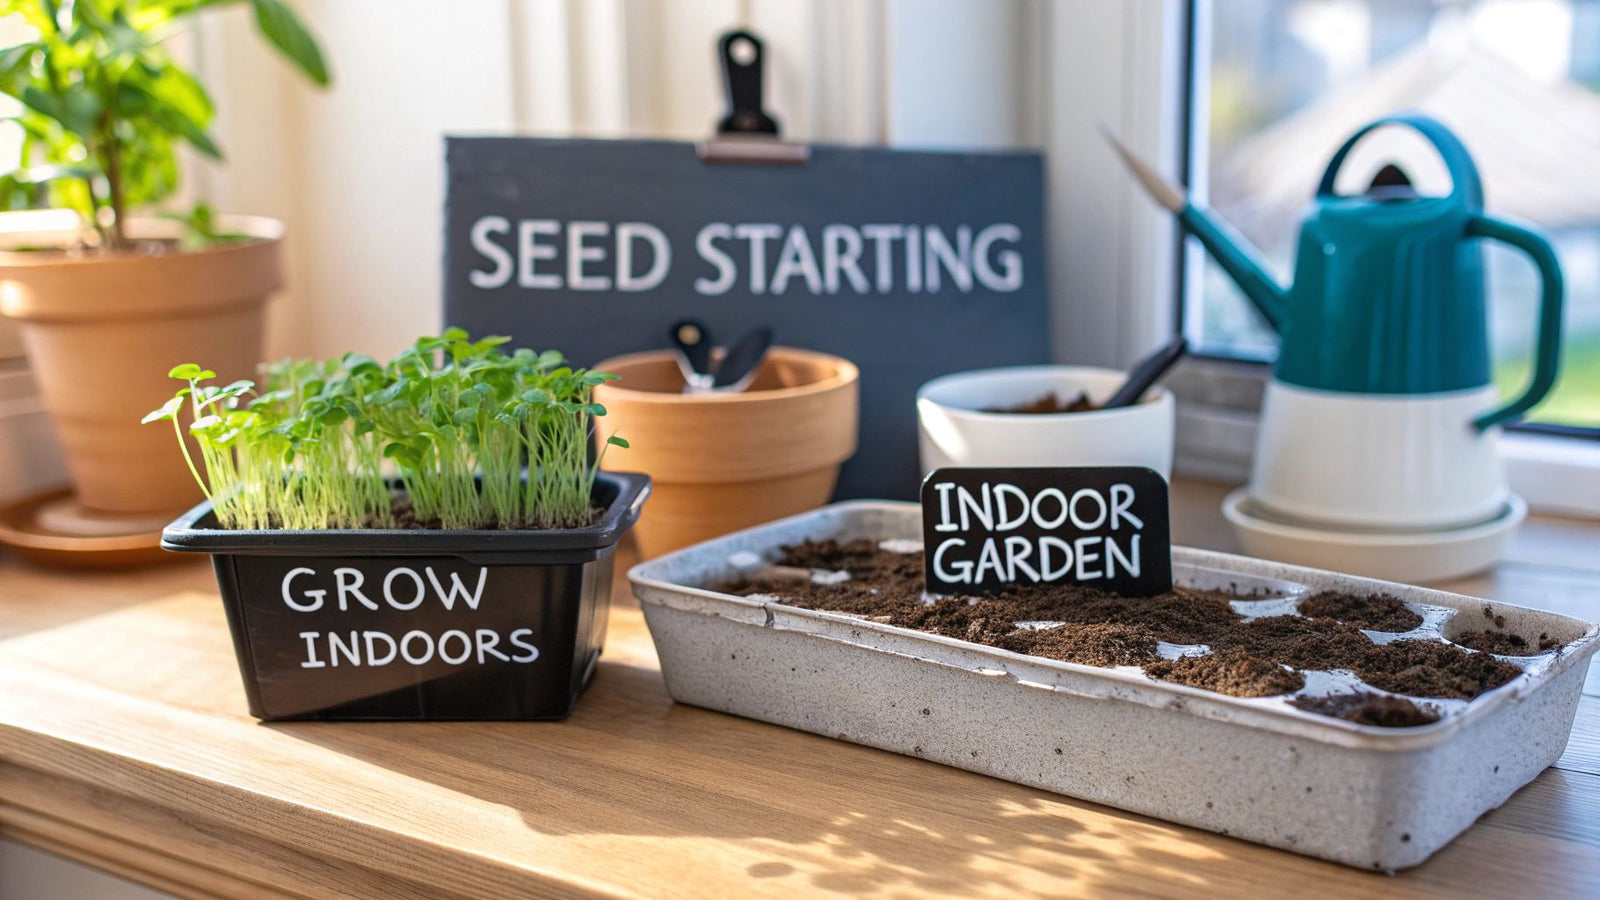

Starting your garden from seed indoors is one of the most satisfying parts of gardening, giving you a real jump on the growing season. The whole process is pretty straightforward. It all comes down to picking the right seeds, giving them a good home to grow in, and then providing the perfect mix of light, warmth, and moisture. This guide will walk you through the journey, turning that tiny seed into a thriving plant in 11 simple steps.
Your Indoor Seed Starting Kickstart Guide
Learning to grow seeds inside really pulls back the curtain on gardening and gives you a huge advantage. It lets you grow varieties that might need a longer season than your local climate offers. I've seen gardeners in chilly northern zones pull off amazing harvests of heat-loving tomatoes and peppers, all because they started them indoors weeks before the last frost.
That head start is the biggest win. Instead of waiting around for the ground to warm up, your seedlings are already well on their way. When the weather finally turns, you've got strong, healthy plants ready to go into the garden. This often means you'll be picking ripe vegetables sooner and enjoying flowers for a much longer period.
Key Factors for Success
Success really just boils down to managing a few environmental factors. Don't let it intimidate you; it's easier than it sounds.
Your main goals are simple:
- Keep Them Warm: Most seeds need the soil to be somewhere between 70-85°F to wake up and start growing. A heat mat is a game-changer here.
- Stay Moist, Not Soaked: You're aiming for the consistency of a wrung-out sponge. The soil should be damp to the touch, but never a soggy mess.
- Lots of Light: As soon as you see those first green shoots, they need a ton of light. Without it, they'll get long and spindly, which is a classic rookie mistake.
Of course, timing is everything. Getting a handle on when to start seeds indoors is a crucial skill. Start them too early, and you end up with leggy, root-bound plants that struggle when you transplant them.
Starting seeds inside isn't just about practicality; it's a chance to connect with the whole life of a plant. There's something truly special about watching a dormant seed burst to life. It’s a confidence booster for any gardener, whether you're just starting out or have years of experience.
Here’s a quick overview to keep the essentials front and center.
Indoor Seed Starting At-a-Glance
This table breaks down the key stages of starting seeds indoors, from the initial setup to nurturing your new seedlings. Use it as a quick reference to make sure you're on the right track and avoiding common pitfalls.
| Stage | Key Requirement | Common Mistake to Avoid |
|---|---|---|
| Germination | Consistent warmth (70-85°F) and moisture. | Letting the soil dry out completely. |
| Sprouting | Immediate, strong light source (12-16 hours/day). | Keeping seedlings too far from the light, causing them to stretch. |
| Growth | Proper air circulation and consistent watering. | Overwatering, which can lead to "damping off" disease. |
| Hardening Off | Gradually exposing seedlings to outdoor conditions. | Moving plants outside too quickly, causing shock or sunscald. |
Remember, each step builds on the last. A strong start during germination sets your seedlings up for healthy growth later on.
With just a few basic supplies and a little attention, you can transform a windowsill or a small corner into a bustling plant nursery. Let's dive into the specifics and get your indoor garden started today.
11 Steps to Grow Seeds Indoors
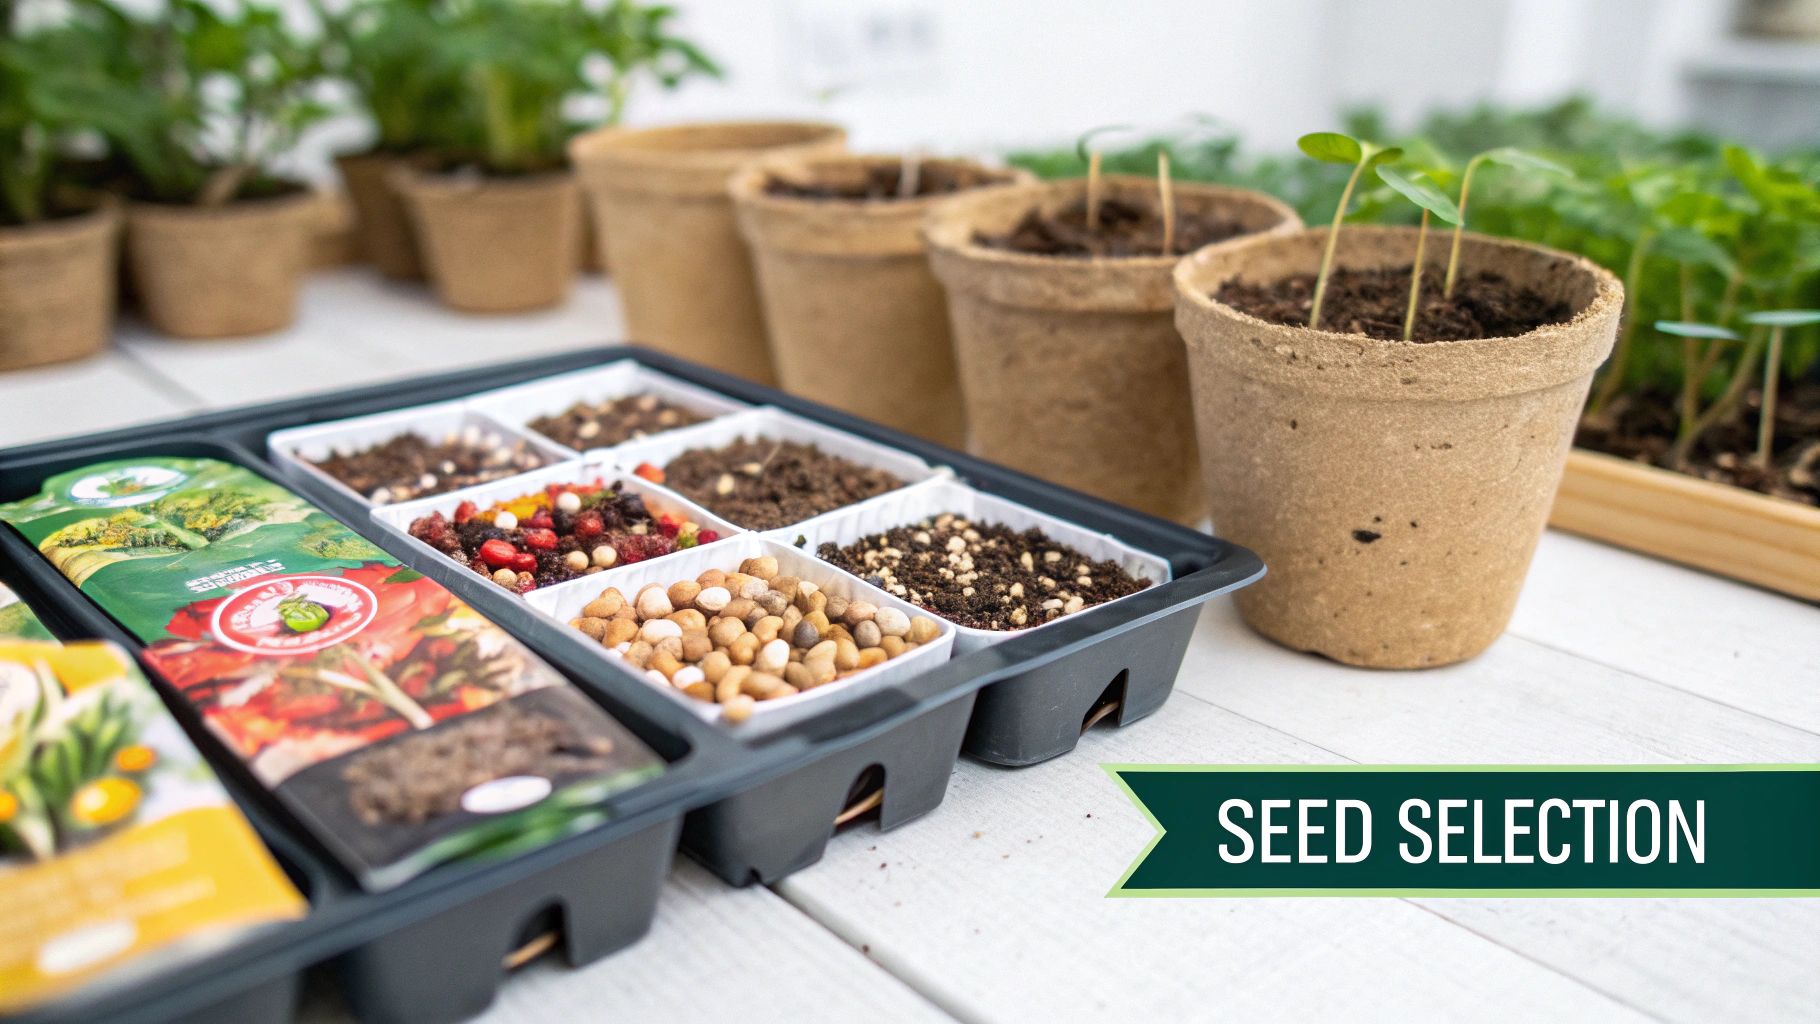
1. Choose Your Seeds and Starting Containers
Every successful indoor garden starts long before a single seed hits the soil. It all begins with a little bit of planning—choosing the right seeds for your space and the perfect containers to give them a healthy start. This is the groundwork that sets the stage for a thriving garden later on.
When you're standing in front of that wall of seed packets, it's easy to be drawn in by the beautiful photos. But the real gold is on the back. Flip that packet over and you'll find everything you need to know: planting depth, germination time, and ideal spacing. For indoor starting, I always look for varieties labeled as good for containers or those with shorter "days to maturity," which is a lifesaver if your local growing season is on the shorter side.
2. Pick the Perfect Pot
Your seedlings need a place to call home as they get going, and you've got a ton of options, no matter your budget or style. Each one has its pros and cons.
- Plastic Cell Trays: These are the workhorses of seed starting. They’re cheap, reusable, and let you plant a whole bunch of seeds in a small, organized space. A classic for a reason.
- Peat Pots: I love these for plants that hate having their roots disturbed. Since the whole pot is made of compressed peat, you can plant it directly into the garden. This makes transplanting a breeze and really cuts down on stress for delicate seedlings.
- Soil Blocks: This is a fantastic, eco-friendly method where you use a special tool to press moist soil into dense cubes. No pots needed! This technique encourages amazing root growth by "air pruning" the roots as they reach the edge of the block.
- DIY Containers: Don't be afraid to get resourceful! Yogurt cups, egg cartons, and even pots made from rolled-up newspaper work just fine. The golden rule is to make sure you poke drainage holes in the bottom. Soggy soil is the fastest way to kill a seedling.
Think practically. If you're starting 50 tomato plants, those plastic trays are your best friend for efficiency. But for something with sensitive roots like cucumbers or sweet peas, peat pots are a game-changer.
3. Test Your Old Seeds for Viability
We've all been there—you find a half-used packet of seeds from a few years ago and wonder if they're still viable. Instead of just planting them and crossing your fingers, a quick germination test can save you a lot of time and wasted soil.
When it comes to growing seeds indoors, knowing your germination rate is key. A rate of 90% or higher is fantastic. Personally, I'd toss any seeds that test below 50% because the results just won't be worth the effort. You can learn more about the specifics of how to test germination rates from university extension resources.
The test is incredibly simple. Just lay out 10 seeds on a damp paper towel, fold it over them, and slide the whole thing into a plastic bag. Leave it somewhere warm for a few days to a week (check the seed packet for the typical germination time).
After the waiting period, unfold the towel and count how many seeds have sprouted. If you see 8 sprouts out of 10 seeds, that's an 80% germination rate—definitely good to go! If only 2 or 3 have sprouted, it's time to invest in a fresh packet.
Taking ten minutes to do this little test ensures you’re not wasting your energy on seeds that won't perform. It’s one of the easiest ways to set yourself up for success.
4. Create the Perfect Germination Environment
Think of a seed as a tiny, sleeping plant. It's just waiting for the right alarm clock to go off. Your job is to create an environment that provides that perfect wake-up call. Getting seeds to sprout isn't about luck; it's about understanding the simple signals that tell a seed it's time to grow.
The three most important signals are consistent moisture, steady warmth, and darkness. Believe it or not, most seeds don't need light to sprout. In fact, many germinate best when they're tucked away in total darkness. Your focus right now should be entirely on what's happening under the soil.
5. Nail the Warmth and Humidity
Seeds can be surprisingly picky about temperature. If it's too cold, they'll just stay dormant. Too hot, and you risk cooking them before they even start. The goal is to provide a stable, cozy warmth that feels just like perfect spring soil.
For many of us, the secret weapon here is a seedling heat mat. These are simple waterproof pads that you place under your seed trays to provide gentle, consistent heat from the bottom up. This is so much more effective than just putting trays in a warm room where the air temperature can swing wildly. A heat mat keeps the soil itself right in the sweet spot.
The real magic happens when you pair a heat mat with a humidity dome. That clear plastic cover traps both heat and moisture, creating a miniature greenhouse. This stable, high-humidity environment is exactly what most seeds need to break dormancy and sprout successfully.
This brings us to the importance of temperature control. Research backs this up—the interplay between temperature and moisture is critical. Most vegetable and flower seeds germinate best when soil temperatures are kept between 70°F and 85°F (21°C to 29°C). Drifting too far outside that range can dramatically slow things down or even stop germination altogether.
To really dial it in, remember that different seeds have slightly different preferences. Our detailed seed germination temperature chart can help you find the exact temperature for whatever you're growing.
6. Maintain the Right Moisture Level
You'll hear gardeners say it over and over: "moist, but not soggy." There's a good reason for that—it's the most critical balance to get right. The perfect texture you're aiming for is that of a wrung-out sponge.
- Too Dry: If the soil dries out, even for a little while, the germination process grinds to a halt. The tiny, delicate root that just emerged can shrivel up and die in an instant.
- Too Wet: Soil that's completely saturated cuts off the seed's oxygen supply, essentially drowning it. It's also the perfect breeding ground for fungus and the dreaded "damping off" disease, which rots the seed or seedling right at the soil line.
When you're first planting, following a simple process ensures you're setting your seeds up for success right from the start.

This simple guide covers the physical planting steps, making sure your seeds have enough soil underneath for root growth while being planted at a depth that keeps them moist but still lets them push to the surface easily. Getting this part right creates the ideal physical foundation for everything that follows.
7. Provide Plenty of Light for Seedlings
The moment that tiny green sprout pokes through the soil, everything changes. Until now, it was happy in the dark. But from here on out, light is the single most important thing it needs to survive. How you provide that light is what separates strong, stocky seedlings from weak, spindly ones that won't make it in the garden.

It’s tempting to just stick your seed trays on a sunny windowsill, but that's a classic rookie mistake. I've seen it countless times. The light is almost always too weak and comes from only one direction, forcing your poor seedlings to stretch and strain toward the glass. This is what creates those infamous "leggy" plants—all stem, no substance, and completely unprepared for life outdoors.
Your best bet? A dedicated grow light. It provides the consistent, direct, overhead light that tells a seedling to grow up, not out. You don't need a fancy, expensive setup either. A simple fluorescent shop light or a basic LED grow light from the hardware store will do the trick beautifully.
8. Set Up Your Grow Lights Correctly
Getting your lighting right is pretty straightforward once you know the basics. The whole idea is to give your plants an intense, sun-like experience without actually scorching their brand-new leaves.
Keep the lights hung just 2-3 inches above the tops of your seedlings. This feels incredibly close, but it’s the secret to preventing that desperate stretching. As your plants get taller, you'll need to adjust the lights, always maintaining that small gap.
Most vegetable and flower seedlings need a good 12-16 hours of light each day. The easiest way to handle this is to plug your lights into an automatic timer. It’s a small investment that pays off big time, giving your plants the consistency they crave without you having to remember a thing.
9. Master the Art of Watering
Watering is a delicate dance. Those tiny, fragile root systems can't handle being too wet or too dry. Over the years, I've learned that the absolute best way to water is always from the bottom.
Simply pour water into the solid tray that your seedling containers are sitting in. Let them sit for about 30 minutes, allowing the soil to wick up moisture through the drainage holes. After that, dump out any water that’s still sitting in the tray.
Bottom-watering does something really important: it encourages the roots to grow down deep in search of water. This builds a much stronger, more resilient root system. Watering from the top, on the other hand, can easily dislodge seedlings, compact the soil, and create a damp surface that’s a breeding ground for fungal diseases like damping-off.
10. Feed and Care for Growing Seedlings
Your seedlings won't need any food until they grow their first set of "true leaves." These are the second set of leaves to appear, and they look like miniature versions of the adult plant's leaves. The first little leaves (the cotyledons) are just packed lunches from the seed itself. Once the true leaves are out, it's time for their first real meal.
- Start weak. Begin with a balanced liquid fertilizer, but mix it at quarter-strength. It's easy to overdo it.
- Feed weekly. When it's time to water, use this diluted fertilizer solution about once a week.
- Watch the leaves. Healthy seedlings have a vibrant green color. If they start looking pale or yellowish, they might be hungry for more nutrients.
- Create a breeze. Running a small fan on your seedlings for an hour or so a day works wonders. It helps prevent mold on the soil surface and strengthens the stems, prepping them for the windy world outside.
11. Harden Off Your Plants
Hardening off is all about getting your pampered indoor seedlings ready for the rugged realities of the outdoors. Think about it: they've spent their whole lives in a perfect, climate-controlled environment. Suddenly exposing them to harsh sun, wind, and temperature swings would be a massive shock to their system.
The process is straightforward but absolutely vital.
- Start in the shade. Begin by taking your seedlings outside to a protected, shady spot for just an hour or two on a mild, calm day.
- Slowly add more time and sun. Over the next 7-14 days, gradually leave them out longer and introduce them to a little more direct morning sun each day.
- Keep an eye on them. Watch how they're doing. If you see any wilting, it's a sign they've had enough for one day. Bring them back inside to recover.
Skipping this step is a recipe for disaster. The sun's UV rays can literally burn their delicate leaves (called sunscald), and a gust of wind can snap their stems in an instant. Taking a week or two to harden them off properly ensures they can move into the garden without suffering from transplant shock.
5 Common Seed Starting Problems and How to Fix Them
https://www.youtube.com/embed/AOQayuNOk74
Even the most seasoned gardeners run into a few hiccups when starting seeds indoors. It can be a little gut-wrenching to see your tiny plant babies struggling, but don't worry. Most of these early-stage issues are surprisingly easy to diagnose and fix. Let's walk through the 5 most common problems you're likely to face and how to get your seedlings back on track.
1. My Seedlings Are So Tall and Skinny!
This is probably the most classic beginner problem. You have seedlings that look more like long, pale, wobbly threads than sturdy little plants. Gardeners call this being "leggy," and it happens for one overwhelming reason: not enough light.
Your seedlings are literally stretching themselves thin, desperately reaching for a light source. They pour all their energy into growing taller instead of developing strong stems and healthy leaves.
The fix is simple and you need to act fast. Get your grow light much, much closer—it should be just 2-3 inches from the tops of your seedlings. If you've been relying on a windowsill, it's probably time to accept that it's just not cutting it. Windowsills rarely provide the direct, overhead light that seedlings crave for robust growth.
2. What's This White Fuzz on My Soil?
Waking up to see a white, cottony fluff spreading across the soil in your seed trays can be a bit alarming. The good news is this mold is usually harmless to the seedlings themselves. It's simply a sign that your growing conditions are a little too stagnant and damp.
Think of it as a warning light for two things: overwatering and poor air circulation.
To get rid of it, first, let the top of the soil dry out a bit more between waterings. The real game-changer, though, is getting the air moving. Set up a small fan and aim it near your trays for a few hours each day. That gentle breeze is all it takes to create an environment where mold can't thrive.
3. Help! My Seedlings Suddenly Flopped Over and Died.
This one is truly heartbreaking. One day your seedlings look fine, and the next they've keeled over right at the soil line, looking pinched and brown. You've just met damping off, a fungal disease that attacks the tender stems of young sprouts. It strikes in cool, overly wet conditions.
Unfortunately, once a seedling has damped off, there's no saving it.
Prevention is your only real defense against damping off. Always start with a sterile seed-starting mix, use clean containers with great drainage, and keep the air moving with that fan. The biggest rule is to avoid overwatering—soggy soil is a breeding ground for this disease.
4. Why Haven't My Seeds Sprouted?
You've planted your seeds, watered them, and waited... and waited. Still nothing. When seeds fail to germinate, it usually comes down to a few potential culprits: the soil is too cold, the moisture level is all over the place (either bone dry or soaking wet), or you planted the seeds too deep.
But sometimes, the problem isn't your fault at all—it's the seeds. Old or improperly stored seeds lose their viability. It's a fact of nature. Research shows that the time it takes for 50% of seeds to germinate can stretch from 3.7 days to nearly 6 days when they're under environmental stress.
To avoid the waiting game next season, you can easily germination test for your seeds before you even plant them. A quick test on a damp paper towel can tell you if your seeds are duds, saving you a ton of time and frustration.
5. Why Are My Seedling Leaves Turning Yellow?
If you see the first set of true leaves (not the initial little round ones) starting to look pale or yellow, your seedlings are probably hungry. The seed itself contains just enough energy to get the plant started. Once those true leaves unfurl, the seedling needs to pull nutrients from the soil to keep growing.
Many seed-starting mixes are intentionally low in nutrients to prevent burning tender roots. But that means the seedlings will eventually need a little boost from you.
The solution is to start feeding them. Once you see that first set of true leaves, begin watering with a balanced liquid fertilizer that's been diluted to quarter-strength. A weekly feeding with this gentle solution will give them the food they need to develop lush, green leaves.
Got Questions About Starting Seeds Indoors? We've Got Answers.
Jumping into starting your own seeds indoors for the first time? It's natural to have a few questions. Getting a handle on the basics is the best way to feel confident and watch your little green sprouts flourish. Let's tackle some of the most common things gardeners wonder about.
When Is the Best Time to Start Seeds Indoors?
This is the big one, and the answer comes down to one key date: your area's average last frost date. You're aiming to get your seeds started about 6-8 weeks before that date. This timing is the sweet spot—it gives your seedlings plenty of time to grow strong and sturdy, but not so much time that they become root-bound and desperate to get out of their little starter pots.
Finding your last frost date is easy; a quick Google search for your zip code will do the trick. Also, don't forget to flip over your seed packet. Most of them have specific recommendations right on the back. Starting too early is a common mistake that leads to stressed-out plants, while starting too late robs you of that head start you were after in the first place.
Do I Really Need a Grow Light?
You might think a bright, south-facing window is all you need, but trust me on this one: a grow light is probably the single best investment you can make. The light from a window, even a sunny one, is often too weak and indirect. This forces seedlings to stretch and strain toward the light source, which is how you end up with those famously weak, "leggy" plants that just can't hack it in the real world.
A simple grow light, hung directly overhead, provides the consistent, powerful light your seedlings crave for 12-16 hours a day.
This steady, high-quality light is the secret weapon for growing stocky, healthy plants with thick stems and vibrant green leaves. It’s what prevents them from getting leggy and sets them up for a smooth transition into your garden.
What Is "Hardening Off" and Why Does It Matter?
Hardening off is the vital 11th step in our process, preparing your pampered indoor seedlings for the rugged realities of the outdoors. They've spent their whole lives in a perfect, climate-controlled environment. Suddenly exposing them to harsh sun, wind, and temperature swings would be a massive shock to their system.
The process is straightforward but absolutely vital.
- Start in the shade. Begin by taking your seedlings outside to a protected, shady spot for just an hour or two on a mild, calm day.
- Slowly add more time and sun. Over the next 7-14 days, gradually leave them out longer and introduce them to a little more direct morning sun each day.
- Keep an eye on them. Watch how they're doing. If you see any wilting, it's a sign they've had enough for one day. Bring them back inside to recover.
Skipping this step is a recipe for disaster. The sun's UV rays can literally burn their delicate leaves (called sunscald), and a gust of wind can snap their stems in an instant. Taking a week or two to harden them off properly ensures they can move into the garden without suffering from transplant shock.
At Homegrown Garden, we believe everyone deserves to feel the magic of growing their own food and flowers from a tiny seed. From heirloom vegetable seeds to complete indoor herb garden kits, we have what you need to start your journey. Explore our curated collection and get inspired at https://www.homegrown-garden.com.

