


Growing watermelon in a pot? It's not as crazy as it sounds. In fact, it's surprisingly straightforward if you get a few key things right from the start. We're talking about four essentials: a massive pot, the right kind of compact plant, a whole lot of sun, and consistent watering. Nail these, and you'll be slicing into your very own juicy, homegrown watermelon right on your patio.
This guide will walk you through everything you need to know for a successful harvest.
Your Quick Guide to Potted Watermelons
At first glance, trying to grow a sprawling watermelon vine in a container seems like a tall order. But it's actually a fantastic solution for gardeners with small spaces or those fighting a shorter growing season. The real advantage of a pot is control—you can manage soil temperature, moisture, and nutrients with a precision you just can't get in a big garden bed.
This method is a game-changer for city dwellers or anyone in a cooler climate. Watermelons are picky; they demand soil temperatures above 70°F to get going, which can be a real challenge in the ground up north. A container, on the other hand, soaks up the sun and warms up fast. The trick is choosing a pot that’s big enough to handle the plant’s surprisingly greedy root system. You’ll want something in the 10-15 gallon range, minimum. For a deeper dive into the technical side, the Penn State Extension offers detailed watermelon production guides.
The Essentials for Success
Before we get into the nitty-gritty, let's look at the big picture. Getting a sweet, ripe watermelon from a pot isn't about some secret trick. It's about consistently providing what the plant needs. These are the absolute non-negotiables.
If there's one mistake I see over and over, it's skimping on pot size and sunlight. A watermelon is a hungry, sun-loving beast. Give it a cramped home or a shady spot, and you're setting yourself up for disappointment every time.
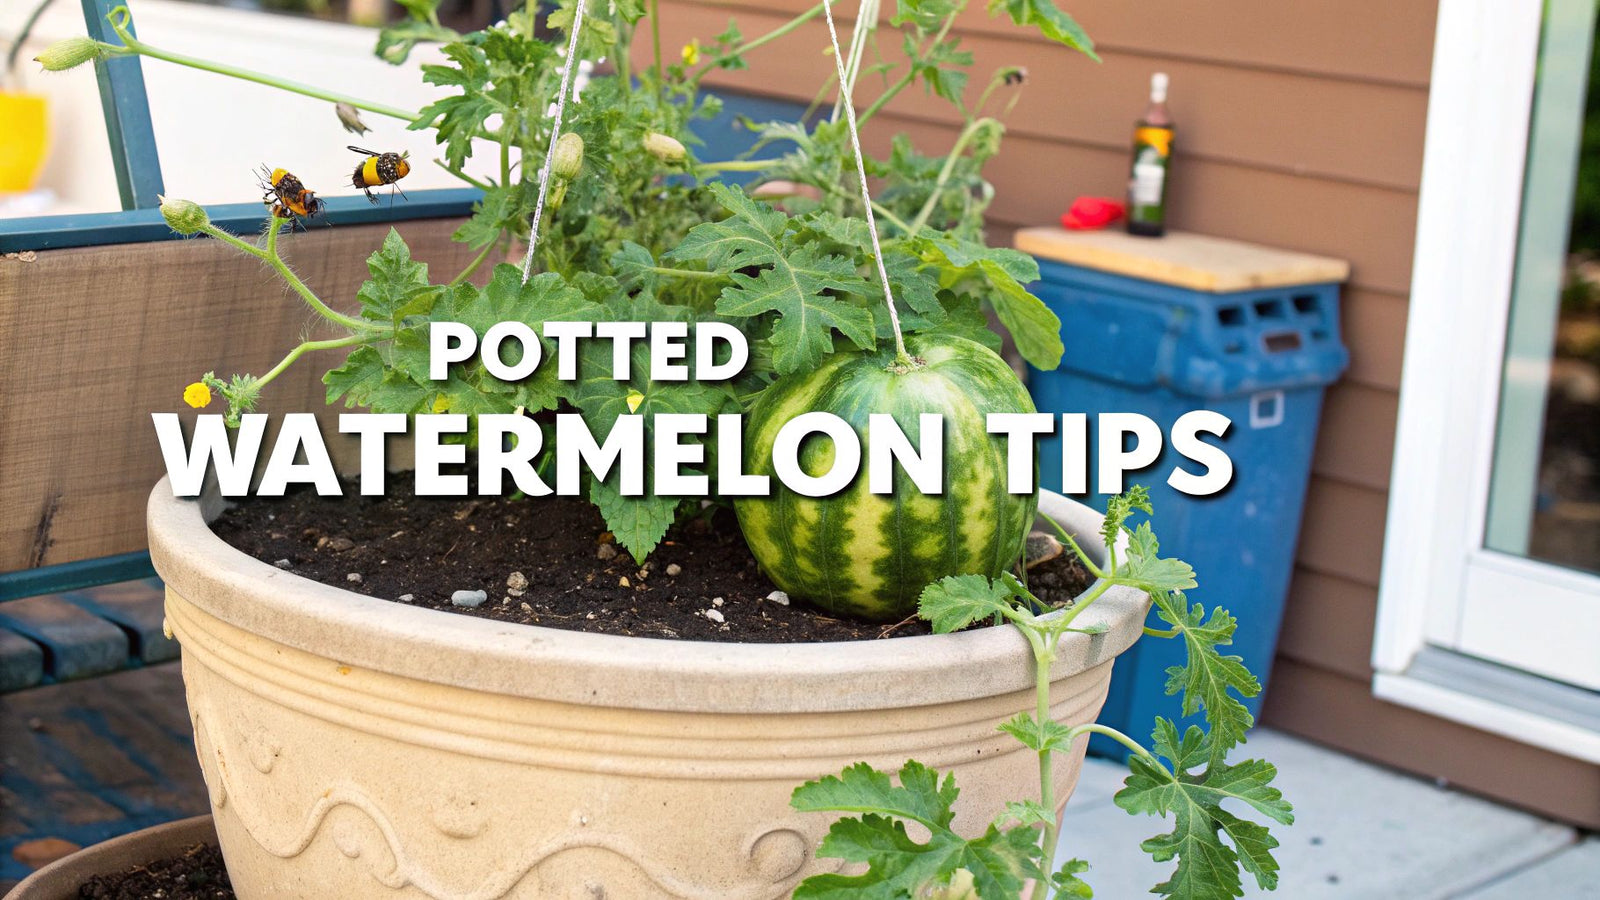
Here's a look at the classic striped fruit we're all aiming for—the perfect reward for your gardening efforts.
This is what a successful harvest looks like, and it's totally achievable in a container.
To make things simple, I've put together a quick checklist of the most important things to focus on. Think of this as your cheat sheet for a great harvest.
Essential Checklist for Success
This table breaks down the absolute must-haves for your container watermelon project. Get these right, and you're well on your way.
| Key Aspect | Details |
|---|---|
| Pot Size | Go for at least 10 gallons, but 15-20 gallons is much better. It prevents the roots from getting cramped and stressed. |
| Sunlight | Find a spot that gets a solid 8-10 hours of direct, blazing sun every day. No cheating here! |
| Variety | Stick with smaller "icebox" or bush types. Look for names like 'Sugar Baby' or 'Bush Sugar Baby'—they're bred for this. |
| Support | A strong trellis or cage is a must. Training the vines to grow up saves space, keeps fruit off the ground, and boosts air circulation. |
Keeping these four points in mind from day one will save you a lot of headaches later and dramatically increase your chances of enjoying a sweet, homegrown melon.
1. Setting the Stage with the Right Pot and Soil
When you decide to grow watermelon in a pot, the first two things you choose—the container and the soil—are absolutely crucial. Think of it like building the foundation for a house. If the foundation is shaky, everything you build on top of it will be compromised. The same goes for your watermelon plant.
The number one rule? Go big. A 10-gallon pot is the bare minimum, and even that's cutting it close. I always recommend aiming for a 15 to 20-gallon container. This gives the massive root system plenty of room to stretch out and find the water and nutrients it needs. It's the best way to prevent the plant from becoming root-bound, a stressful situation that will absolutely stunt its growth and kill your chances of a decent harvest.
Choosing Your Container
Picking a pot isn't just about size. The material it's made from and its ability to drain water are just as important for creating a healthy environment for your plant.
- Material Matters: Terracotta pots look classic, but they dry out incredibly fast, especially in the summer heat. Plastic or glazed ceramic pots are much better at holding onto moisture, which is a huge benefit for a plant as thirsty as a watermelon.
- Drainage is Non-Negotiable: Check for plenty of large drainage holes at the bottom of the pot. Waterlogged soil is a one-way ticket to root rot, which will finish off your plant before it even thinks about making fruit. If the holes look a bit small, don't be shy about drilling them bigger.
This infographic breaks down the core needs of a potted watermelon: a big pot, lots of sun, and something for the vines to climb on.
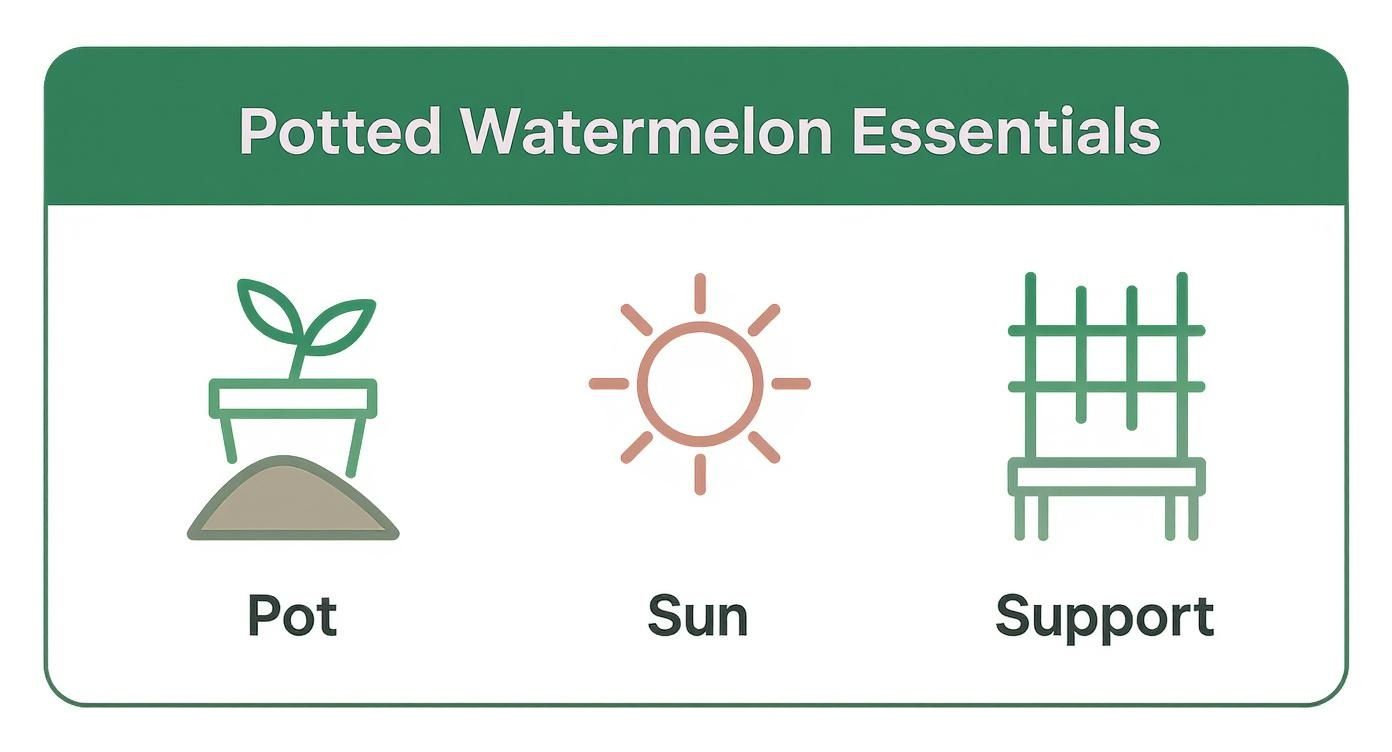
Nailing these three things right from the start puts you on the fast track to a successful and delicious harvest.
Crafting the Perfect Soil Blend
Whatever you do, don't just scoop some dirt out of your garden and call it a day. Garden soil is far too heavy and dense for a container. It compacts easily, suffocating the roots and holding way too much water. You need a custom blend that’s light, airy, and packed with nutrients. For more general advice, have a look at our comprehensive container gardening tips.
The perfect potting mix for watermelon should feel like a rich, crumbly cake. It needs to hold enough moisture to keep the plant happy but be loose enough to let excess water drain away freely, allowing the roots to breathe.
To give you a better idea of what works, this table compares a few options based on container size.
Pot Size and Soil Mix Comparison
| Container Size | Soil Mix Composition | Ideal pH |
|---|---|---|
| 10 Gallons | 50% Potting Mix, 25% Compost, 25% Perlite | 6.0 - 6.5 |
| 15 Gallons | 40% Potting Mix, 40% Compost, 20% Perlite | 6.0 - 6.8 |
| 20 Gallons | 40% Potting Mix, 40% Compost, 10% Perlite, 10% Peat Moss | 6.0 - 6.8 |
Each blend is designed to provide the right balance of moisture retention, drainage, and long-term nutrition for the specific container volume. A larger pot can support a richer, denser mix.
A simple recipe I've had great success with is one part high-quality potting mix, one part rich compost or well-rotted manure, and one part perlite. This trio provides the structure, slow-release nutrients, and aeration that watermelons crave. A quality mix like this provides everything your plant needs to thrive in a small space.
2. Getting Your Watermelon Planted
Alright, you’ve got your pot and soil sorted. Now for the fun part: planting. This is where your journey to a homegrown watermelon really begins. Whether you're starting with a seed or a young plant from the nursery, these first few weeks are critical. A little care now pays off big time with a healthy, productive vine down the road.
Starting from seed is incredibly rewarding and gives you access to some really interesting varieties you won't find at the local garden center. But it does take a bit of patience. Watermelon seeds are sun-worshippers; they need warmth to wake up, so don't rush them. If you live somewhere with a shorter growing season, you can get a jump on things by starting them indoors about four weeks before your last frost date.
Sowing Seeds the Right Way
Putting a seed in dirt sounds easy, but a few pro tips can make a world of difference, especially in a container where space is at a premium.
- Planting Depth: Poke 2-3 seeds about an inch deep right in the middle of your pot. This is just a little insurance in case one doesn't sprout.
- Warmth is Everything: For these seeds to even think about germinating, the soil needs to be at least 70°F. If your house is on the cool side, a simple seedling heat mat is a game-changer. It can seriously cut germination time in half.
- Just Enough Water: Give the soil a gentle watering after you plant. The goal is to keep it consistently moist, like a wrung-out sponge, not a swamp. A spray bottle is perfect for this, as it won't wash your seeds away.
Once you see those little green sprouts pop up, you’ll have to make a tough choice.
It’s time to thin them out. I know, it feels brutal to sacrifice a perfectly good seedling. But if you let them all grow, they'll choke each other out, competing for water and nutrients. You'll end up with a few weak, struggling plants instead of one powerhouse.
Wait until the seedlings have their first set of "true" leaves (the ones that look like tiny watermelon leaves). Pick the strongest, healthiest-looking one and snip the others right at the soil line with a pair of scissors. Don't pull them! That could damage the roots of the one you want to keep.
Working with Transplants
Starting with a young plant from a nursery? Great! Your main job is to prevent transplant shock. That's the stress a plant goes through when it's suddenly moved to a new home. A shocked plant can just sit there, refusing to grow for weeks, which is a major setback.
The secret is to harden them off first. This just means getting them used to the great outdoors slowly.
- Find a shady, sheltered spot. On the first day, let the plant hang out there for just an hour or two.
- Over the next few days, gradually increase its time outside and let it get a little more direct sun each day.
- After about a week to 10 days, it should be tough enough to handle the real world. Now it's ready for its permanent home.
When you're ready to plant it in the big container, be as gentle as you can with the roots. Dig a hole about the same size as its nursery pot, carefully slide the plant out, and settle it into its new home. Fill in around it with soil and give it a good, deep drink of water to help it settle in. Nail this part, and you've set the stage for a summer of explosive growth.
3. Mastering the Art of Watering and Feeding
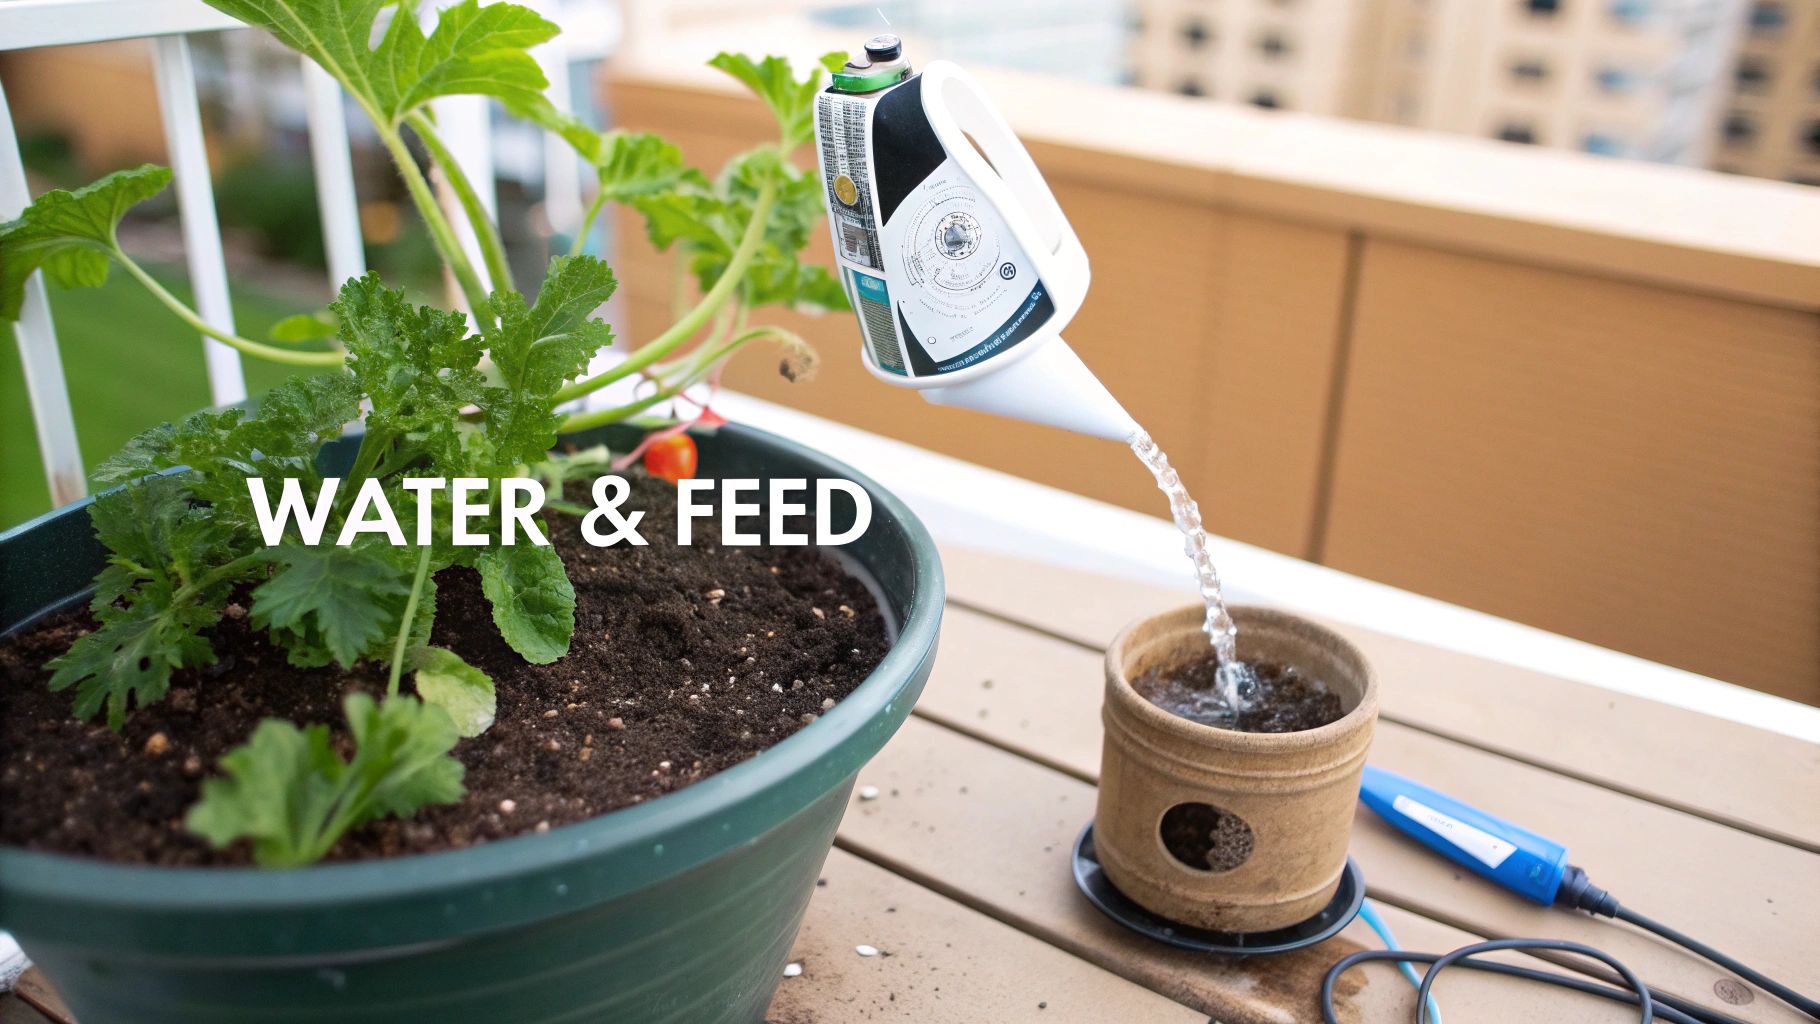
It’s no secret that watermelons are thirsty plants—the name says it all! After all, the fruit itself is over 90% water. When you're growing them in a pot, getting the watering right becomes your most important daily task. Unlike in a sprawling garden bed, a container has very limited real estate for soil, meaning it can dry out shockingly fast, especially on a sun-drenched patio.
The real trick is consistency. A plant that's constantly going from bone dry to sopping wet is a stressed plant, and stress is the enemy of good fruit. You're aiming for that sweet spot of soil that's always moist, like a wrung-out sponge, but never a swampy, waterlogged mess.
The Daily Watering Ritual
My best advice? Ditch the rigid schedule. The only reliable way to know if your watermelon needs a drink is to check the soil every single morning. Just stick your finger about two inches down into the pot. If it feels dry at that depth, it’s time to water.
When you do water, do it thoroughly. Give the plant a deep soak until you see water freely draining from the bottom holes. This is critical because it ensures the entire root ball gets hydrated, which encourages the roots to grow deep and strong. If you only give it a little splash on top, the roots will stay shallow, making the plant far more vulnerable to drying out on a hot day. In the middle of a heatwave, you might even find yourself watering twice a day.
A common mistake I see is shallow watering. Just wetting the surface might seem fine, but it forces the roots to stay near the top, where they can easily bake in the sun. Always aim for a deep, saturating soak that reaches the very bottom of the pot.
A Tale of Two Fertilizers
Feeding your potted watermelon correctly is just as important as watering it. Think of it like a two-act play: the plant has different nutritional needs at different points in its life. Giving it the right food at the right time is the secret to getting big, sweet melons instead of just a jungle of leaves.
Act 1: The Growth Phase
For the first month or so after your transplant gets settled, its only job is to grow a big, healthy network of vines and leaves. This is the plant's engine room, its solar panel factory.
- Nutrient Focus: During this initial growth spurt, your plant is hungry for nitrogen (N). Nitrogen is the key nutrient that fuels lush, green, leafy growth.
- Application: I recommend using a balanced, all-purpose liquid fertilizer every two weeks. Look for one with a higher first number, like a 10-5-5 formula.
Act 2: The Fruiting Phase
The moment you spot the first female flowers—you can't miss them, they have a tiny, pea-sized melon at their base—it’s time to change your strategy. If you keep feeding it high-nitrogen fertilizer now, you’ll get an enormous, beautiful vine with zero fruit to show for it.
- Nutrient Focus: Now, the plant needs to shift its energy from leaves to flowers and fruit. That means less nitrogen and more phosphorus (P) and potassium (K). Phosphorus is vital for setting flowers and fruit, while potassium is all about fruit quality, sweetness, and overall plant vigor.
- Application: Switch over to a fertilizer formulated for blooms or tomatoes, which will have higher middle and last numbers (like a 5-10-10). Apply this every 10-14 days as soon as you see those first little fruits forming. If you're looking for great options, you can explore this guide on the best organic fertilizer for vegetables.
Nailing this two-stage feeding plan gives your plant exactly what it needs to grow strong and then produce the sweet, juicy watermelons you've been waiting for.
4. Training Vines
A healthy watermelon plant is a bit of a wild thing. Those vines will happily scramble across your entire patio if you let them, quickly turning your tidy space into a jungle. This is where a little bit of training comes in—it’s not just about saving space, but it's a critical step for a healthier, more productive plant.
For container watermelons, growing up is almost always the answer. By encouraging the vines to climb a sturdy trellis, cage, or netting, you solve several problems at once. You get your precious floor space back, improve air circulation to keep nasty fungal diseases at bay, and lift the developing fruit off damp soil where it could easily rot.
Smart Vine Management
As your plant starts sending out those long, searching vines, your job is to become their gentle guide. Weave them through the openings in your trellis or loosely secure them with soft garden ties. The key word here is "gently"—the vines are surprisingly delicate and can snap if you force them.
Once the main vine has a few baby melons forming, you can think about pruning. This sends a clear signal to the plant: stop putting energy into growing more leaves and pour everything you've got into making the existing fruit bigger and sweeter.
- Pinch the Tip: After 2-3 fruits have set on a main vine, I usually pinch off the growing tip of that same vine. This stops it from growing longer.
- Remove Side Shoots: You can also trim away some of the secondary vines (often called suckers) that aren't producing any fruit. This really helps the plant focus its resources.
5. Ensuring Pollination
Here's a hard truth: you can have the most beautiful, healthy vine in the world, but if pollination doesn't happen, you won't get a single watermelon. It's that simple. Pollination is just the transfer of pollen from a male flower to a female flower, but it's the magic spark that tells the plant to start growing a fruit.
In a big garden, bees and other insects handle this for you. But on a balcony or a small patio, you might not have enough pollinators buzzing around to get the job done. When that happens, you get to step in and play matchmaker.
Don't be intimidated by hand-pollination. It's one of the most empowering things a container gardener can learn. Taking just five minutes in the morning to do it yourself can be the difference between a disappointing season and a successful harvest.
First, you'll need to know who's who. Watermelon flowers typically open early in the morning, and telling them apart is easy once you know what to look for.
| Flower Type | Identifying Features |
|---|---|
| Male Flower | Sits on a simple, thin stem right behind the yellow petals. The center is fuzzy with powdery yellow pollen. |
| Female Flower | Look for a tiny, swollen green bulb at its base, just behind the petals. This bulb is the mini, unpollinated watermelon. |
The process itself is incredibly straightforward. Gently pick a male flower and peel back its petals to expose the pollen-dusted center part (the stamen). Then, carefully dab or brush that pollen all over the sticky center (the stigma) of a female flower. That’s all there is to it!
It's a similar process for a lot of garden plants. If you're curious, you can learn more about how to pollinate corn by hand in our other guide. Once you master this skill, you'll never have to worry about a lack of bees again.
6. Knowing When to Harvest Your Homegrown Melon
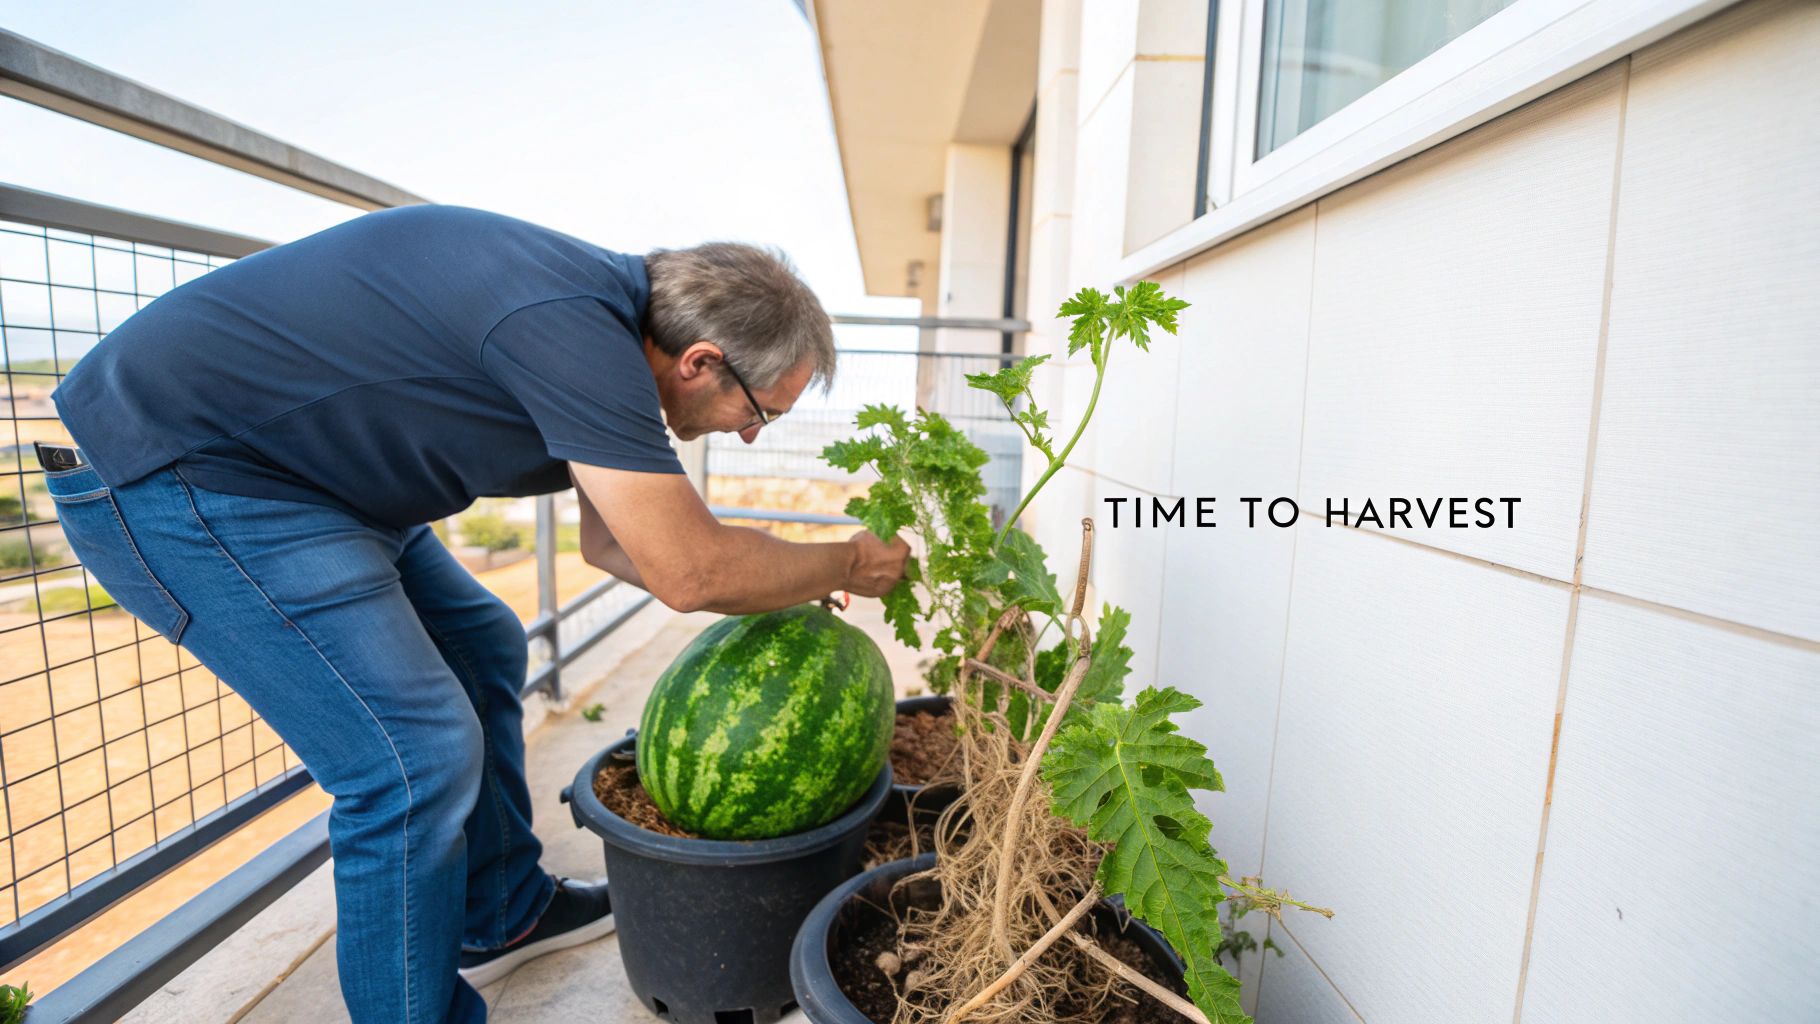
After all those weeks of careful watering and feeding, you’ve finally made it to the most exciting (and slightly nerve-wracking) part: knowing when to pick your watermelon. This is the moment of truth. Unlike a tomato that might ripen a bit on your windowsill, a watermelon stops ripening the second you cut it from the vine. Getting the timing just right is everything.
Fortunately, you don't have to guess. Your watermelon plant sends out some pretty clear signals when it's ready. Once you learn to spot them, you can harvest with confidence, knowing a sweet, juicy reward is just a slice away. Forget just counting days on a calendar—the plant itself is your best guide.
Reading the Signs of Ripeness
You're looking for a trifecta of clues. When you see all three of these line up, it's time to get out the shears.
The Tendril Tells the Tale
This is probably the most reliable indicator I've found. Look for the small, curly tendril on the vine right where the melon’s stem attaches. When that little curlicue turns brown and completely dries up, it’s a huge sign the melon is ripe.
If that tendril is still green and pliable, the plant is still pumping sugars into the fruit. Be patient.
Check the Field Spot
Flip your watermelon over gently and look at the spot where it has been resting. This is called the field spot. On an unripe melon, this patch will be a stark white or pale green. As the melon matures, this spot will transform into a lovely creamy yellow, sometimes even a pale orange. A bright white spot is a dead giveaway that it needs more time on the vine.
Trust the Thump Test
There's a reason the classic thump test has been around forever—it works. Give the watermelon a firm but gentle rap with your knuckles. A ripe melon will reward you with a deep, hollow sound, almost like a drum.
If you hear more of a dull thud, the melon is still dense and underripe.
It takes a little practice, but once you hear the deep, resonant "thump" of a ripe watermelon, you'll never forget it. It's the sound of a perfectly sweet, juicy melon ready to be enjoyed.
By patiently watching for these three signs—the dry tendril, the creamy field spot, and the hollow thump—you can nail the timing and ensure every homegrown watermelon you harvest is at its absolute peak.
7. Troubleshooting Common Questions
Even the most seasoned gardeners run into a few head-scratchers when growing watermelons in containers for the first time. It's a bit different than planting in a big garden bed, but thankfully, most issues have a straightforward fix. Let's tackle some of the questions I hear most often.
So, how many watermelons can you realistically expect from a single potted plant? For the smaller "icebox" varieties that are perfect for containers, a good goal is 2 to 3 melons per vine. Pushing for more often means the plant spreads its energy too thin, leaving you with smaller, less flavorful fruit. It's all about quality over quantity here.
Why Are My Watermelon Flowers Falling Off?
Seeing those bright yellow flowers drop can be disheartening, but don't panic just yet. It's often perfectly normal. Watermelon vines produce both male and female flowers. The male ones are programmed to open, release pollen, and then fall off within a day or two. That’s just part of their job.
The real concern is when the female flowers start to drop. You can spot these easily—they have a tiny, unpollinated melon at their base. If these are turning yellow and falling off, you've almost certainly got a pollination problem. This is a classic issue for container gardens on patios or balconies where bees might be scarce. The simple fix? Play matchmaker and hand-pollinate them yourself.
Can I Reuse My Potting Soil Next Year?
I get it, good potting mix isn't cheap, and it feels wasteful to toss it. But for a plant as hungry as a watermelon, reusing soil is a risky move. A single vine will suck a huge amount of nutrients from its pot over the course of a growing season.
Trying to grow another heavy-feeding crop in last year's depleted soil is like asking a chef to cook a gourmet meal with an empty pantry. You're setting yourself up for disappointment.
If you're determined to try, you can't just replant in it. You'd need to seriously amend it with a generous amount of fresh compost and a quality slow-release granular fertilizer to even begin to replace what the watermelon took out. Honestly, for the best results and less guesswork, starting with a fresh bag of high-quality potting mix is the way to go.
At Homegrown Garden, we believe everyone can experience the thrill of picking food from their own patio. We've put together a collection of heirloom seeds, easy-to-use kits, and all the gear you need for your container gardening journey. Find all your essentials to get started at https://www.homegrown-garden.com.
Want to grow your own melon from seed? Try our Crimson Sweet watermelon seeds to get started.

