


Timing is everything when you're starting tomatoes from seed. Get it right, and you'll have robust, healthy transplants ready for the garden just as the weather warms up. Get it wrong, and you might end up with leggy, stressed-out plants.
The sweet spot for when to start tomatoes from seed is between 6 to 8 weeks before your area's last average frost date. This window gives your seedlings enough time to develop a strong root system without becoming overgrown and root-bound in their starter pots.
Step 1: Pinpointing Your Perfect Tomato Sowing Date
Your entire tomato-starting schedule hinges on one critical date: the last average spring frost for your specific location. Think of this date as your finish line—everything else works backward from there. Once you know that date, a little simple math is all it takes to find your starting line.
Finding Your Frost Date
So, how do you find this magic date? It's easier than you think. My go-to resources are the Old Farmer's Almanac website or the site for my local agricultural extension office. Just pop in your zip code, and they’ll give you an estimated date based on historical weather data for your town.
Let’s walk through a real-world example. Say you live in USDA Zone 6, where the last frost is typically around May 15th.
- To find the 8-week mark, you'd count back from May 15th, which lands you around March 20th.
- To find the 6-week mark, you'd count back, which puts you at April 3rd.
For a gardener in Zone 6, the ideal window to sow tomato seeds indoors is from the third week of March to the first week of April. It’s that simple!
This timeline helps you visualize how to work backward from your last frost date.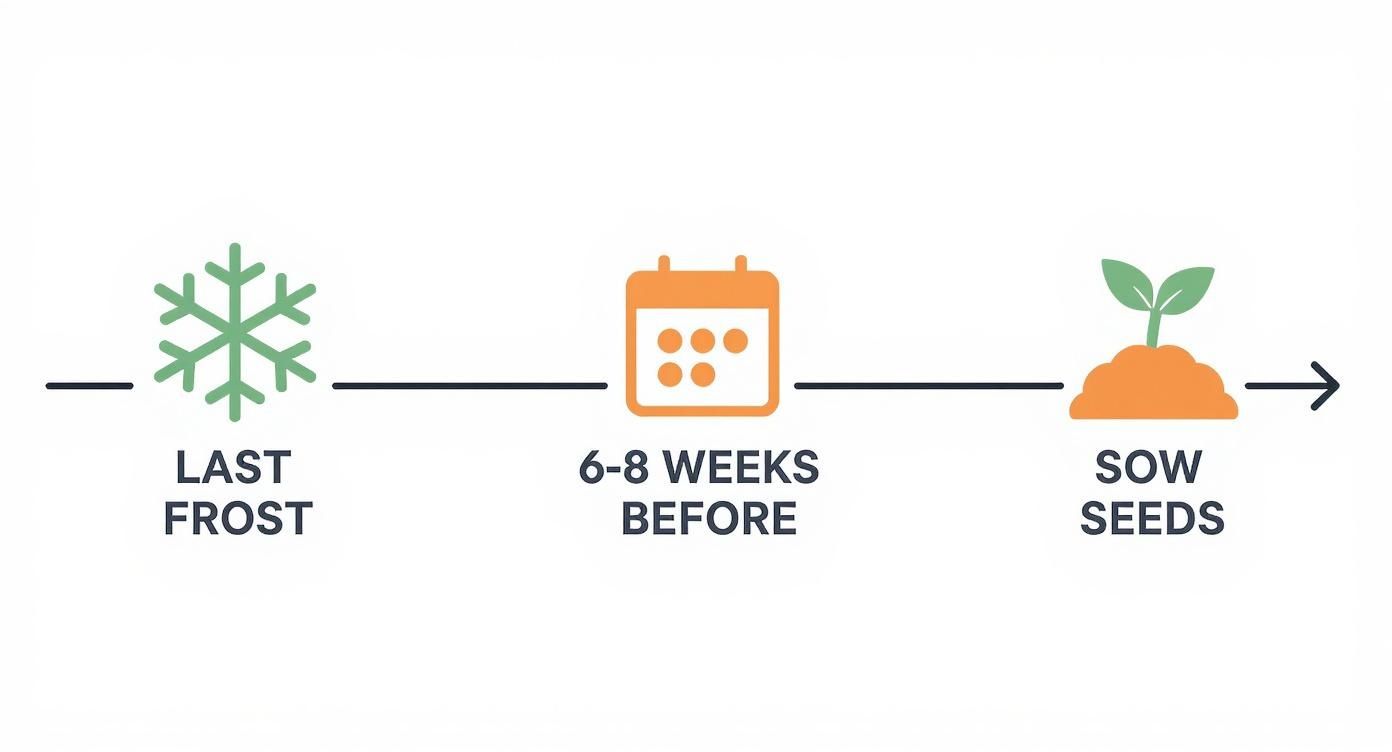
As you can see, that last frost date is the anchor for your entire planting schedule.
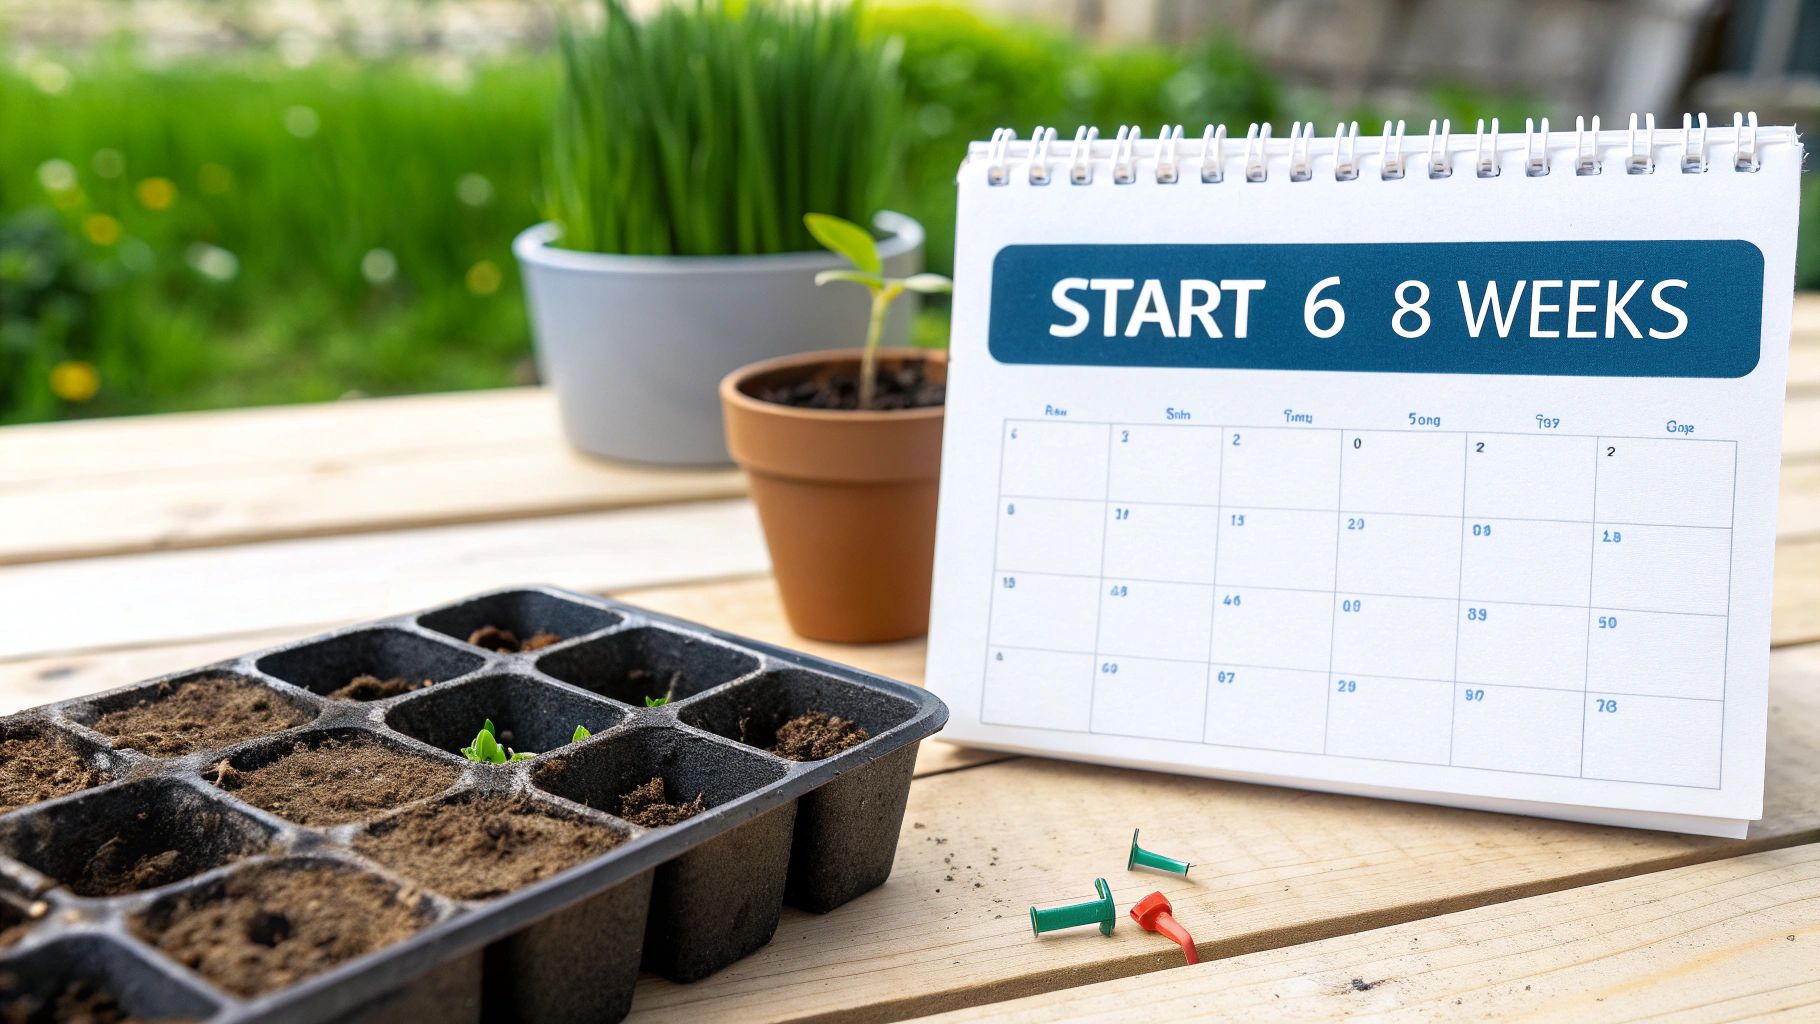
Your Tomato Seed Starting Calendar
Use this quick-reference table to calculate your personal seed-starting window. Just find your last frost date in the first column and see your ideal start dates.
| If Your Last Frost Date Is | Start Seeds 8 Weeks Before | Start Seeds 6 Weeks Before | Your Ideal Starting Window |
|---|---|---|---|
| March 30 | February 2 | February 16 | Early to Mid-February |
| April 15 | February 19 | March 4 | Late Feb to Early March |
| April 30 | March 5 | March 19 | Early to Mid-March |
| May 15 | March 20 | April 3 | Late March to Early April |
| May 30 | April 4 | April 18 | Early to Mid-April |
This simple calculation takes the guesswork out of the process, ensuring your seedlings are the perfect age and size for transplanting.
This 6-to-8-week guideline is pretty standard for gardeners in most temperate climates. Whether you're in North America or Europe, starting seeds in late winter usually means they’re ready to go into the ground by mid- to late-May. That’s when the soil has finally warmed up to a consistent 55°F (13°C) or more—a critical temp for happy tomato roots.
Getting the timing down is a fundamental skill, and you can dive deeper into the topic with our complete guide on when to start seeds indoors.
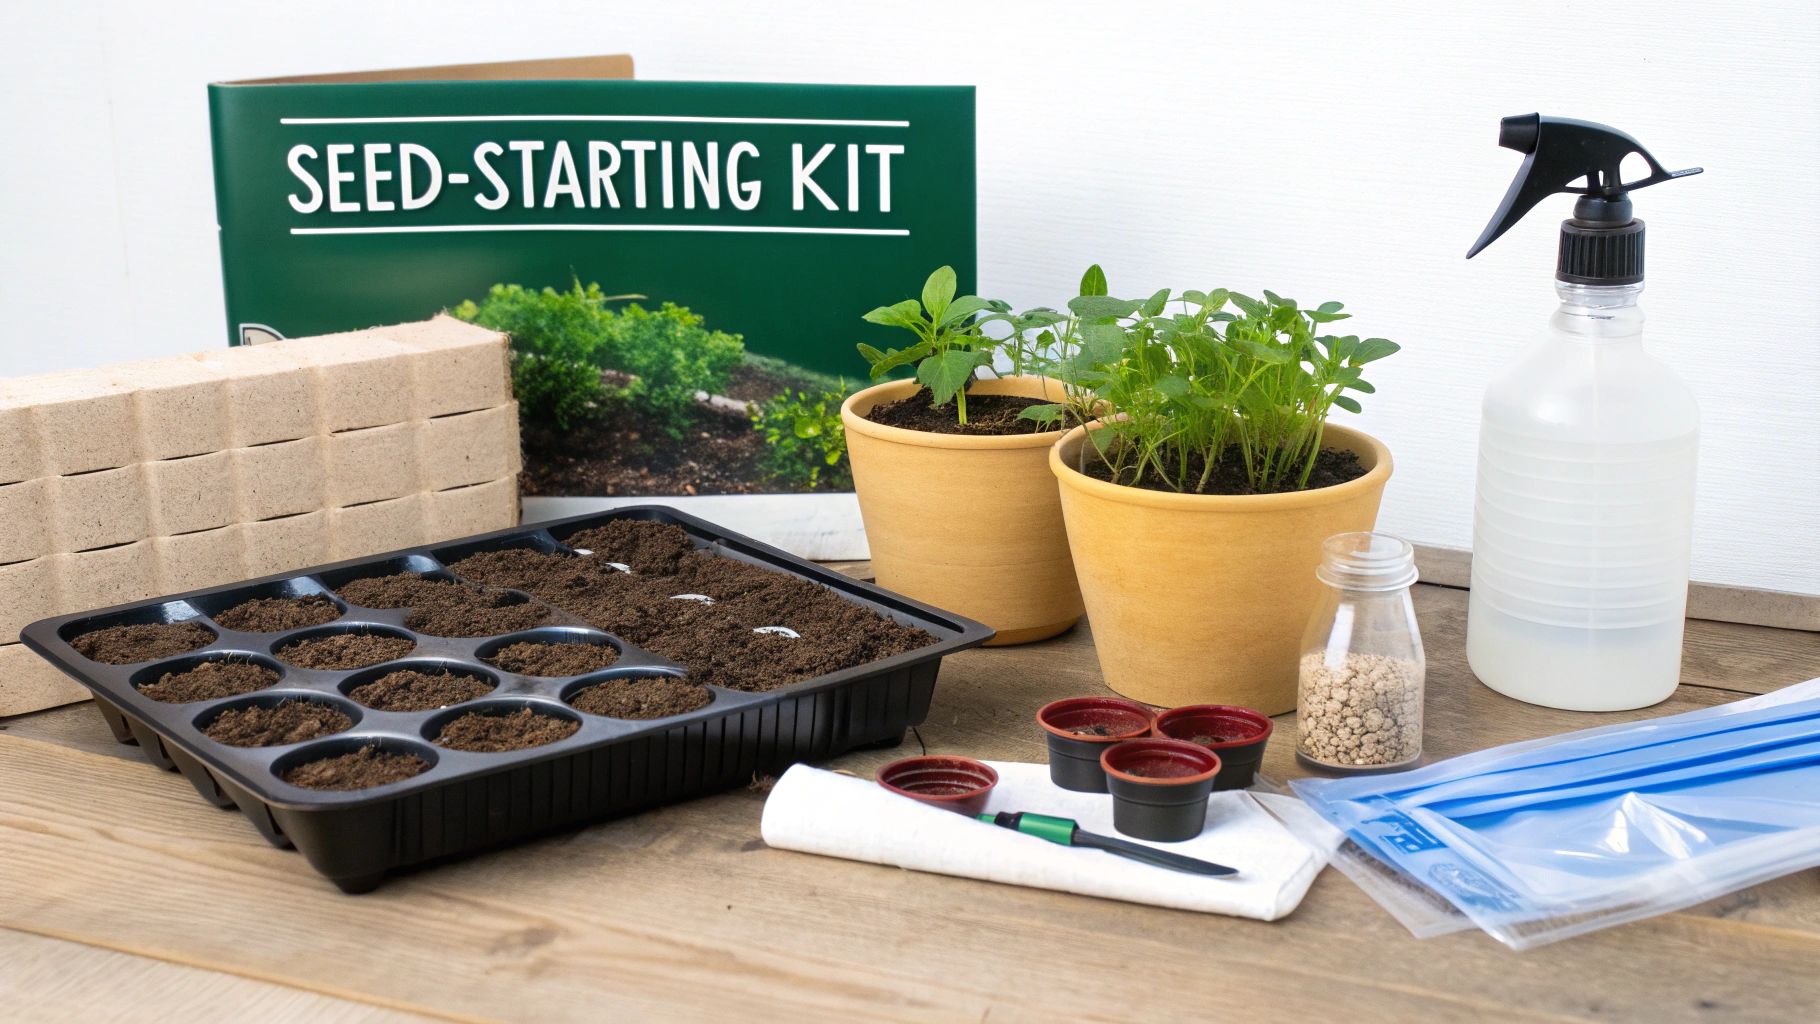
Step 2: The 7 Must-Haves for Starting Seeds Indoors
Before you even think about tearing open a seed packet, let's get your workstation set up. Having the right gear on hand is what separates a frustrating gamble from a rewarding success. By gathering these seven essentials, you're creating the perfect little nursery for your seeds to sprout and thrive, giving your future tomato plants the strongest possible start.
Your Foundation: Soil and Containers
First things first, let's talk about what your seeds will actually live in. Don't be tempted to scoop up dirt from your garden—that's a classic rookie mistake. Garden soil is heavy, compacts easily, and can be full of fungal spores that cause "damping off," a disease that’s fatal to tiny seedlings.
You absolutely need a sterile seed starting mix. It's light, fluffy, and designed for delicate new roots.
You’ll also need something to put that mix in. You can go with classic seed starting trays with individual cells, or get creative with repurposed yogurt cups or egg cartons. Whatever you choose, just make sure it has drainage holes at the bottom. Soggy soil is the enemy of healthy roots.
Your Complete Seed Starting Toolkit
Here's a quick rundown of everything you should have within arm's reach before you begin:
- Sterile Seed Starting Mix: A clean, disease-free medium is non-negotiable for healthy germination.
- Seed Trays or Small Pots: Gives each seedling its own space to grow without competition.
- Plant Labels: Trust me on this one. You’ll be 100% convinced you'll remember which tomato is which... and you will be 100% wrong. Label everything!
- Fine-Mist Spray Bottle: The best way to water without blasting tiny seeds out of place.
- Humidity Dome or Plastic Wrap: This traps moisture and creates a mini-greenhouse effect that seeds love.
- A Quality Light Source: A sunny window is rarely enough. A dedicated light source is the key to preventing weak, spindly seedlings.
- Waterproof Tray: Goes under your pots to catch runoff and keep your surfaces clean and dry.
Getting these basics right from the start makes all the difference. Skipping the sterile mix or skimping on a proper light source are the two biggest reasons seedlings fail to thrive.
Nurturing Your New Sprouts
The last few items on the list are all about controlling the environment once your seeds are sown. That spray bottle allows you to keep the soil surface perfectly moist for germination. Covering your trays with a clear plastic humidity dome (or just a sheet of plastic wrap) locks in that moisture, which is exactly what most seeds need to wake up.
And finally, let's talk about light. While a south-facing window seems like a great spot, it almost never provides the consistent, direct light that seedlings crave—we're talking 14-16 hours a day. An inexpensive grow light is the single best investment you can make for stocky, vigorous plants.
For a deeper dive into the equipment, take a look at our complete guide to building the perfect indoor seed starting setup. It'll walk you through everything you need to know.
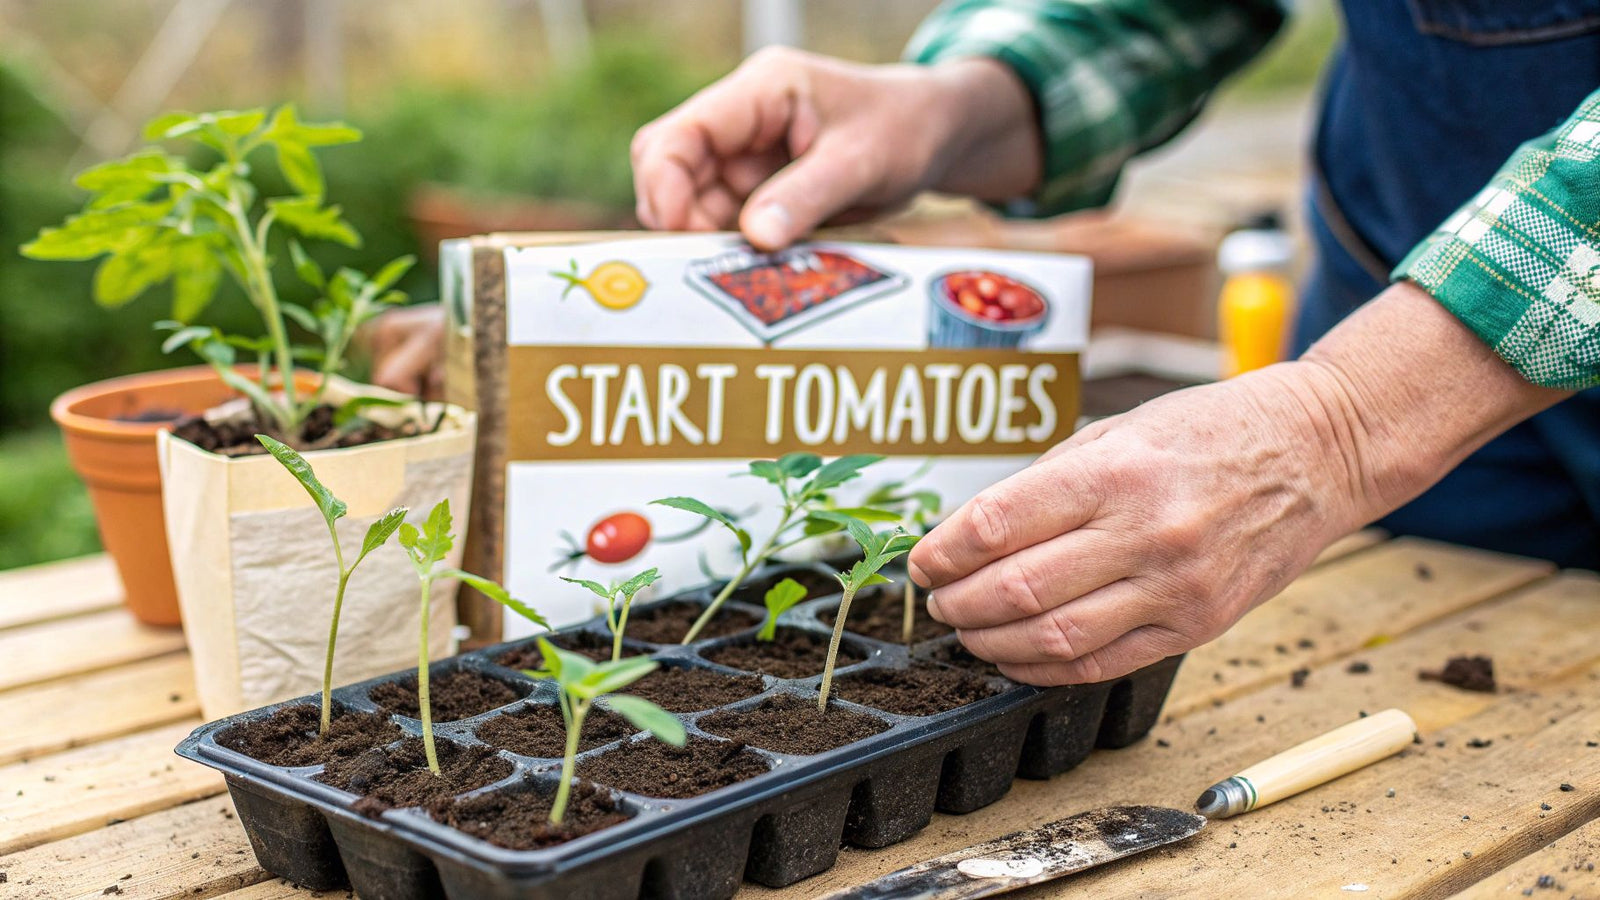
Step 3: Getting Your Seeds Sown the Right Way
Alright, your supplies are gathered and the calendar is marked. Now for the fun part: sowing the seeds. Nailing your technique here is what separates a tray full of strong green sprouts from a few sad, spotty results. Answering the question of when to start tomatoes from seed is pointless if the seeds don't get the start they need.
First things first, let's get that seed starting mix ready. It's usually bone-dry straight out of the bag, which means it won't absorb water well. I find the best way to handle this is to dump the mix into a tub or bucket and slowly add warm water. Get your hands in there and mix it up until it feels like a wrung-out sponge—it should hold its shape when you squeeze it, but no water should drip out.
From Planting to Popping Up
Once your soil mix is perfectly moist, go ahead and fill your seed trays or pots. I like to gently press it down to get rid of any sneaky air pockets, which can dry out roots later on.
Now, for the seeds themselves. The biggest mistake I see gardeners make is planting them way too deep. A tiny seed only has so much energy to push its way to the surface.
- Planting Depth: A good rule of thumb is to plant a seed about twice as deep as it is wide.
- Tomato Seeds: For small tomato seeds, that’s barely a quarter-inch.
- Technique: I just use a pencil eraser to make a tiny divot, drop in one or two seeds per cell, and then sprinkle a little more mix over the top.
A final, gentle mist of water on the surface ensures the seed makes good contact with the soil, which is exactly what it needs to get started.
The secret to fast, even germination isn't light—it's warmth. Tomato seeds really take off when the soil temperature stays consistently between 70-80°F (21-27°C), which is often a lot warmer than the average room.
This is where a simple waterproof heat mat becomes your best friend. Sliding one under your seed tray can cut germination time down to just 5 to 7 days. It’s a game-changer.
What to Do When You See Green
The moment you spot those first little green loops breaking through the soil, your role shifts. Take that plastic humidity dome off immediately. While it was crucial for trapping moisture to get the seeds to sprout, leaving it on now can spell disaster.
That stagnant, humid air is the perfect breeding ground for damping-off, a fungal disease that will wipe out your tender seedlings overnight. Removing the cover and ensuring the little plants get good air circulation is the first step toward raising strong, healthy tomato plants.
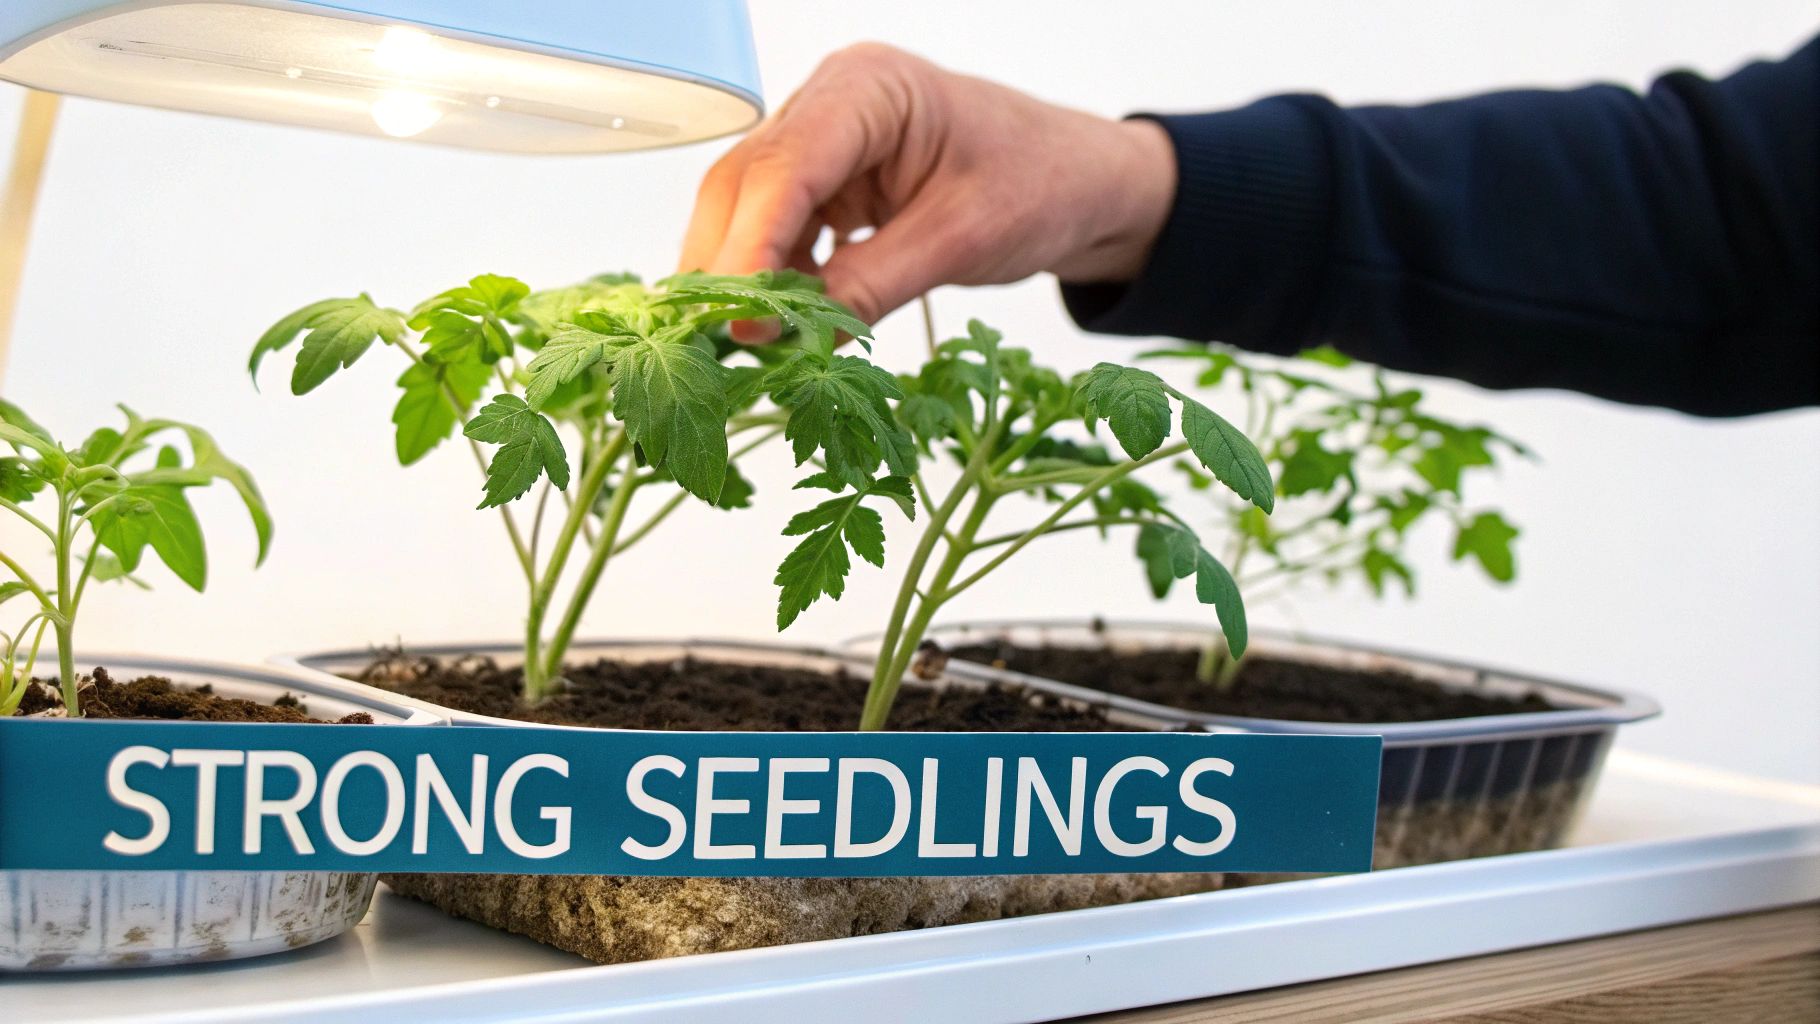
Step 4: Nurturing Strong Seedlings with Light and Water
https://www.youtube.com/embed/8Du4IxzJgaA
Once you see that first hint of green, the real fun begins. Your focus now shifts from germination to raising strong, stocky seedlings. You want plants that are sturdy and ready for the garden, not the tall, flimsy ones that come from struggling for light.
Getting this right really comes down to two things: light and water. And believe me, mastering them is simpler than it sounds.
A classic rookie mistake is thinking a sunny windowsill is enough. It almost never is. Seedlings on a sill have to stretch and crane their necks toward the sun, which results in weak, spindly stems. We gardeners have a term for this: "leggy." A leggy seedling is a fragile seedling, one that will have a tough time supporting itself later on.
Getting the Light Just Right
Your best friend for preventing leggy plants is a dedicated grow light. You don't need to break the bank on a professional setup, either. A simple shop light from the hardware store fitted with full-spectrum bulbs does a fantastic job.
What truly matters is how you use it.
- Keep it Close: The light source should hang just a few inches above the tops of your seedlings. This is crucial. As your little plants get taller, you'll need to raise the light to maintain that close distance.
- Set a Schedule: Your baby plants thrive on a routine, just like us. They need a consistent "day" and "night." Aim to keep your lights on for 14-16 hours daily. A simple outlet timer is a lifesaver here—just set it and forget it.
If there's one piece of gear I recommend to new seed-starters, it's a basic grow light setup. It provides the kind of intense, direct light that a window just can't offer, and it’s the secret to developing those thick, sturdy stems.
Watering Smarter, Not Harder
Overwatering is the other big danger. It’s just as bad as not enough light, creating a swampy environment that’s a breeding ground for fungus gnats and the dreaded root rot.
For this reason, I’ve become a huge fan of bottom-watering. It completely changes the game.
Instead of pouring water over the top, you place your seed trays into a larger, waterproof tray. Add about an inch of water to the outer tray and let the seedlings sit for 15-30 minutes. The dry soil will wick up exactly the moisture it needs from the bottom holes.
This simple trick encourages the roots to grow downward, searching for water, which builds a much stronger root system. Plus, keeping the soil surface drier helps prevent a whole host of pest and mold issues. It's a win-win.
Step 5: Choosing the Right Tomato Variety for Your Garden
It might surprise you, but the specific tomato you decide to grow actually shapes your entire seed-starting schedule. Before you even think about soil, you need to match your tomato choice to your climate and garden space. It’s a step many gardeners skip, but getting this right from the start makes all the difference.
First things first, you need to understand the two main types of tomatoes: determinate and indeterminate. It’s basically the difference between a bush and a vine.
- Determinate (Bush) Tomatoes: These guys grow to a set size, usually around 4 feet tall, and then stop. They produce their entire crop of tomatoes in a concentrated burst over a few weeks. This makes them fantastic for containers or small garden plots where space is tight.
- Indeterminate (Vining) Tomatoes: These are the marathon runners of the tomato world. They'll just keep growing and setting fruit all season long, right up until the first frost nips them back. They definitely need tall, sturdy supports like a strong cage or a tall stake.
Matching Varieties to Your Climate
The climate where you live is a huge factor. If you're gardening somewhere with a cool, short growing season, you’ll want to look for early-maturing varieties. Think names like 'Early Girl' or 'Sub-Arctic Plenty'. These can produce ripe fruit in as little as 55-65 days after you transplant them, which is a massive advantage when summer is short.
On the flip side, gardeners in really hot climates need to hunt down heat-tolerant varieties. These have been specifically bred to set fruit even when the temperatures get blistering hot, which helps prevent the dreaded blossom drop and keeps your harvest coming.
This kind of strategic timing isn't just for home gardeners. Commercial growers in places like California's Central Valley time their plantings down to the day. They'll start specific hybrids 6-8 weeks before transplanting to hit a perfect, uniform harvest window that aligns with factory processing schedules. You can see how this works on a massive scale in this tomato seed market analysis.
For us at home, the lesson is the same: picking a variety that’s happy in your environment is the single best thing you can do for a great harvest.
Step 6: Getting Your Seedlings Ready for the Great Outdoors
Moving your tender seedlings from their cozy indoor setup straight into the garden is one of the quickest ways to lose them. It's a huge shock to their system. We have a name for this crucial transition period: hardening off. Think of it as a training program to toughen them up for life outside.
This whole process should take anywhere from 7 to 14 days. I know it's tempting to rush, but skipping or speeding through this step is a classic mistake that can undo all the effort you've put in so far.
Start by finding a sheltered, shady spot for your seedlings. On the first day, just give them an hour outside before bringing them back in. That's it. It’s a slow and steady race.
A 7-Day Acclimation Plan
The idea is to gradually increase their time outdoors, exposing them to more sunlight and wind each day. A gentle breeze is fantastic for building strong, sturdy stems, but a sudden, harsh gust can snap a young plant in a heartbeat.
Here’s a schedule that I’ve found works well:
- Days 1-2: Begin with 1-2 hours in a fully shaded, protected spot.
- Days 3-4: Bump it up to 3-4 hours and introduce them to some dappled morning sun.
- Days 5-6: Now you can aim for 5-6 hours outside, with a couple of those hours in direct sunlight.
- Day 7: They can stay out for most of the day, but it's still a good idea to bring them in at night.
Keep a close eye on your plants. If the leaves start looking pale or a bit wilted, that’s your cue to pull back. They’re telling you it’s too much, too soon. Just move them to a more protected spot and shorten their outdoor time the next day.
This same principle of a controlled start is used everywhere, even on a massive scale. Did you know that in North America, greenhouse production accounts for more than 25% of all fresh tomatoes? Those plants all get a gentle start before they ever face the field.
And remember, always pay attention to the forecast. If a surprise cold snap, heavy rain, or a wild windstorm is headed your way, just keep the seedlings inside. You can always pause the schedule and pick up where you left off when things calm down.
To really get this technique down, take a look at our complete guide on how to harden off seedlings properly. A little bit of patience here goes a long way toward ensuring your tomatoes are tough, healthy, and ready for their final home in the garden.
Step 7: Troubleshooting 2 Common Seed Starting Problems
Even the most seasoned gardeners run into a few hiccups when starting seeds indoors. It’s all part of the process! Let's walk through a couple of the most common issues you might see with your tiny tomato seedlings and how to fix them.
1. What To Do With Tall, Skinny Seedlings
We’ve all been there: you check on your seedlings, and they’ve shot up, looking pale, tall, and skinny. This is what gardeners call being “leggy,” and it’s a classic sign they’re desperately stretching for more light.
It’s an easy fix, though. Your grow light needs to be much closer to the plants—think just 2-3 inches above the tops of the seedlings. You'll also want to leave that light on for a good 14-16 hours a day to give them the intensity they crave.
2. Why Aren't My Seeds Sprouting?
You’ve planted your seeds, and... nothing. Don't panic! Tomato seeds can take their sweet time, often anywhere from 5 to 10 days to pop up. More often than not, the culprit behind a long wait is chilly soil.
Tomatoes are heat-loving plants right from the start. They need consistently warm soil, ideally between 70-80°F (21-27°C), to really get going. The simplest and most effective way to solve this is with a seedling heat mat placed right under your seed tray. It provides that gentle, steady warmth that tells the seeds it’s time to wake up.
Ready to get your hands dirty and start your own tomato patch? Homegrown Garden offers a fantastic selection of unique heirloom seeds and has all the gear you'll need. You can browse their collection of seeds and supplies to find your new favorite variety.

