


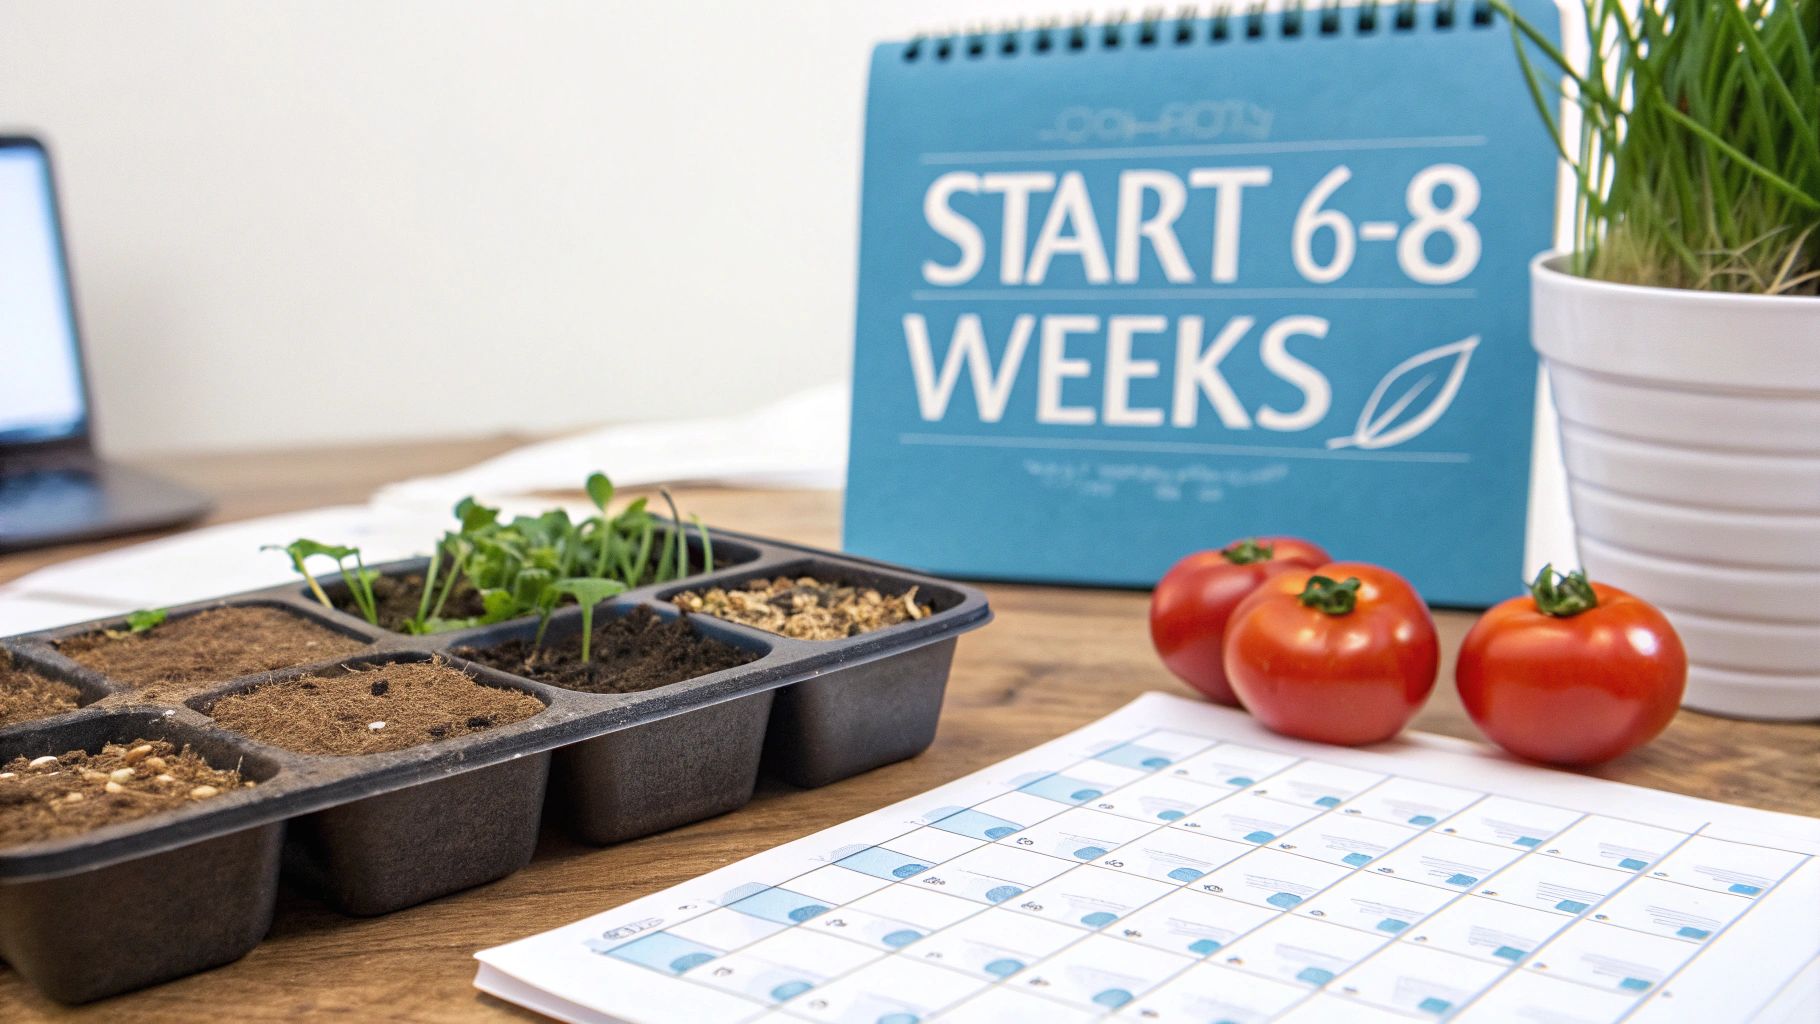
Timing is everything when it comes to getting a head start on your tomato season. The golden rule I've learned over countless seasons is this: start your tomato seeds indoors 6 to 8 weeks before your area's last expected frost date.
This timeframe isn't just a random suggestion. It's the sweet spot that gives your seedlings enough time to develop a strong root system and sturdy stems. Get them going too early, and you'll end up with lanky, stressed-out plants that struggle when it's time to move them outside. Start too late, and you're just cutting into your precious harvest window.
Step 1: Pinpoint Your Local Last Frost Date
The entire seed-starting calendar hinges on one crucial piece of information: your local last frost date. This is the average day in spring when you can reasonably expect the danger of a plant-killing frost to have passed.
You can't just guess this date. The most reliable way to find it is by checking the USDA Plant Hardiness Zone Map, which gives you a great baseline. For even more localized and often more accurate data, I always recommend checking with your local county agricultural extension office. They have the boots-on-the-ground knowledge for your specific microclimate.
Once you have that date, the rest is simple math. Just count back on the calendar.

For example, if my last frost date is May 15th, I’ll be looking to sow my seeds sometime between March 20th (eight weeks out) and April 3rd (six weeks out). This window gives the plants the perfect head start. For more tips on timing your entire garden, you can check out our broader guide on when to start seeds indoors.
Calculate Your Tomato Seed Starting Date
To make it even easier, here's a quick reference table. Just find your last frost date in the first column to see your ideal seed-starting window.
| If Your Last Frost Date Is... | Start Seeds Between (8 Weeks Before) | And (6 Weeks Before) |
|---|---|---|
| April 15 | February 18 | March 4 |
| April 30 | March 5 | March 19 |
| May 15 | March 20 | April 3 |
| May 30 | April 4 | April 18 |
| June 15 | April 20 | May 4 |
This simple calculation is the first and most important step to ensure your tomato seedlings are healthy, robust, and perfectly timed for their big move into the garden.
Step 2: Get Your Seed Starting Gear Ready
Before you plant a single seed, let's get your toolkit in order. Gathering everything you need upfront makes the whole process feel less like a chore and more like the exciting first step it is. Getting this right from the start is the key to raising strong, healthy seedlings.
Think of it as setting up the perfect nursery for your baby tomato plants. You're creating an environment where they have the best possible shot at a healthy life.
Containers and Soil
First things first: what will your seeds grow in? You've got options. While you can absolutely get creative with recycled yogurt cups or egg cartons (just poke drainage holes!), I find that dedicated seed starting trays give you the most consistent results. Peat pots are another fantastic choice because you can plant the whole thing in the ground later, which really cuts down on transplant shock.
No matter what container you pick, drainage is non-negotiable. Soggy soil is the fastest way to rot your seeds before they even have a chance.
A common rookie mistake is scooping up dirt from the garden. Don't do it! Garden soil is far too heavy, compacts easily, and can be full of pests or diseases that will kill off delicate seedlings.
Always, always use a sterile, fluffy seed starting mix. This stuff is specifically designed to hold just the right amount of moisture while staying light and airy, giving those brand-new roots room to breathe and grow.
Building the Perfect Environment
I'm going to be blunt: a sunny windowsill is not going to cut it for tomato seedlings. It's a classic beginner trap. Plants started on a windowsill almost always end up "leggy"—all stretched out, pale, and weak from reaching for inadequate light.
To avoid this sad fate, you need to provide a more controlled setup. A proper indoor seed starting setup is easier to create than you might think and makes an incredible difference. Here’s what your seedlings are really asking for:
- Good, Strong Light: An inexpensive shop light with basic fluorescent or LED bulbs is perfect. You'll want to hang it just a few inches above the seedlings and keep it on for 14-16 hours a day.
- Cozy Warmth: Tomatoes are heat-lovers. Their seeds germinate fastest when the soil is warm, somewhere between 70-80°F. A seedling heat mat placed under your trays is the easiest way to provide this gentle, consistent warmth. It really speeds things up.
- Constant Humidity: That clear plastic dome that comes with most seed trays isn't just for show. It acts like a tiny greenhouse, trapping moisture and creating the humid, steamy conditions that tell seeds it's time to wake up and sprout.
Once you have these key items ready, you're all set to move from the planning stage to actually planting your seeds.
Step 3: Sow Seeds for a Successful Germination
You’ve got your supplies, you’ve picked your seeds, and now it’s time for the fun part—getting them in the soil. This is where the magic really begins. The goal here is simple: we're creating the perfect little bubble of warmth and moisture to trick those seeds into thinking spring has arrived.
First things first, let's get that seed-starting mix ready. You want it moist, but definitely not soggy. The perfect consistency feels like a well-wrung-out sponge. I always mix my soil with a bit of water in a separate bucket before filling my trays. This ensures every bit of the mix is evenly damp and prevents your seeds from getting washed around when you water them later.
Once your mix is pre-moistened, fill your seed cells or pots. A gentle tap on the workbench will settle the soil perfectly without turning it into a brick.
Planting Your Tomato Seeds
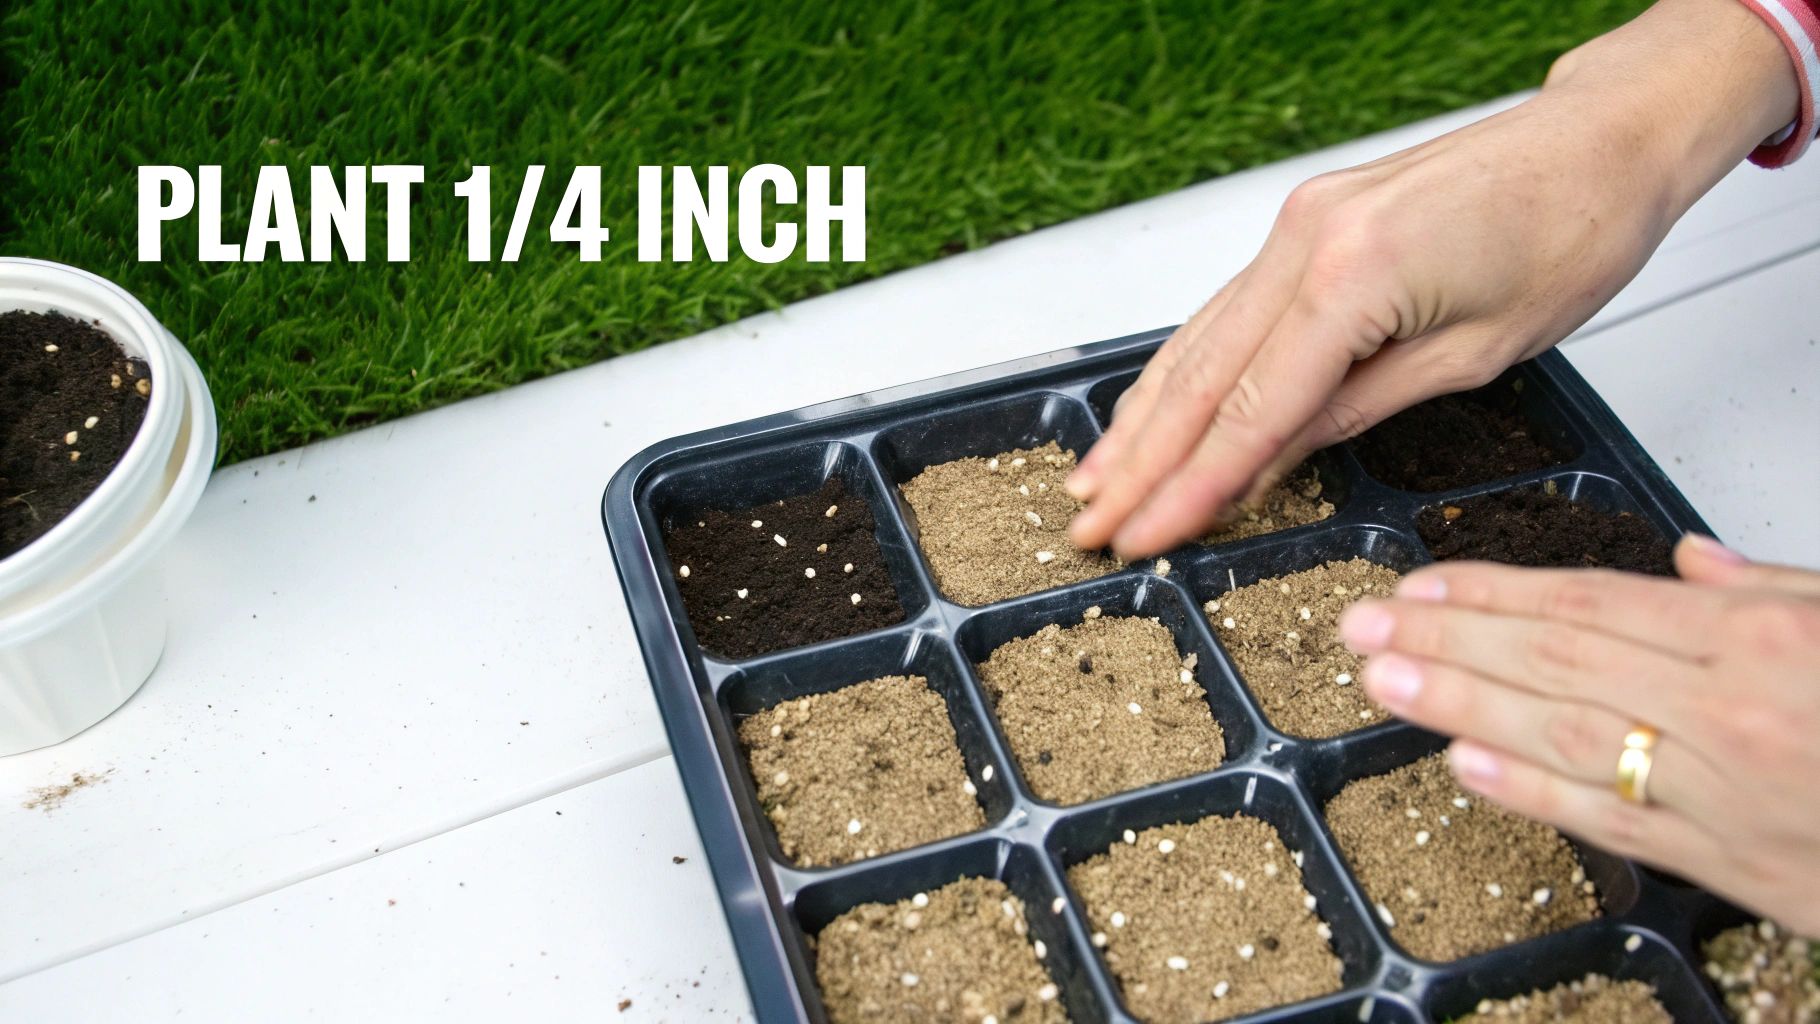
Planting depth can make or break your success. Tomato seeds are tiny and just don't have the energy reserves to push through a ton of soil. But don't worry, there's an easy way to get it right every single time.
-
Make the Divot: Grab a pencil or even a chopstick and make a small indentation in the center of each cell. You’re aiming for about a 1/4-inch deep. No need for a ruler, just eyeball it.
-
Sow Two Seeds: I always drop two seeds into each little hole. Think of it as cheap insurance. This little trick basically guarantees at least one seedling will pop up in every cell, so you don't end up with frustrating empty spots.
-
Cover and Label: Gently brush some of the surrounding mix back over the seeds. Give the surface a light pat to make sure the seeds are snuggled in with good soil contact. And please, don't forget to label everything with the variety and the date you sowed them! You'll thank yourself later.
Creating the Ideal Germination Environment
To wake up from their slumber, tomato seeds are pretty demanding. They need two things above all else: consistent warmth and high humidity. If you slack on either, you're looking at slow, spotty, or even failed germination.
The sweet spot for soil temperature is between 70-80°F (21-27°C). Trying to hit that mark with just the air temperature in your house is a real challenge.
A seedling heat mat is, hands down, the single best investment you can make for this stage. It sits right under your tray and delivers gentle, consistent warmth right where it's needed—at the roots. It's not an exaggeration to say it can cut your germination time in half.
To lock in that crucial humidity, pop the clear plastic dome on top of your tray. This creates a fantastic mini-greenhouse, trapping moisture and creating the steamy environment that seeds love.
Keep that dome on until you see the first little green sprouts breaking through the soil, which usually takes about 5 to 10 days. If you want a deeper dive into the science behind this, check out our guide on mastering the art of seed germination at home.
Once you see green, the game changes. It's time to get that dome off and shift your focus to light and watering.
Step 4: Nail the Light and Water for Strong Seedlings
Once those first little green sprouts push through the soil, your job description changes. You're no longer just a seed-sower; you're now the parent to a nursery full of tiny tomato plants. The next few weeks are critical, and getting the light and water right is where a good tomato start becomes a great one. This is also, frankly, where a lot of new gardeners go wrong and end up with weak, floppy plants.
The most common rookie mistake? Thinking a sunny windowsill is enough. It seems like a great idea, but the light is almost always too weak and comes from just one direction. This forces the seedlings to stretch and lean desperately toward the glass, resulting in "leggy" plants—all stem, no substance. These spindly little guys just don't have the strength to make it in the great outdoors.
Giving Them the Light They Crave
To grow stout, stocky seedlings, you have to provide them with intense light directly overhead. You don't need a fancy, expensive setup—a basic fluorescent or LED shop light is your secret weapon here.
- Light Hours: Your seedlings need 14-16 hours of light every single day. This long "day" mimics the ideal growing conditions of early summer and fuels robust growth. I highly recommend plugging your lights into an inexpensive outlet timer; it automates the whole process and is one less thing to remember.
- Light Distance: Position the light fixture just 2-3 inches above the tops of the seedlings. This is crucial. As the plants get taller, you must raise the lights to maintain this close distance. This proximity is what prevents them from stretching and encourages them to develop thick, sturdy stems.
It's not just about brightness, either. The type of light matters. Studies have even found that certain light spectrums can influence how the plant grows later on. For instance, giving seedlings supplemental UV-A light indoors has been shown to result in earlier flowering once they're moved outside. You can read more about how the light spectrum affects tomato development if you want to geek out on the science.
Getting Watering Just Right
Watering is the other side of the coin, and it’s just as important. Overwatering is the number one killer of young seedlings. It creates the perfect environment for a fungal disease called "damping-off," which causes the tender stem to rot right at the soil line, toppling the plant. Your goal is to keep the soil consistently moist, but never soggy.
The best way to check is with the simple "knuckle test." Just stick your finger into the soil. If it feels dry down to your first knuckle, it's time to water. If you still feel moisture, give it another day.
My best advice is to always water your seedlings from the bottom. Pour water directly into the solid tray that holds your seed cells. Let them sit and soak up the moisture through the drainage holes for about 20-30 minutes. This technique encourages the roots to grow deep and strong as they search for water.
After they've had their drink, make sure to pour out any leftover water from the tray. Letting your seedlings sit in a puddle is a fast track to root rot. This simple bottom-watering method is one of the most effective habits you can build for raising healthy, trouble-free tomato plants from day one.
Step 5: Pot Up Seedlings for a Robust Root System
As your tomato seedlings start to take off, they’ll quickly use up the space and nutrients in their little seed-starting cells. This is when we step in with a crucial process called "potting up." Moving them to a bigger pot is essential to prevent them from becoming root-bound and gives them the foundation they need to become strong, productive plants.
Getting this timing right is just as important as when you first sowed the seeds.

So, when is the right time? You're looking for one key signal: the first set of true leaves. These are the second set of leaves that appear, and you’ll notice they look like miniature, serrated versions of a mature tomato leaf—not the simple, rounded first "seed leaves" (cotyledons).
Once those true leaves are fully unfurled and your seedling is standing about 3-4 inches tall, it’s go-time.
The Potting Up Process
Moving a tiny seedling can feel a bit nerve-wracking, but it’s a straightforward process that works wonders for the plant. The main goal is to move the seedling without stressing out its delicate roots.
Here's how I do it:
- Prep the New Pot: Get your 3-4 inch pots ready by filling them with a good-quality, pre-moistened potting mix. This mix should be richer than your seed-starting medium to give the plants the fuel they need for their next growth spurt.
- Ease the Seedling Out: Gently squeeze the sides of the seed cell to loosen the soil. Then, tip the cell over into your hand, letting the entire soil plug slide out. Whatever you do, never pull the seedling out by its stem—it’s incredibly fragile.
- Bury the Stem Deep: This is the secret weapon for growing amazing tomatoes. Settle the seedling into its new pot and fill it with soil, making sure to bury a good portion of the bare stem.
Here’s why that last step is so important: Tomatoes have the incredible ability to grow new roots (called adventitious roots) all along any part of their stem that's buried underground. Burying the stem deeply creates a massive, dense root system that you wouldn't get otherwise. More roots mean the plant can absorb more water and nutrients, making it far sturdier and better prepared for the shock of being transplanted into the garden later.
Once your seedlings are all potted up, give them a gentle but thorough watering to settle the soil and get rid of any air pockets. Then it’s right back under the grow lights to continue their journey. They’ll barely miss a beat and will quickly take to their new, roomier homes.
Step 6: Prepare Your Plants for the Great Outdoors
Your tomato seedlings have had a pretty cushy life so far. They’ve been living in a climate-controlled environment, sheltered from harsh winds, intense sun, and wild temperature swings. Tossing them straight into the garden now would be a massive shock to their system—and a recipe for dead plants.
This is where hardening off comes in. It’s arguably the most critical step before your tomatoes go into the ground. You’re essentially training them, toughening them up for the realities of outdoor living. This process helps them thicken their cell walls and develop a waxy coating on their leaves, which acts as a natural sunblock and windbreaker.
If you skip this, you’re asking for transplant shock. You’ll see it as scorched, white leaves, wilting, and stunted growth. It can set your plants back weeks, or even kill them outright.
My 7-Day Hardening Off Schedule
The secret to hardening off is to do it gradually. You can’t rush it. I find a 7 to 14-day period works best, but you can usually get away with a solid week if you pay close attention.
Here's the simple schedule I follow every year:
- Days 1-2: A Gentle Start in the Shade. Find a protected spot outside, maybe on a covered porch or under a dense tree, that gets zero direct sun. Leave your seedlings out there for just 1-2 hours, then bring them back inside. That’s it.
- Days 3-4: A Little Dappled Light. Now, bump up their outdoor time to 3-4 hours. You can move them to a spot that gets some filtered or dappled sunlight. Think of the light under a big, leafy tree. You still want to avoid any harsh, direct sun.
- Days 5-6: A Taste of Morning Sun. It’s time to get a little bolder. Extend their stay outside to 5-6 hours and let them get a couple of hours of direct morning sun. Morning sun is much gentler than the intense afternoon rays, so it’s the perfect introduction.
- Day 7: The Final Dress Rehearsal. Let the plants spend most of the day outside, preferably in the spot where you plan to plant them. This gives them a full day to experience the light and breeze. Bring them in for one final night indoors.
A quick but important note: Always keep an eye on the weather forecast during this week. If the temperature is going to dip below 50°F (10°C), or if you’ve got high winds or a torrential downpour on the way, just keep them inside. It’s always better to add a day or two to your hardening-off schedule than to risk damaging all the beautiful plants you’ve worked so hard to grow.
Once they’ve gone through this process, your tomato plants will be tough, resilient, and ready to thrive in your garden. From figuring out when to start tomato plants indoors to this final step, you’ve set them up for a successful and productive season.
Step 7: Troubleshoot Common Seedling Problems
Even the most seasoned gardeners run into a few hiccups when raising seedlings. Let's be honest, those tiny plants have a mind of their own sometimes! Here are the answers to a couple of the most common issues people face, so you can troubleshoot like a pro and keep your seedlings happy.
Think of this as your personal Q&A session for those little "what do I do now?" moments. Knowing how to read the signs your seedlings are giving you is the key to a successful start.
What Should I Do About Leggy Seedlings?
Ah, the dreaded leggy seedling. We’ve all been there. You walk in one morning to find tall, skinny, pale-looking plants that seem to have shot up overnight. This is almost always a cry for more light. When the light source is too weak or too far away, seedlings will stretch themselves thin trying to get closer to it.
The good news is, the fix is pretty simple. Get your grow light down closer to the plants, aiming for just 2-3 inches above the top leaves. Keep that light on for 14-16 hours a day. You can't really shrink the leggy part that's already grown, but this will immediately stop the stretching and encourage the new growth to be much stockier and stronger.
Pro Tip: Don't despair over a leggy tomato plant! You can turn this into an advantage. When it's time to pot up, just bury most of that long, bare stem deep in the new pot. Tomatoes are amazing—they'll sprout new roots all along that buried stem, creating an incredibly robust root system for a stronger plant in the long run.
Why Are My Seedlings Turning Yellow?
Yellowing leaves on a seedling usually point to one of two things: too much water or not enough food. Before you do anything else, check the soil. Is it soggy? If so, you're probably overwatering. The goal is to keep the soil consistently moist, like a wrung-out sponge, not waterlogged. Always let the surface dry out a bit before giving them another drink.
If your watering technique is spot-on, then it's likely a nutrient issue. Most seed-starting mixes are pretty sterile and don't contain much food. After a few weeks of growth, your baby plants have eaten up everything that was in there and are getting hungry.
- Time to start feeding. Once your seedlings have developed their first set of "true" leaves (the second set that appears), it’s time to introduce a gentle fertilizer.
- Go slow and steady. Use a balanced, all-purpose liquid fertilizer, but dilute it to quarter-strength. Feed them this weak solution about once a week.
This little bit of food is all they need to stay vibrant and green without burning their delicate, young roots. It’s the perfect bridge to get them ready for life in the garden.
At Homegrown Garden, we provide the heirloom seeds and expert guidance you need to make your gardening dreams a reality. Explore our curated seed collections and comprehensive grow kits to start your journey today at https://www.homegrown-garden.com.

